How to Fix Steam Error Code 118 and 138

Steam is a reliable client that easily allows you to install and run games. But if it’s not running or connecting to the internet, you’re going to have a hard time doing much. Today, we’re looking at two major connection failures: Steam error code 118 and 138. We have some troubleshooters to hopefully get you back online.
What Causes This Error?
Both Steam error code 118 and 138 are both connection warnings, meaning that Steam on your machine cannot connect to Valve. That said, there are some differences between the two:
- Error code 118 means the user cannot access the Valve servers, or their machine won’t allow it.
- Error code 138 means the page has failed to load.
If Steam encounters a connection issue on startup, it won’t retry and will send these messages instead. Both mean that parts of the Steam client, like the Store, Friends, or the game Library, won’t function properly.
Fixing Steam Error Code 118 and 138
As frustrating as it is, these two error codes are quite common and have established fixes. Let’s take a look.
Restart Your Router
A frequent cause of these errors, especially 138, is a faulty internet connection. It’s an easy and obvious fix, but it can be the answer you need. So, to potentially fix Steam error code 138, restart your router and check your internet connection and speed.
You can also reset your network settings through Command Prompt. Here’s how to do it:
Step 1. Open the Run Dialog (Win + R) and type “cmd” before pressing (Ctrl + Shift + Enter) to run as an Admin.
Step 2. In Command Prompt, type the following commands, pressing “Enter” after each one.
netsh winsock reset
netsh int ip reset
ipconfig /release
ipconfig /renew
ipconfig /flushdns
Step 3. Once the commands have run, exit Command Prompt and restart your machine.
Fix Your Firewall
Another major offender is the Windows Firewall blocking Steam’s access to your PC. Changing permissions might be your way to fix Steam error code 118, so here’s what to do.
Step 1. Open Settings (Win + I) and click “Privacy & security” in the sidebar.
Step 2. Select “Windows Security” in the main window.
Step 3. Click “Firewall & Network protection” and a new window will open.
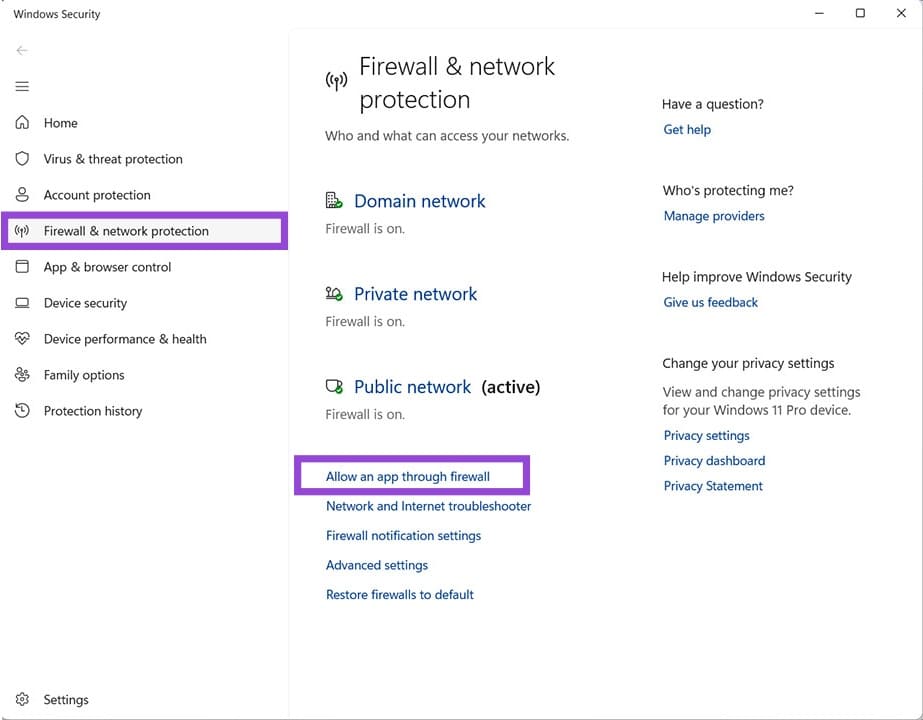
Step 4. Click “Allow an app through firewall.”
Step 5. In the new window, click “Change Settings” and confirm Admin access.
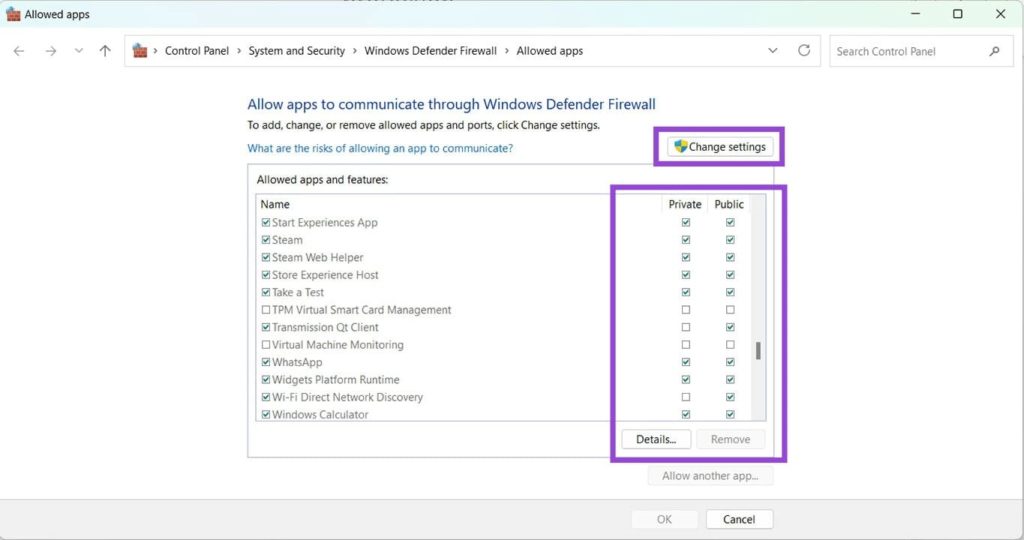
Step 6. Scroll down to the different Steam options (there will be a few) and ensure all are checked for both “Private” and “Public.” Click “OK” once done and restart your Steam app to see if the problem’s resolved.
Change Your DNS Settings
Another network fix to try is to tweak your DNS settings to Google. Here’s what to do:
Step 1. Type “Network Connections” into the search bar.
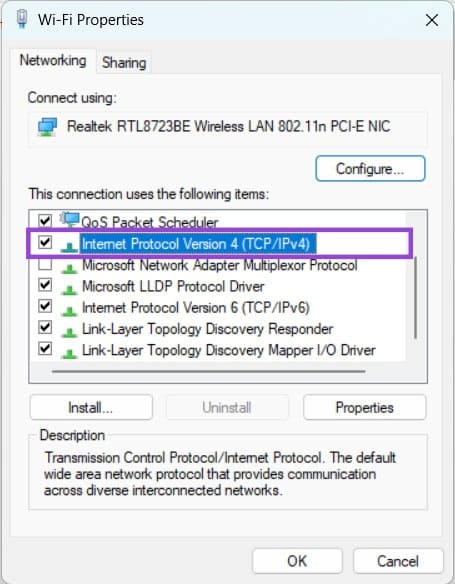
Step 2. In the new window, right-click your current internet access icon and select “Properties” from the dropdown list.

Step 3. Scroll down to “Internet Protocol Version 4” and double-click it.
Step 4. In the next pop-up, check “Use the following DNS server addresses” and enter “8.8.8.8” at the top and “8.8.4.4” at the bottom for Google’s DNS servers.
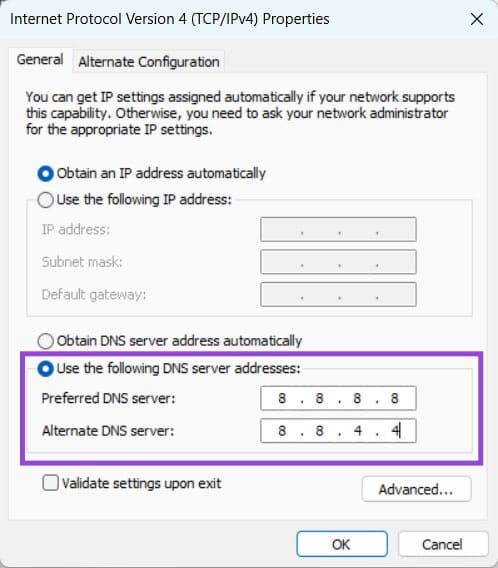
Step 5. Click “OK” to confirm, restart Steam, and see if the errors have been resolved.