How to Fix Your PC Did Not Start Correctly Error
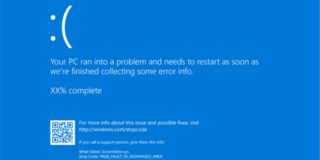
Out of all of the day-ruining messages you can get when you fire up Windows, the dreaded BSOD (the Blue Screen of Death) is the one that gets most of the notoriety. Yet, there are still plenty of others that can be just annoying, especially if they occur frequently.
Case in point, the Automatic Repair message.
If you’re being greeted with the message “Your PC did not start correctly” and don’t know where to start yourself, this article will be your guide.
What Causes the “Your PC Did Not Start Correctly” Error?
The Automatic Repair tool appears when you boot your PC. If your machine doesn’t pass the Power On Self-Test (POST), the Automatic Repair tool kicks in to identify the problem and attempt to fix it. As with most error messages like this, there can be a few causes.
The reasons for an improper start can include:
- Faulty software or an incomplete Windows update
- Corrupted drivers or other system files
- Your PC was improperly or abruptly shut down
- Faulty startup data (e.g. Boot Configuration Data)
Possible Fixes
As with any problem with several possible causes, there are also several solutions. It helps to try all possible options until the Automatic Repair screen stops haunting you. Here are some major ones to try:
Restart Your Machine
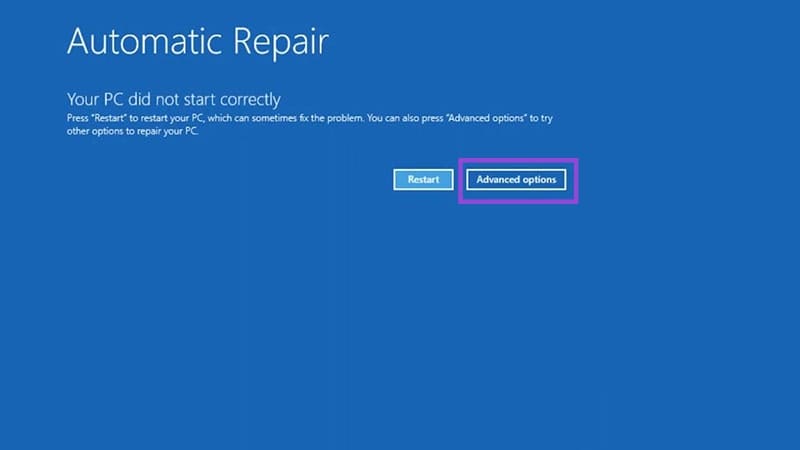
Perhaps the easiest and most obvious solution, restarting your PC should also be the first one you try. When the message appears, simply click the “Restart” button and try booting up your machine again. If the Automatic Repair message appears again or in a loop, you’ll have to do more.
Startup Repair
From here, your solutions will lie in the “Advanced options” button. Your first move should be the Startup Repair Tool. Here’s what to do:
1. Click the “Advanced options” button on the Automatic Repair screen.
2. Select “Troubleshooting” from the next menu.
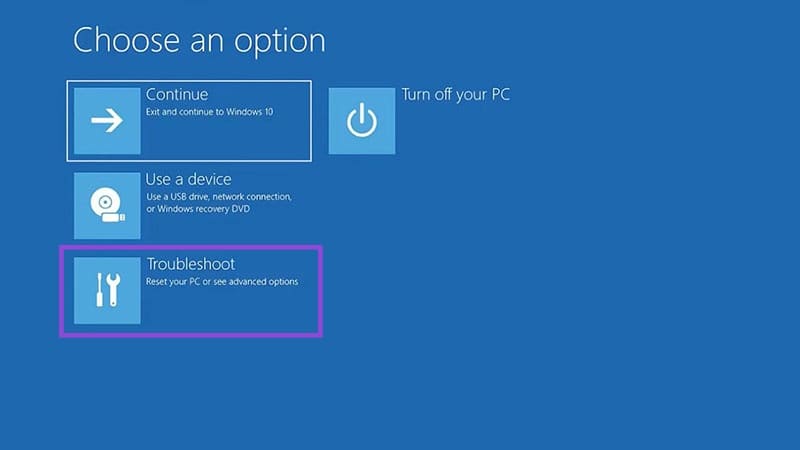
3. Choose “Startup Repair.”
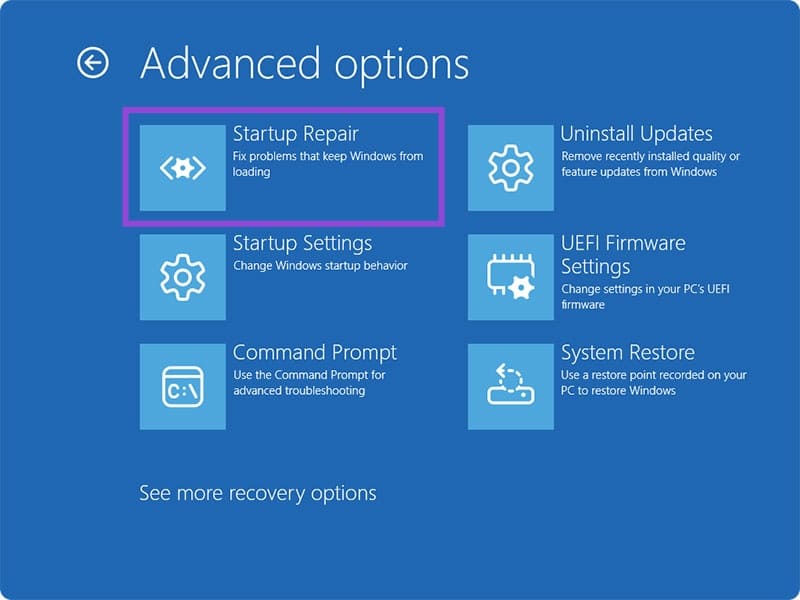
4. The tool will then attempt to identify and repair the error that’s keeping your machine from starting. You’ll be asked to enter your login details to run the process.
5. Once Startup Repair is finished, restart your device.
Safe Mode
If you suspect that the problem might be related to recent driver updates or installed software, it could be a good idea to boot in safe mode and uninstall or roll back. Safe mode disables the most advanced features on your machine, allowing you to troubleshoot. Here’s what to do:
1. From the Automatic Repair menu, choose “Troubleshoot.”
2. In “Advanced Options” choose “Startup Settings.”
3. Press the number “4”, “5”, or “6” to enable safe mode. The “4” is the simplest option. Both number or function keys will work.

4. Uninstall or roll back any recent changes to your machine and restart once done.
System Restore
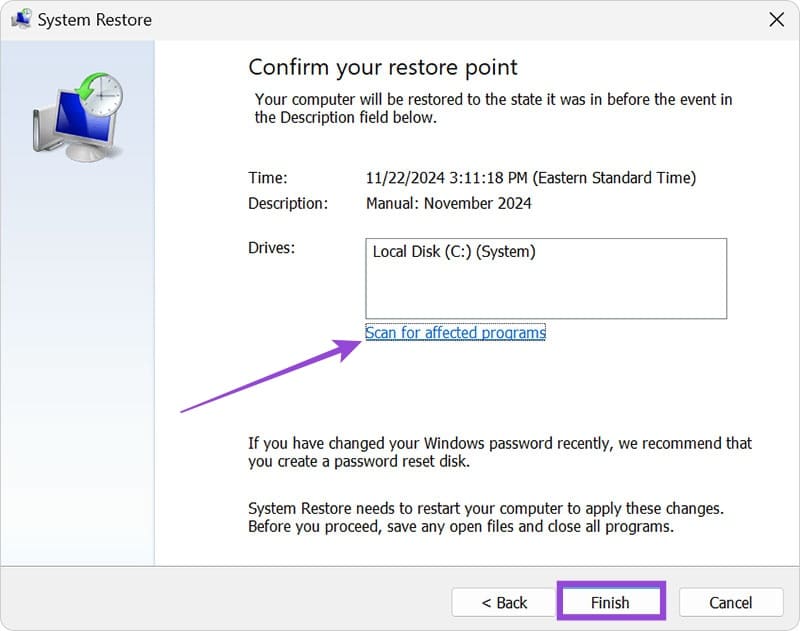
If Windows has been updated recently and has been causing problems, then you might need to perform a System Restore to take your machine back to a more stable restore point. Here’s what to do:
1. In the “Advanced options” menu, click the “System Restore” button.
2. If your machine has previous restore points, you’ll see a list of them for you to choose from.
3. Select the restore point you click “Next.”
4. If you suspect a certain program may be causing the problem, you can also choose the option “Scan for affected programs.”
5. Click “Finish” to begin the restore.
Repair via Command Prompt
If the BCD at startup is a problem, then you can use Command Prompt to try to repair it. Here’s how:
1. Head to the “Advanced options” menu and click the “Command Prompt” button.
2. When it opens type “bootrec/fixmbr” and hit Enter.
3. Then type “bootrec/fixboot” and press Enter.
4. Finally, type “bootrec/rebuildbcd” and hit Enter.
5. Restart your machine immediately and see if the issue is resolved.
Last Ditch
If these solutions still don’t get rid of the Automatic Repair message, then either reset your PC or seek professional help. If you’re afraid of losing important files and information, it’s a good idea to seek help first.