How To Insert an Image or Picture into an Excel Cell

Microsoft Excel is an excellent program to store, sort, and manipulate data. It can also be a great place to showcase images linked to that data.
But how do you go about adding pictures into cells while keeping everything organized?
The tutorial below will show you exactly how you can embed pictures into individual cells while ensuring your data remains orderly and composed.
Embed and Lock An Image Into An Excel Cell
An image that has been inserted into an Excel cell will normally float on a separate layer independently from all other cells atop the spreadsheet.
To embed an image into a cell, you’ll need to change the properties of the image by:
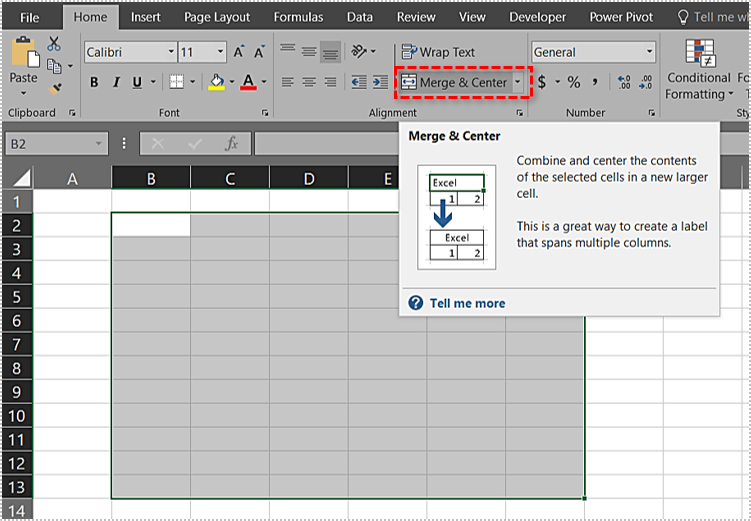
- Resizing the inserted image to properly fit within the cell. You can also opt to enlarge the cell or merge a few cells together. To merge cells, select and highlight them by holding down Shift while left-clicking on the targetted cells. Then click on the Merge & Center icon.

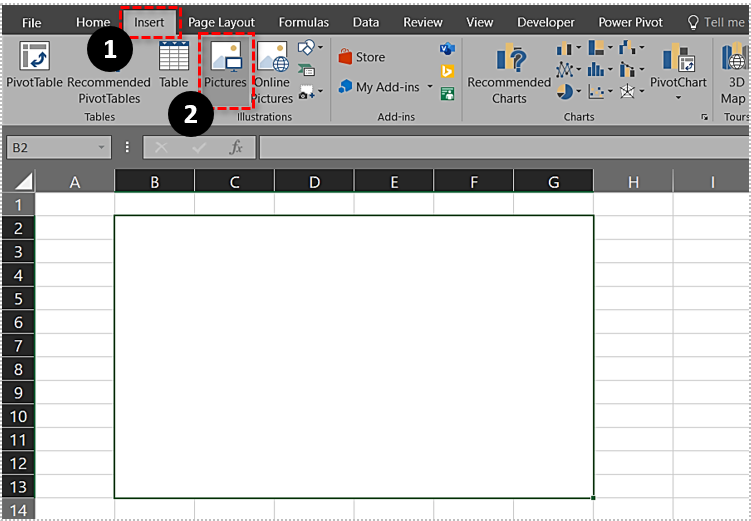
- Once the cells are properly sized for your image, click on the “Insert” tab and choose Illustrations inside the menu ribbon. From the drop-down options, choose how you’d like to load in your image. For this tutorial we selected Pictures.
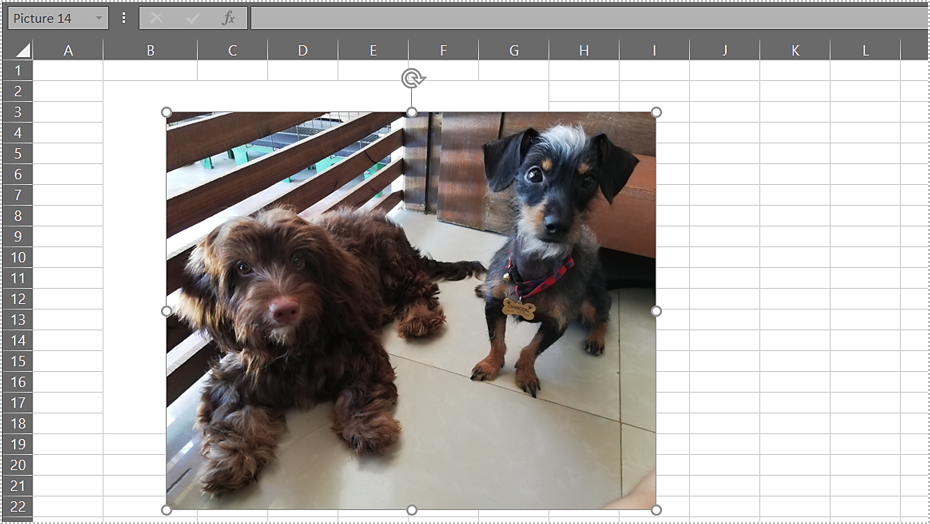
- Once your picture has been loaded in, you can adjust the height and width to fit within the cell area you adjusted previously.

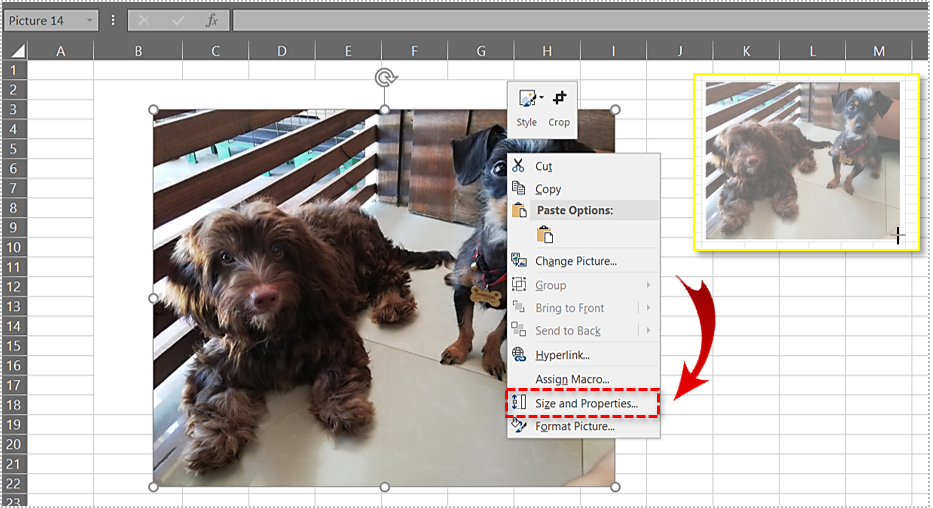
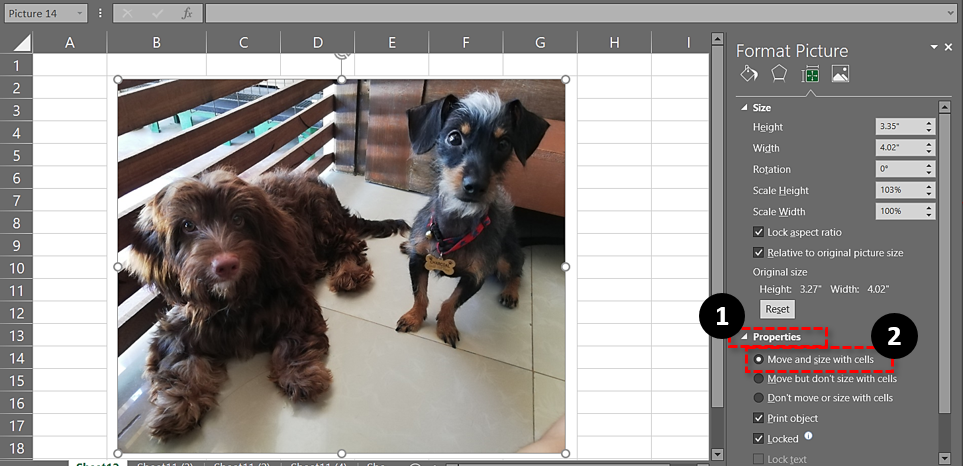
- Either use the image adjusters via mouse by dragging one of the corners until the proper size is achieved. Alternatively, you can right-click the image itself and from the menu provided choose Size and Properties… which is where you’ll need to be for the next step.

- While in the Size and Properties tab, scroll down to the Properties section and open it. Click on the radial button for Move and size with cells.

That’s all there is to it. If you have further images you’d like to lock within cells, simply follow the above steps once again for each individual image. You can embed multiple images within a single cell as well if that is something you’d be interested in. Using an image to accompany a specific data item is a great way to organize your Excel sheet.
Embedding Multiple Images Into A Cell
If you have the need for multiple images to occupy your Excel datasheet, it would be hectic to have to do each one individually. In order to do this, you’ll need to feel comfortable working within the Microsoft Visual Basic for Applications window. You can also choose to download an Excel add-on like Ablebits’ Ultimate Suite or Kutools.
Using the Microsoft Visual Basic for Applications:
- Select the range that you want to insert images.
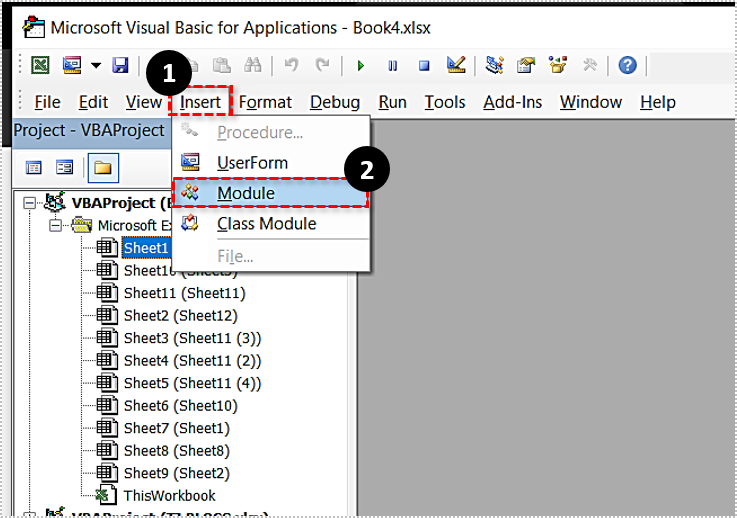
- Hold down ALT + F11 to open up the Microsoft Visual Basic for Applications window.
- At the top, click the “Insert” tab and from the drop-down click Module.

- Inside the Module window, paste this Macro:
SubInsertPictures()'Update 20140513DimPicList() AsVariantDimPicFormat AsStringDimRng AsRangeDimsShape AsShapeOnErrorResumeNextPicList = Application.GetOpenFilename(PicFormat, MultiSelect:=True)xColIndex = Application.ActiveCell.ColumnIfIsArray(PicList) ThenxRowIndex = Application.ActiveCell.RowForlLoop = LBound(PicList) ToUBound(PicList)SetRng = Cells(xRowIndex, xColIndex)SetsShape = ActiveSheet.Shapes.AddPicture(PicList(lLoop), msoFalse, msoCTrue, Rng.Left, Rng.Top, Rng.Width, Rng.Height)xRowIndex = xRowIndex + 1NextEndIfEndSub - Press F5 to run the macro.
- Choose the folder where your images are located and specify the images you’re wanting to load into Excel.
- Click Open.

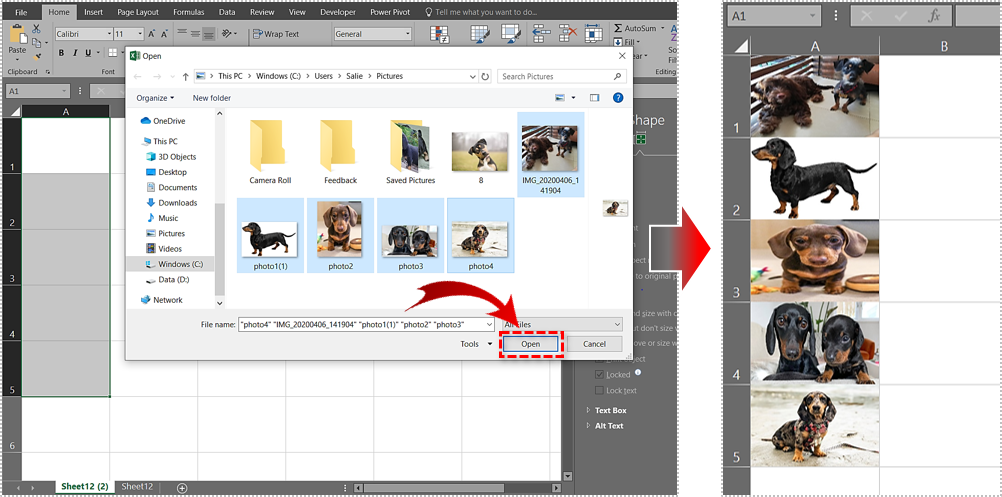
The images will be imported and resized to fit the cell range selected.
Embedding An Image Into A Comment
Inserting an image into an Excel comment may often convey your point better. To have it done, please follow these steps:
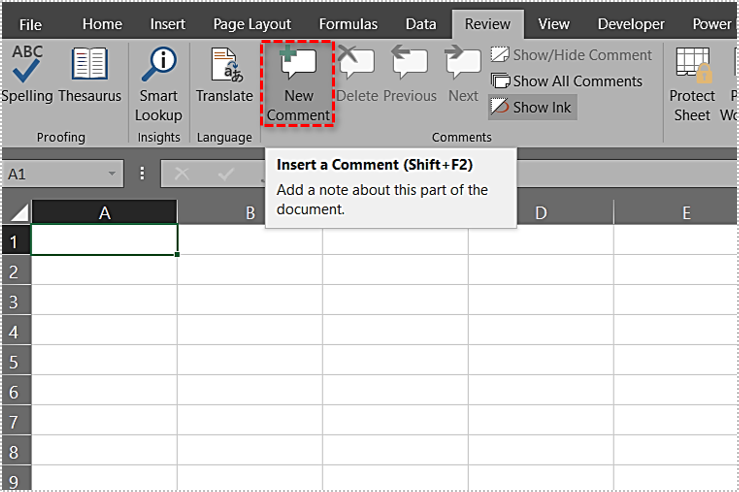
- Create a comment by going into the “Review” tab and clicking New Comment, or right-clicking a cell and selecting Insert Comment from the drop-down menu. You can also press Shift + F2.

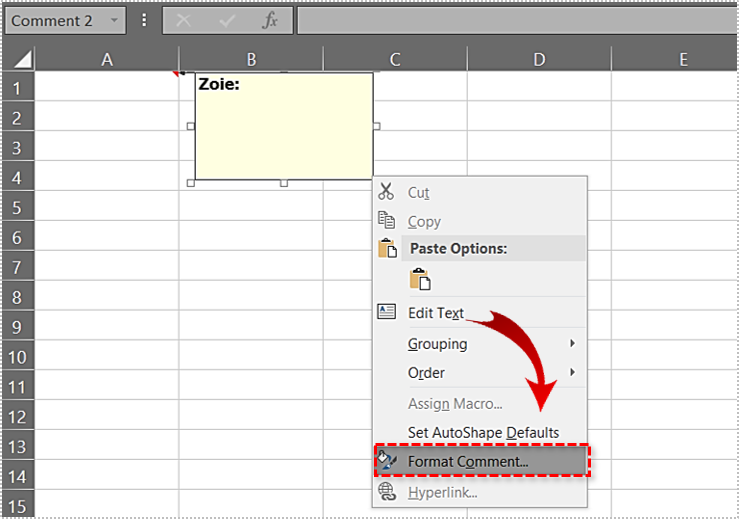
- Right-click along the border of the comment (you’ll know it when the cursor resembles cross arrows)and choose Format Comment… Have an existing comment you’re wanting to put an image in? In the “Review” tab select Show All Comments and then right-click the border of the targeted comment.

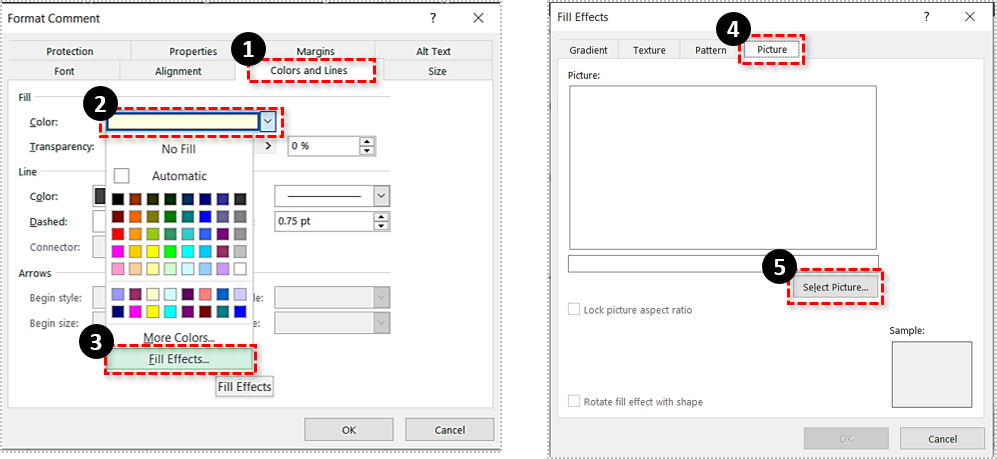
- While in the Format Comment dialog box, click over to the “Colors and Lines” tab and open the Color drop-down list. At the bottom, click on Fill Effects.
- In the Fill Effects window, swap to the “Picture” tab, click Select Picture, locate and select your image, and click Open. You’ll get a picture preview inside the comment box. To lock the aspect ratio, make sure to check the box located below the image marked as Lock aspect ratio.

- Click OK twice and you’re all set.
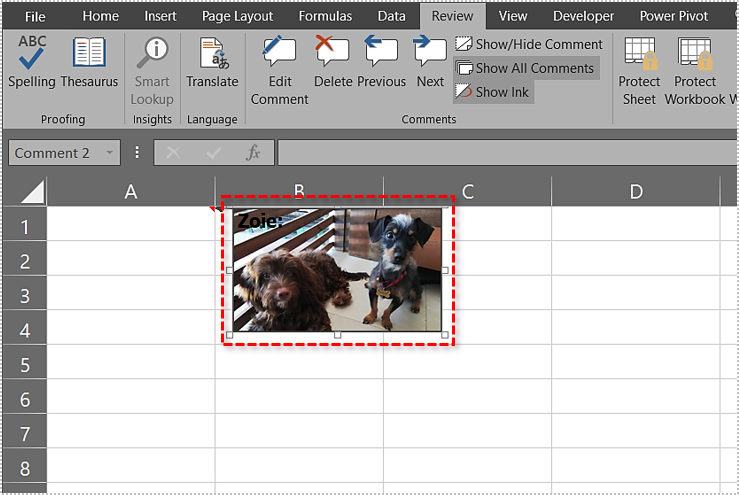
The image will now be visible while hovering over the comment cell.
Replace or Delete An Embedded Image
For whatever reason, you may need to replace an existing picture with a new one. In order to do this:
- Right-click the image and select Change Picture.
- Choose the image you want and select Insert.
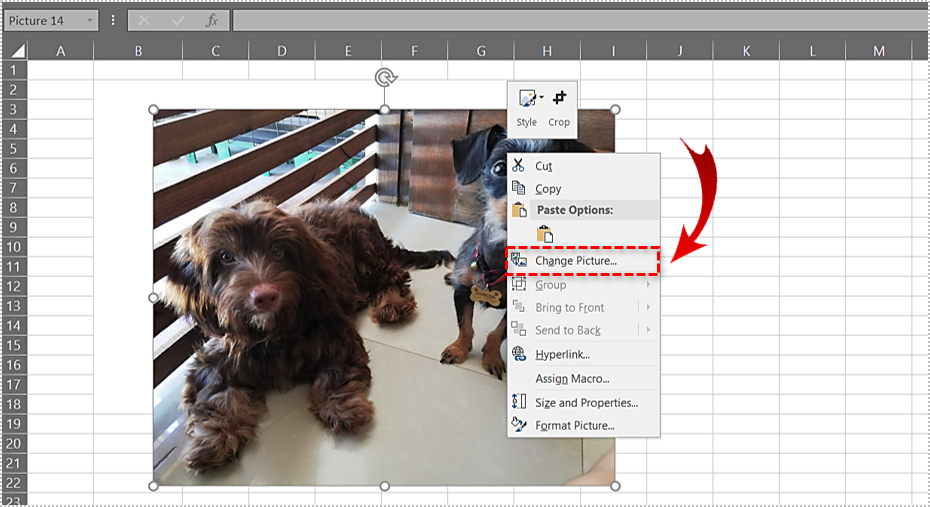
The new picture will replace the old one in the same exact position including all formatting options.
When you want to delete a single picture, highlight the image with a left-click and press the DEL button on your keyboard. When you need to delete several pictures, simply hold down CTRL while selecting the images for removal. Once all the images are selected, hit the DEL key.
To remove all images on the current sheet:
- Press F5 to open the Go To dialog box and click Special…
- Inside “Go To Special”, place a check in the Object box and click OK.
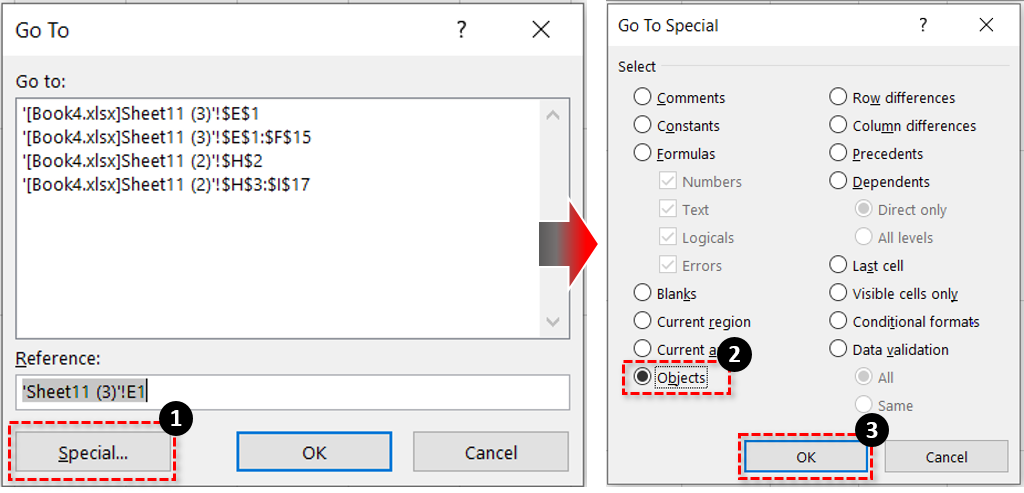
This technique will select all pictures located on the active worksheet. Once you press the DEL key, all will be removed. This not only will remove all pictures, but it will also delete shapes, WordArt, etc. Ensure that only the objects you want to be deleted are selected before following through.