


Normalize Volume Levels in Windows With Loudness Equalization
If you listen to lots of different types of media on your Windows PC — music, YouTube, podcasts, etc. — you may find that they’re all at different volumes, some too quiet and some too loud. This forces you to adjust your PC or speaker volume frequently.
One solution to this is a built-in feature in Windows called Loudness Equalization. Similar to “night modes” found on home theater receivers, Loudness Equalization analyzes your PC’s audio in real time and automatically adjusts the audio levels so that everything remains at a relatively consistent volume. In other words, it makes quieter sounds louder and louder sounds quieter, ensuring that there are no surprises when listening to lots of different sources.
A feature like this, while helpful in many cases, by necessity reduces the dynamic range of your source audio. In some situations, maintaining the original dynamic range is important, so you definitely don’t want to enable this feature if you’re performing tasks like video editing or audio mixing, or if you want to watch a movie or listen to an album with the audio track the producers intended.
Still, for most users, Loudness Equalization can really improve the overall experience, especially in situations where you don’t want any unexpectedly loud noises such as in a shared office or at night.
Enable Loudness Equalization in Windows
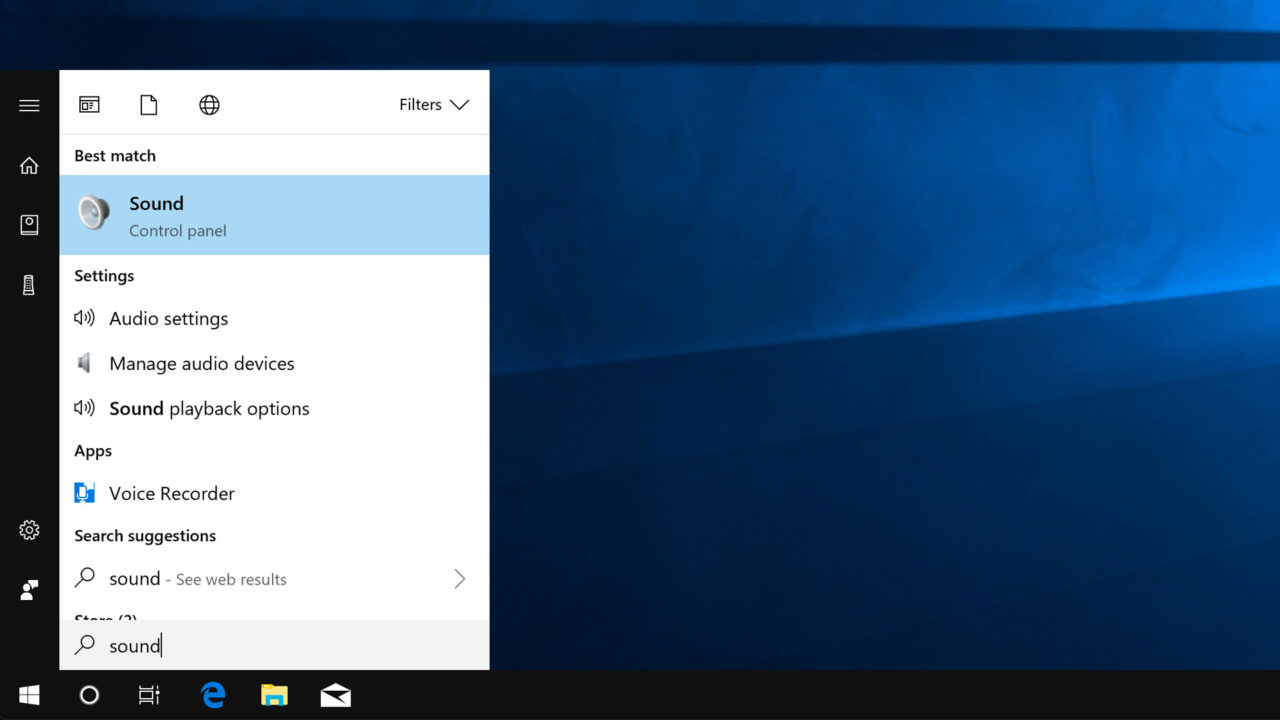
- From the Windows desktop, use the Start Menu to search for Sound. Open the result associated with the Control Panel.
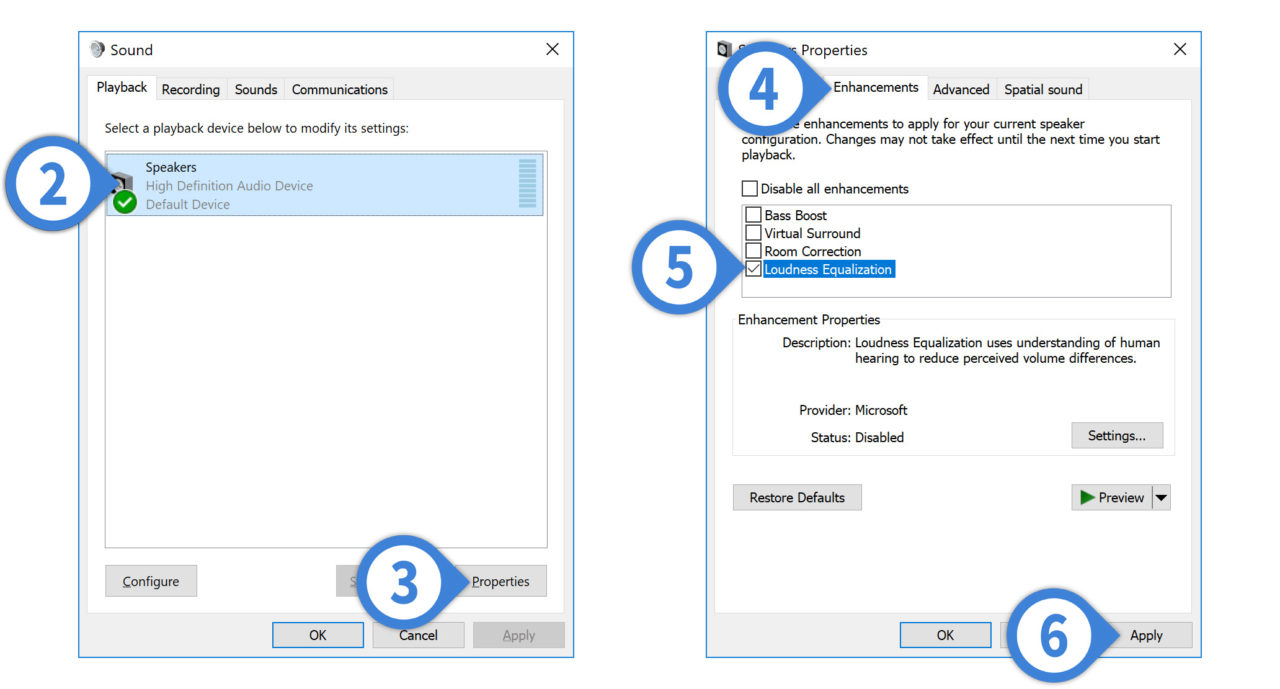
- Select your primary speaker or headphone output from the list.
- Click Properties.
- Select the Enhancements tab at the top of the window.
- Check the box labeled Loudness Equalization.
- Click Apply to save your change and then OK to close the window.
Once enabling this feature, you should notice a significant reduction in the dynamic range of your sources, with quieter sounds amplified and louder sounds attenuated. Note, however, that not all audio configurations support the use of Windows audio enhancements. Some third party sound cards have their own equalizer and enhancement effects, and some digital audio connections don’t pass through the audio enhancements.
If you don’t like the reduced dynamic range offered by Loudness Equalization, simply repeat the steps above and either uncheck the corresponding option in the Enhancements tab or check the box Disable all enhancements. If you don’t notice any changes, be sure you selected the correct audio device in Step 2.


One thought on “Normalize Volume Levels in Windows With Loudness Equalization”