


Use Organize by Conversation the Right Way with a Toolbar Button in OS X Mail

Starting in OS X Mountain Lion, Apple introduced a new way to view messages in the OS X Mail app: conversations. This new view automatically groups and displays all of the messages originating from the same topic, allowing users to keep easier track of long email chains, especially those involving multiple people.
But many users, including those here at TekRevue, prefer to view email in a traditional chronological order. In other words, from an organizational and productivity standpoint, it’s more valuable to some users to keep all emails in order from newest to oldest (or vice versa) rather than have older emails displayed out of order because they belong to a recently updated “conversation.”
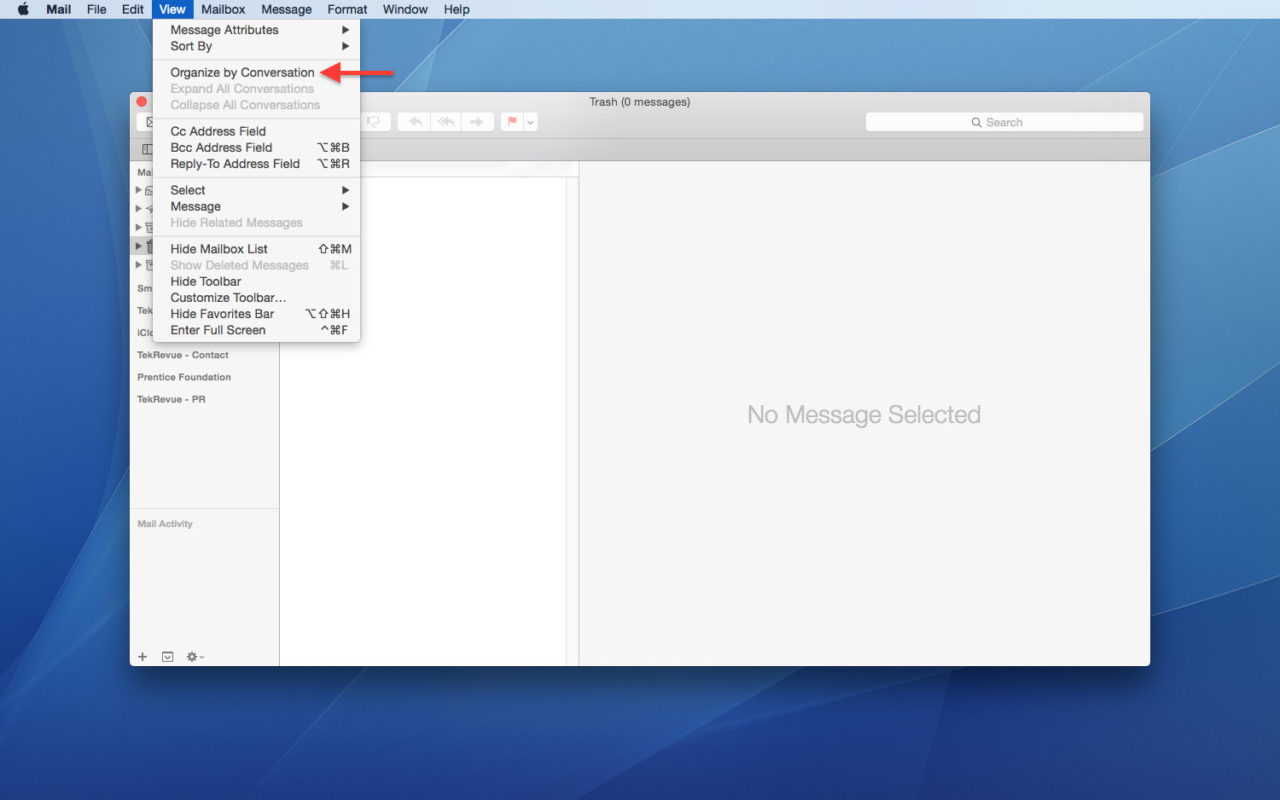
Although Apple enables the email conversations option by default, users who prefer the traditional method of email organization can disable this feature by going to Mail > View in the app’s menu bar and deselecting “Organize by Conversation.”
Note, however, that you’ll need to do this for each mail account individually. Most users have only one or two email accounts at most, so this requirement isn’t a big deal. But if you run a business or otherwise have many email accounts and mailboxes, it can be annoying to have to turn Organize by Conversation off for each account, especially if you switch Macs somewhat frequently and have to do it all over again.
While there’s no universal option to disable Organize by Conversation for all mailboxes at once, you can make the process of disabling it for multiple email accounts quicker and easier by using a button in the Mail toolbar rather than navigating the app’s menu structure. To add a toolbar button to enable or disable Mail conversation view, open Apple Mail, right-click on an empty space in the app’s toolbar, and select Customize Toolbar.
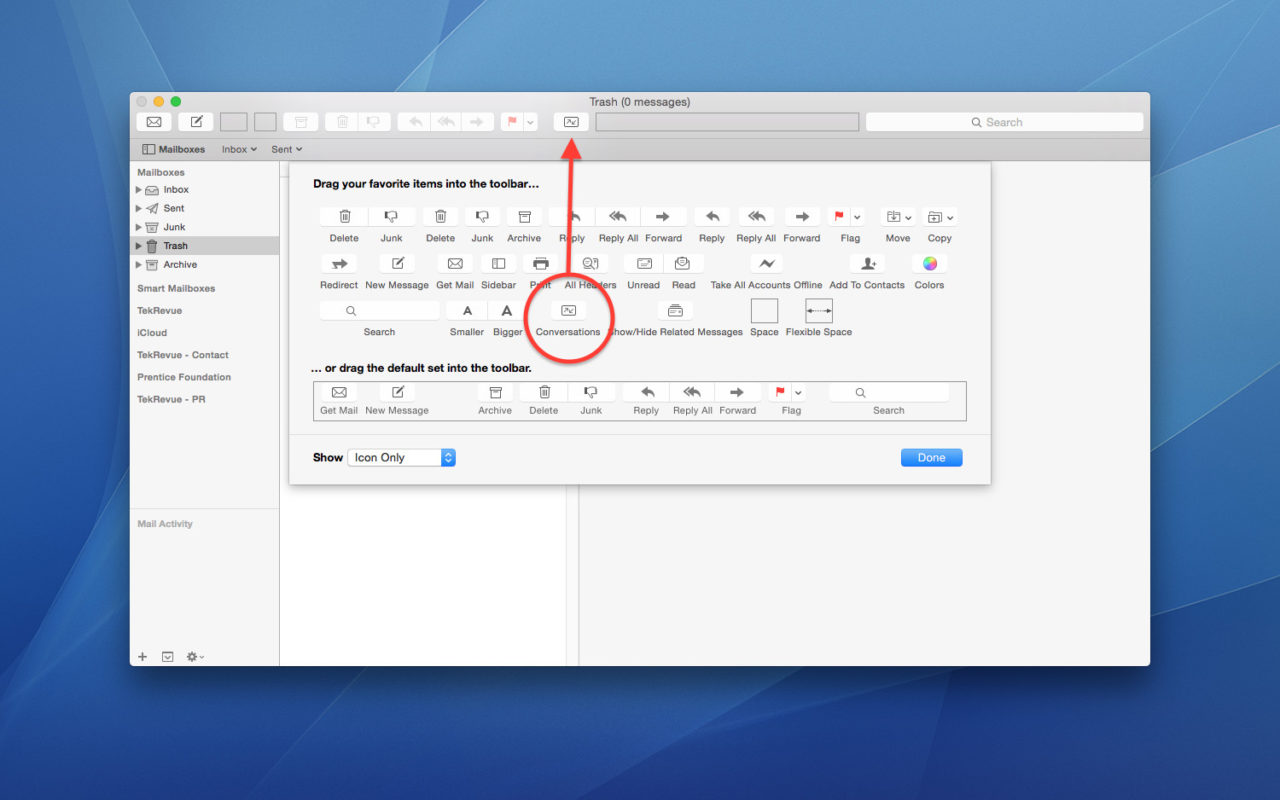
A new window will appear showing you all of the toolbar options available, as well as the default set of options at the bottom, which you can use to restore the look and functionality of the Mail toolbar if you make too many changes and want to revert to the original layout. In the list of options, find the button labeled Conversations, the one that shows two arrows pointing past each other in opposite directions. Click and drag this button to an empty place on the Mail toolbar and press Done to close the Customize Toolbar window.
Now navigate to any mailbox that contains multiple emails with the same subject, and click the Conversations button you just added to the toolbar. Depending on your current configuration, you’ll see Organize by Conversation become enabled or disabled, and you can toggle the view by continuing to click the Conversations button.
We’ve never been a big fan of the Organize by Conversation view in OS X’s Mail app, but there are a few times when it comes in handy. Adding a toolbar button to turn this feature on or off with just a single click not only makes disabling it on multiple mail accounts easier, but also gives users the flexibility to use the view on occasion when desired. If you wish to remove the Conversations button from your toolbar, simply head back to the Customize Toolbar window and, with this window open, drag the Conversations button off of your toolbar to delete it (similar to the way you would remove an unwanted item from your OS X Dock).


One thought on “Use Organize by Conversation the Right Way with a Toolbar Button in OS X Mail”
1. Collapse your folder hierarchy by clicking the arrow next to the top folder, such that you only have one “root” folder showing (and closed)
2. Alt-click on the arrow to expand ALL your folders under this root folder
3. Select (highlight) the first folder by clicking on it
4. Scroll down to the bottom of your folder list and SHIFT-click on the last one — this will select (highlight) ALL your folders
5. In the menu bar, select View > Organize by conversations — this will set conversation view to ON for all folders
6. Repeat step 5 a 2nd time, and this will REMOVE conversation view from all folders
This works, and it just takes a minute, no matter how many folders you have.
Afterwards, if you do want to have conversation view on for any one (or more) of the folders, just toggle it on for that (those) particular folder(s).