


Parallels Desktop: Using XML to Create Custom Touch Bar Buttons for Windows Apps
One of the unique and interesting features of Parallels Desktop is that it adds Touch Bar support to popular apps in Windows virtual machines. When you run a Windows VM in a recent version of Parallels on a Touch Bar-equipped MacBook Pro, you’ll see that the Parallels developers have added Touch Bar icons to popular Windows apps like Chrome, OneNote, and Word. Indeed, with each new Parallels release, the company’s developers have expanded the list of Windows software with Touch Bar support.
But even more interesting is the fact that Parallels allows users to build their own custom Touch Bar buttons for virtually any application via custom XML editing. This lets you add Touch Bar buttons for your preferred action to almost any Windows application, without needing to wait for the Parallels dev team to add it for you. Here’s a look at how this all works.
Add Custom Touch Bar Actions in Parallels Desktop for Mac
First, let’s note the system requirements for this advanced feature. As of the date of this article’s publication, you need Parallels Desktop 13 or Parallels Desktop 14 running a Windows 7, Windows 8, or Windows 10 virtual machine. You’ll also obviously need a MacBook Pro with a Touch Bar, although those without one can simulate the Touch Bar with an app like Touché.
It’s also important to note that this tutorial is a bit more advanced than those we regularly cover here at TekRevue. Although anyone can master the steps with practice and trial and error, inexperienced users may wish to stick to the default GUI-based methods for customizing the Touch Bar.
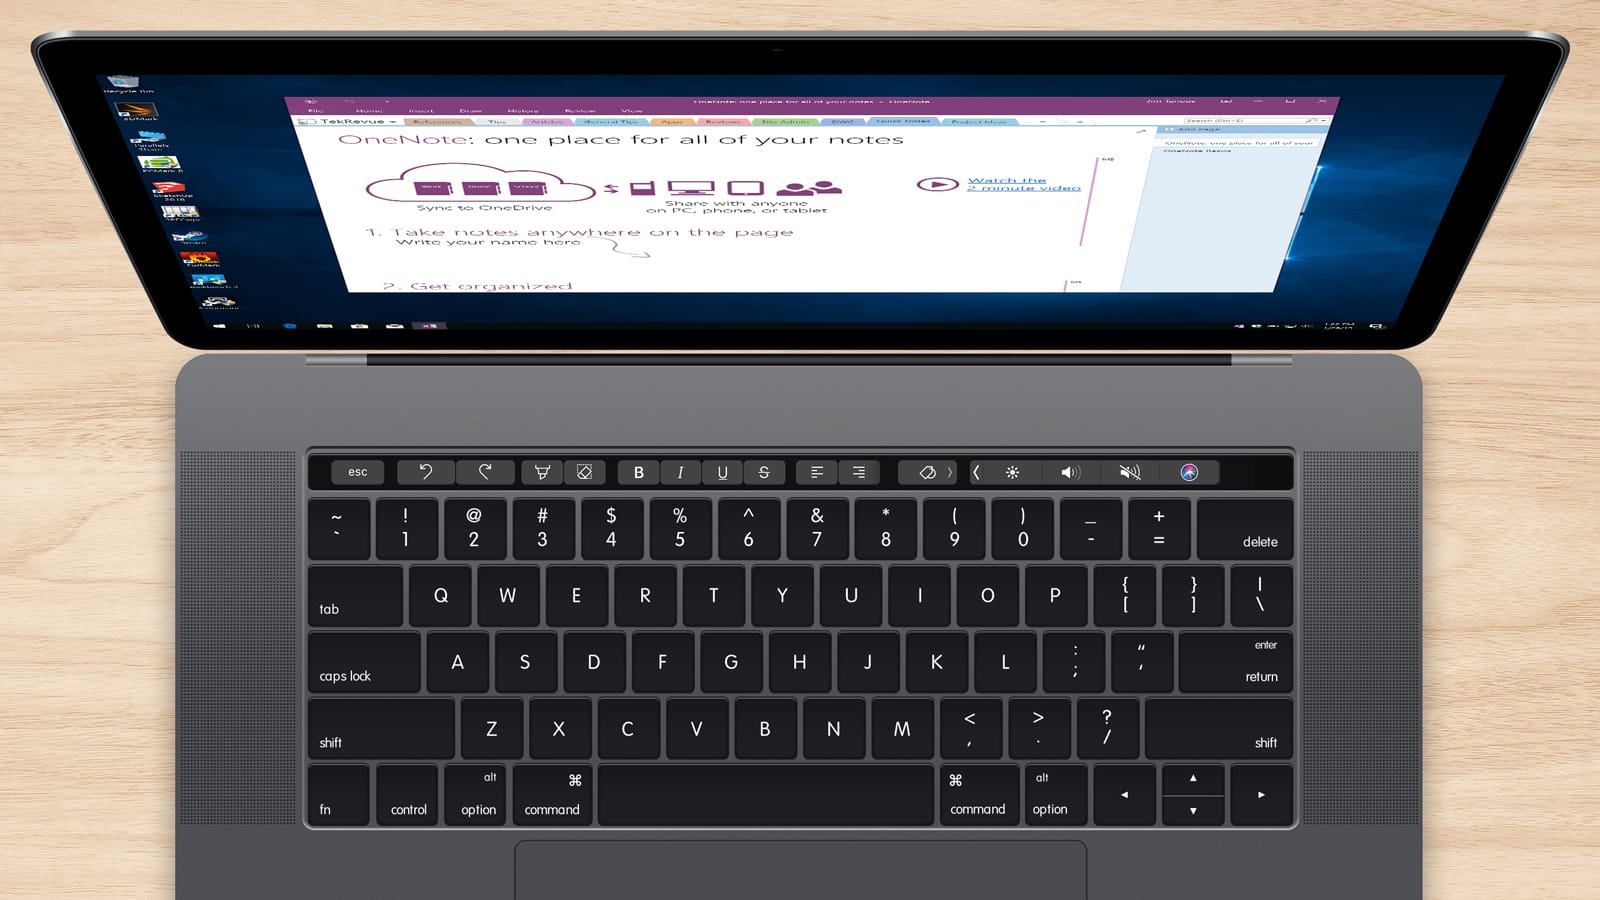
For those ready to proceed, we’ll start with an example. As mentioned, launching a supported app in a Windows VM, such as OneNote, displays the custom Touch Bar layout.
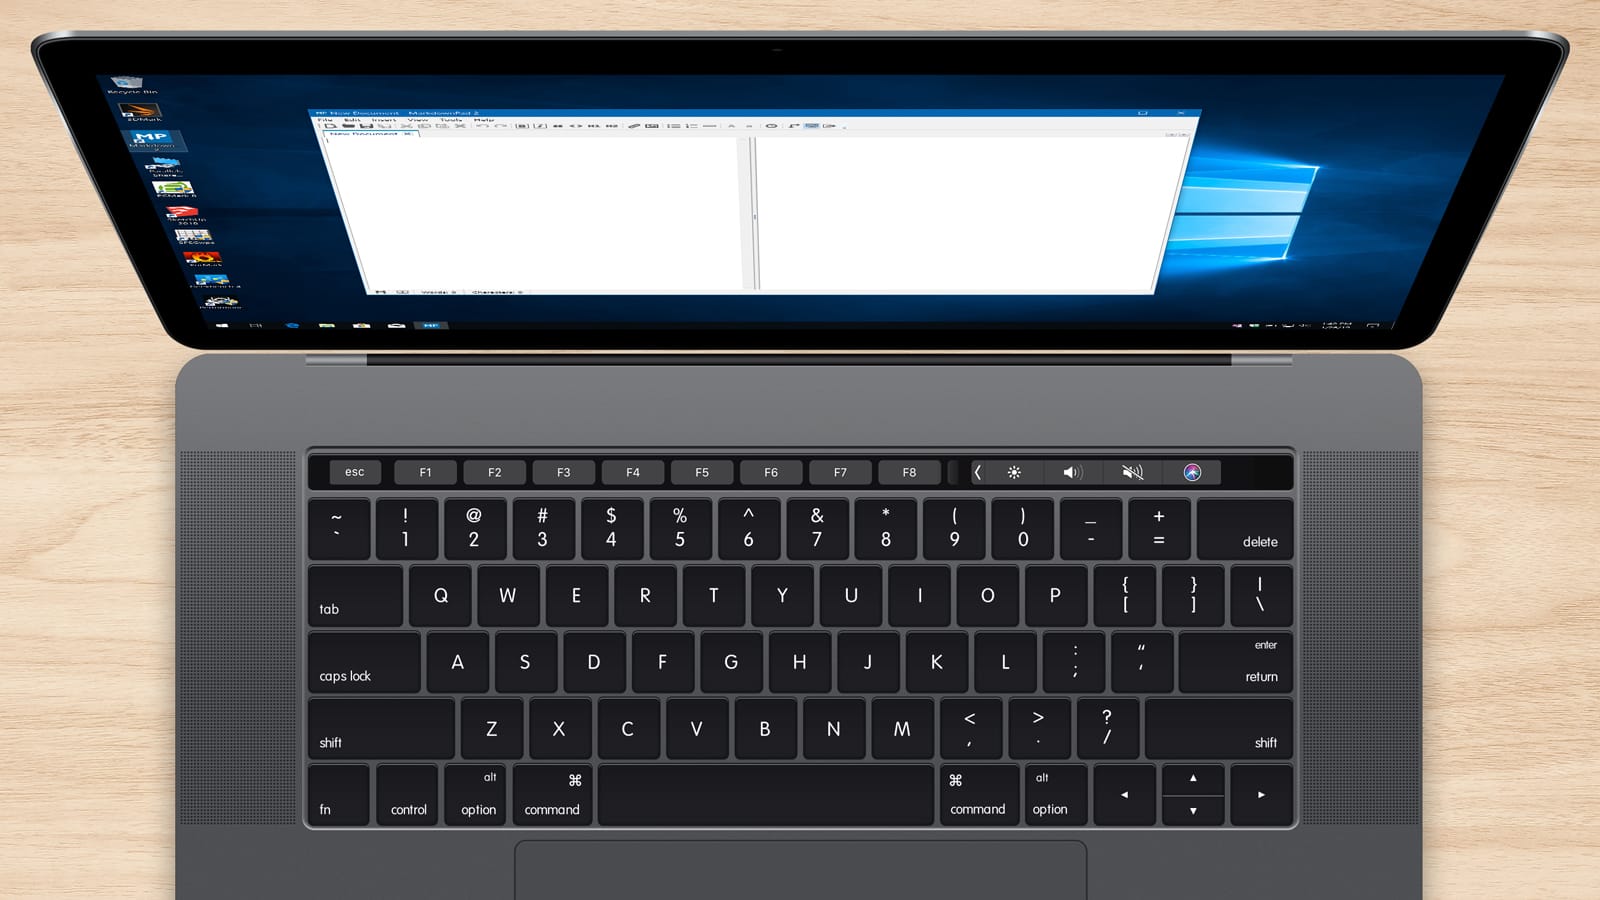
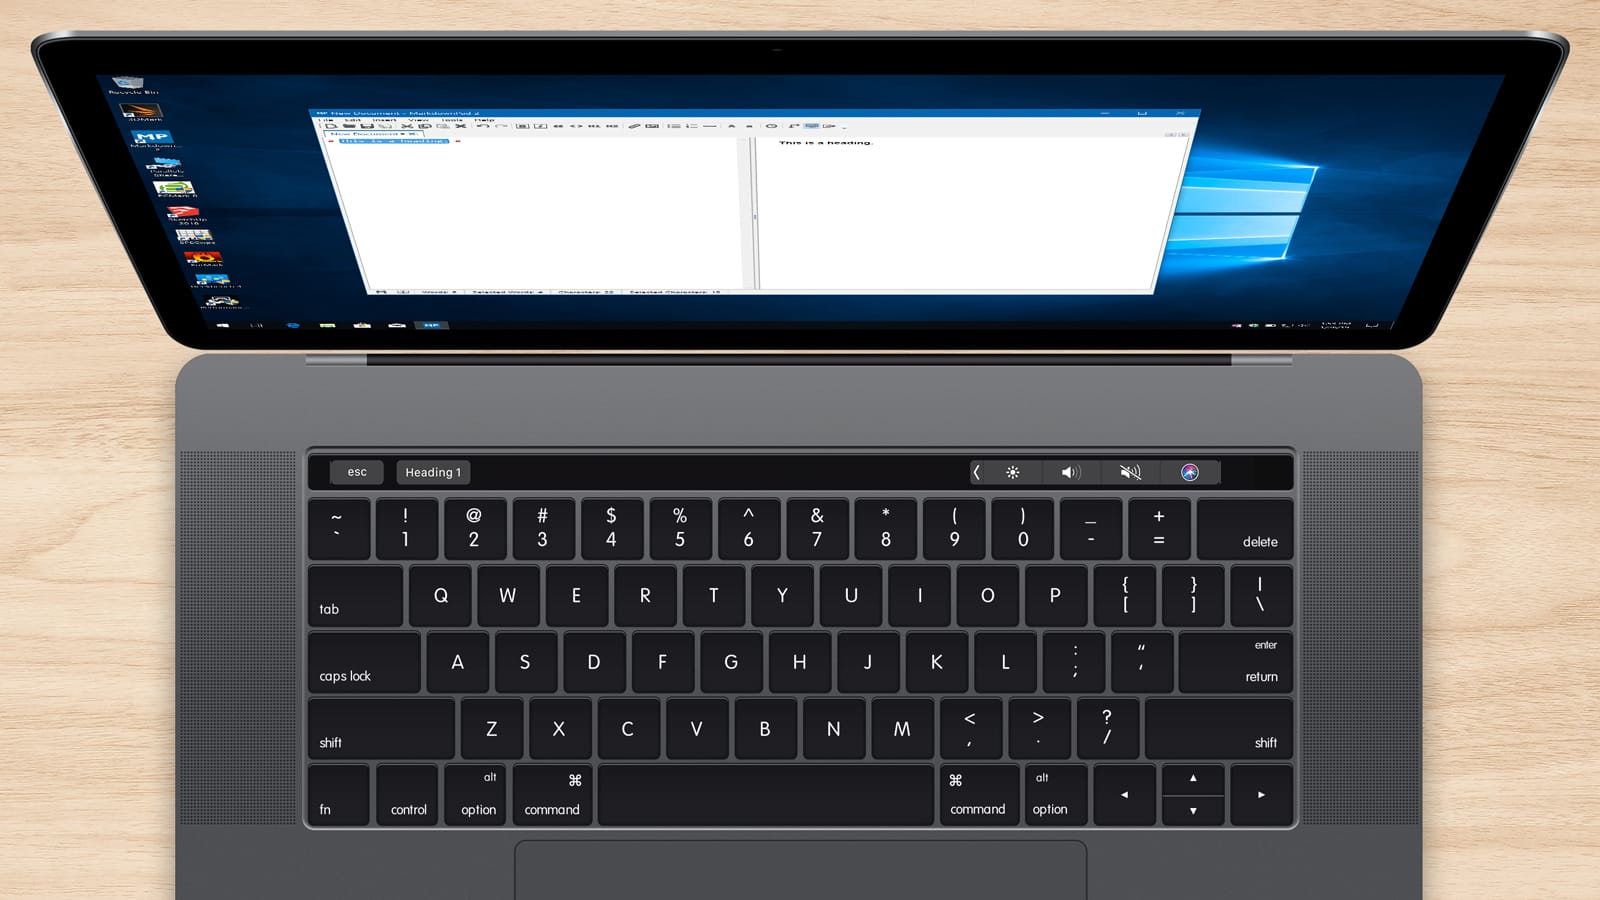
But launching an unsupported app, such as the text editing utility MarkdownPad 2, displays only the default Function Key layout on the Touch Bar.
To create custom Touch Bar buttons for an unsupported app like MarkdownPad, first make a copy of your virtual machine via the Parallels Desktop Snapshot feature. To do so, launch your VM and select Actions > Manage Snapshots from the menu bar at the top of the screen (assuming your VM is not in full screen mode). Then choose New > Snapshot. This creates a backup of your VM state and configuration at this exact moment. If something goes wrong in subsequent steps, you can always restore back to this point.
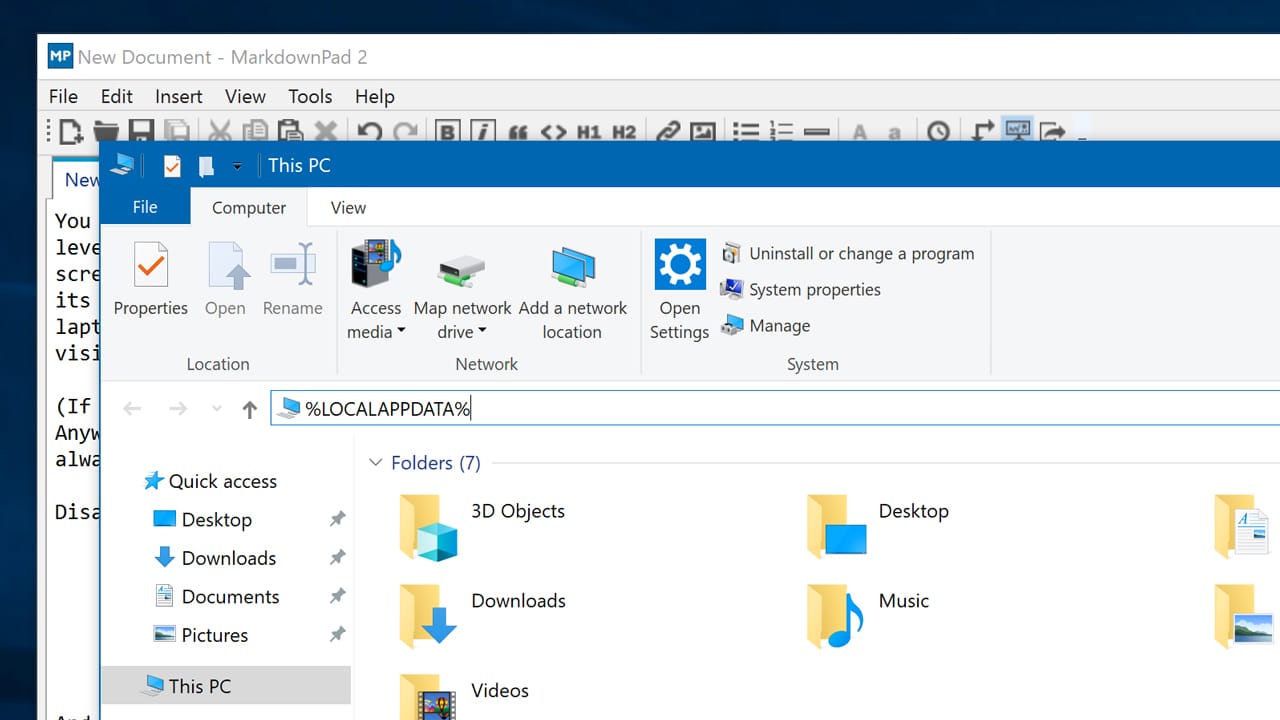
With your VM snapshot created, open File Explorer from within your Windows VM, select the path bar, and enter %LOCALAPPDATA%. This is a shortcut to the user’s local AppData folder. Alternatively, you can navigate there directly via C:Users[username]AppDataLocal.
Regardless of how you got there, create a new folder inside that Local folder called Parallels and then another new folder within called CustomTouchBars. Next, we’ll need to create a new XML file to place here, which will tell Parallels which app to use for our custom Touch Bar buttons, and what those buttons do. You can use any basic text editor, such as the built-in Windows Notepad, or you can use a coding-focused editor like Notepad++ which can make things easier to track with color-coded guides and tab support. We’re using Notepad++ in our example screenshots.
Either way, create a new document and enter the following text as a starting point:
[code language=”xml”]
<TouchBar id=’application_name’ defaultItemIdentifiers=’button’>
<Button id=’button’ keyCode=’shortcut′ title=’Button Name’>
</TouchBar>
[/code]
This is the basic format for creating a single custom Touch Bar button for one application. Modify the text to match your desired application and shortcut as follows:
id=‘application_name’: the application name is the exact name of the application’s executable. You can find this by right-clicking on the application’s task bar icon, selecting Properties, and looking at the top of the General tab. In the case of our example application, it’s MarkdownPad2.exe.
id=‘button’: this is the unique identifier for your custom Touch Bar button. This is used only within this XML file to keep track of multiple entries. So if you’re creating just a single button, you can leave it as ‘button,’ but if you eventually add more custom Touch Bar buttons, you can change it to something more descriptive. Just make sure to also update its entry in the defaultItemIdentifiers field to make sure they match.
keyCode=‘shortcut’: here’s where you’ll enter the keyboard shortcut you want to trigger with your custom Touch Bar button. You’ll find the shortcuts in the menus or configuration options of your target application. For example, to add a level-1 heading in MarkdownPad 2, the keyboard shortcut it Ctrl+1. If your shortcut actually involves the plus or comma keys, use the words plus or comma instead. You can also trigger sequential key presses by separating entries with a comma.
title=‘Button Name’: finally, replace Button Name with whatever text you want to appear on the actual Touch Bar button itself. Continuing our example, we would use Heading 1 to designate the corresponding function.
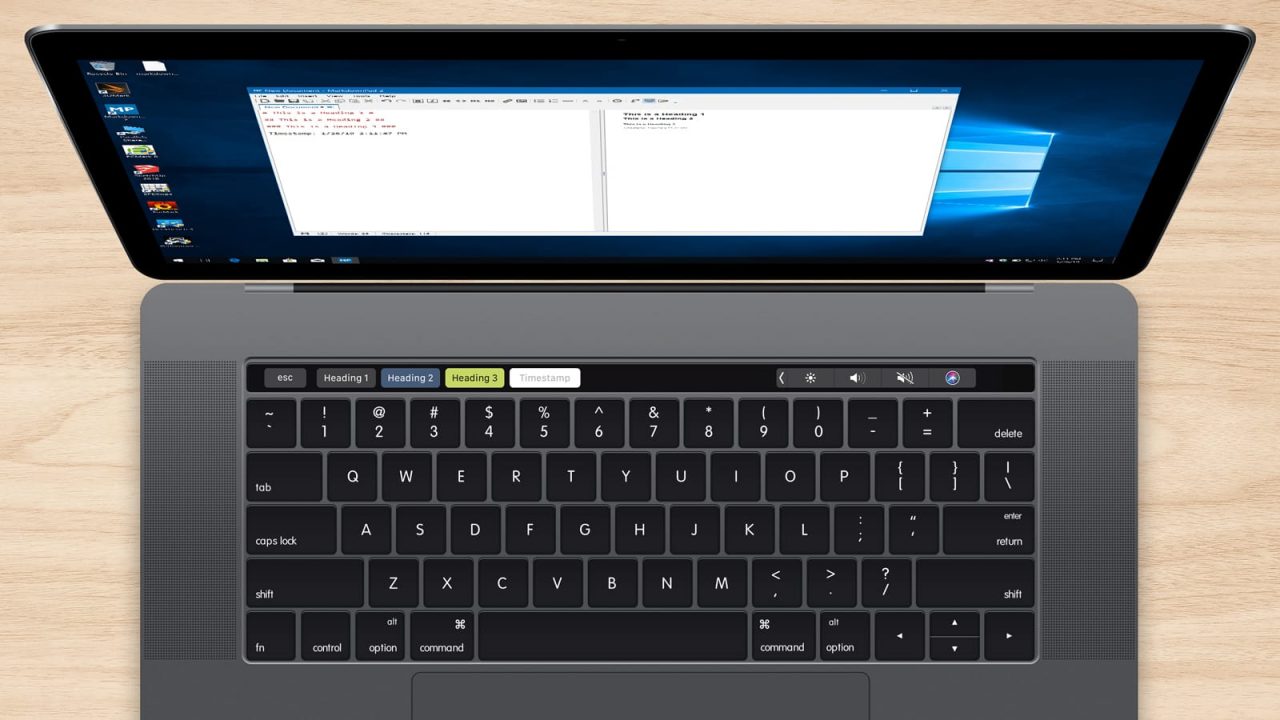
Looking at our example, here’s what our XML file looks like for a single button:

Now, save the file as <executable name>.exe.xml — again, in our case that would be MarkdownPad2.exe.xml — and make sure it’s in the CustomTouchBars folder you created earlier. Finally, restart your virtual machine.
When the VM boots back up, launch the app for which you created the custom Touch Bar button and you should see the button appear on your Mac’s Touch Bar. Test out its functionality to make sure everything works.


Further Customizing Touch Bar Buttons
Now that you have a single custom button built, you can customize that application’s Touch Bar further by adding additional buttons, changing colors, or modifying widths. To add additional buttons, just open up your XML file again and create a new <Button> line. Make sure to give it a unique ID, then add your desired shortcut and give it an appropriate name. Finally, add your new button’s unique ID to the defaultItemIdentifiers list on the top line.
So, for example, if we added a second button to MarkdownPad 2 for level-2 heading format, our XML would look like this:
[code language=”xml”]
<TouchBar id=’MarkdownPad2.exe’ defaultItemIdentifiers=’heading1,heading2’>
<Button id=’heading1’ keyCode=’Ctrl+1′ title=’Heading 1’/>
<Button id=’heading2’ keyCode=’Ctrl+2′ title=’Heading 2’/>
</TouchBar>
[/code]
To change a button’s color, just add a backColor (for the button color) and/or textColor (text color) value to a button’s line along with a hexadecimal color code. So, if we wanted the button to be white with gray text, we would add backColor=‘FFFFFF’ textColor=‘A8ABAE’. Here’s another look at our example XML with the changes:
[code language=”xml”]
<TouchBar id=’MarkdownPad2.exe’ defaultItemIdentifiers=’heading1,heading2’>
<Button id=’heading1’ keyCode=’Ctrl+1′ title=’Heading 1’/>
<Button id=’heading2’ keyCode=’Ctrl+2′ title=’Heading 2’ backColor=’FFFFFF’ textColor=’A8ABAE’/>
</TouchBar>
[/code]

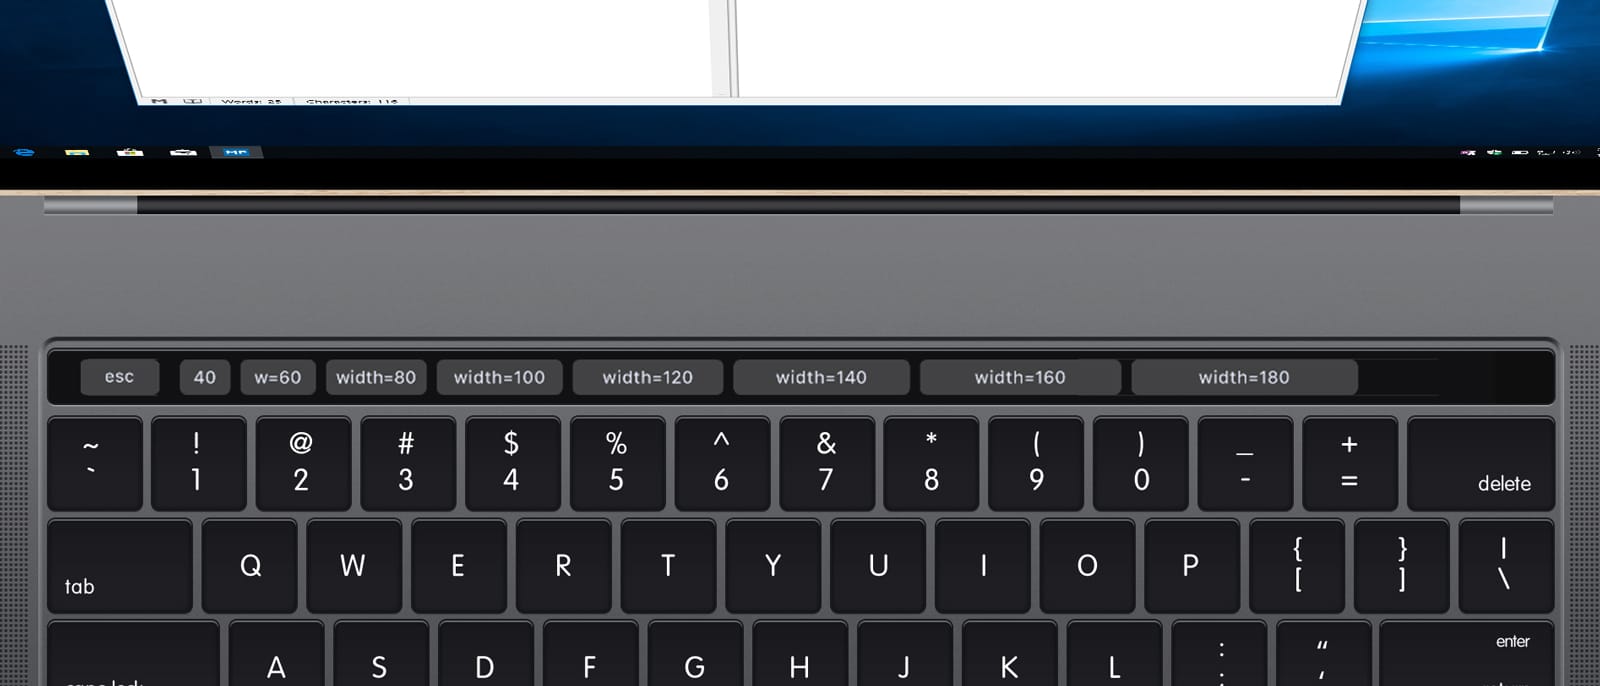
Finally, you can manually set the width of a custom Touch Bar button by adding a width field with a numerical value for the width in pixels. For example, to set the width of a button to 70 pixels, you would add width=’70’ to the button’s line in the XML file. If you don’t specify a width, the button will automatically resize to fit the title text. Here’s an example of how relative width settings will look on your Touch Bar:
These options can get you set up with a completely custom Touch Bar layout for your favorite Windows app. Once you’ve mastered this process, you can also explore even more advanced customization options, such as the ability to add an image to your Touch Bar button, arrange buttons by defined groups or add spacers, create expandable button sets, and more. Check out the Parallels blog for more info on these advanced options.
Conclusion
This tutorial looked at adding custom Touch Bar icons to a single application. Once you’re ready to add custom buttons to additional applications, just create a new XML file following the steps above, being sure to change the application ID and XML file name accordingly.
It’s also a good idea to make backups of your custom Touch Bar XML files in case something goes wrong, and create frequent snapshots of your VM in case something really goes wrong. The key, especially for those without coding experience, is to experiment and have fun, and having robust backups allows you to do this.
Not everyone loves the Touch Bar, but for those who do, creating custom Touch Bar buttons for your frequently used Windows apps can significantly improve your workflow, and bring a bit of that Apple magic to your virtualized Windows apps.


