Home
PC How To Remove the Audio Track from a Video
How To Remove the Audio Track from a Video
If you’re editing a video, you might want to remove the original audio track to get rid of eliminate ambient noise, loud or distracting sounds, or pave the way for a soundtrack.
Fortunately, there are a variety of third-party applications and programs that make it easy to remove audio from video files and replace it with your own audio. Read on to learn how to remove an audio track from a video.
How to Remove Audio From a Video
The easiest way to eliminate the audio track is to use the VLC media player. VLC features sound removal on Windows PCs, Linux, and Mac. You can also use iMovie on macOS. Both VLC and iMovie are entirely free to use.
Remove Audio From a Video Using VLC Media Player – PC
VLC is the king of media players because it plays almost any video file in any format and has a range of powerful editing and manipulation tools for those who want to dig a little deeper.
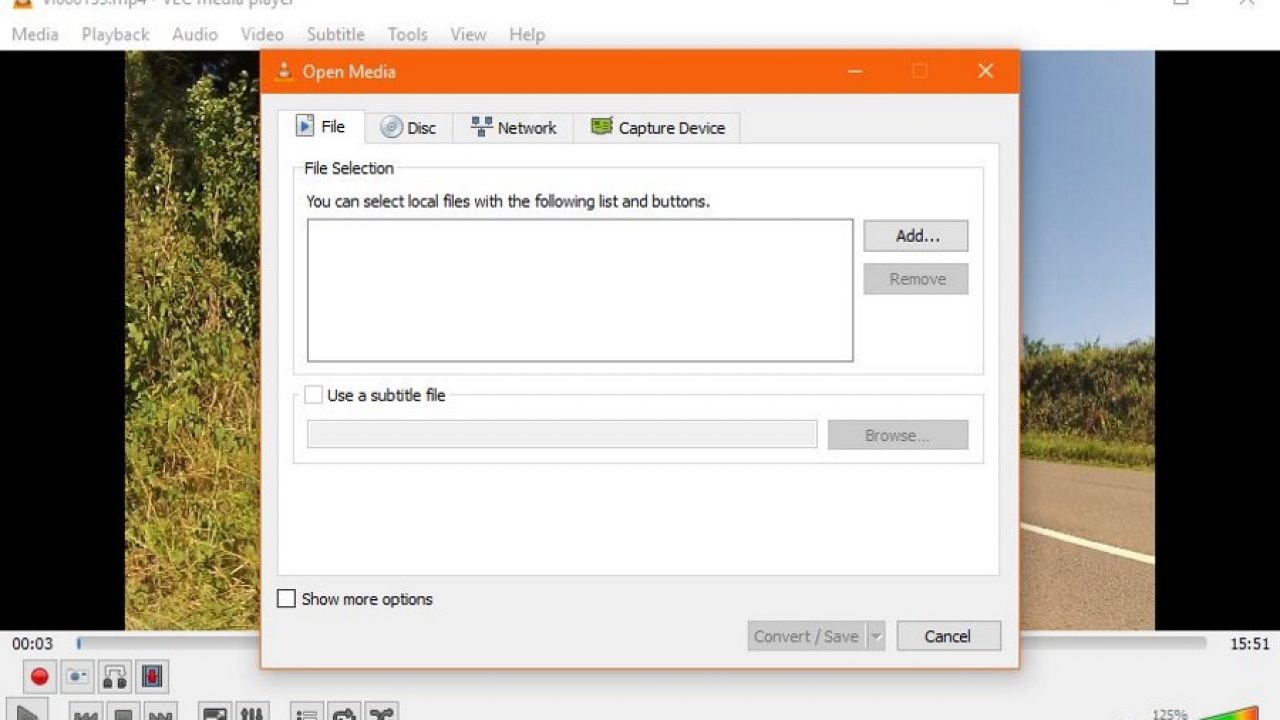
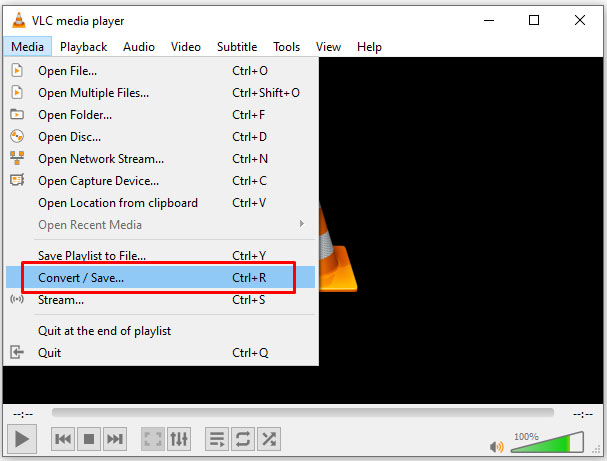
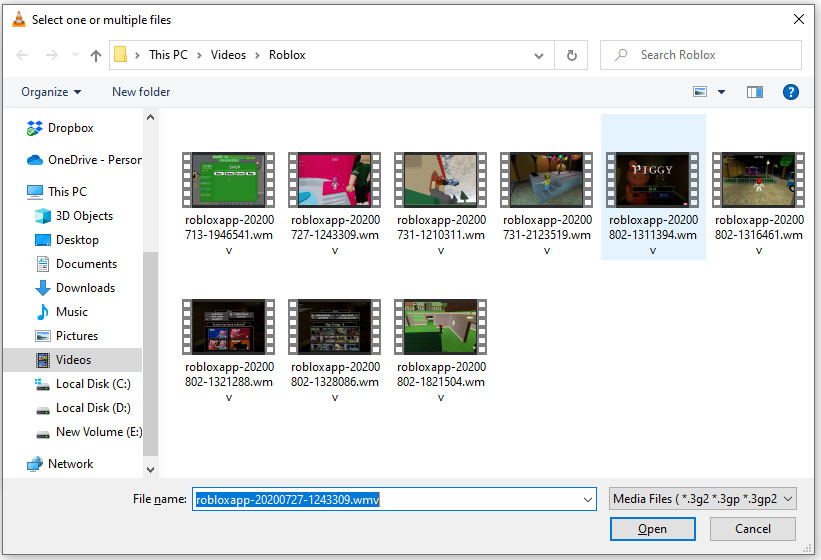
Open VLC and select Media -> Convert/Save.
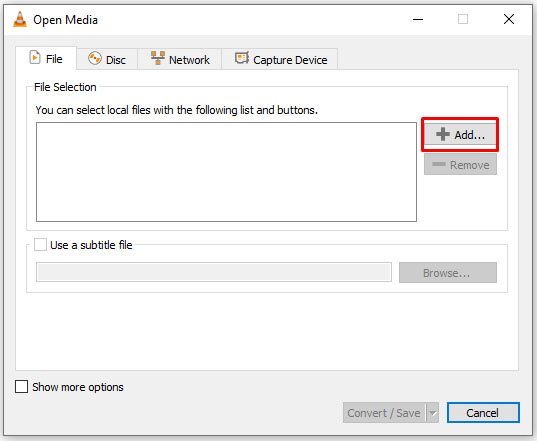
Click Add.
Choose the media you want to remove audio from, and it will appear in the file selection box.
Click Convert / Save from the small box on the bottom.
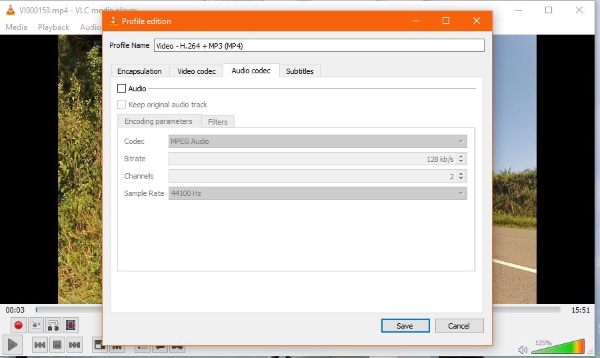
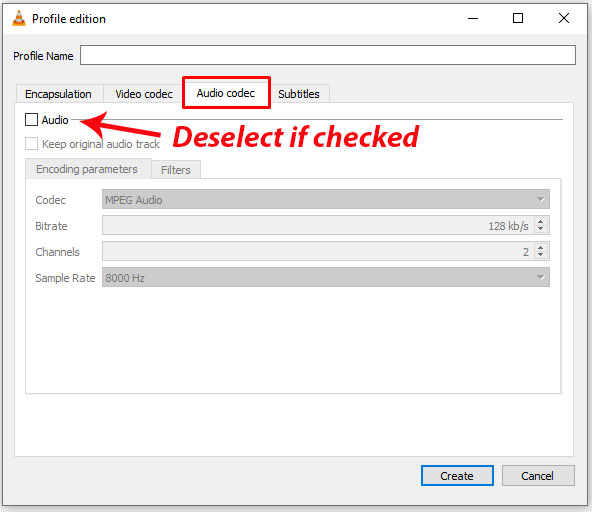
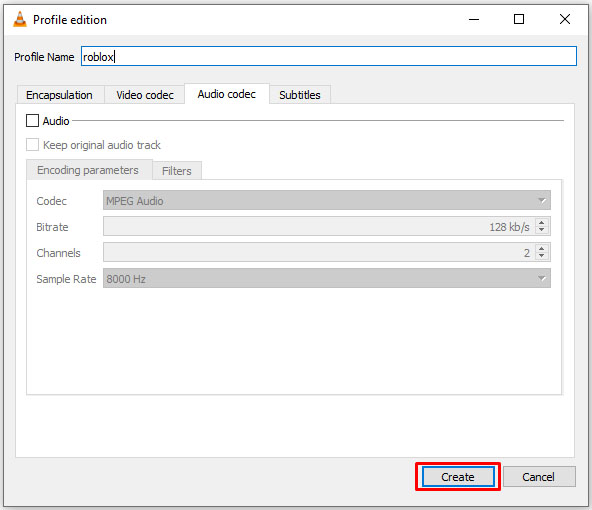
Within the popup window, select the wrench icon .
Select the Audio codec tab and uncheck the box next to Audio.
Hit Create in the bottom section of the window.
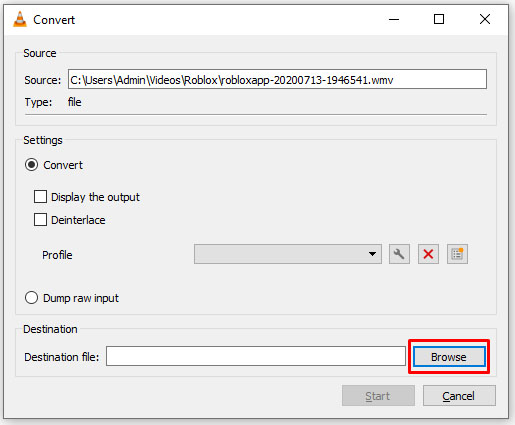
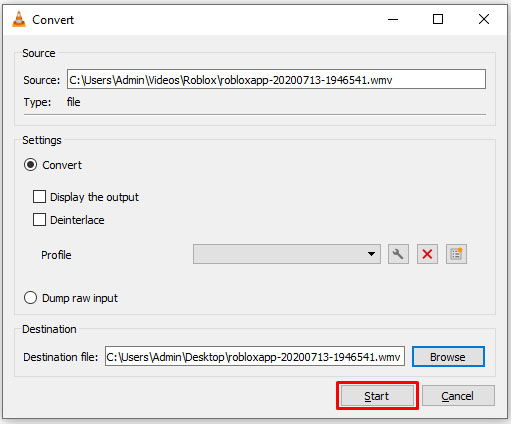
The Convert Window reappears. Enter a destination for the file at the bottom.
Select Start to recode the media without audio.
Remember to rename the file to something different in Step 7 to preserve the original. That way, if anything goes wrong or you want to undo the changes, the original remains untouched. You can always delete the original once you’re sure you no longer need it.
Note: Based on our tests in February of 2021, this does work. However, the video file without audio saved to an entirely different location from the one we set. Use the Cortana search bar to locate the video file and follow the path to retrieve it.
How to Remove Audio From a Video Using VLC – Mac
The VLC Player’s interface is slightly different for a Mac than it is for a PC. Following the same basic principles as above, here is how you remove the audio from a video on macOS.
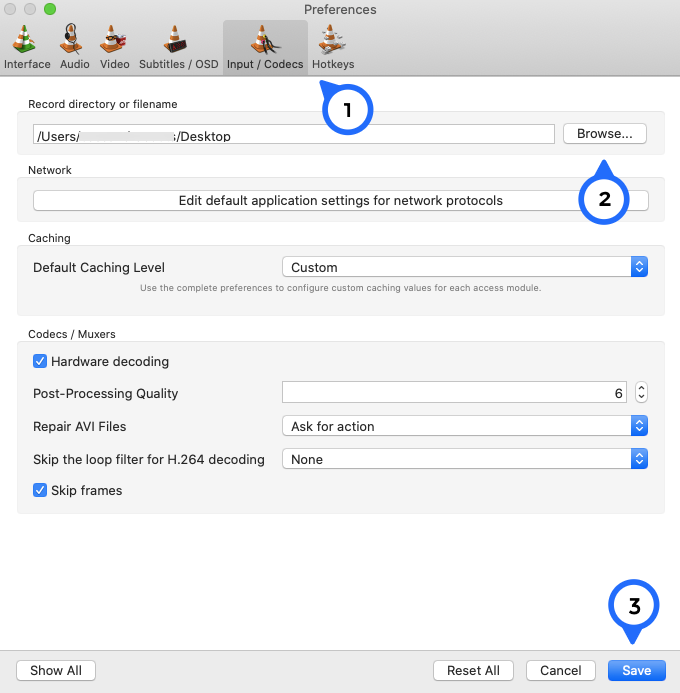
Open the VLC Play and click VLC Media Player in the upper left-hand corner. Select Preferences.
Select the file location you’d like to save to(bear in mind that we selected Desktop and later found the audio file in Downloads, and on another test run, found it in the Videos folder) Click Choose and then Save at the bottom.
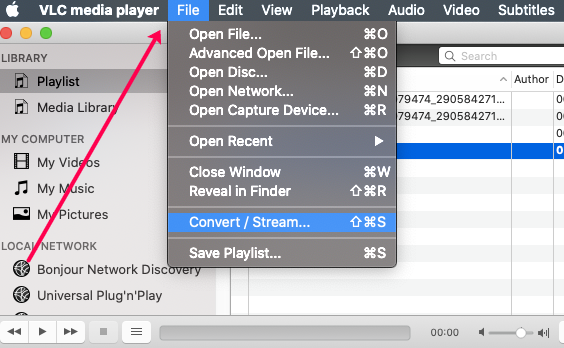
Now go to File and select Convert/Stream.
Click Open Media and select your video file.
Under Choose Profile select Custom from the drop-down, then Customize.
Click on the Audio Codec tab and de-select Audio then click Apply.
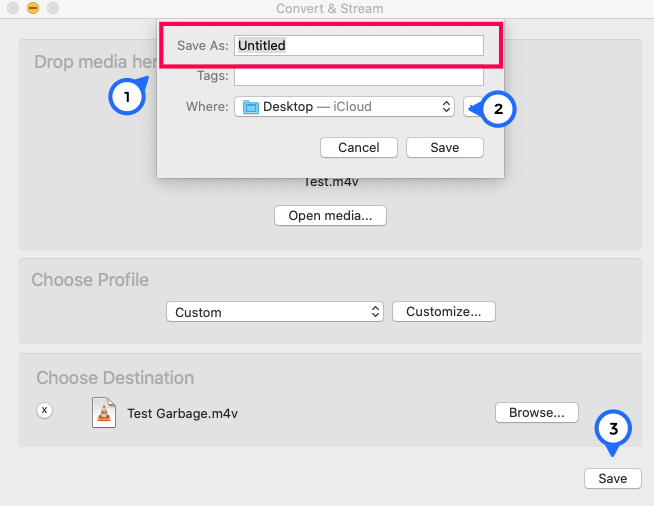
Finally, select Browse and be sure to name your file something you’ll recognize (you may need to use Finder to locate the video) and select the destination where you’d like it to save. Then, click Save.
Go to the location you selected to locate the file. If you open it and it plays with audio, or you simply can’t find it, go to Finder on your Mac, type the name in, and play the video.
Use iMovie to Remove the Audio From z Video
iMovie comes built into macOS and is pretty good for editing short videos. It includes an audio removal feature, just like VLC, and is an overall great option for Mac users.
To delete audio from a video using iMovie, follow these steps:
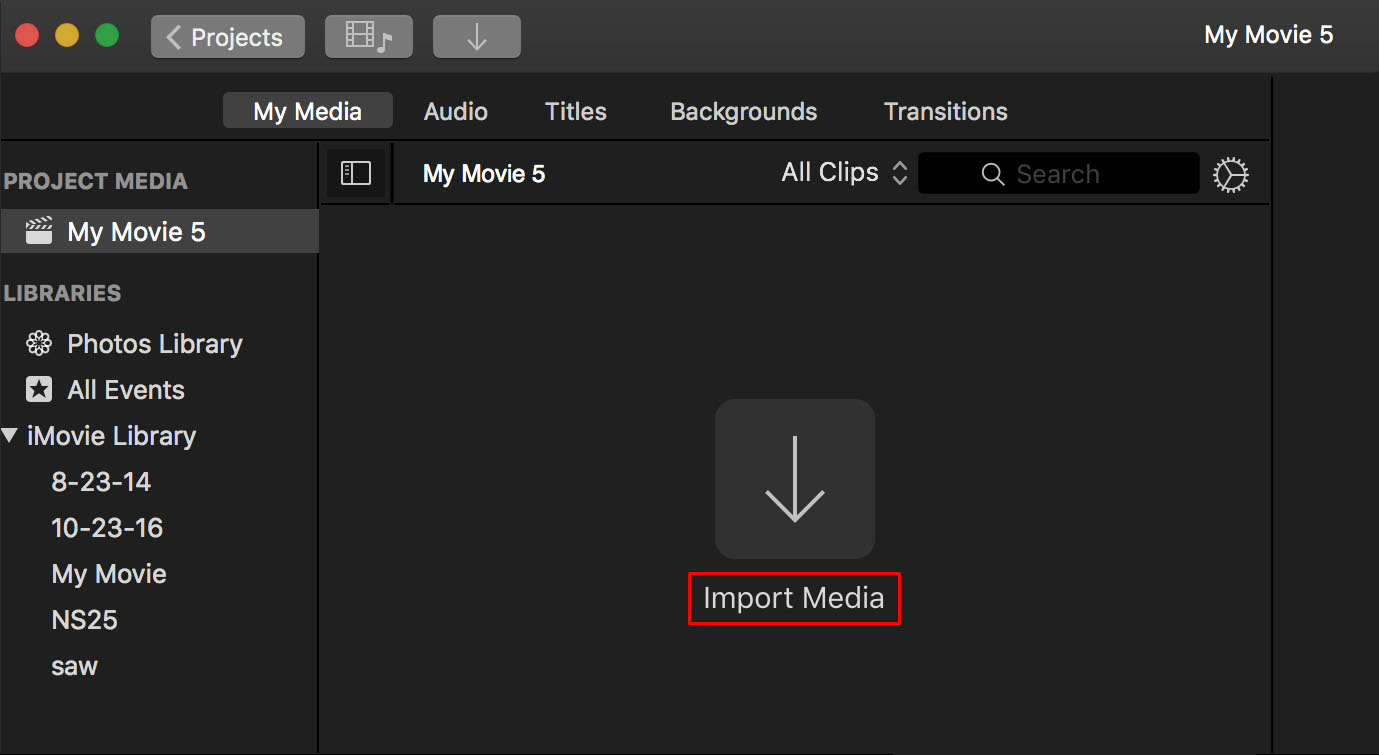
Launch iMovie and select Import Media in the center.
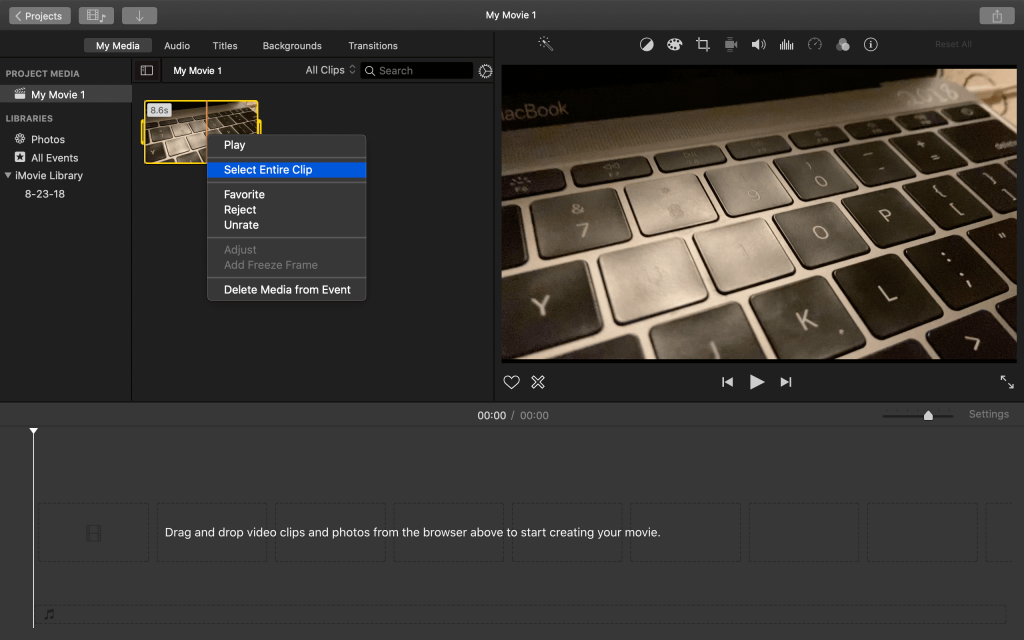
Load your video, right-click it, and choose Select Entire Clip.
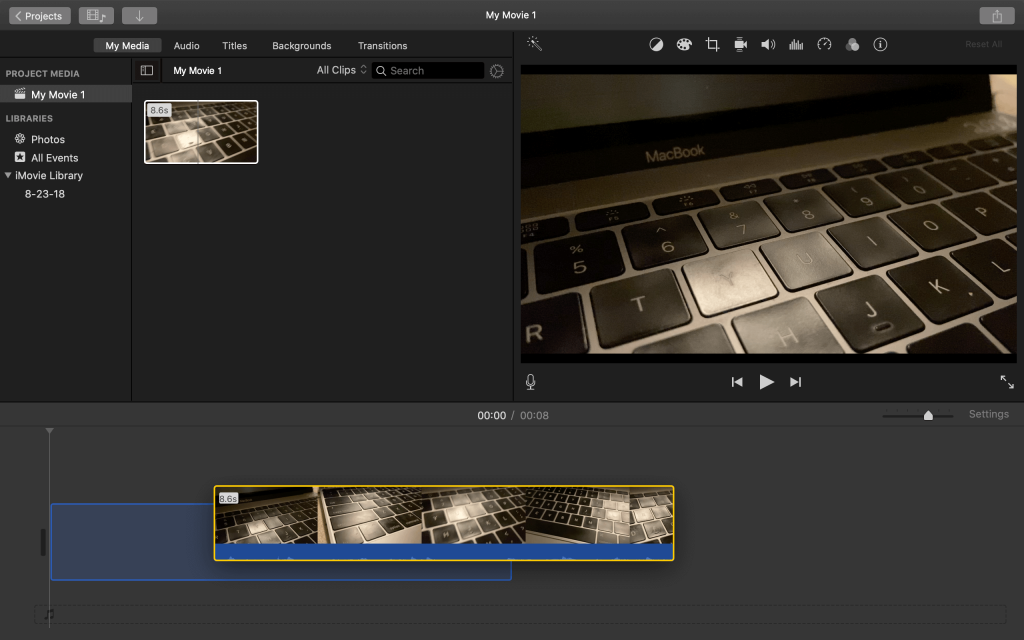
Drag the video into the Timeline at the bottom of the screen to allow editing.
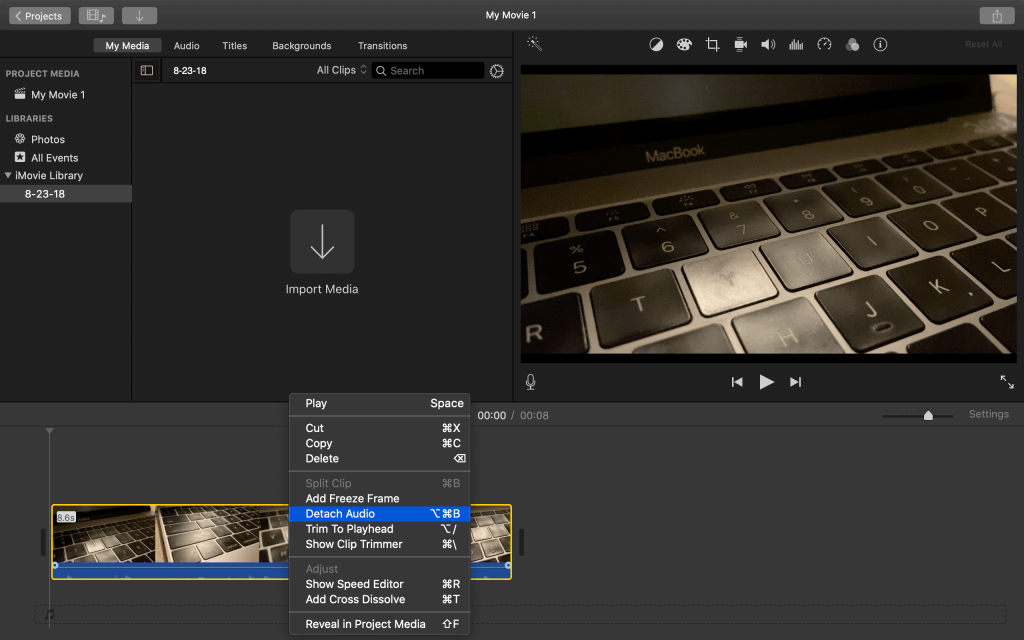
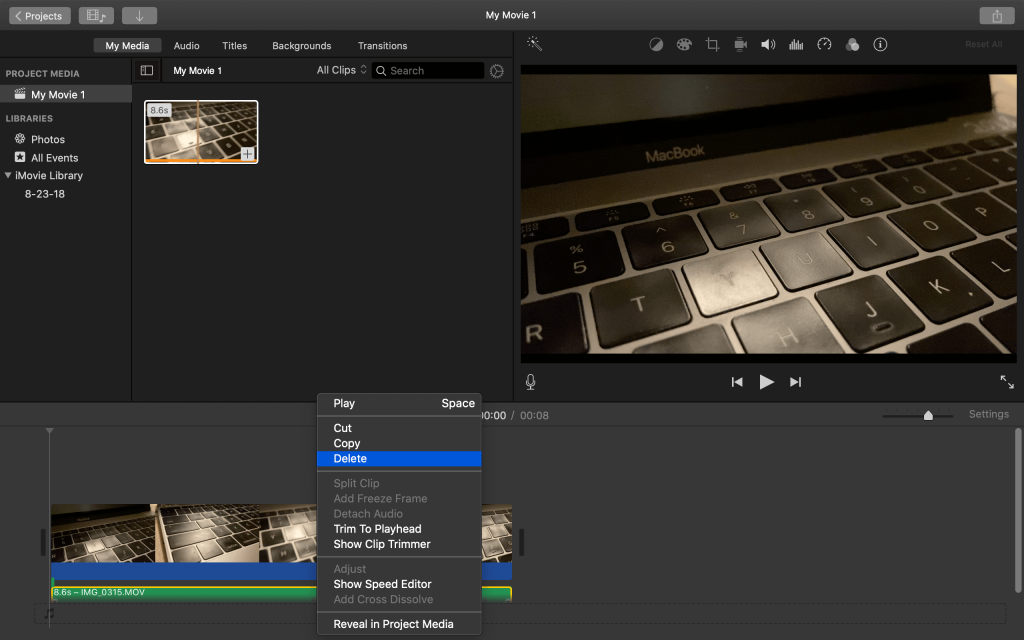
Right-click on the timeline and select Detach Audio to split the file into pure video and pure audio tracks.
Right-click the audio track and hit Delete.
Select Export in the menu and save the video somewhere.
Using a different filename ensures that your original isn’t overwritten, allowing you to undo or redo any changes. You can delete the original file after you’ve made sure the new one is all you need.
Use Adobe Premiere Pro to Remove the Audio Track From a Video
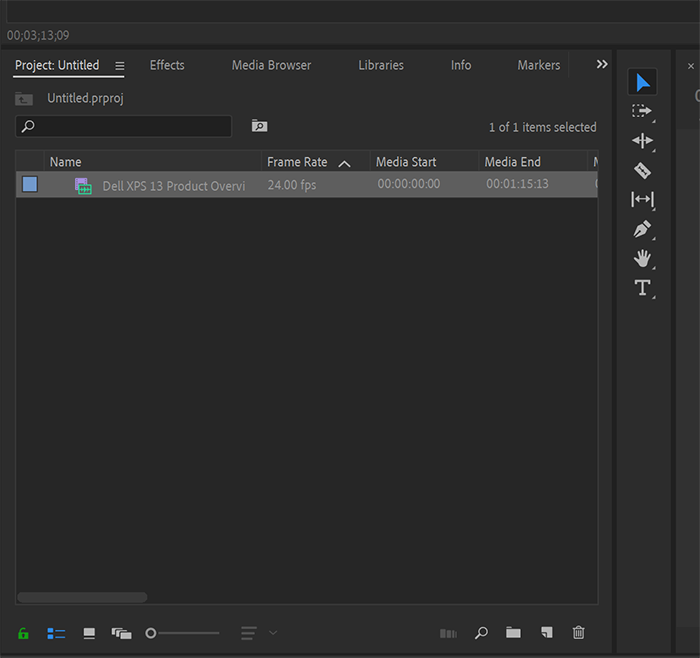
You can also use Adobe Premiere Pro to remove the audio files from any video quickly. Make sure you have the video stored on your computer, then open up Premiere and create a new project.
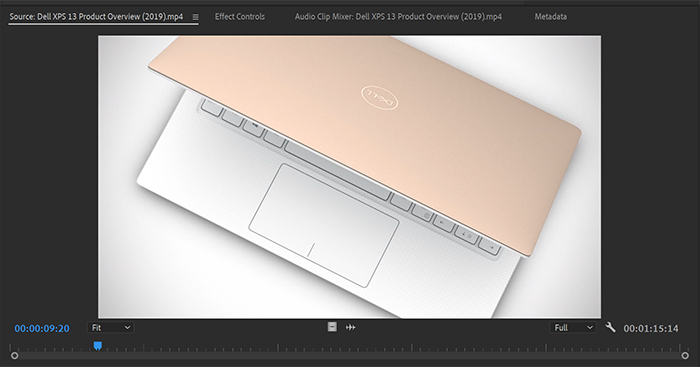
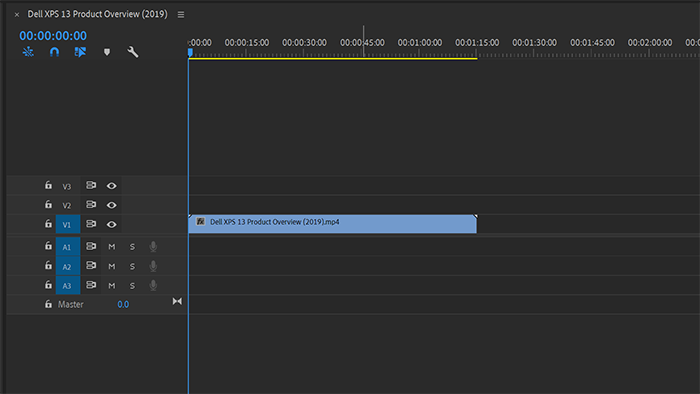
In Premiere’s standard layout, drag and drop your video into the library in the lower-left corner of your display. Double-click this file to load it into your preview monitor on the upper-left portion of the screen, then click and hold the video icon below this. Drag and drop the video icon you’re holding onto the timeline, and have Premiere set the sequence settings based on your file. Your video will now appear in the timeline with an audio file attached.
Now export your video from Premiere while ensuring that your export matches your sequence settings. The resulting video file is the original video you imported into Premiere without audio attached, and it only takes about thirty seconds to complete.
Remove the Audio Track From a Video on Mobile
You might be working directly from your smartphone or tablet and cannot access a desktop PC. Mobile-only solutions are less feature-laden, but if all you need to do is strip out audio, then a single-purpose app can get the job done for you.
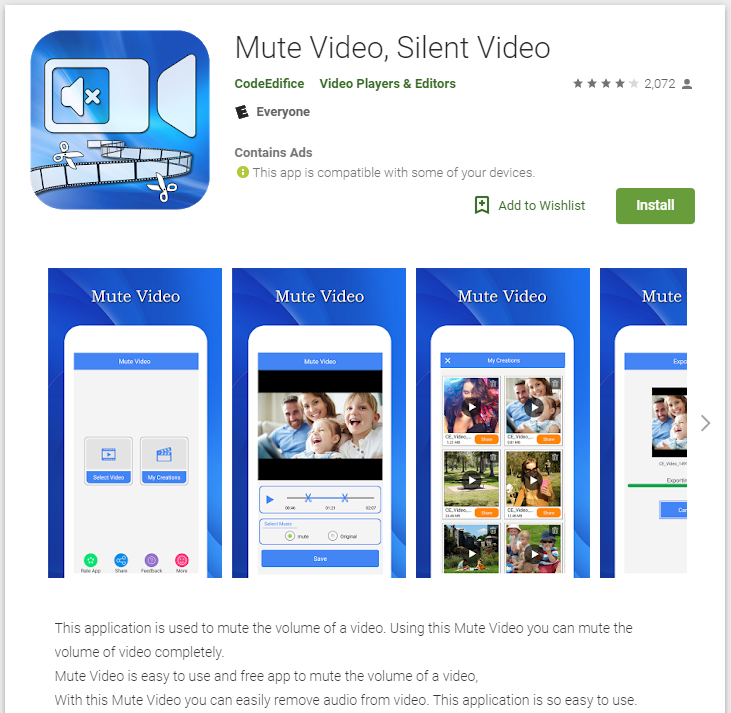
For Android, try Mute Video, Silent Video. The app does what it says on the label—it takes a video shot on your phone and removes the audio track before saving it. You can then use the video as you see fit.
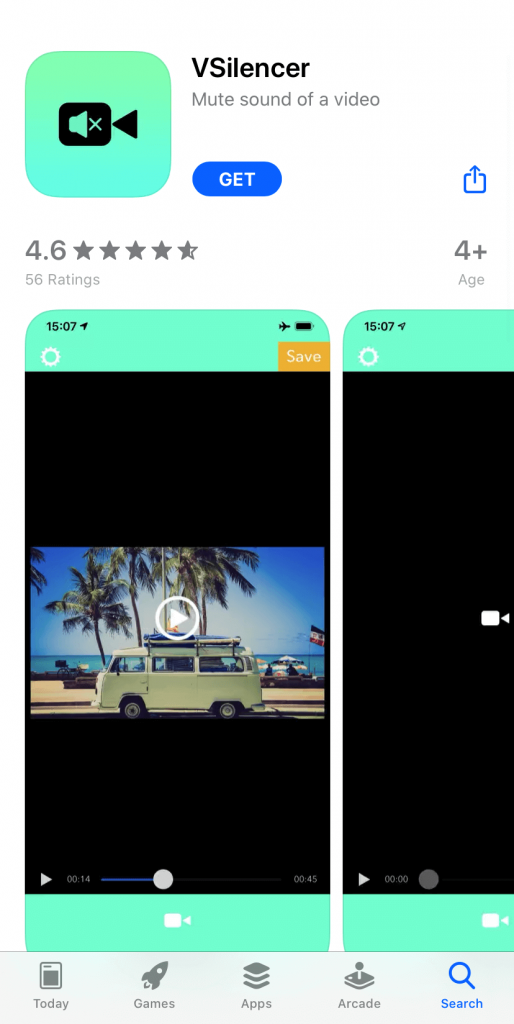
For iOS, try VSilencer, which works similarly to the Mute Video, Silent Video app above. This app has a mini timeline where you edit your video and then save it while removing the audio track. VSilencer enables you to save or download your file to another device should you wish to.
The only real downside of the smartphone-based apps is that they are significantly slower than desktop software. Mobile CPUs aren’t really up to the challenge of handling large video files quickly (other than to play them), and so it may take a while. If speed is a necessity, then desktop solutions are the way to go.
Remove Audio With A Web-Based Tool
If you have a slow computer but a decent Internet connection, then using a web-based tool to remove your audio track might be the way to go. There are many apps available, such as Kapwing Mute Video. Kapwing has other free video tools online, but in this case, the mute video tool does all you need. It also gives you the ability to trim off material from the beginning or end of the video, which might be helpful. The resulting video doesn’t have a watermark, and the service is high-speed.
Final Thoughts
No matter what device or application you use to delete audio from a video, the results will be the same, so choose whichever option best suits your needs.
With today’s technological advancements, smartphones can easily handle the job just as much as a PC or Mac, so no matter what device you’re using, you’ll be able to edit the audio in your video with ease.
The 10 Best Free Alternatives to Microsoft Visio [February 2021]
I’ve no idea who you are but you haven’t got a clue what you’re talking about. Obviously you’ve never dealt with the microsoft nightmare known as windows 10. Nothing that you’ve written here works because you’re apparently using an old version of vlc.
it should be ok for codec and audio ai cleanup and translations making it more simple to do 8k
IMAX conversions in the future once the software matures for old movies and tv shows and games with animation and cgi tech in them.
You may add the file to iDealshare VideoGo, and click “Setting…” -> ‘Advanced’ tab -> ‘Audio Codec’ -> ‘Disable Audio’ option, click False tab on the right side of Disable Audio to select True from the drop-down list;
I have a video with 4 audio tracks in difference languages, and I would like to resave it with just the english one so it can be played in my TV and not play another language


11 thoughts on “How To Remove the Audio Track from a Video”
I can remove audio, but which one?
That is the problem.
IMAX conversions in the future once the software matures for old movies and tv shows and games with animation and cgi tech in them.