Steps to Disable Smart App Control (Windows 11)
Do you frequently rely on third-party apps or programs created from open-source software? If you do, then you’re probably already familiar with the Smart App Control security measure that attempts to block any attempts of installing programs that can’t be found on the Windows store.
Unfortunately, this subsystem is completely cloud-based and relies on Windows itself managing the database of “trusted” apps, so there’s no way to set it to ignore specific downloads.
With that in mind, here are two steps to completely disable Smart App Control Windows 11 users can take to regain control over their downloads.
Step 1: Before You Disable Smart App Control
There are a few important notes before you proceed with disabling the system:
- Once you disable Smart App Control, Windows won’t let you enable it without resetting the PC (though a registry workaround exists, which we’ll mention later).
- Most systems have Smart App Control disabled by default, as it was introduced in the 22H2 update to Windows 11. Even then, users with a clean install need to enable the setting before they download and install anything.

- Smart App Control has an “Evaluation” mode that attempts to learn where you’ve downloaded apps and selectively allow third-party installs.
- If you already have decent PC security habits, Smart App Control might be overkill and you can work without it.
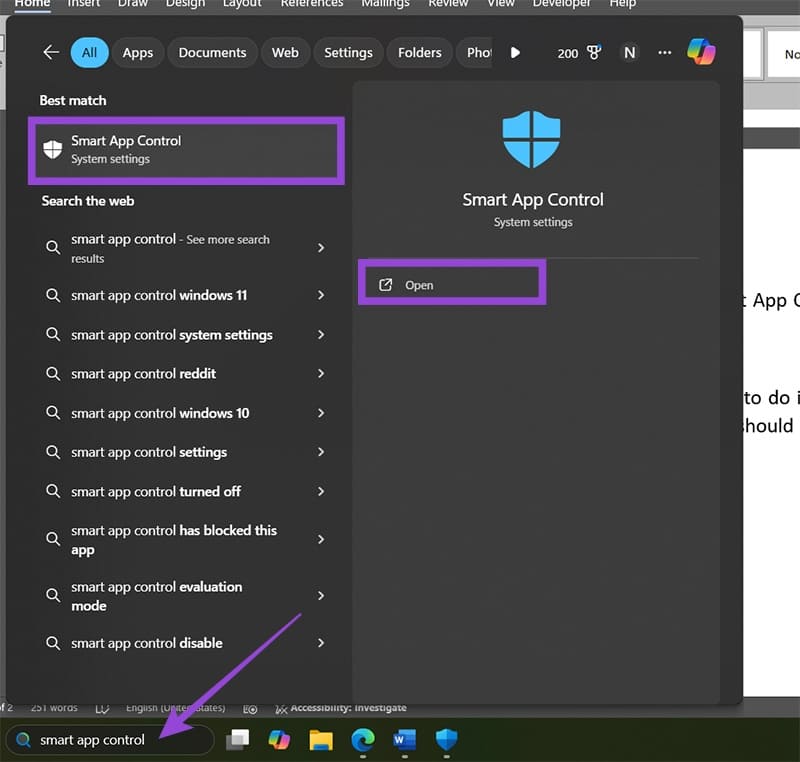
Step 2: Entering the Smart App Control Settings
Getting to the menu in question is fairly easy. All you have to do is type in “Smart App Control” in the search bar and click on the first result that comes up.
Step 3: Change the Smart App Control Settings
Once you enter the Smart App Control Settings, you’ll have three options:
- On: This may or may not be the default setting, depending on when and how you installed and set up your Windows device.
- Off: Choose this option to turn off the feature. Windows will prompt you that the action is irreversible unless you perform a reset or reinstall Windows.
- Evaluation: If Smart App Control is turned on and you have diagnostic data enabled, this option will allow Windows to adapt to your download patterns and attempt to reduce the disruption when you try to install apps outside of the Microsoft Store.
Step 4: Disable Smart App Control Windows 11
When you hit the “Off” option, you might need to restart Windows for the change to take place.
Reverting the Change Without a Clean Install
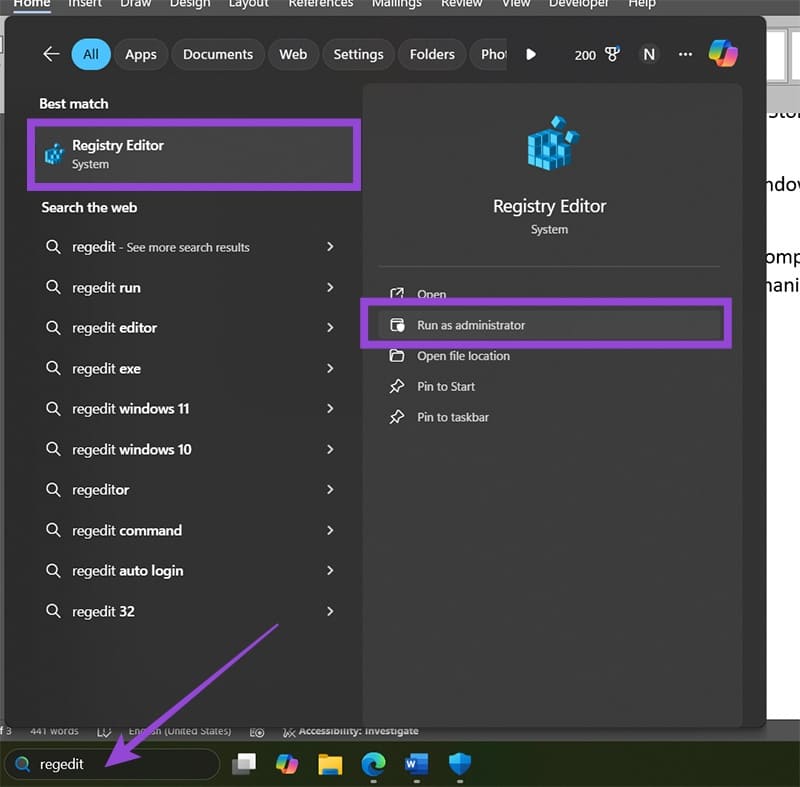
Normally, re-enabling Smart App Control means you have to completely reset the PC, removing all installed software. However, there’s a workaround that uses registry manipulation to trick the PC into thinking this has been done.
Step 1: Run the Registry Editor as an administrator.
Step 2: Go to the following address (you can paste it into the navigation bar):
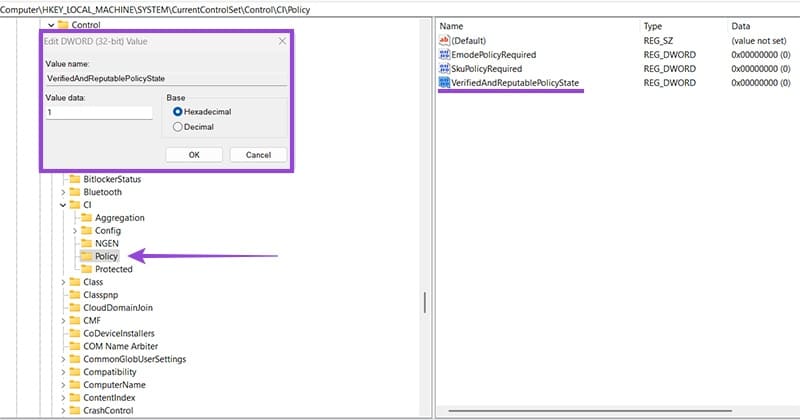
HKEY_LOCAL_MACHINE\SYSTEM\CurrentControlSet\Control\CI\Policy
Step 3: Double-click on the “VerifiedAndReputablePolicyState” entry on the right-hand side, or right-click and select “Modify.”
Step 4: Enter the value “1” and save the change by pressing “OK.”
Step 5: Exit the Registry Editor and restart your PC.
Putting the value “2” in the aforementioned key will change the Smart App Control setting to “Evaluation” mode instead. Also, it’s a good idea to back up the registry before editing to preserve the original settings.