How to Stop Your Computer Going to Sleep at Random Intervals
Windows 10’s sleep function is designed to save power and put your device to sleep when it isn’t needed. It’s useful in that it also turns off your monitor and can save screen burn as well as electricity. Usually it works well and just gets on with its job. Sometimes sleep kicks in too early or at random intervals. That’s what we’re going to tackle today.
Windows has an entire Control Panel section for sleep and you can configure it to the nth degree. The default power plan is okay for most users and except for turning off hard disks or USB ports, the default Balanced power plan should work for most people.
Control how your computer goes to sleep
Controlling how and when sleep kicks in can be done from within Control Panel and it is usually a setting there that causes your computer to go to sleep randomly. It is rare that a hardware issue causes the computer to go to sleep. Overheating would cause a shutdown and a Windows error would typically cause a crash or hang. Nine times out of ten it’s a configuration issue if computer is going to sleep at random intervals.
Here are a few ways to fix it:
Check your power plan
The first thing to do is to check to see how your power plan is configured and how long the idle interval is for sleep. It could be set at too short a time period and we can fix that in a second.
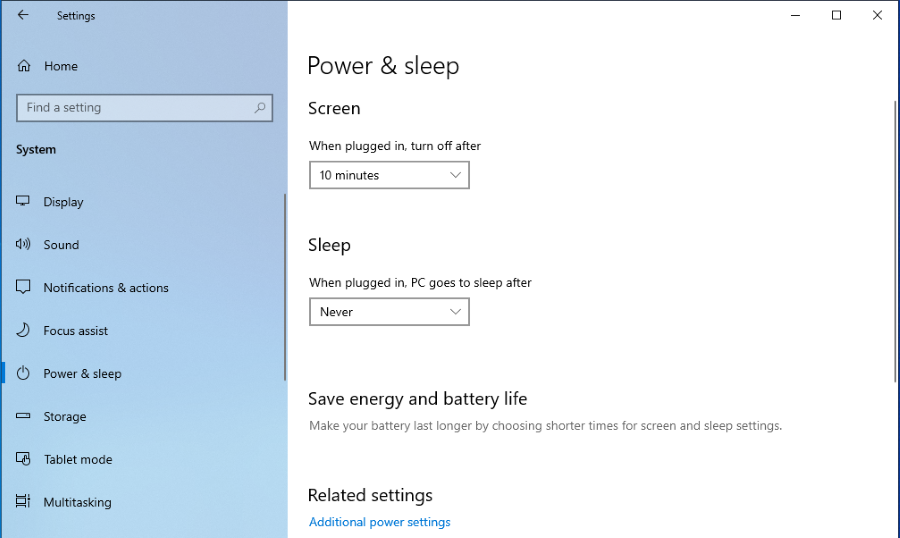
- Right click the Windows Start button and select Settings.
- Select Power & sleep.
- Check the Sleep timer in the right pane.
There should be a time set by Sleep or it might be set to Never. If the timer is too short, change it in the radio menu and retest. If it is set to a long time or Never, move on to the next step.
Restore default power settings
If you upgraded to Windows 10 from another operating system, even an earlier version of Windows, a common issue is a miscommunication between the two in terms of power. Where your previous power plan was written into the operating system, Windows 10 sometimes has issues overwriting it. Even if it looks okay on the surface, it may be using your old settings instead of the new ones. There’s a simple fix for this.
- Open Power & sleep as above.
- Select Additional Power Settings by Related Settings.
- Select the Restore Default Settings For This Plan text link.
- Select Yes in the popup window.
This will reset your power plan back to its defaults and should now allow you to overwrite that old power plan with a new one within Windows 10.
Configure a new power plan
Whether you tried the previous option or not, changing the power plan can reset Windows 10 into following it. Even a single change can cause Windows to begin paying attention to your settings and use the power plan properly.
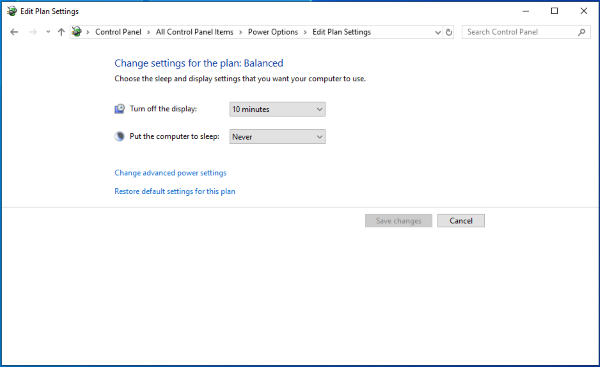
- Open Power & sleep.
- Select Additional Power Settings by Related Settings.
- Select the Change Advanced Power Settings text link.
- Change any setting in the plan and select OK.
Key things to change would be the hard disk timeout or USB timeout. If you’re a gamer, turning PCI Express Link State Power Management off would be useful. Once you have changed the plan, retest your computer. It may now stop randomly going to sleep.
Turn off Hybrid Sleep
Hybrid Sleep was a good idea that never really worked in practice. It was a combination of the old Hibernate mode in Windows 7 and 8 and sleep but never worked as advertised. It has been known to interfere with sleep so we could try turning it off.
- Open Power & sleep.
- Select Additional Power Settings by Related Settings.
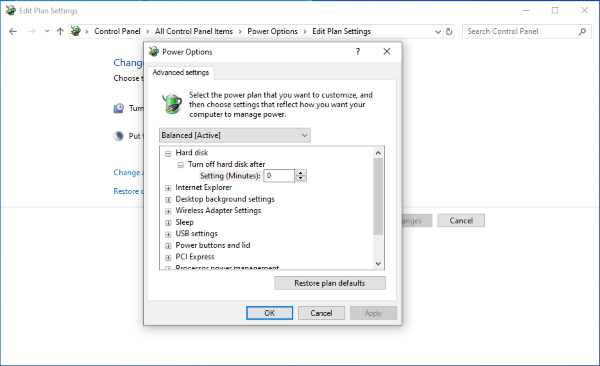
- Select the Change Advanced Power Settings text link.
- Select Sleep in the Advanced Settings window.
- Turn Allow Hybrid Sleep to Off.
- Check the Sleep After setting to make sure it matches your power plan.
- Select Hibernate after and set it to Never.
- Select OK to save the settings.
Retest your computer and see what happens.
Registry change to stop your computer sleeping at random intervals
My final fix requires a registry modification to reconfigure the sleep timer. This is useful if you have the time set correctly in Power & sleep but your computer is ignoring it. This changes the setting at the registry level which undercuts whatever the plan says.
- Press the Windows key + R.
- Type ‘regedit’ and hit Enter.
- Navigate to HKEY_LOCAL_MACHINE\SYSTEM\CurrentControlSet\Control\Power\PowerSettings\238C9FA8-0AAD-41ED-83F4-97BE242C8F20\7bc4a2f9-d8fc-4469-b07b-33eb785aaca0.
- Double click on Attributes and change the value to 2.
- Open Power & sleep.
- Select Additional Power Settings by Related Settings.
- Select the Change Advanced Power Settings text link.
- Select Change Settings That Are Currently Unavailable.
- Select Sleep and then System.
- Set the System Unattended Sleep Timeout to 20 minutes or longer.
- Select OK to save.
If that doesn’t work, I don’t know what will!