What to Do if Windows 11 Keeps Shutting Down Unexpectedly
If you’re working with a computer that seemingly doesn’t want to keep working and shuts down at random intervals, you probably want some answers. In this article, we’ll be looking at causes and fixes for when Windows 11 shuts down unexpectedly.
What Causes This Issue
Despite the operating system in the title of this article, Windows 11 may only be one reason your PC keeps shutting down randomly. There are quite a few hardware issues that may trigger this, too. The major issues causing shutdowns include:
- Your system is overheating
- An overclocked GPU
- Incorrectly configured power plan settings
- Driver issues, which conflict with Windows 11
- Fast startup bugs
Windows Shuts Down Unexpectedly – Troubleshooting Tips
We’ve got a few troubleshooters below that tackle the above causes. Hopefully, one of them will keep your PC running:
Update Everything
To ensure all your drivers and your OS version aren’t to blame, update your system and your drivers (especially the GPU) to their latest versions.
Disable Overclocking on Your GPU
If your PC shuts down after or during gaming or other intense processes, it might be your graphics card that’s to blame. Overclocking is useful for demanding tasks, but permanently enabled can cause overheating and power supply problems. Disable overclocking on your GPU and see if the problem is resolved.
Check Your PC Temperature
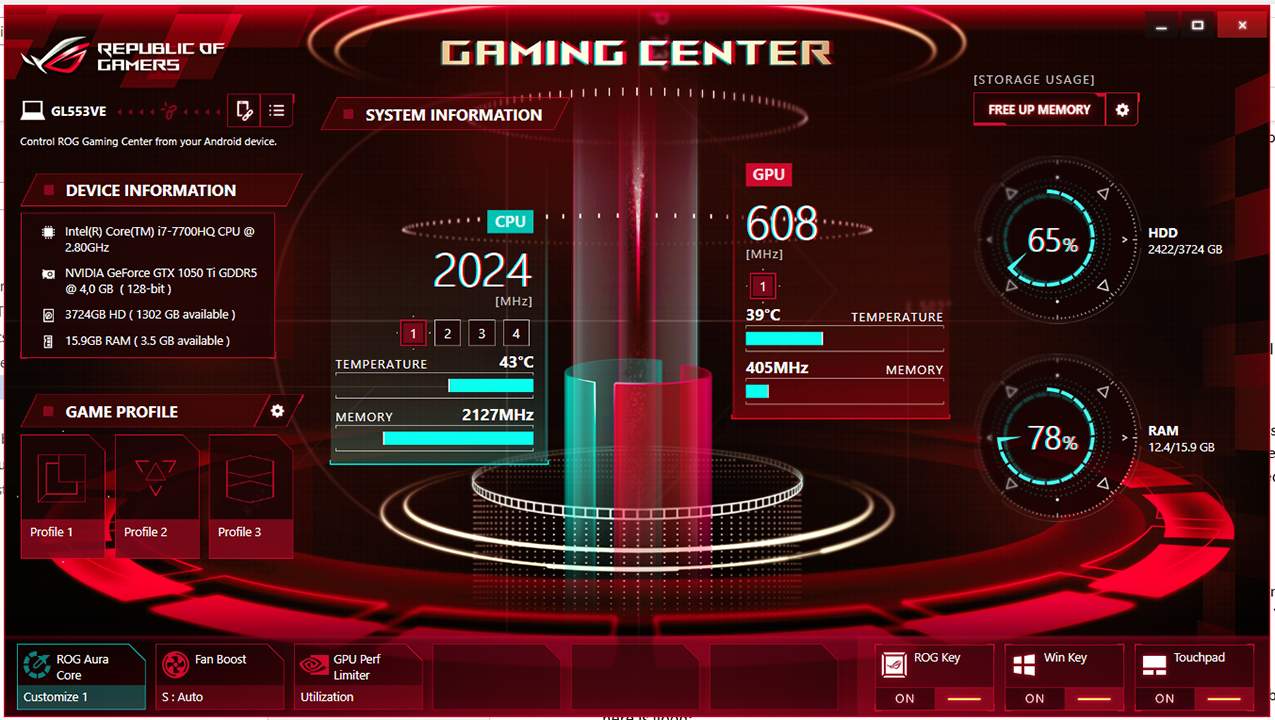
If possible, try checking your PC temperature with the built-in software. Ensure that the PC’s fans are clear of dust, reapply any thermal paste if you can, and keep all vents clear of obstruction. If your PC runs too hot, it can shut down to prevent system damage.
Check Your Power Supply Unit
Your Power Supply Unit (PSU) controls the juice your computer’s getting. If something goes wrong, or the PSU isn’t up to the demanding tasks you’re performing, your whole PC might shut down. You’ll need to inspect and, if need be, upgrade your PSU to resolve the issue.
Power Troubleshooter
Windows 10 and 11 have plenty of troubleshooters to help you out. If you’re not sure where to begin, start here:
Step 1. Open Settings (Win + I) and click “System” from the sidebar.
Step 2. Navigate down to “Troubleshoot.”
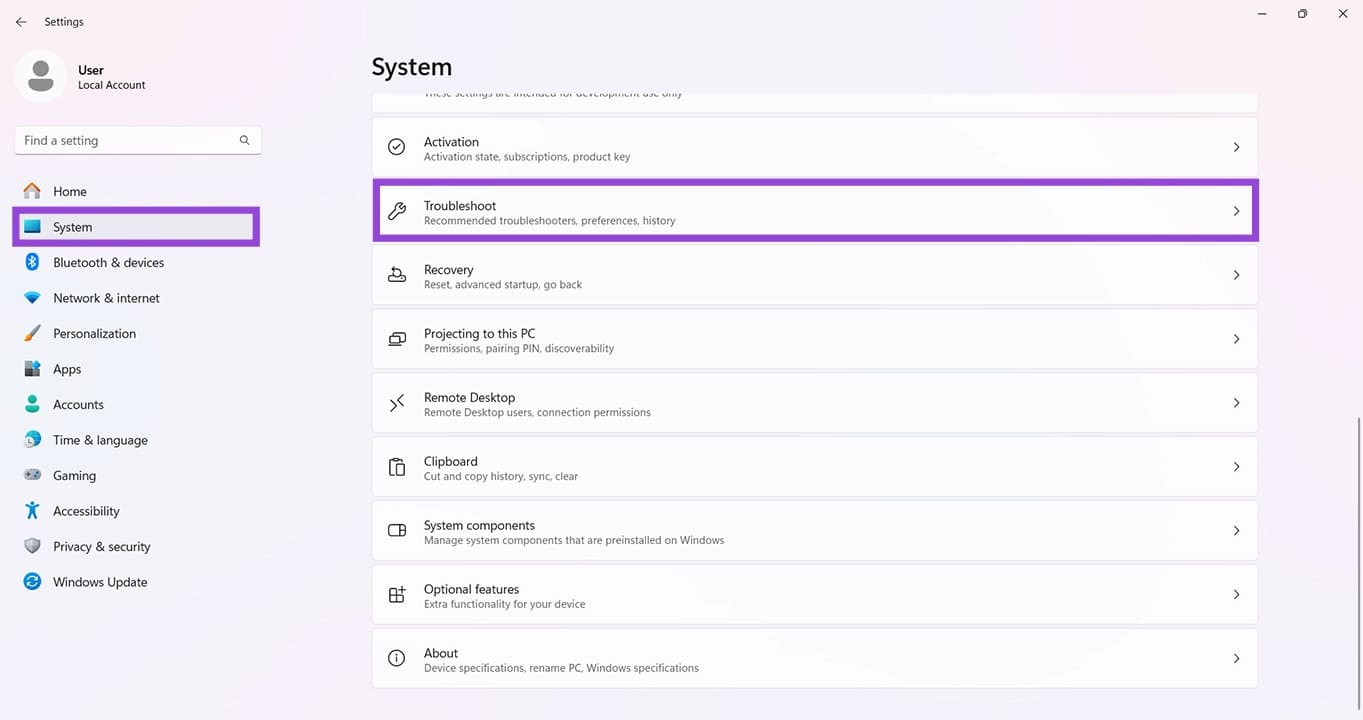
Step 3. Click “Other troubleshooters.”

Step 4. Scroll to the “Power” troubleshooter and click the “Run” button next to it. Follow the steps.
Change Your Power Plan
Windows 11 can also help curb excessive power draw and stop overheating or instability. You can change your Advanced Power Plan like so:
Step 1. Type “Edit Power Plan” in the Search Bar and choose the option that pops up.
Step 2. Click “Change advanced power settings.”
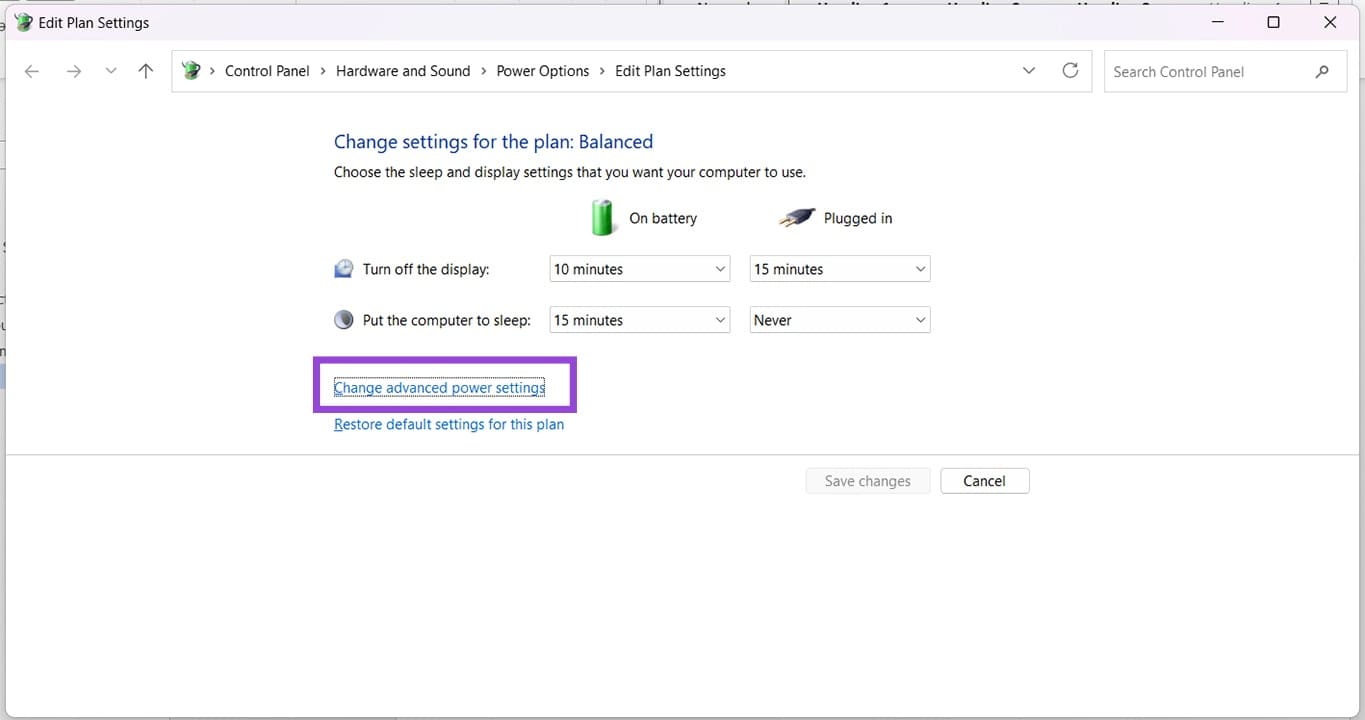
Step 3. In the new window, scroll down to “Power processing management” and ensure the “Minimum processor state” is set either to 5% or another low number.
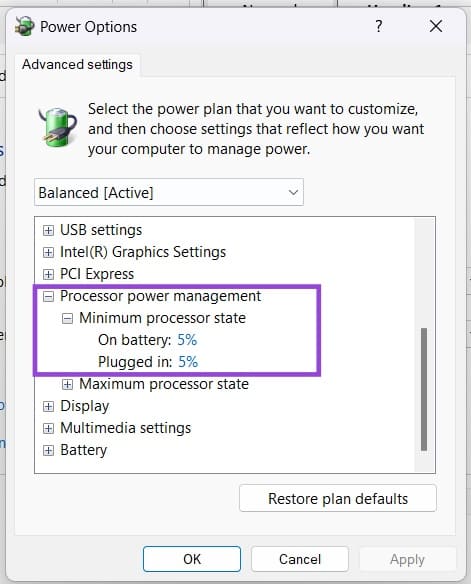
Step 4. Press “OK” to finalize.
Disable Fast Startup
Fast startup, as its name implies, allows you to start up your PC quickly by not fully shutting down, entering a form of hibernation instead. This is handy, but it can cause power issues like sudden shutdowns. Here’s how to disable it:
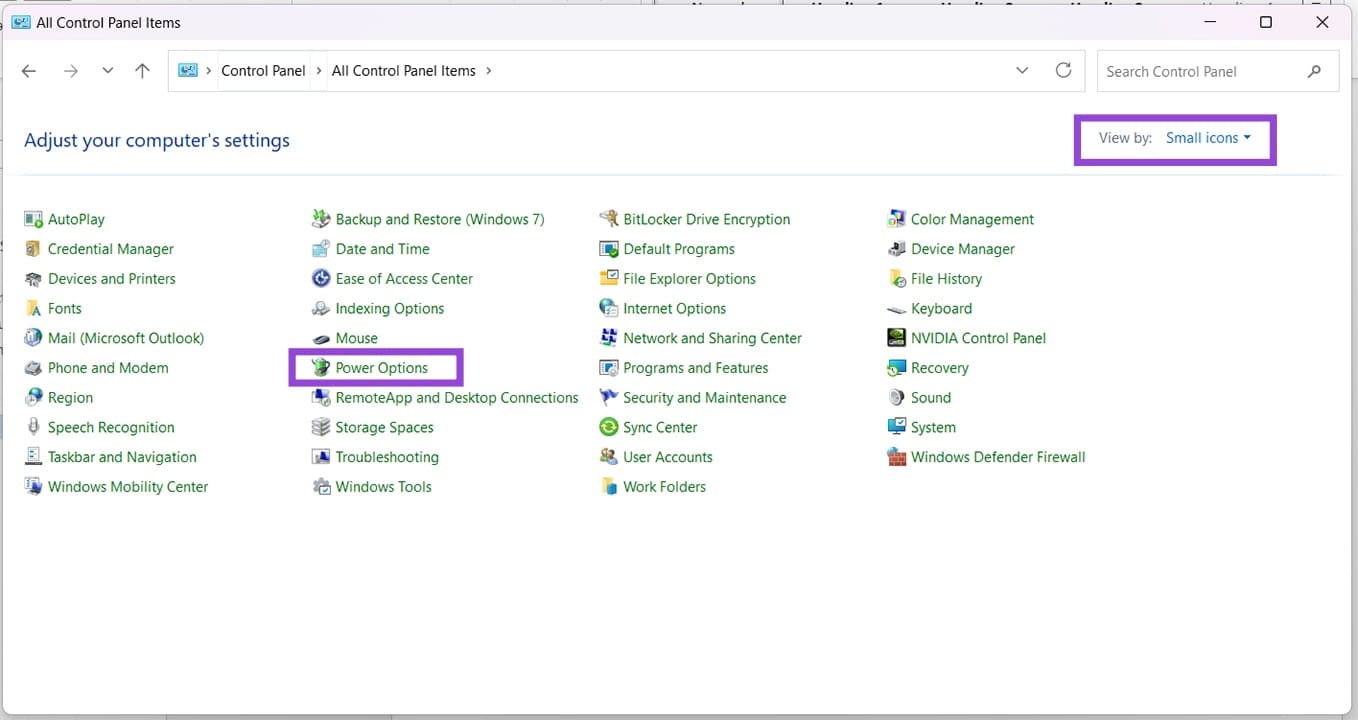
Step 1. Type “Control Panel” into the Search Bar and choose the option.
Step 2. Click “Power Options” in the “Small icons” menu.
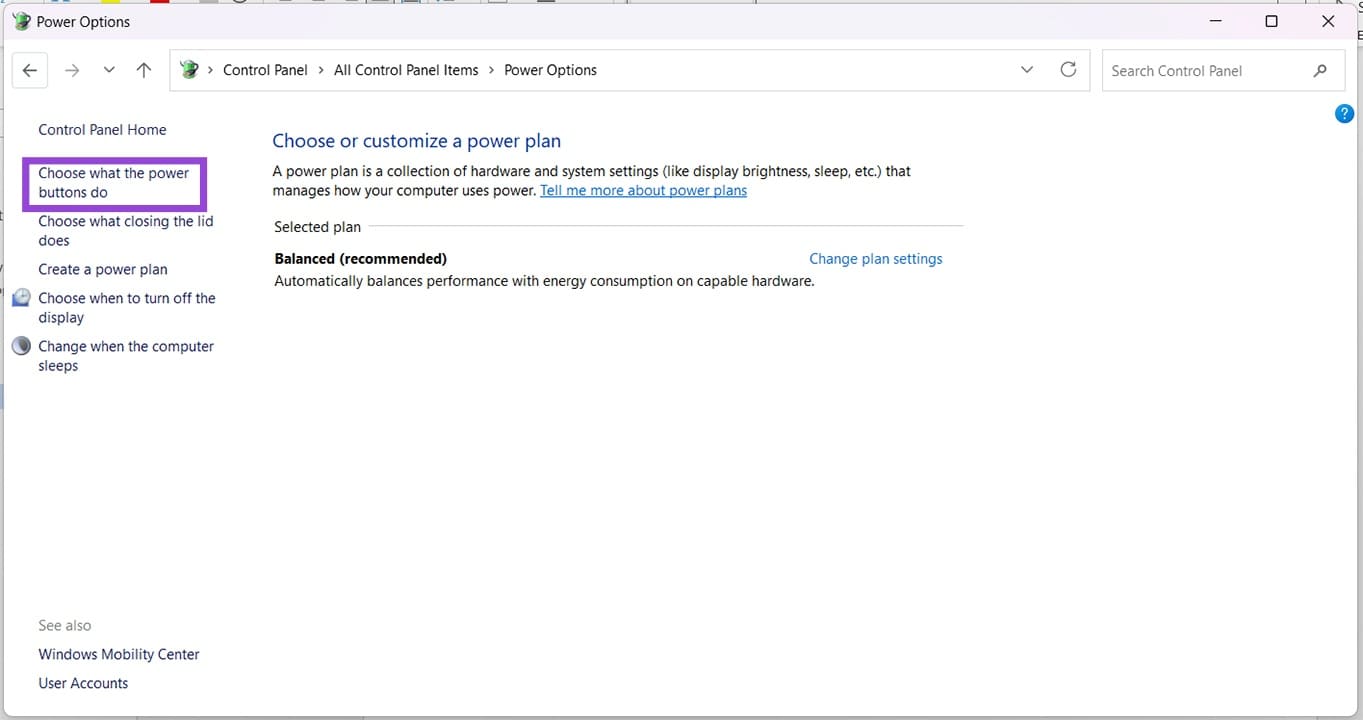
Step 3. Click “Choose what the power buttons do” in the sidebar.
Step 4. Select “Change settings that are currently unavailable.”
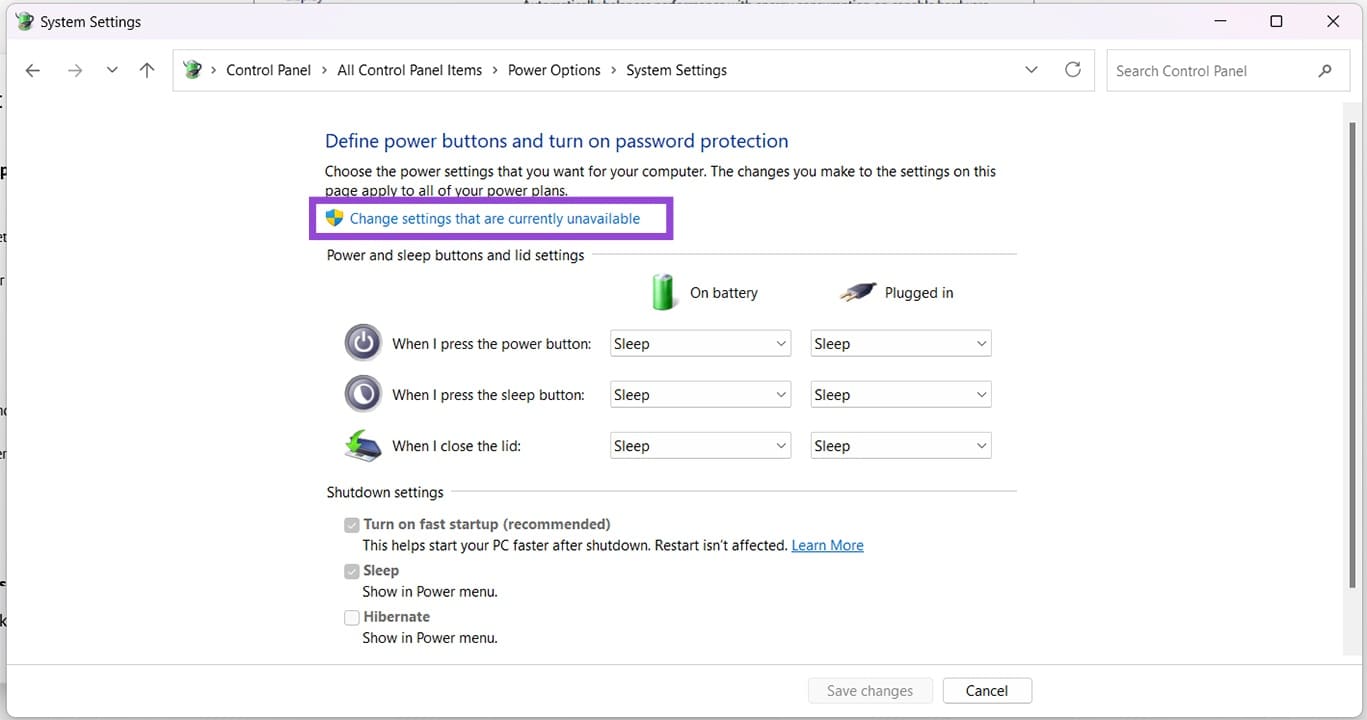
Step 5. Under “Shutdown settings,” uncheck “Turn on fast startup.”
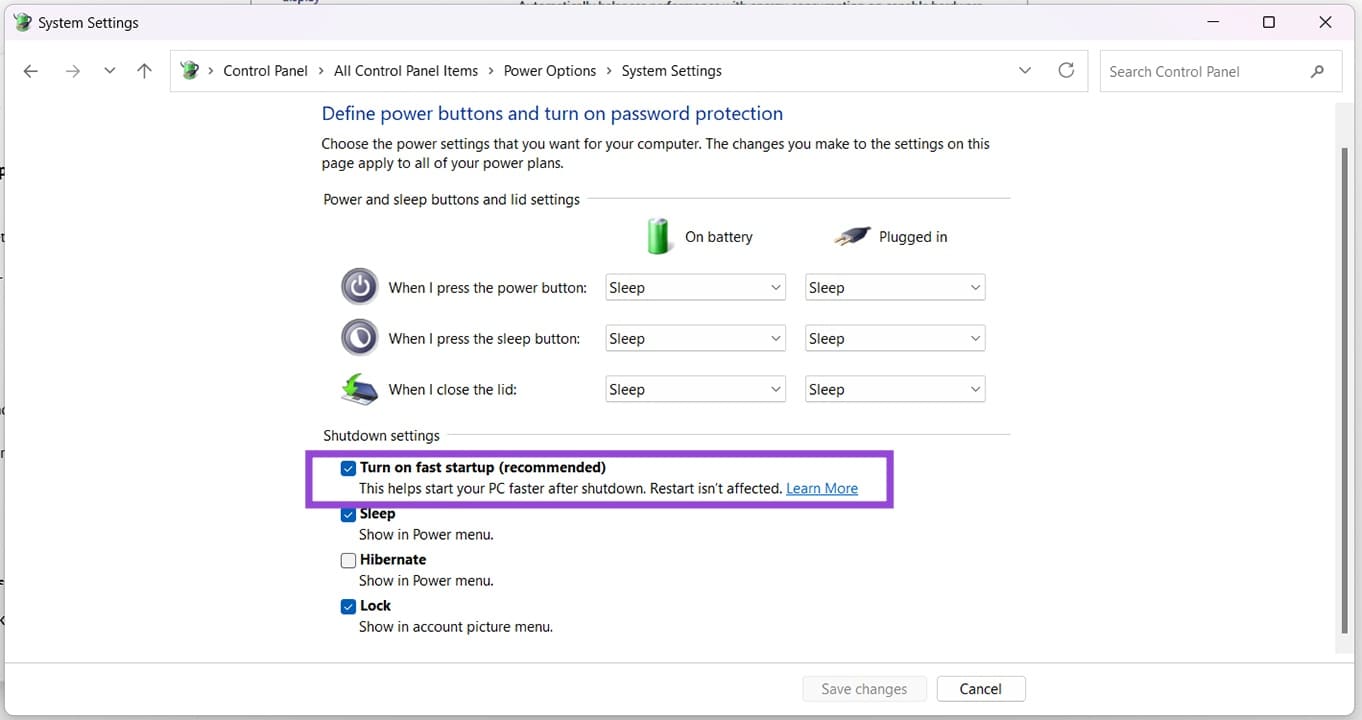
Step 6. Click “Save changes” to finalize.