


How to Configure Windows Defender to Ignore Your NAS

Windows Defender is the free, built-in antivirus and antimalware utility included in Windows. With its default settings, Windows Defender will scan your PC in real-time to monitor and quarantine any threats you may acquire via a web download, file transfer, or email attachment.
But Windows Defender also scans all of your PC’s drives, including any network drives you have mapped in File Explorer. This functionality can be useful if you frequently add files to your NAS and want to be sure that no malware slips in, but it also puts a strain on your local network and the limited resources of your NAS. Further, many NAS devices include other methods to scan for viruses and malware that are optimized specifically for a networked device.
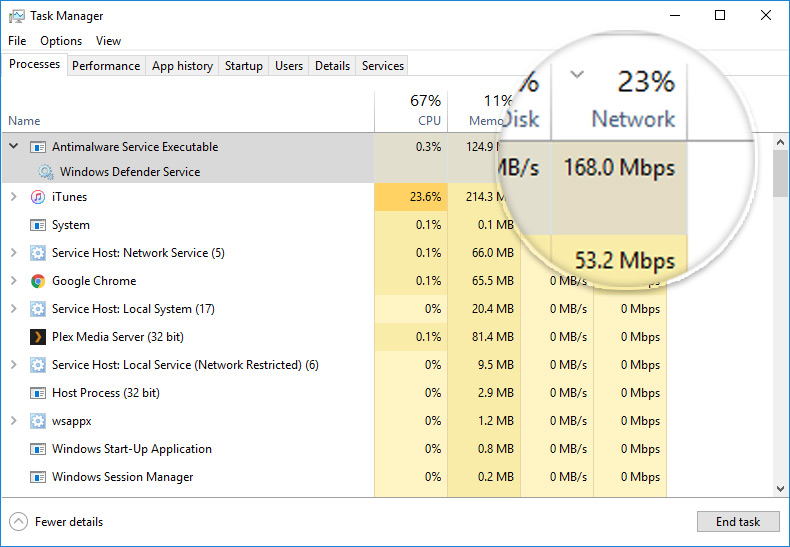
If you’ve noticed high network and resource usage as a result of Windows Defender attempting to scan your NAS, you can configure Defender to ignore the NAS while allowing the utility’s monitoring to remain enabled for your local drives. Here’s how to do it.
Configure Windows Defender to Ignore Your NAS
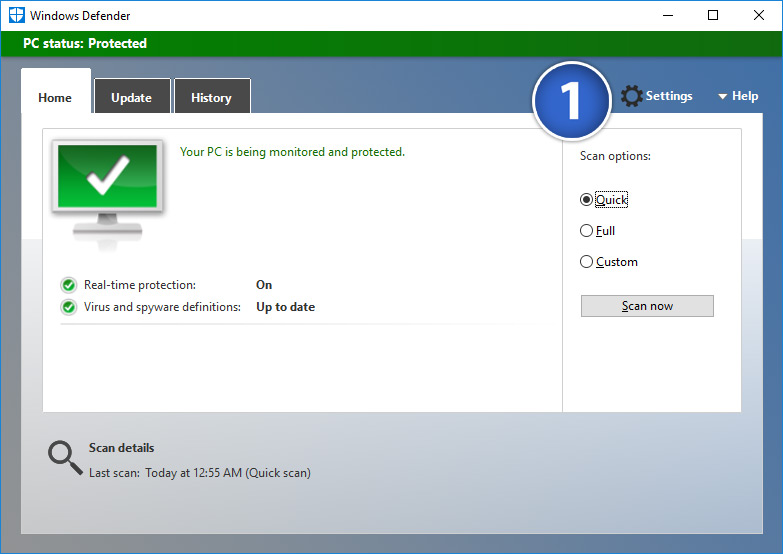
First, launch Windows Defender if it’s not already open. The easiest way to do this is to search for Windows Defender from the Windows 10 Start Menu. Select the appropriate search result to launch the Defender application.
From the main Windows Defender window, click Settings.
This will launch the Windows 10 Settings app and take you to the correct location for Defender settings. Scroll down until you see the section labeled Exclusions and click on Add an exclusion.
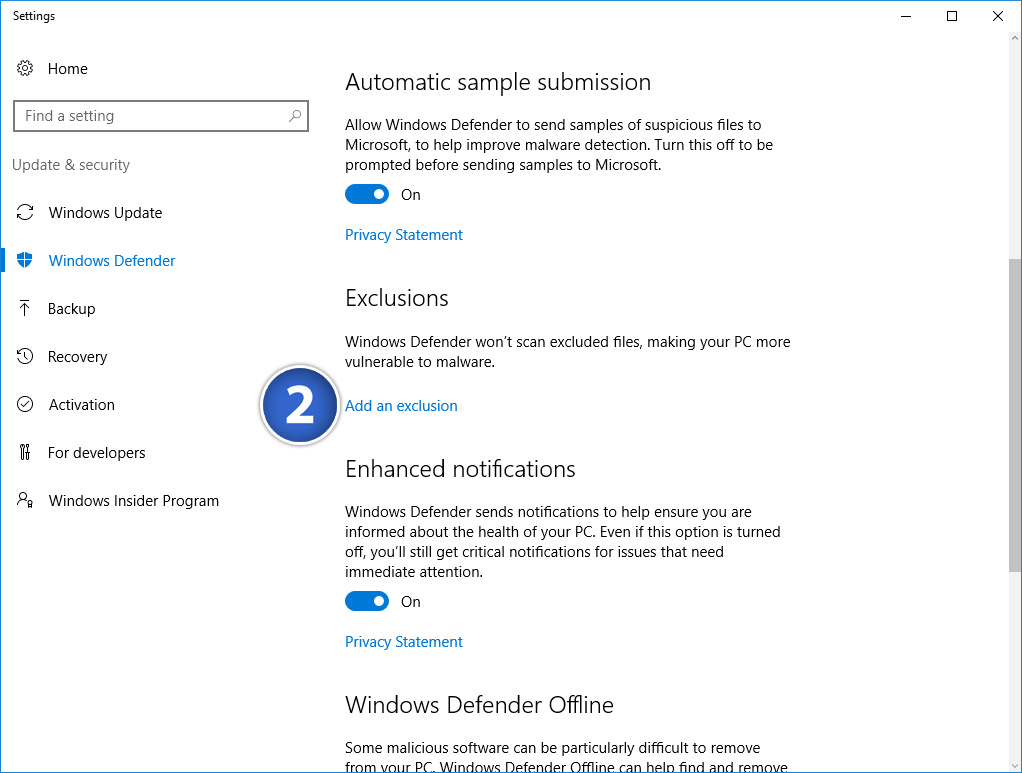
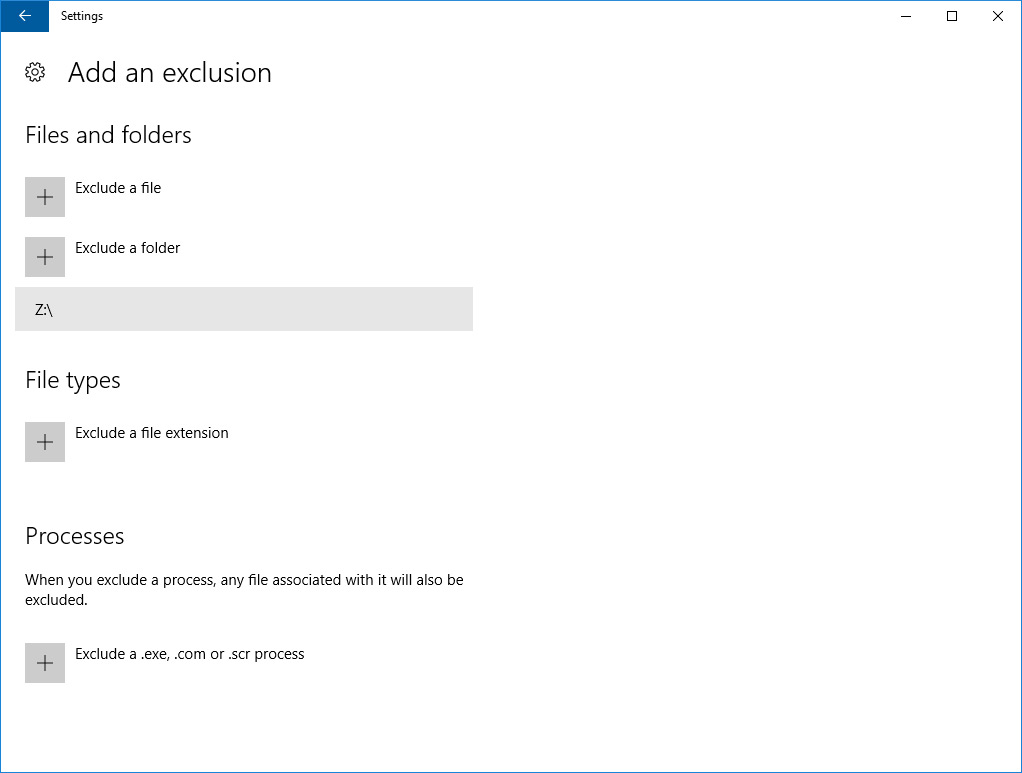
Here you can exclude certain items or locations from Defender’s scans, such as telling it to ignore a proprietary file format that you may use for your business, or skip over certain applications or processes to avoid resource conflicts. For the purposes of telling Windows Defender to ignore your mapped NAS device or other shared network location, click Exclude a Folder.

Select your NAS location from the file selection window and click OK to save your change. In our example screenshots, the network volume hosted on our Synology DS2415+ is mapped to Drive Z on our local PC. By selecting this drive for exclusion, Windows Defender won’t scan the files or folders on our NAS during the course of its real-time or scheduled monitoring.
While these steps work great for preventing Windows Defender from scanning your NAS and other shared network drives, you can also use them to instruct Defender to ignore certain files or folders on your PC. This would be helpful, for example, if Defender is giving you a false positive on files you know for certain to be clean, or if you want Defender to stay out of a certain folder for any reason.
As you make exclusions for Windows Defender, however, just don’t forget about them! As its name describes, Defender will not scan or monitor excluded folders, which means if you wanted to exclude a folder only temporarily and forget to remove it from the exclusion list, your PC will be vulnerable to any malicious files which may arrive in that location.


