


How to Stream Audio From Windows to HomePod
Apple’s HomePod has earned high marks for its impressive sound quality, but one area where it lacks is connectivity options. HomePod offers no physical 3.5mm or optical audio inputs, no HDMI, no Bluetooth. Instead, it relies exclusively on Apple’s proprietary AirPlay technology. Modern Macs have AirPlay capabilities built-in, so it’s easy to stream audio from the Mac to HomePod.
But what about Windows? While Microsoft’s operating system unsurprisingly lacks integrated AirPlay capability, there are still a few ways that you can pair your sleek new HomePod with a Windows PC.
Anyone who is familiar with Apple understands its products are all a part of one seamless ecosystem. But that also means it really doesn’t like outsiders intruding on its golden software. The products are phenomenal but they don’t offer a lot of flexibility for users. It will take some workarounds that we’ll discuss in this article to get your Homepod to work with your Windows 10 OS.
Stream Audio from iTunes for Windows to HomePod
iTunes runs natively in Windows and offers its own built-in AirPlay functionality. To use it, just download and install iTunes from Apple’s website if necessary and load a source for music.
This can be your iCloud Music Library, your Apple Music subscription, or simply dragging and dropping some compatible audio files from your PC into the iTunes library.
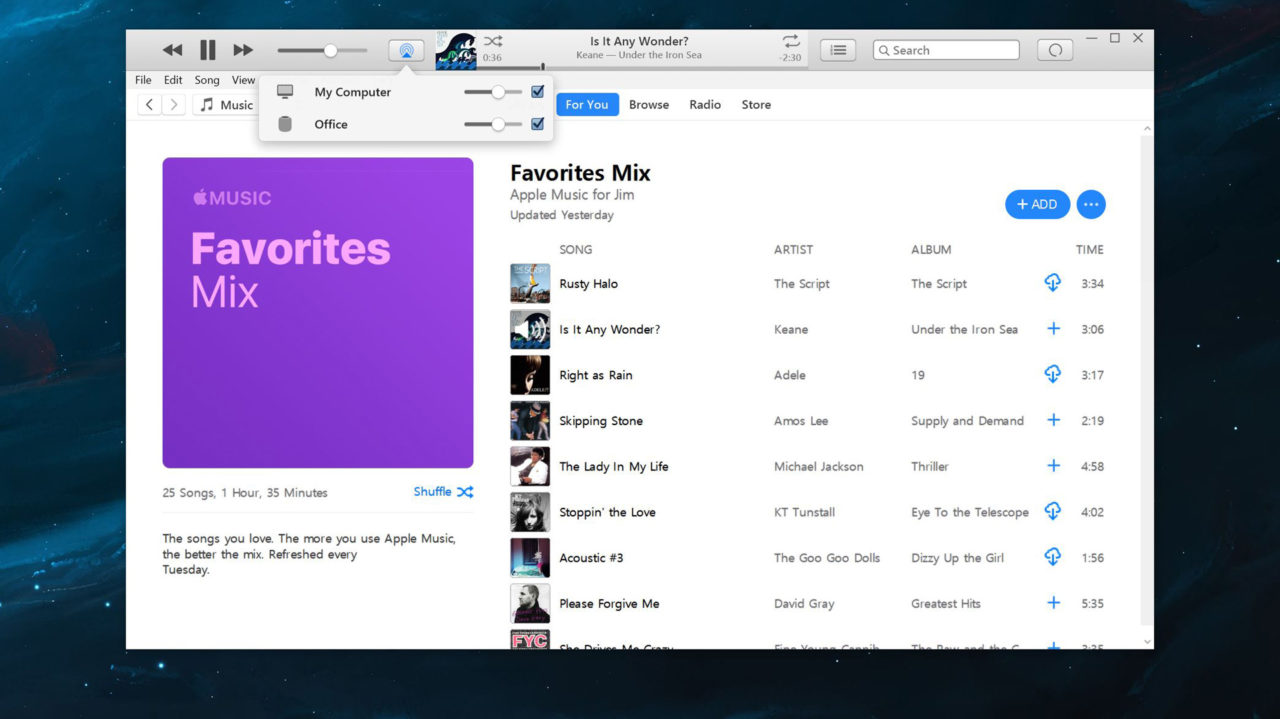
Once your music is playing, click the AirPlay icon to the right of the volume slider. This will display any available audio output interfaces available to iTunes, including your AirPlay-capable speakers like the HomePod.
In our example screenshot, our HomePod is named Office. The My Computer entry indicates the speakers physically attached (or built-in) to your PC.

Check the box next to your HomePod to start playing your iTunes music on it. Uncheck “My Computer” to have the audio play only from the HomePod. You can adjust the volume of your HomePod individually by using its small volume slider in the AirPlay list. You can also use the master iTunes volume slider to control the volume output of all speakers and outputs.
Note: Several users have reported difficulty with this method on newer updates. At times your music could randomly quit playing, you could experience extreme latency, or the Airplay icon will disappear altogether. If that’s happening to you, there is another option.
Stream Everything Else from Windows to HomePod with AirParrot 3
There was once an option to download and utilize the Airfoil software to fix compatibility issues and take your Airpod even further. At the time of writing that application is only available for iOS devices.
Fortunately, the developers at Squirrels LLC created AirParrot 3 to give Windows users the option to have their dream speaker and use it too.
What is AirParrot 3?
Released in May of 2020, this new software boasts improvements that reduce latency (16 milliseconds) while offering cross-compatibility. From Chromecasts to Homepods, AirParrot appears to be the best solution available today.

The software puts less strain on GPU than other methods but also offers extended desktop functionality. The only drawback; it costs $15.99 to download. In comparison to the $299 Homepod and the savings you get from not having to buy a $1200 Mac, we’ll call that a win.
How to Connect HomePod to Windows 10
Now that we know what software we’re using, let’s install AirParrot, and set up the HomePod.
Download AirParrot
Visit the Squirrels website to access the software.
Click ‘Try’ to get a 7-day free trial, or go ahead and click “Buy US$15.99” if you’re ready to make a commitment.

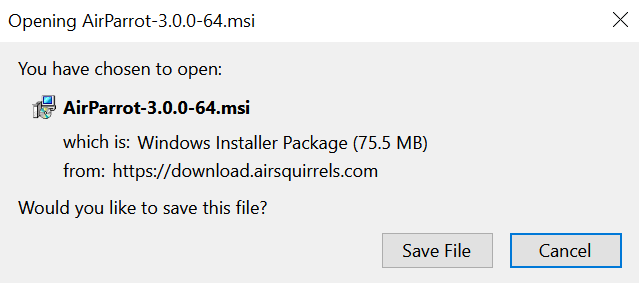
Next, click the version you’d like to download.

Click ‘Save File’ and follow your PC’s install process.
Once Installed, you’ll want to make sure that your Homepod is set up and connected properly. If you’ve already done this feel free to skip ahead. If not, we have the instructions for you.
Set Up Your HomePod
In true Apple fashion, you won’t be able to complete these steps without an Apple companion product. Just like the Apple Watch and other great tech devices, you’ll need to track down an iPhone or other compatible device to get started.
Even if you have an older iPhone that isn’t on the cellular network, or perhaps you’re using a friend’s, you can use that for the setup as long as it’s connected to wifi and running the latest iOS version (iOS 14 at the time of writing).
Once you’re ready, setup is as simple as we’d expect from the tech giant:
Plug your Homepod into a power outlet. A white light will begin to flash on your HomePod when it’s ready for setup.
Unlock your iPhone, and tap ‘Setup’ at the bottom.

Your phone will walk you through picking a room where your HomePod is located (this is especially useful if you have more than one device), setting up iCloud, connecting to wifi, and enabling Personal Requests.
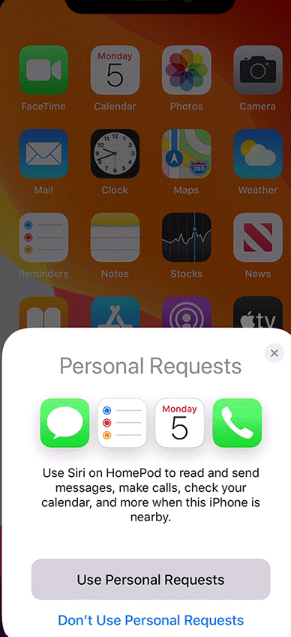
Your iPhone will let you know that your HomePod is ready to use.
How to Connect with AirParrot 3
Now, we can go back to your PC and open AirParrot 3, then follow these steps:
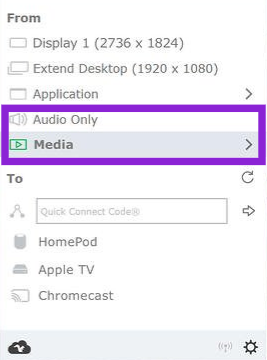
Open AirParrot 3 on your computer and tap ‘Audio Only’ to stream music from Spotify, Apple Music, or another program.
You can also select ‘Media’ to stream an MP3 or MP4 file.
Next, under the “To” section, select your HomePod to connect the devices.
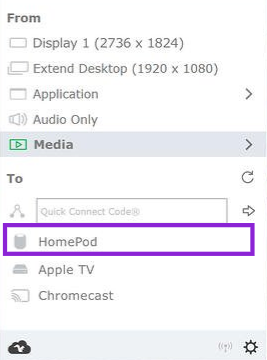
Your devices will connect automatically as long as they’re on the same wifi network. When connecting to the wifi, ensure that both devices are connected to the same frequency band. For example, if your HomePod is connected to a 2.4GHz and your PC is connected to the 5GHz band, the HomePod will not appear in AirParrot 3.
Frequently Asked Questions
Here is some more information for you about HomePod and Windows 10.
Is the Apple HomePod worth it?
After reviewing your options for HomePod connection, PC users may wonder if the hassle of connecting the two devices is even worth it. Not only do you have to purchase the HomePod, but you also need an iPhone for setup and pay for a subscription to a third-party application.
Essentially, the HomePod has excellent reviews, it offers better audio quality than many other speakers available, and it has the reliability of any other Apple product (it likely won’t fail for years and years to come).
If you’re serious about audio quality it’s certainly a good buy. It’s simple to use and the design is impeccable. That said, if you also have to purchase a new iPhone to get it set up, it may be best to look for other speakers.
Are there any free options to connect my PC to my HomePod?
If you’re a bit turned off by AirParrot 3’s $15.99 price tag, we don’t blame you. That’s a lot for a simple application. Fortunately, it is only a one-time fee, but nonetheless, it’s more money you have to spend on an already pricy setup (depending on your definition of ‘setup’ when it comes to audio).
Scrolling through Reddit and other online forums you’ll come across software that individuals have developed. We don’t always recommend this as it is often at the best buggy and at the worst malware.


3 thoughts on “How to Stream Audio From Windows to HomePod”
As expected using iTunes works well. Pitty apple won’t share their magic with Windows in general.