How To Wrap Text in Adobe InDesign

InDesign is a powerhouse platform for designers who want a wide array of features that will let them express their creativity. Just the text editing alone has all kinds of options for you to choose from to create stunning artwork.
When it comes to text wrapping, there are many ways to create a connection between an object and your text. If you need some guidance, this article will help you understand how it works.
Text Wrapping
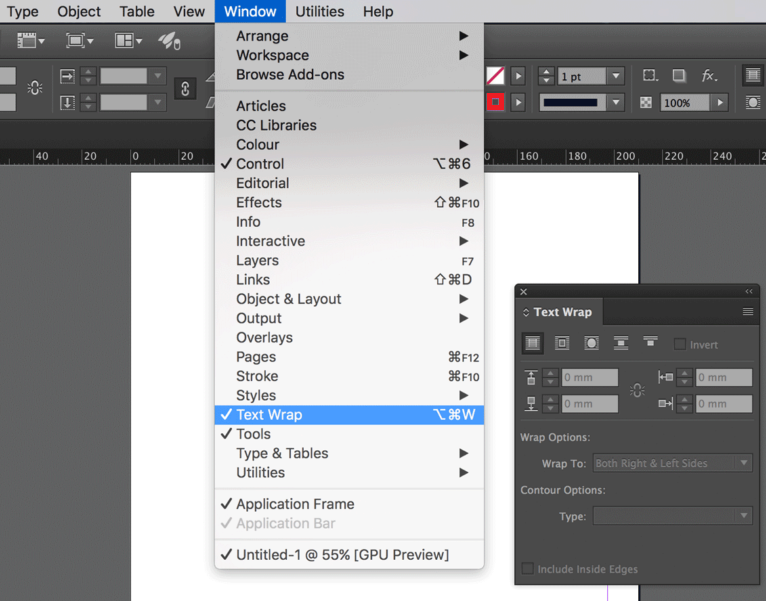
When you first insert an object into InDesign, it’s set by default to No Text Wrap. To open the text wrapping menu, go to Window > Text Wrap. You’ll see a pop-up menu that contains the wrapping options.
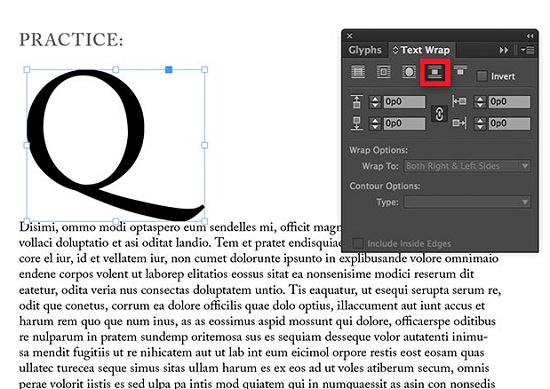
The first thing that you can do is to wrap text around a bounding box. When you insert an object, here’s what you have to do:
- Go to the Tools panel and choose the Selection Tool.
- Navigate to the Text Wrap panel, then click on the Wrap Around Bounding Box button.

The text will align to the box around your object, which you can undo by clicking the No Text Wrap button again.
If you want your text to skip over the inserted object, the option that you’ll want to choose is Jump Text. Once you select it, you’ll see the text go over and under the object.
One of the most useful wrapping options for designers is wrapping text around the shape of an object. There’s a dedicated option for this as well. All you have to do is to select Wrap Around Object Shape. Then, under Wrap Options, you can select Wrap to > Both Right and Left Sides. If your object has an empty interior, some of the text will attempt to fill it (which you can also disable). It will look something like this:
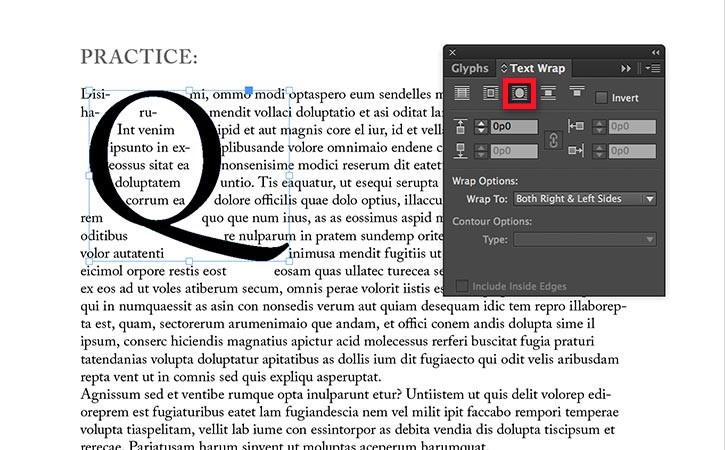
If this isn’t what you want the text to look like, you can change this with the following options.
Changing Text Wrap Offset Values
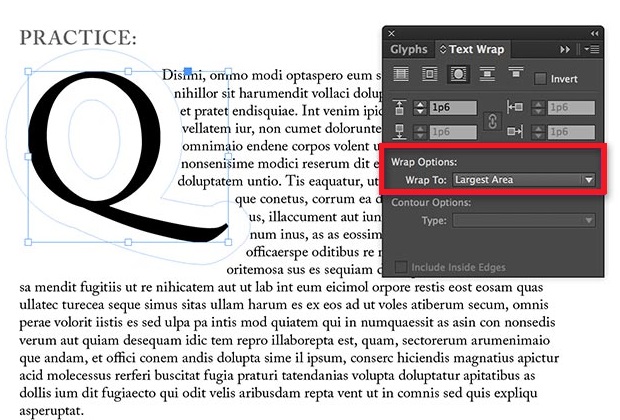
InDesign lets you adjust the space between the text and your object. With your text wrapped around the object, you can control these values from the Text Wrap panel. You can use the up and down arrows to do this or just type in any value that you have in mind.
In addition, you can choose whether you want the text to be on the left or right side of the object. When you select an object, click on Wrap to > Right/Left side. This will push the text in the direction that you want it to go, but you might still see some of it in the inner contours if your object has them. To fix this, select Wrap to > Largest Area and you’ll move the text away from the contours.
Hidden Layers
By default, your object will impact the composition of the text in all layers if its own layer is hidden. This might reorder your text in different layers.
To fix this, all you have to do is go to the Layer Options dialog box, then select Suppress Text Wrap When Layer Is Hidden.
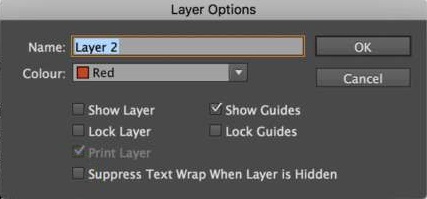
This will fix all text in place for as long as the object’s layer is hidden, so it won’t mess up other layers.
Invert Text Wrap
So far, we’ve talked about how to wrap text around an object. But what if you want to place it inside of it? All you have to do is to use the Invert option. Here are the steps that you need to follow:
- Select the object that you wish to wrap the text inside.
- Under Type, select Wrap around object shape, as well as Detect Edges.
- Move the text and place it above your shape.
To make sure the text doesn’t go over the object’s borders, you can change the offset values to fit the shape or add some additional space between your text and the shape’s borders.
Wrapping Up
As you can see, text wrapping in InDesign is quite easy, and there are many adjustments to ensure the text fits inside or outside the object. You can do it all from within the same panel, and with a bit of tweaking, you can have the exact design that you have in mind.
Are there any other things about InDesign that you wish to know more about? If so, don’t hesitate to share your questions in the comments.