




Find and Remove Duplicate Files on Windows 11

Unless you’re storing absolutely everything in cloud-based drives, you’re likely to worry about running out of storage space on your Windows computer at some point. One factor that can lead to reduced storage is the accidental duplication of files.
Files can become duplicated if you accidentally hit the download button more than once, or if you save a file in multiple locations, or if you save backup copies of files and then forget to delete them later. Every duplicate effectively doubles (or more) the volume of storage you’re using, so finding and deleting duplicates is a quick win to free up space.
To find duplicate files, Windows 11 offers an alphabetical sorting option, which quickly helps to highlight matching entries in File Explorer. You can also use PowerShell to remove duplicate files on PC or a laptop. Read on to find out how.
Find Duplicate Files in Windows 11: Use File Explorer
Step 1. Open Windows Explorer and navigate to a folder that you think may have duplicate files, for example, Pictures.
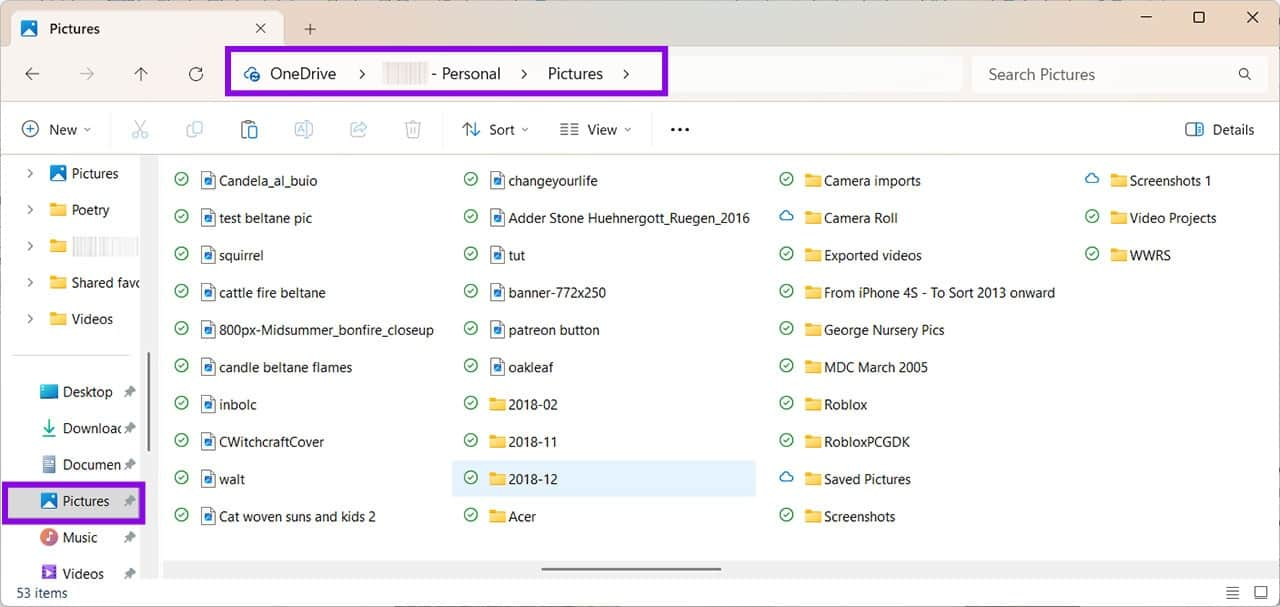
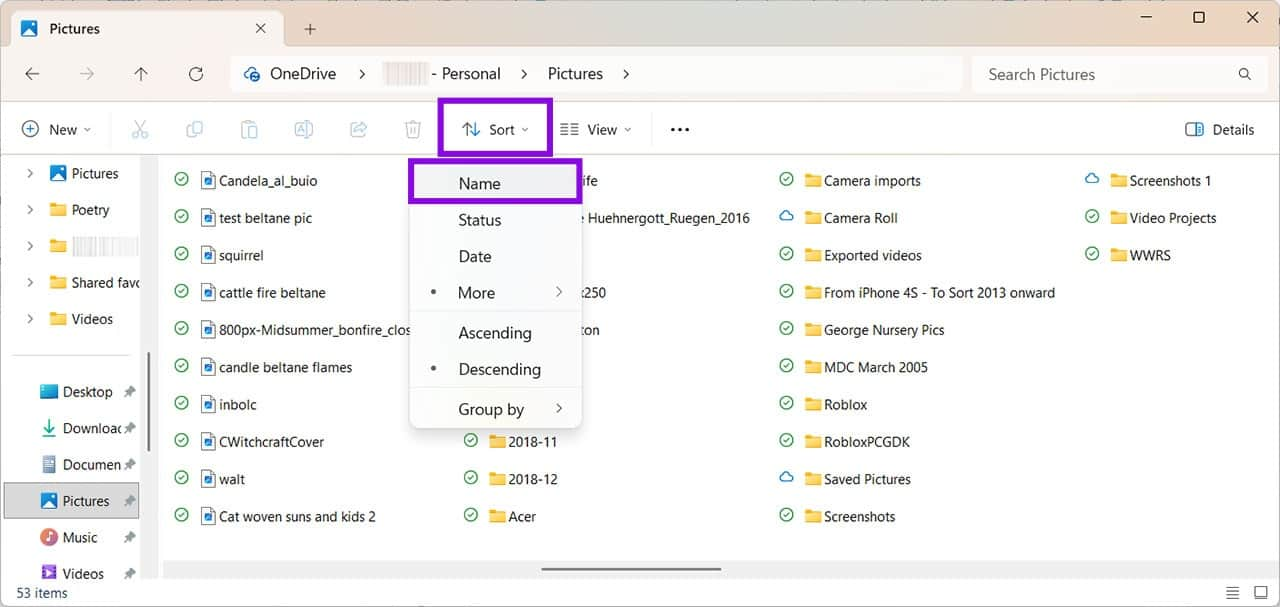
Step 2. Click the “Sort” button above the right-hand window pane, then choose “Name.”
Step 3. You will now see any files with identical names listed together, usually with a number in brackets next to it. You can select any of the duplicate files, right-click, then press “Delete,” but check their contents first. Tip: To select multiple files, hold “CTRL” and click each file in turn.
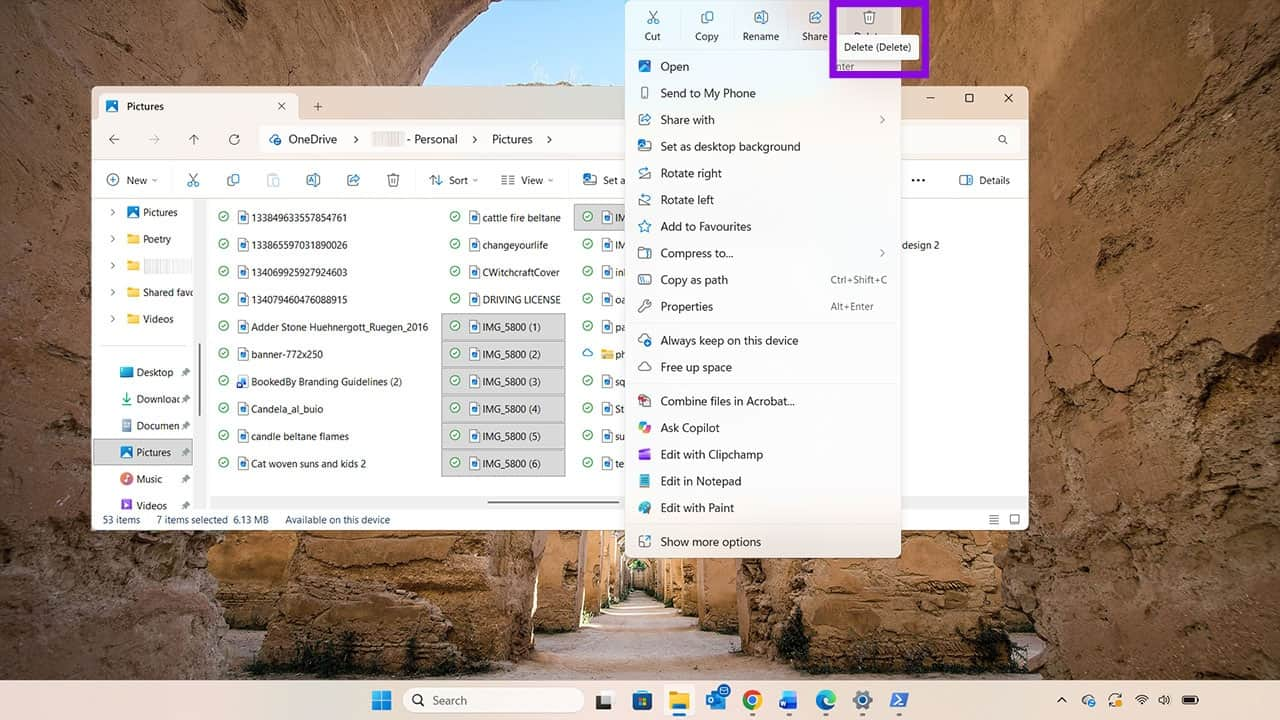
Repeat this process for any folders containing duplicate files.
Find Duplicate Files in Windows 11: Use PowerShell
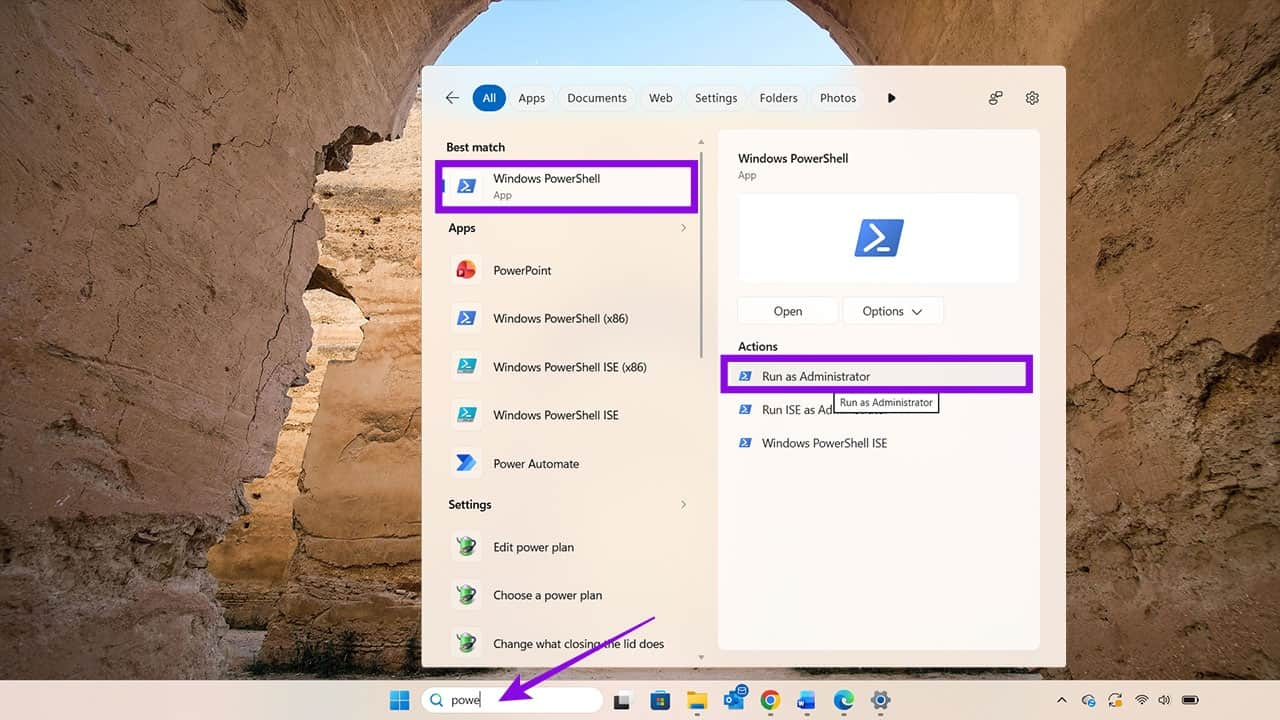
Step 1. The manual process can be a little time-consuming. You can, as an alternative, use PowerShell to enter a short command that will crawl through a specific location to find duplicates. Start by searching for PowerShell and choosing the option to “Run as Administrator.”
Step 2. Type this command, being sure to change the “Your Name” section to your actual username in Windows. You can find this by clicking on the location bar in File Explorer at any time.
Get-ChildItem -Recurse -Path “C:\Users\YourName\Documents” |
Where-Object { -not $_.PSIsContainer } |
Group-Object -Property Length |
Where-Object { $_.Count -gt 1 } |
ForEach-Object {
$_.Group | Get-FileHash |
Group-Object -Property Hash |
Where-Object { $_.Count -gt 1 } |
ForEach-Object { $_.Group.FullName }
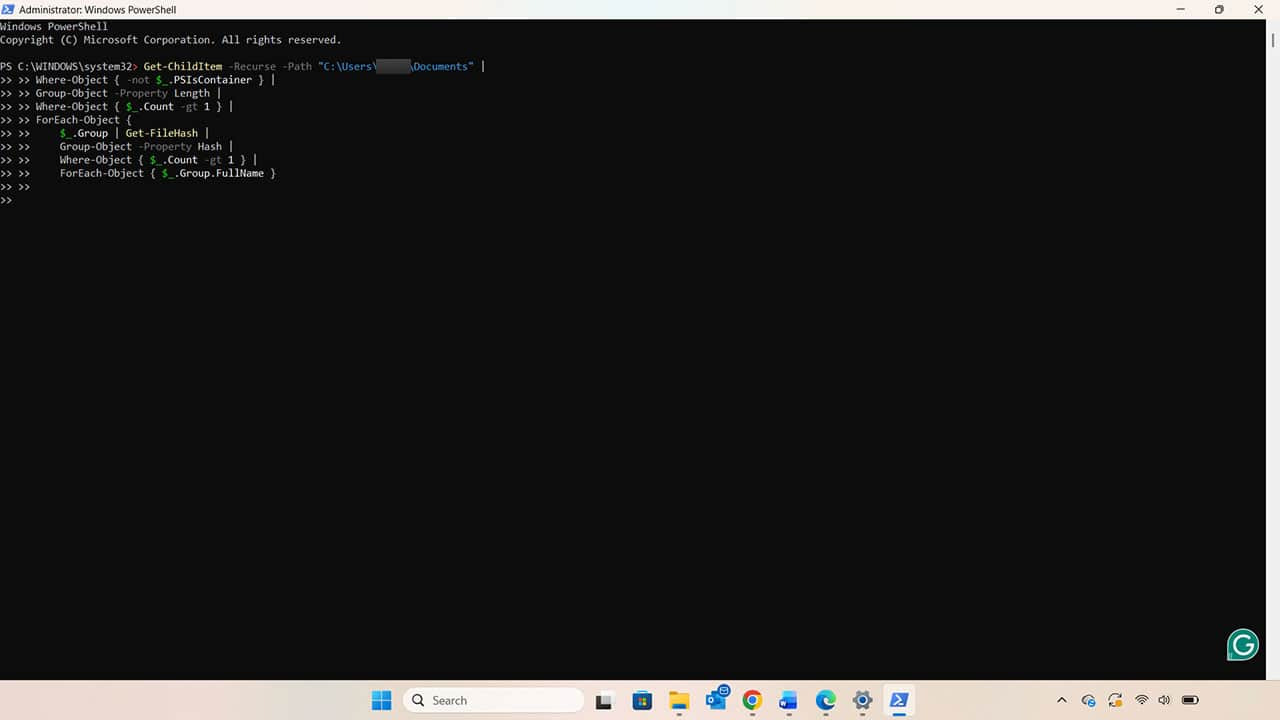
Step 3. Press “Enter.” If there are no duplicate files, no results will appear. If you have duplicates, their locations will be listed in the PowerShell window. Head to the locations listed to delete these files.
You can also source third-party apps that are designed to find and delete duplicate files. However, you should always be careful about adding apps to your computer that don’t come from the official Microsoft Store. Check user reviews and overall ratings, and head to independent review or software and app testing sites rather than relying on reviews posted by the developer.
How to Summarize Long PDFs in One Click with Adobe Acrobat Summary Generator
Read Next