How To Easily Transfer Files Between Your Mac, iPhone, and iPad With AirDrop
Have you ever wanted to seamlessly share files between your Mac, iPhone, or iPad without having to deal with cloud services like Dropbox or hardware like USB sticks? Well, you can with a neat little feature called AirDrop! We’re going to show you just how to use it to send those files from your Mac to your iPhone without a hitch.
Some Requirements
Before we get started, there are a few requirements you should be aware of first. For your Mac, you’ll need to be running OS X Yosemite and have a machine that was released in 2012 or later. For the iPhone and iPad side of things, you’ll need to be running iOS 7 or later. Additionally, AirDrop will only work with the iPhone 5 or later, the iPad 4 or later, iPad Mini, or a fifth-generation iPod Touch.
A surefire way to see if your Mac supports AirDrop is to open up Finder. If you don’t see AirDrop listed in the navigation pane, your machine does not support it.
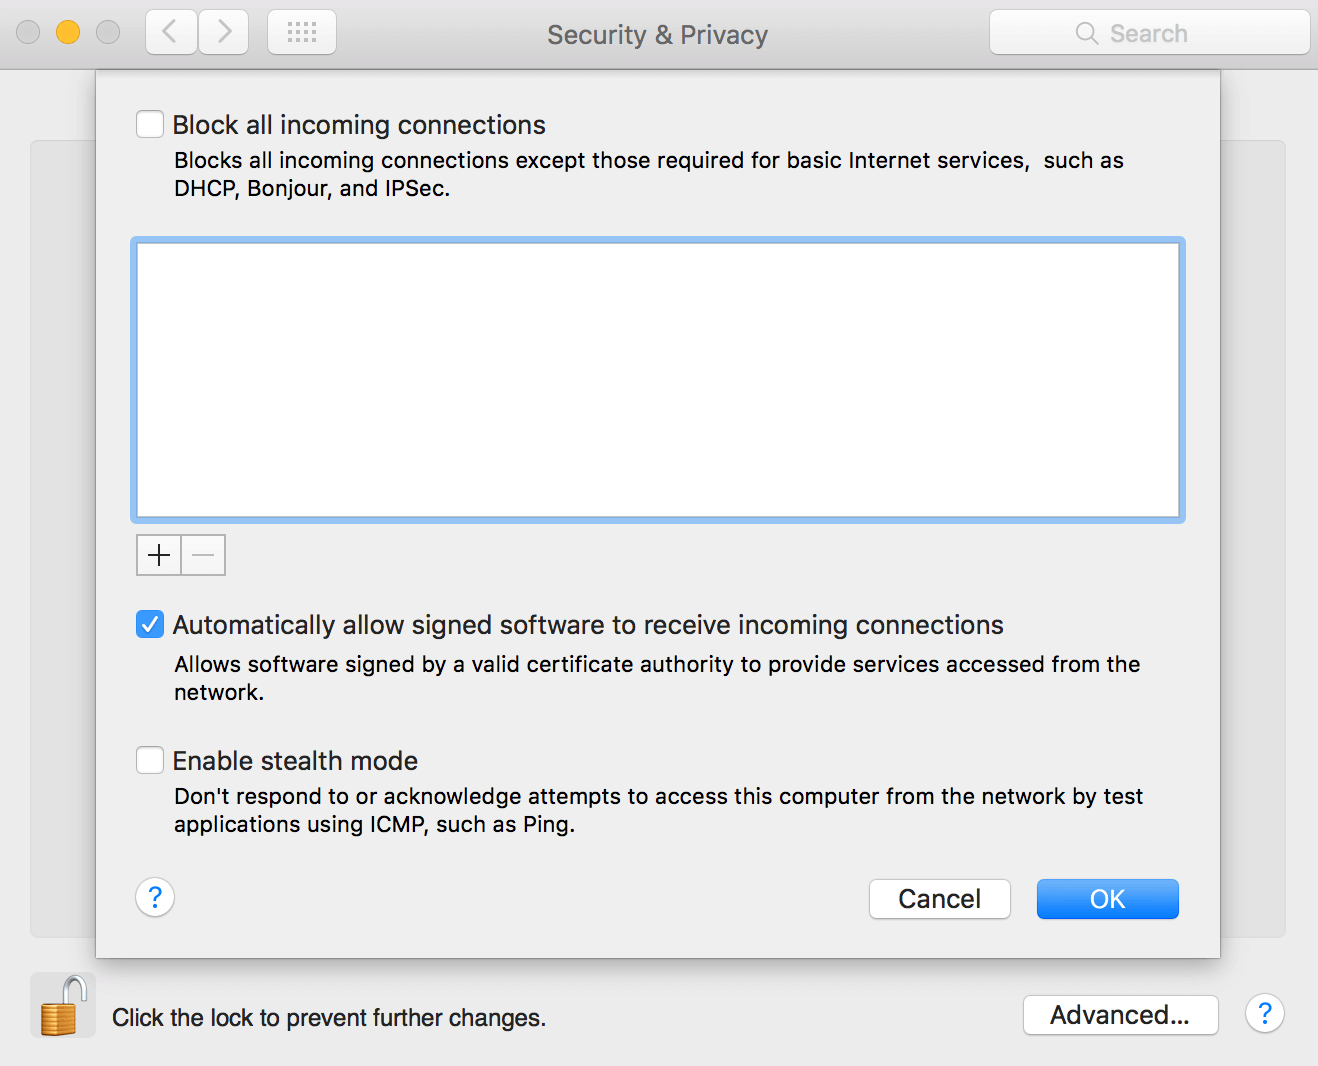
Apple also notes that when using this tool, you should ensure that your Mac and iOS device are within 30 feet of each other. In addition, you’ll need to make sure that your Mac is not blocking all incoming connections. You can make sure that box isn’t checked by heading into System Preferences > General > Security & Privacy > Firewall > Firewall Options.
Finally, a quick mention about iCloud. You actually don’t have to be connected to the same iCloud account to accept incoming files by way of AirDrop. However, if you are on the same iCloud account, things do get a little easier, as files will transfer automatically through AirDrop without needing any permissions. For instance, a photo you take on your iPhone that you want to AirDrop to your Mac won’t require any approval on your Mac.
Now, with that out of the way, below is how you can actually use this streamlined file transferring process.
How To Use AirDrop
The first step is to ensure that both Wi-Fi and Bluetooth is enabled on your Mac and iOS device.
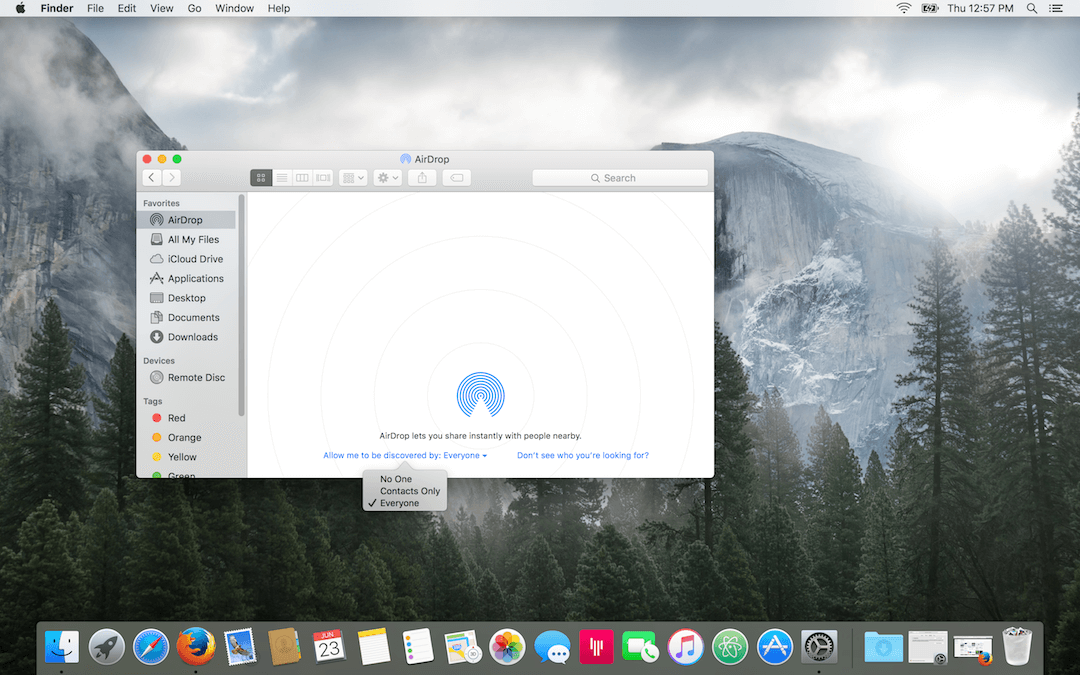
The next step is to make sure AirDrop is enabled on both devices. For the Mac, you can open Finder and navigate to the menu bar at the top of the display. Under “Go,” click on the “AirDrop option. From there, make sure to choose whether you are discoverable by “Contacts Only” or by “Everyone.”
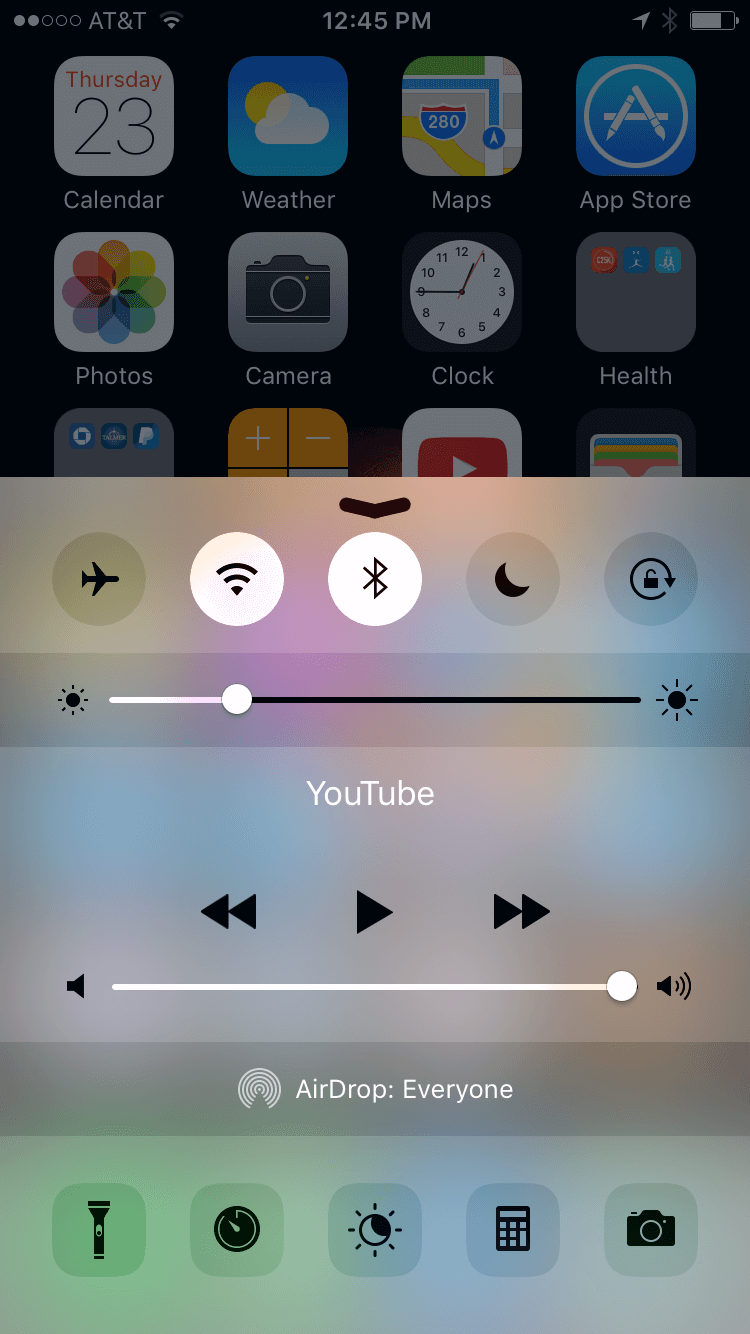
On iOS, you can do this same thing by swiping upwards from the bottom of the screen to access the Control Center. Once the Control Center is open, simply tap on the AirDrop bar to select your preference.

Congratulations! You’re now all set to start using this streamlined process to transfer files between your devices. To make sure everything is works, I’ll be right-clicking on a photo and navigating to Share > AirDrop.

You can do this for almost any type of file. Once you press that AirDrop option, a list of nearby devices should show up. Simply click on the device or person you want to send the photo to you. Once you’ve done that, the device you sent it to will be asked to accept the transfer.
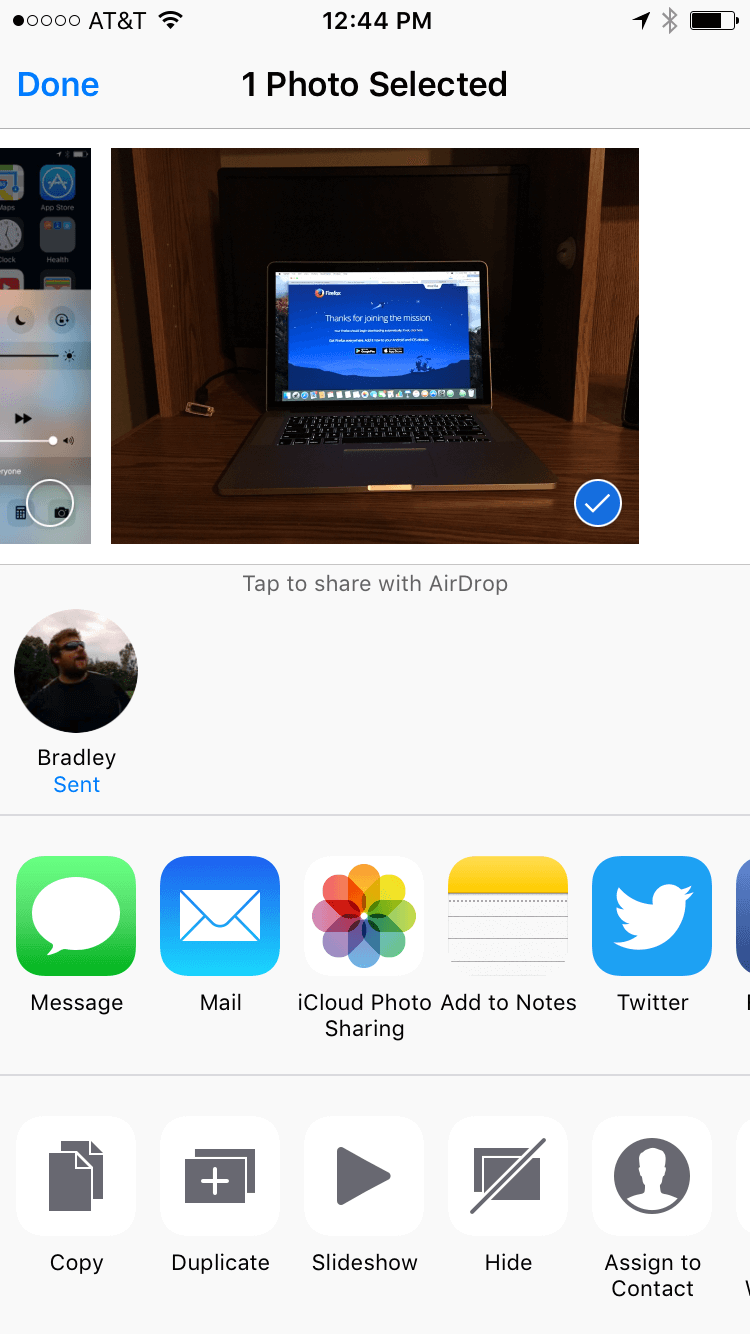
In the same vein, you can click the Share button on a file in iOS and share it with a nearby device, such as your Mac. Once you choose to share it with your Mac, you’ll be asked to accept the file on that machine.
And that’s all there is to it. Happy streamlined file sharing!