


How to make your own 3D creations with Paint 3D
You might be familiar with Paint, which has been around since Windows 1.0 in 1985. It’s a pretty simple program you can use for basic editing, such as cutting, pasting, copying, cropping and painting to an extent. But now, Windows 10 with the Creators Update has a new paint program — Paint 3D. It’s a way for you to make your own 3D creations using a bevy of 3D tools, and today, we’re going to show you what those tools are and what they do.
What is Paint 3D?
It’s worth noting that Paint 3D is completely different than the Paint program that has been with Windows since 1985. The only similarities are in name as well as the painting tools. Besides that, the programs themselves are completely different. Paint 3D is an easy-to-use 3D modeling program (not a replacement from Microsoft Paint) that is included in Windows 10’s Spring Creators Update.
For anyone wanting to get started in 3D modeling, Paint 3D really is an easy-to-use program, making it a great start for beginners. It has a lot of great features, such as being able to download models and/or scenes from Microsoft’s Remix 3D website and export them to your local Paint 3D environment.
Another neat thing about Paint 3D is that, once you’re finished creating your 3D model, you can actually print your scenes/models with a 3D printer. Or, if you don’t have a 3D printer, you can actually order your model to get printed, too. However, depending on your dimensions and the material you choose this can be quite pricey.
Using Paint 3D
Using Paint 3D is fairly easy. We’re going to show you the tools you have available to create your own 3D scenarios, but really, you have to get into the program and start using the tools for yourself. It essentially comes down to getting a feel for them so that you can better control your object.
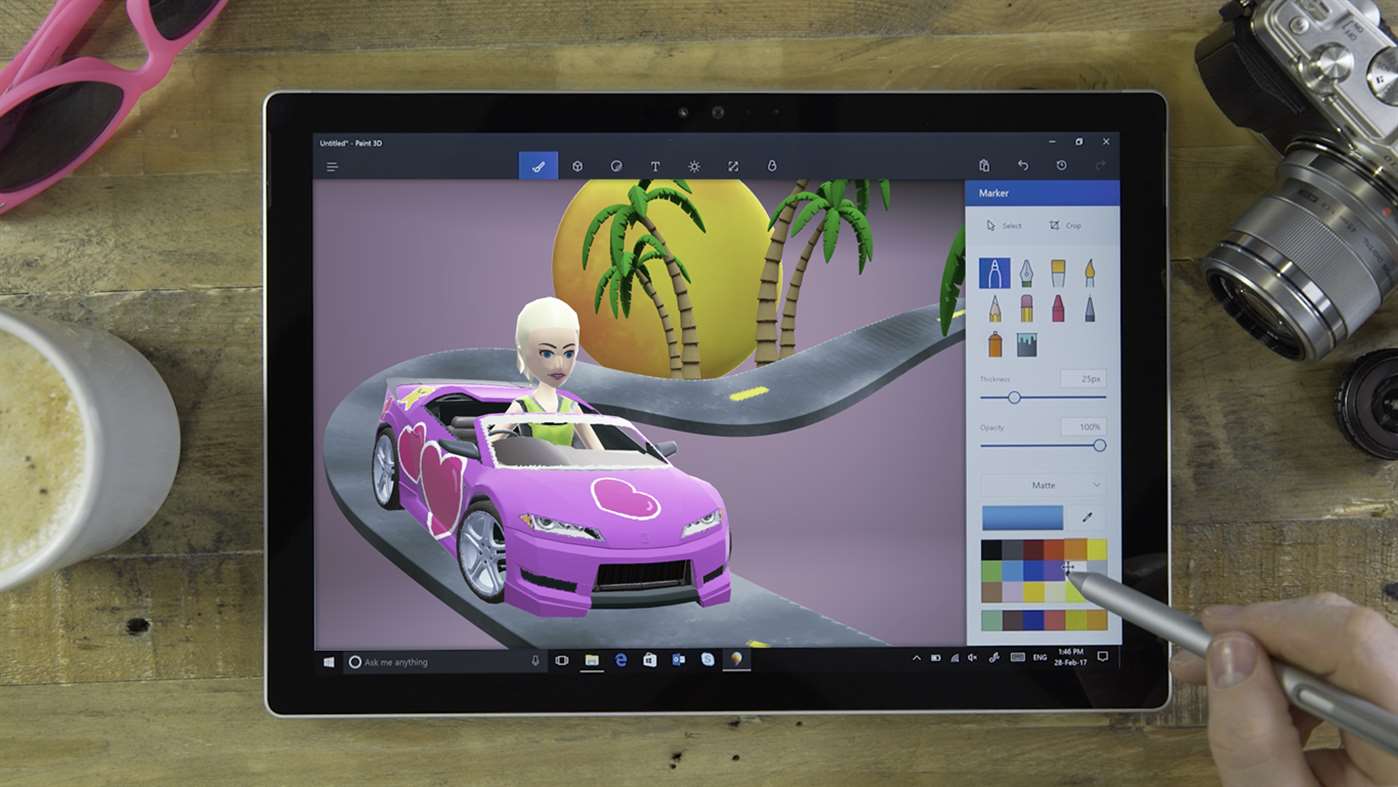
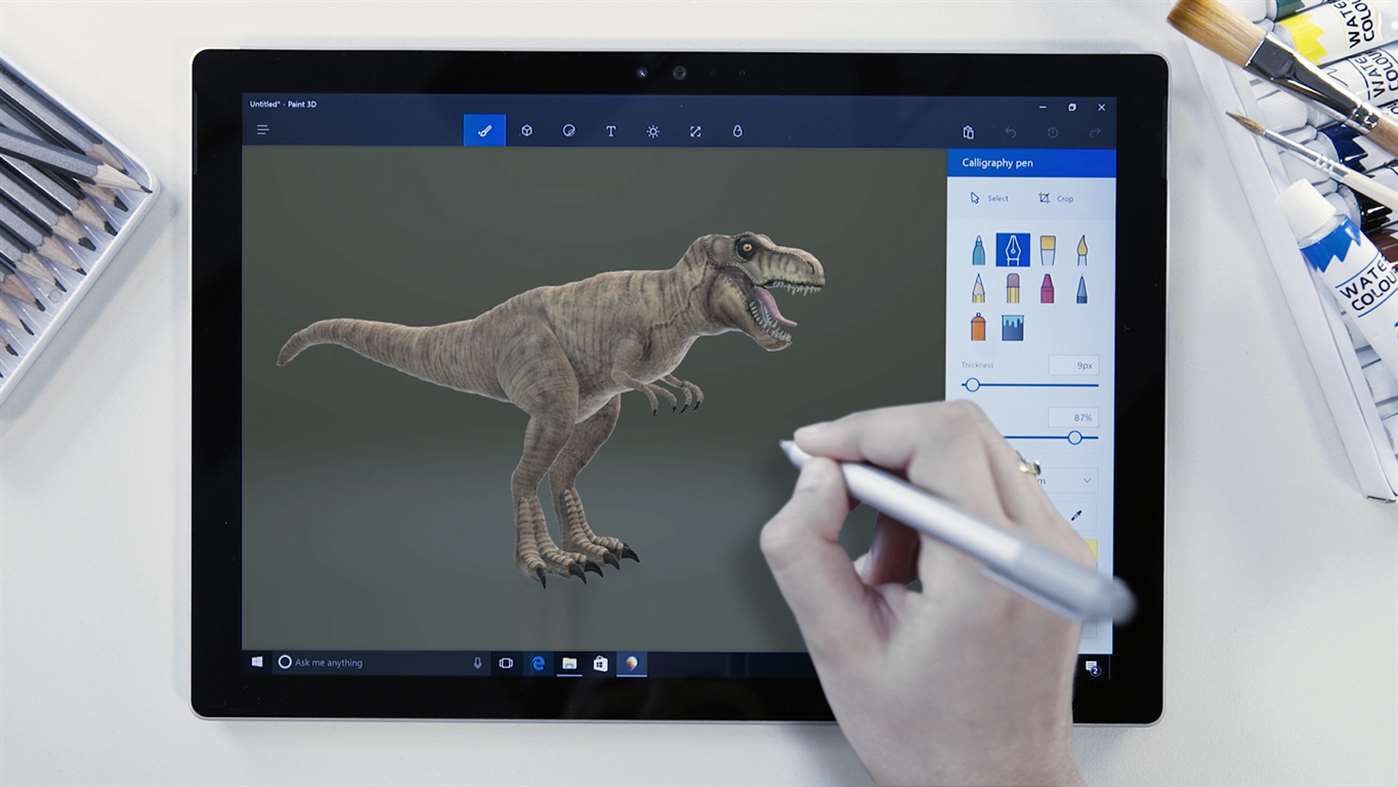
The first area you’ll see when you create a new project or canvas is the Tools panel. At the top of the program, you’ll see this in the navigation pane — it’s the first option on the left. Here, you have a lot of different options — markers, brushes, fill tools and so on. You can choose different colors to use as well as the texture of the brush (e.g. using a matte-like texture). Using these colors is as simple as clicking on the marker and color you want to use, and then using a stylus (if you’re on a touchscreen device) or a mouse to apply it to your scenario — whichever you’re most comfortable with, really.
The second option is the way you can add and manipulate 3D objects into your scene. There’s some already prepared models you can throw in, but there’s also different shapes you can add and manipulate, too.
The next tool in the navigation pane is for adding stickers. Paint 3D comes with a handful of default stickers that you can throw on your scene, but you can also add more stickers by importing your own image file. You simply click on a sticker to add it to your 3D scenario.
Next, you have the Text tool. This is pretty self-explanatory, letting you add 2D text to your canvas or even 3D text, which kind of just “floats” on your scene. Obviously you have different colors and font styles available to you here as well.
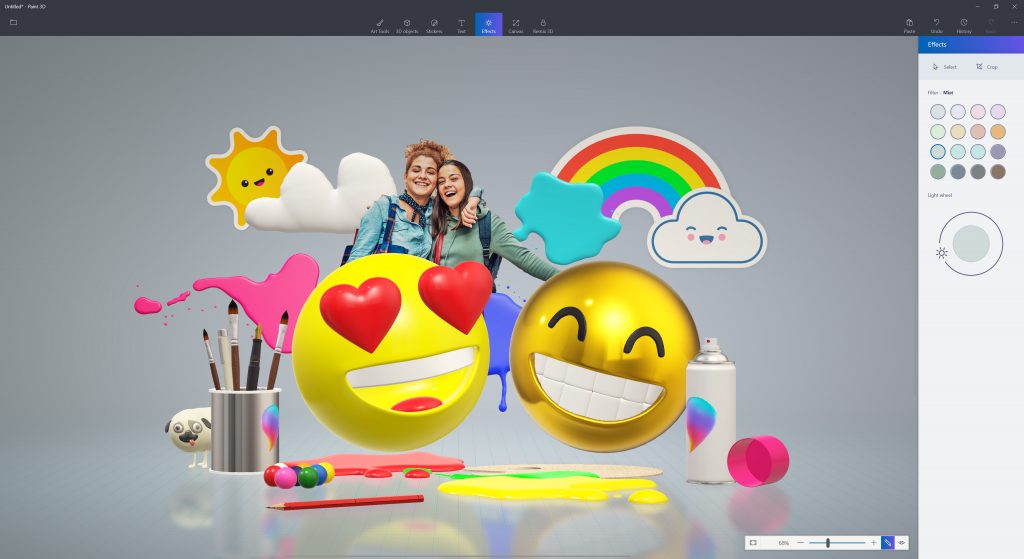
Right after the Text tool is the Effects tool. With it, you can choose a lighting effect in a handful of different colors. It’s really not the most thought-out feature, so it’s fairly limited as to what you can do with it. For example, you can only use one lighting effect, and it applies it to your whole project.
Next up in the list is the Resize tool. It basically allows you to adjust the size of your canvas, making it larger or smaller. However, that’s all it really does.
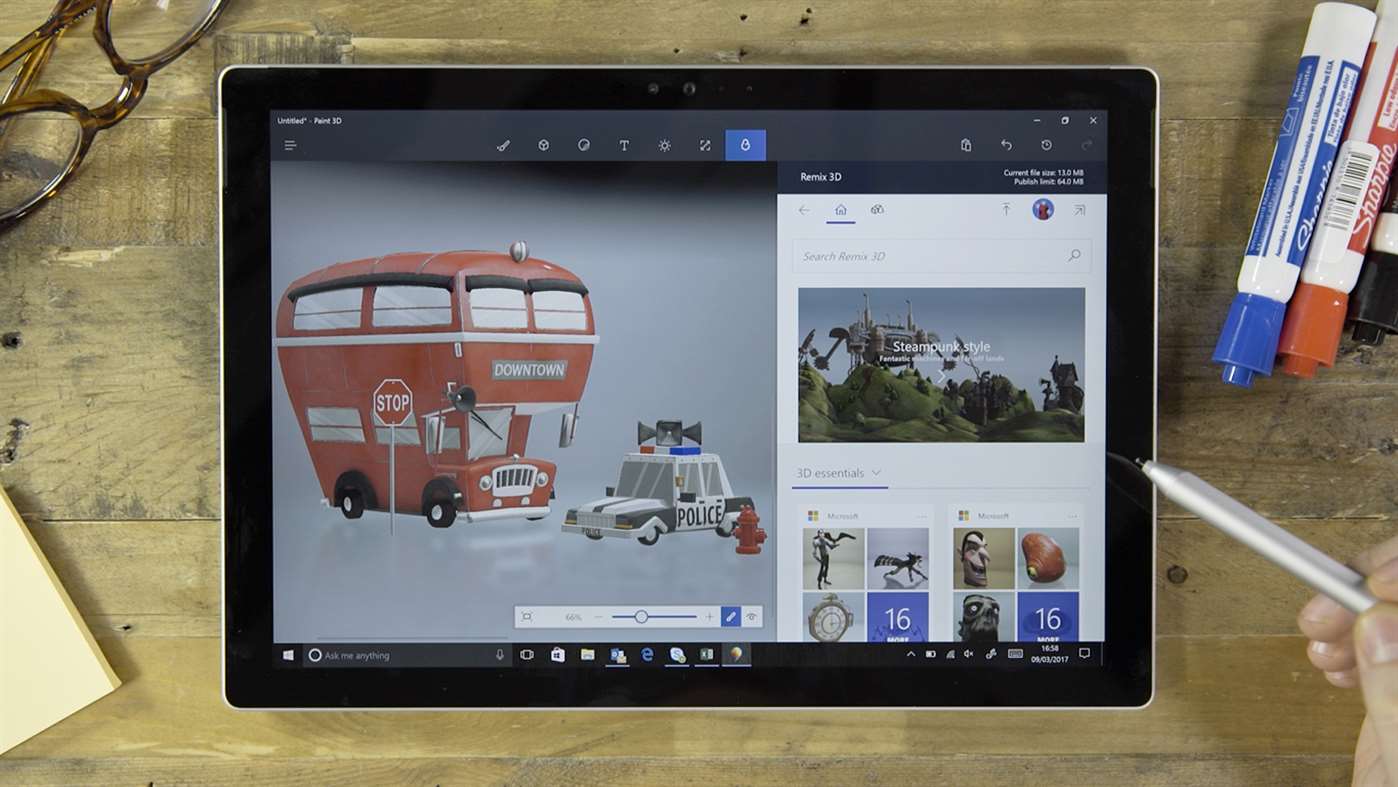
Finally, the last tool in the navigation pane is the Remix 3D tool. Here, you can search for models created by other people and import them in your project. Using the Remix 3D tool you can, as we already said, place someone else’s 3D creation in your project, but also rotate, paint, use stickers and more with it.
The best is yet to come
Microsoft is still working on some really neat features for Paint 3D, which we’ll hopefully see in the upcoming Fall Creators Update. One of the things Microsoft is working on is letting you export 3D models from Minecraft straight into 3D Paint. Another we were really looking forward to is the ability to is capture 3D objects in the real world with your smartphone and import it into Paint 3D.
These features were both missing from this Spring’s Creators Update, so we can only imagine that they weren’t ready for prime time just yet.
Closing
Paint 3D really is a neat program. It’s a great way to get started into the 3D modeling scene. However, do keep in mind that you just aren’t going to make professional 3D models in Paint 3D. This really is just a tool for getting started. If you’re wanting to create something more detailed and professional, you’ll need to look at more professional 3D programs, such as Autodesk’s 3DS Max.


