Best Settings for High Performance on Windows 11
If you’ve invested a lot of money in your Windows laptop or PC, you’ll naturally want to get the most value out of it in everyday use. Or, even if it’s a lower-end device, you might want to configure your system so that you can optimize whatever memory, processing power, and other system specs you have.
So, here’s how to set the best settings for high performance on Windows 11.
Method 1. Adjust the Battery Plan
Windows offers multiple power modes that you can switch between at any time to change how your device uses power and whether it prioritizes efficiency or performance.
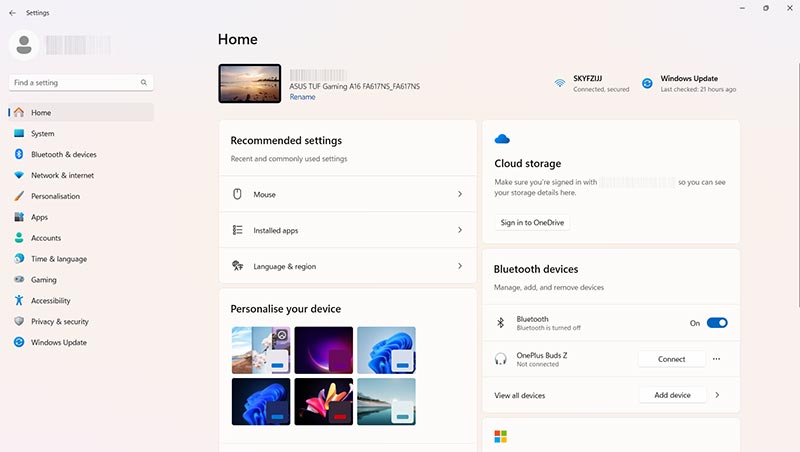
Step 1. Go to the “Settings,” either via the Start menu shortcut or just by pressing “Windows” and “I” together.
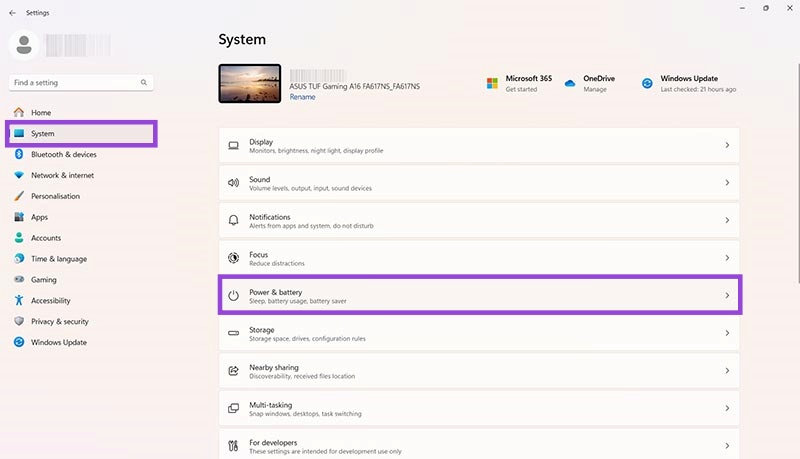
Step 2. Click on “System” and then select “Power & battery.”
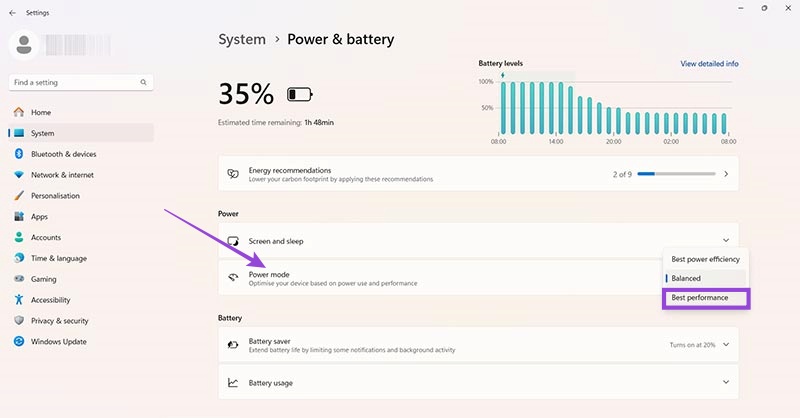
Step 3. Find the option labeled “Power mode” and click the drop-down menu. Set the mode to “Best performance.”
Method 2. Get Rid of Unnecessary Apps
Many PCs and laptops ship with a whole bunch of apps installed alongside the Windows 11 operating system. Often, you don’t need some of those apps and may never benefit from them – they just take up system resources and potentially slow your device. So, getting rid of unwanted and unnecessary apps is another way to improve performance.
Step 1. Press “Windows” and “I” or use a shortcut to access the “Settings.”

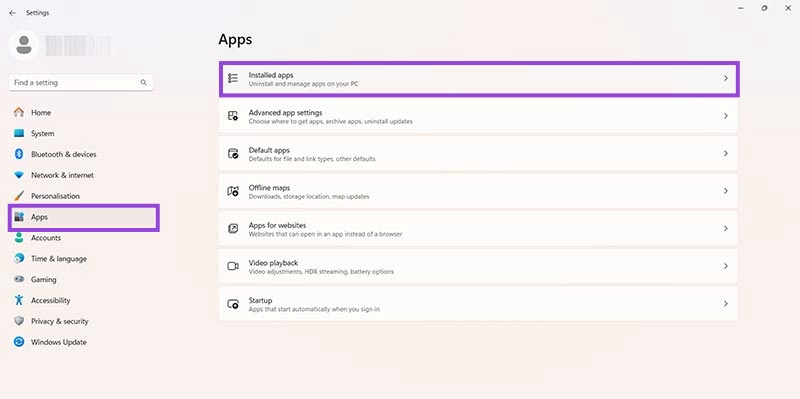
Step 2. Click “Apps” and then “Installed apps” to see a list of all apps on your device.
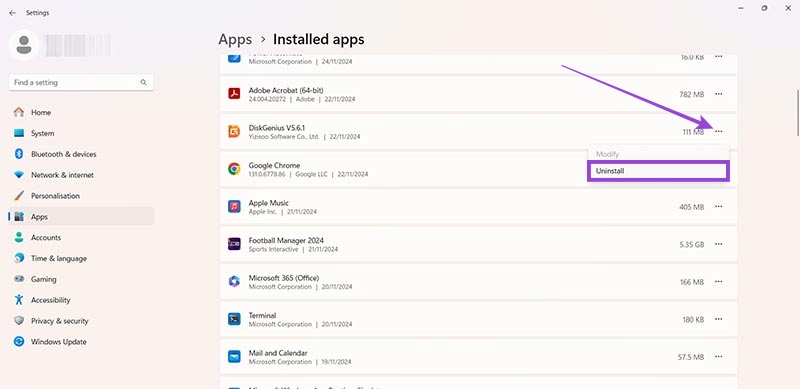
Step 3. Go through the list and find apps you don’t use or want. Then click the three little dots icon beside them and select “Uninstall.” Note you can only uninstall one at a time, so wait until the process is done before trying to uninstall another app. If you’re not sure what certain apps do and whether they’re needed, you can look them up online.
Method 3. Adjust Performance Options
This tip is particularly useful for those with devices that don’t have too much memory (RAM). However, even on bigger and better machines, it may provide a notable performance boost.
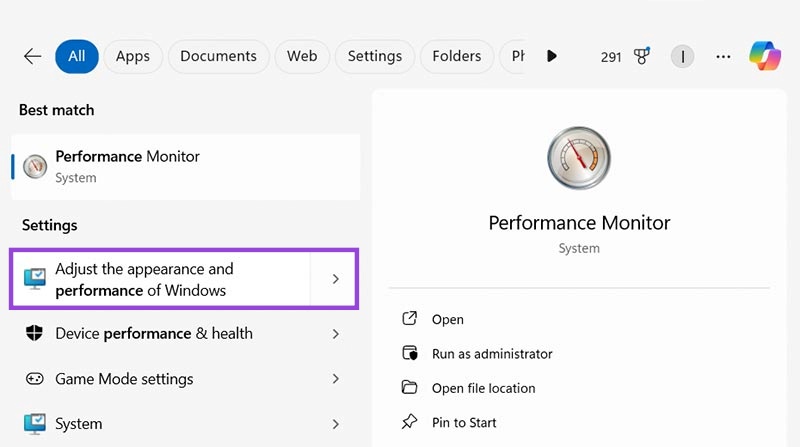
Step 1. Type “performance” into the search bar and you should see “Adjust the appearance and performance of Windows” show up as one of the top results. Select it.
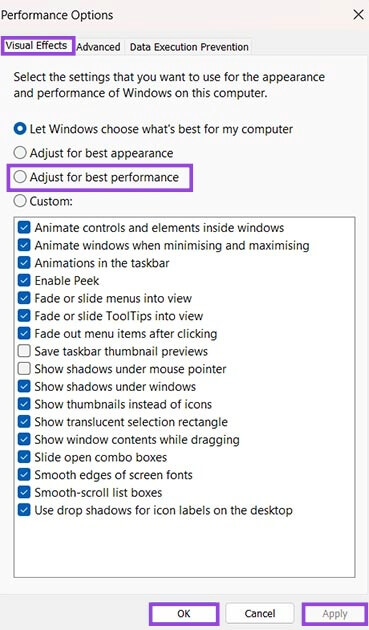
Step 2. In the “Visual Effects” tab of the pop-up window, click on “Adjust for best performance.” Then hit “Apply” and “OK.” Restart your system after to apply the changes.
Method 4. Disable Startup Apps
Startup apps can be a big drain on your system. These are apps that load up automatically every time you start your computer. While you need some of them, there are others that aren’t necessary, so it’s worth disabling certain apps.
Step 1. Go to the “Settings” through the Start menu or by pressing “Windows” and “I” together.

Step 2. Go to “Apps” and then “Startup.”
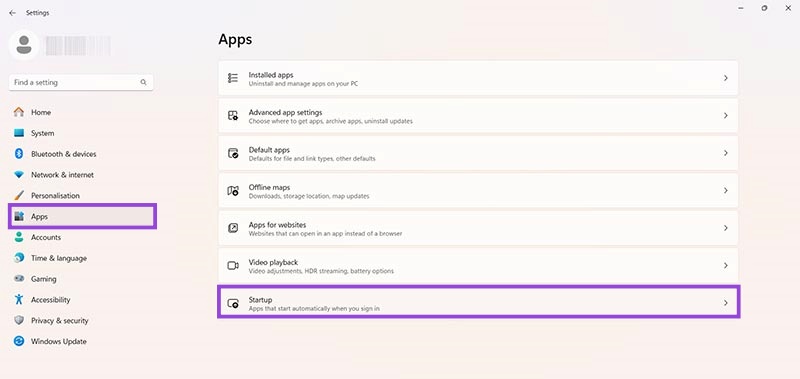
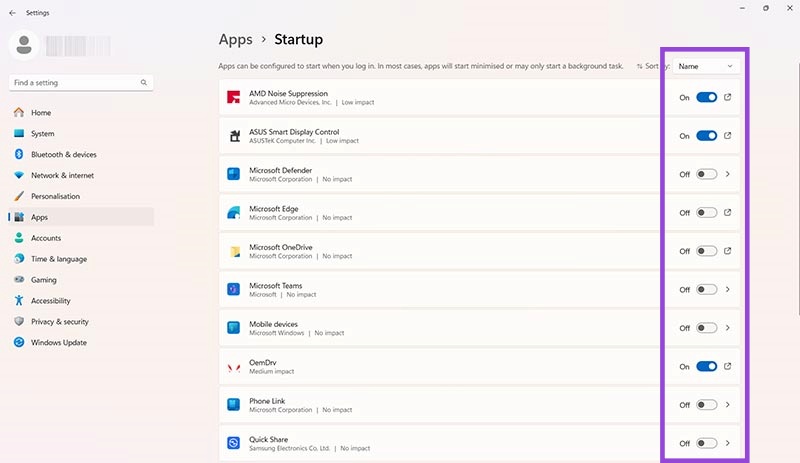
Step 3. Look through the list of startup apps and toggle the ones you don’t need to the “Off” position.
Method 5. Turn Off Tips and Notifications
By default, Windows has a system that delivers user tips and notifications from various installed apps. While this can be useful, it’s also yet another drain on your device’s resources, so you may notice your PC or laptop slow down a little when a new tip or notification appears.
Step 1. Go to “Settings.” Either press “Windows” and “I” to get there or use a shortcut in the Start menu.

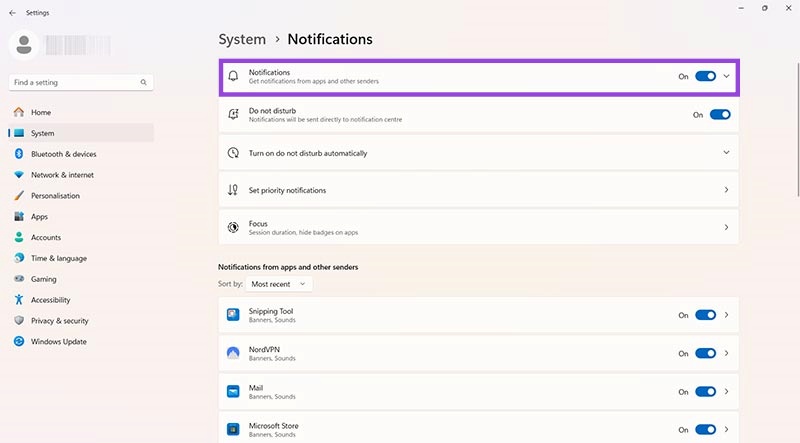
Step 2. Go to “System” and then “Notifications.”
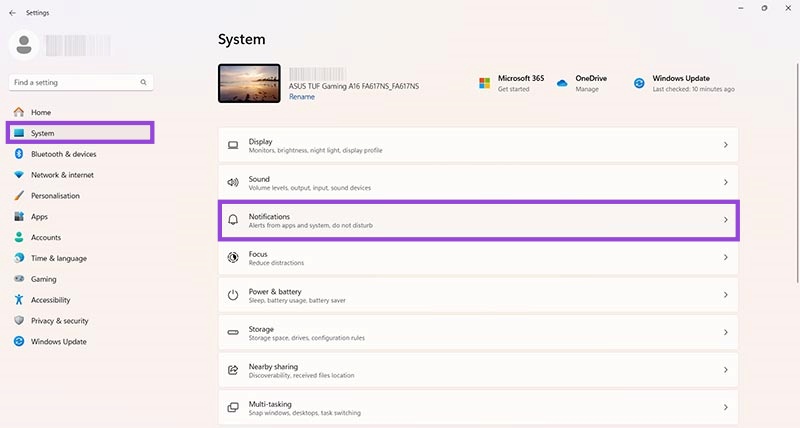
Step 3. Now you can either just toggle all notifications off using the button at the top, or you can go through the list of apps further down the page and disable notifications for those you don’t need.
