


How To Install Exodus on Kodi 17.3

Exodus is one of the most popular add-ons for the Kodi player, giving its users access to large quantities of video content. This guide will explain how to install it on Kodi version 17.3. However, make sure to research your local laws that concern streaming in order to avoid potential issues that can come from accessing licensed content.
Step-by-Step Guide
Before you get to installing Exodus itself, there is one step you need to go through first. That is to enable Kodi to get add-ons from unknown sources. These sources, known as “repositories”, can either be official or unofficial. Since Exodus is third-party software, you will need to get it from the latter category.
This is something you only need to do the first time you want to install a third-party add-on. Therefore, if you’ve done this before, feel free to skip ahead. But if you’re new to this, this is the procedure you need to follow. It only involves a few clicks and won’t take long at all.
Of course, the very first thing you need to do is launch Kodi. From the home screen, you need to select the “Settings” option. That is the gear icon you can see in the upper left corner of the screen.
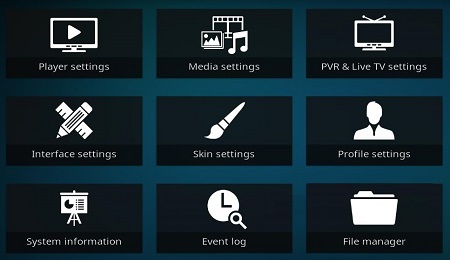
This will take you to the menu that allows you to fine-tune and customize various things regarding the Kodi player. Remember it because you will need to return to it once more. For now, select “System Settings”. Then, go to the “Add-ons” tab and look to the right.
You will see an option labeled “Unknown Sources”. Turn it on. As soon as you do that, a warning message will appear. Select “Yes” to proceed.

You are now done with the prerequisite step and can move on to installing the Exodus add-on itself.
We mentioned you would be returning to the Settings menu, and now is the time to do that. So, go back one screen. You can do this by clicking the word “Settings” in the top left corner. Once you’re in the appropriate menu, choose “File Manager”.
On the left-hand side of the screen, select the option “Add Source”. Select “None” and you will be prompted to enter a path to allow the Kodi player to search for the add-on in the appropriate location.
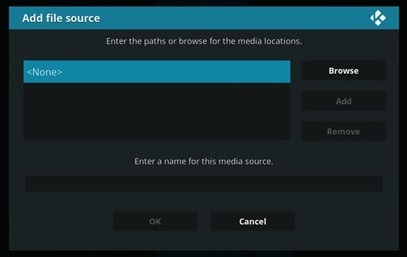
Here, you need to type in the following web address: “http://srp.nu/” (without the quotes). Or just copy/paste it from here. Either way, you will also need to name this media source by filling out the appropriate field below. Put in “SuperRepo” since that’s the name of the repository you’re using. Once you’re done entering the name, click “OK”.
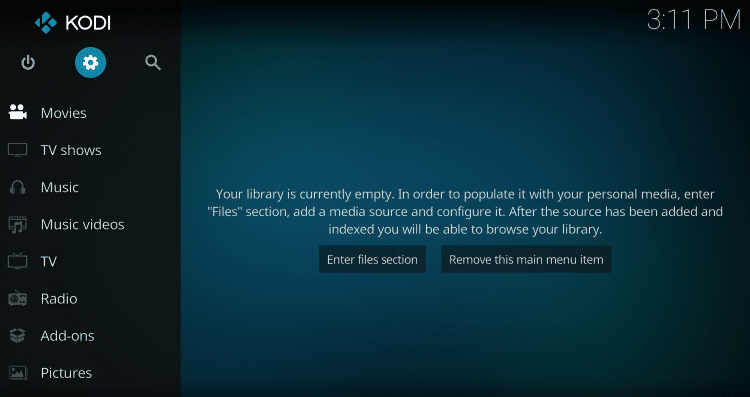
Now, it’s time to go all the way back to the home screen. Once you’re there, select the “Add-ons” tab on the left.
What you need to do next is select the “Package Installer” option. It’s the icon that looks like a box, once again located in the upper left section of the screen.
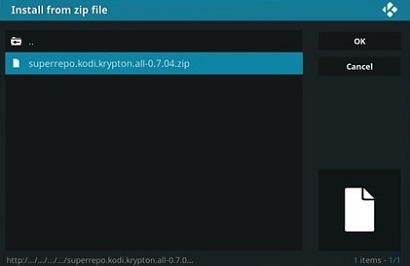
Once you’ve selected it, you will be in yet another menu. Here, you have to choose the option to “Install from zip file”. A box will pop up, and you need to find the web source called “Super Repo”.
From the following list of options, select “Krypton”. That’s the codename for version 17 of the Kodi player. In the following menu, choose “Repositories”. Then, select the zip file which will have the designation “superrepo.kodi.krypton.all-“ and will also contain several numbers in the name.
Kodi will now install it, and you will be back in one of the previous menus. Wait for a little bit, and you will see a notification in the top right corner telling you that the add-on has been enabled. Now, choose the option “Install from Repository”.
Then, select “SuperRepo Repositories [Krypton][v7]”. You are almost done. All that is left to do is choose “Video Add-ons” in the following menu and then “Exodus”. You will see the “Install” option in the bottom right corner – click it.
Your work is now done. Kodi will download the necessary files and install them. You just need to wait for that process to complete. It will take a bit of time, but it’s not too long. A notification will inform you when it’s done, and the Exodus add-on will be ready to use.
To access it, go to the home screen, select “Videos”, followed by “Video add-ons”. That’s where Exodus will be.
Final Words
This is how you install Exodus on Kodi 17.3. If the repository used here becomes unavailable, you will need to look for an alternative. Fortunately, the process is largely the same. You will simply need to enter a path to a different online source.
And once again, only use Kodi add-ons to view content that is not in violation of copyright laws.


One thought on “How To Install Exodus on Kodi 17.3”