How to Use iPhone Screen Recording in iOS 11

As a consultant, I spend a lot of time typing up instructions. More than I’d care to admit, honestly, so iOS 11’s new feature that lets me record my iPhone or iPad’s screen from Control Center is going to be an amazing addition to my arsenal. We’ve been able to do something akin to this for a while now by connecting our devices to QuickTime on the Mac, but recording the screen directly is just so much easier and quicker (especially if you need to show someone how to enable a feature in Settings or if you’d like to record something funky your device is doing). Can you tell I’m excited? I’m excited! Get excited with me and come learn how to record your iPhone screen. Or your iPad, I guess, if you’re all fancy like that.
To get started with the built-in screen recorder in iOS 11, we first need to make some changes to our Control Center (the ability to modify Control Center is itself another new iOS 11 feature). Head to Settings > Control Center. Find and select the option labeled Customize Controls.
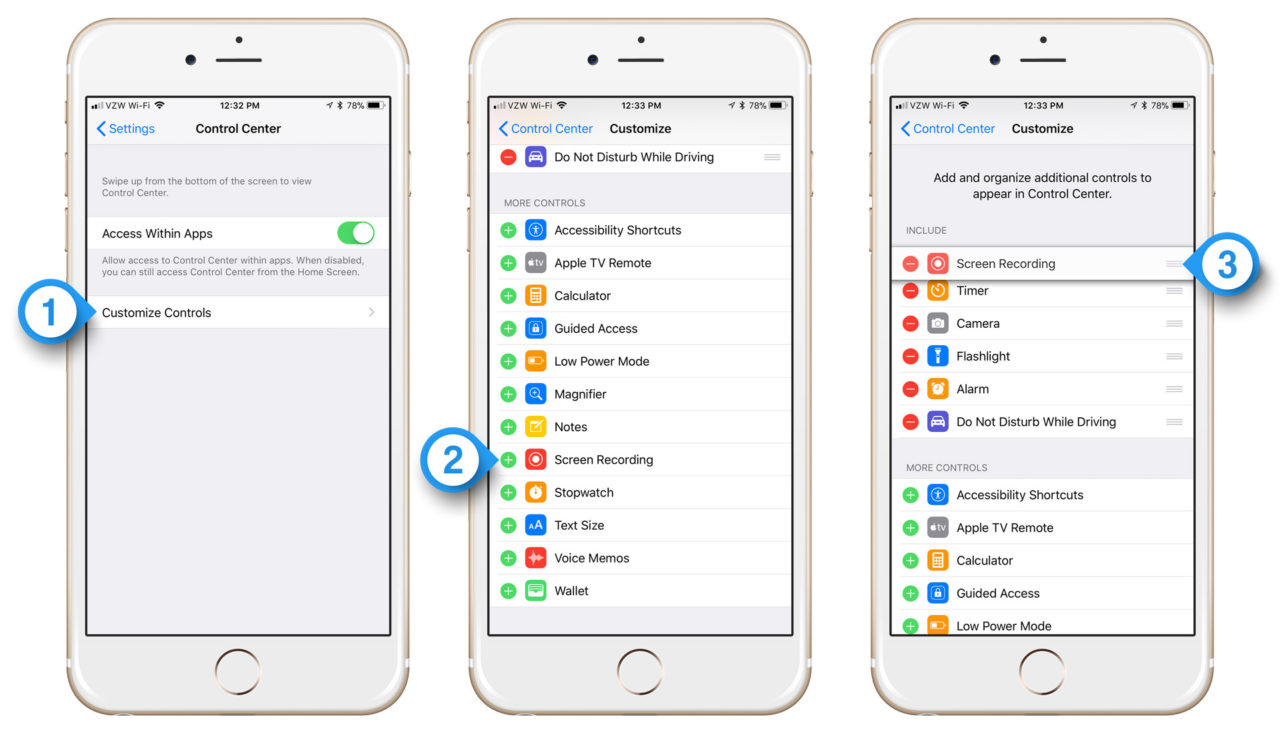
At the top of this screen are the controls already in your Control Center, while the controls on the bottom are the ones you can optionally add. Find the control labeled Screen Recording and tap the green plus icon next to it to add it to your Control Center. Once it’s there, you can tap, hold, and drag on three lines to the right to reposition it relative to your other controls.
Once Screen Recording is added, close Settings and activate Control Center by swiping up from the bottom edge of the screen. If you have a new iPhone X, you can also launch Control Center by swiping down from the upper-right corner of the screen. For iPad users, double-clicking the Home button will also get you there.
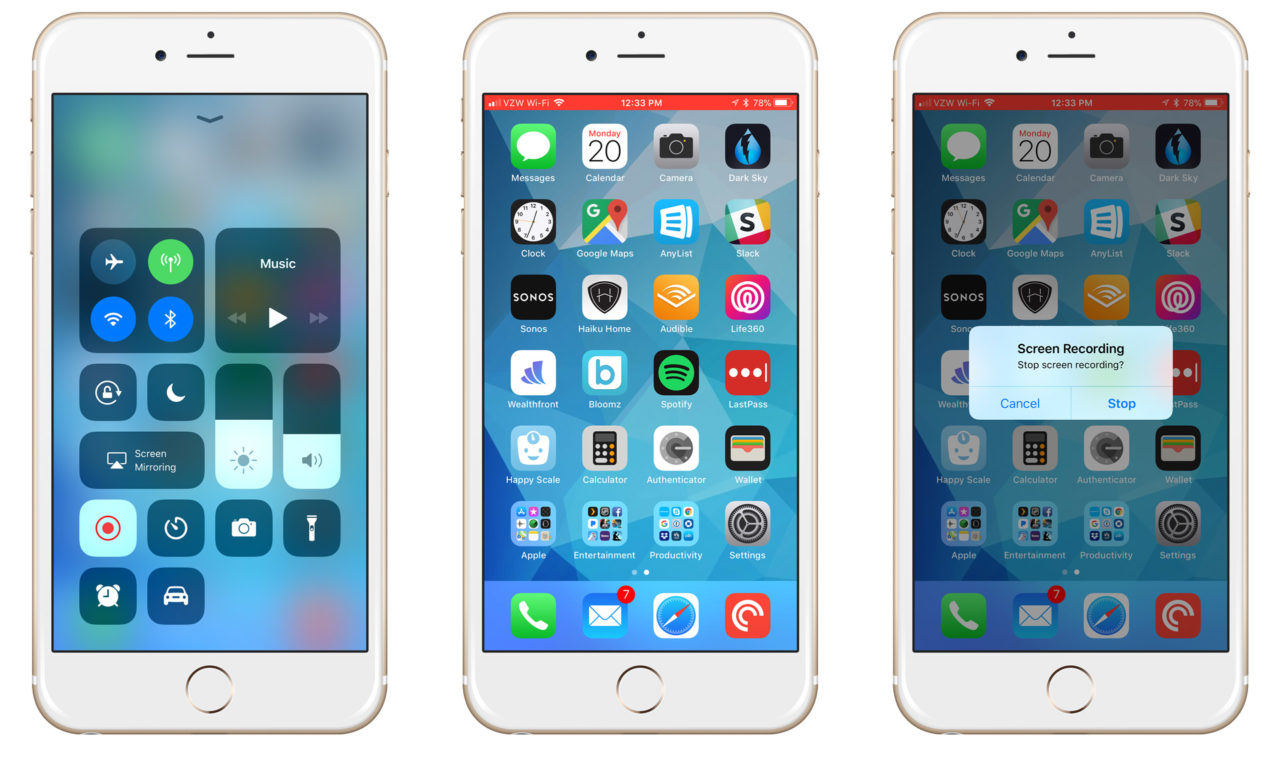
With Control Center open, you’ll see the new Screen Recording icon listed in the position you assigned it in Settings. Tap it once and you’ll see a three-second countdown before screen recording begins. While it’s recording, you’ll see a red status bar at the top of your screen. You can switch apps, adjust settings, and do whatever else you wanted to record (you can always trim the video later to remove an extraneous frames). To stop recording, either tap on the red status bar or return to Control Center and tap the Screen Recording icon again. You’ll receive a confirmation dialog to confirm your choice.
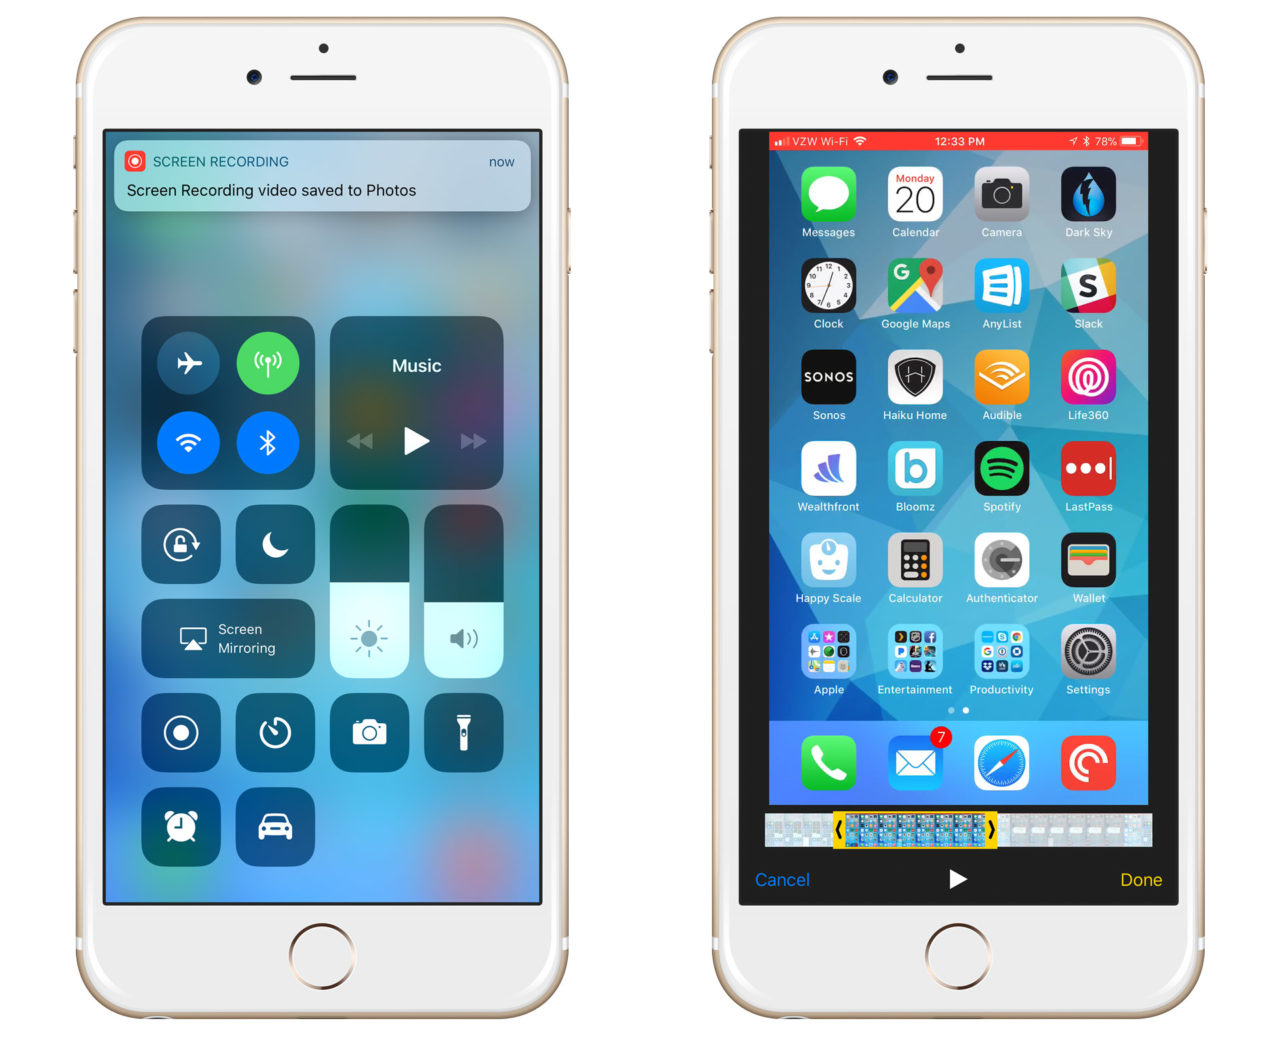
Your iPhone screen recordings will be automatically saved to your camera roll, where you can use the Photos app to view and edit them as necessary. From there, you can share them directly or copy them to a Mac or PC for further editing and organization.
A final note: this on-device method of iPhone screen recording does not give you the clean status bar look that you get when recording the iPhone via QuickTime in macOS. This is good for troubleshooting in the sense that your final video file will show exactly what you see on the screen, but it does mean that your recordings for other purposes won’t have quite the same polish. If that’s important for you, you can still use the old QuickTime method if you have a Mac available.