


Turn Your Raspberry Pi Into The Ultimate Music Player With Volumio
What is Volumio?
Volumio is a music player, but it’s certainly more than that. Volumio is a music operating system. It turns a normal PC or a smaller embedded device, like a Raspberry Pi, into a custom audio playing powerhouse, purpose built for making the most of your media collection.
Volumio isn’t like Kodi or any of the media operating systems based around it. Volumio is meant to function as the brain of a stereo system. It handles library management, playing Internet radio, importing music from networked sources, and serving it all from a sleek web interface.
Volumio makes itself available to anyone over your local network, making it both super convenient for everyday use and the ultimate party music player. Anyone with a phone and access to your WiFi can pick the next song, almost like a communal jukebox. Of course, that means that Volumio takes full advantage of wireless controls too. You don’t need to be in the same room as your music player. You can even take advantage of Volumio from outdoors, if your WiFi reaches.
If you’re worried about audio quality, don’t be. Volumio is designed with audiophiles in mind. Sure, the Raspberry Pi doesn’t have the best onboard sound, but there’s nothing preventing you from connecting it up to a high quality DAC. In fact, Volumio almost expects you to do just that.
What You’ll Need
There are a lot of options to take into account when setting up your sound system. This isn’t the place to debate over speaker configurations, though. There are some bare essentials that you’ll need if you want to get set up with Volumio.
- Raspberry Pi(pref version 3)
- MicroSD card for the operating system
- Ethernet cable
- Speakers and auxiliary cable
- Optional: DAC
- Raspberry Pi compatible power cable
Flash The Image
Once you have all the ingredients for your new setup, you’ll need to download the Volumio disk image and flash it onto your MicroSD card. First, head to the Volumio download page, and download the latest release for the Raspberry Pi.


When the Download is finished, unzip the image. It’s actually a fairly large file, so it might take a few minutes to complete. You need the raw image ending in the .img extension.
Next, you’ll need some way to flash the image onto your SD card. There’s a great cross-platform tool, Etcher, that you can use. Download the latest release for your operating system, and install it.
Insert your SD card into your computer, and open up Etcher. Select your newly unpacked Volumio image. Then, pick your SD card. When everything looks right, click the last button to write your image to the card. When Etcher is done, you can pull the card from your computer.
Put It Together
Volumio was designed to be used over a network. That includes its initial setup. Unfortunately, there’s no way to connect to WiFi without a graphical interface first, so you’re going to need to use a wired connection for the initial setup.
Put your SD card in the Pi. Then, connect up your speakers and any other audio components that you’re including in the setup. Volumio will ask you if you’re using a DAC in the setup. Plug your Ethernet cable into connect up your Pi to your network. When everything else is in place, plug in the Pi.
It’s going to take a few minutes for the Raspberry Pi to set itself up and resize its partitions. Be patient. While you wait, open a web browser on your computer, and navigate to your router’s admin interface. Find the listing of devices on your network. A lot of routes make it the first page you see. Keep an eye out for a Volumio entry on the list. You may have to refresh a couple of times before it pops up. When it finally appears, open a new tab in your browser and navigate to the IP address of your Pi.
Setting Up Volumio
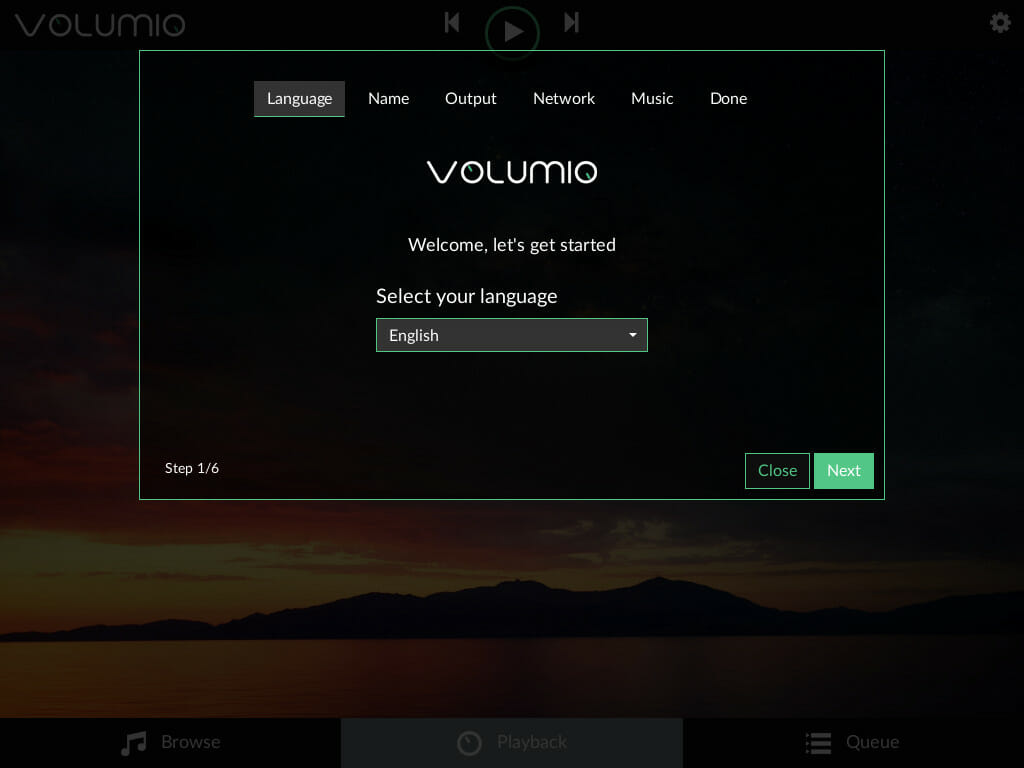
You’ll arrive at the beginning of the Volumio setup, on a page asking you to set your language. Pick what works best for you.
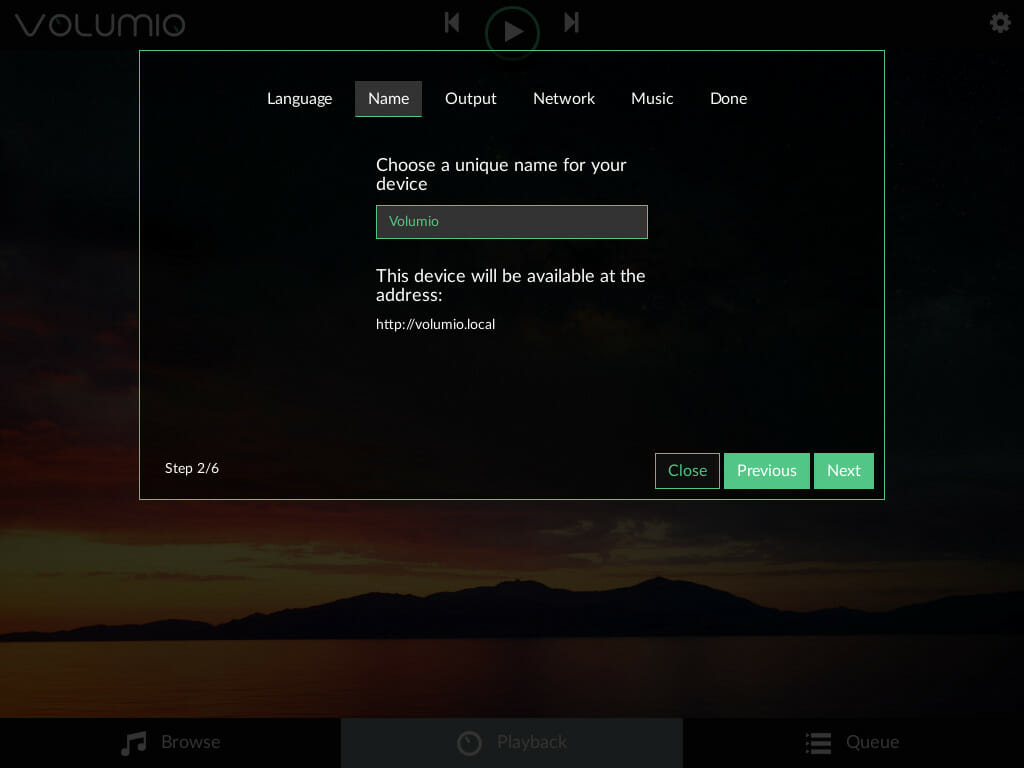
The next screen asks you to set a hostname for your Raspberry Pi. The default is Volumio. This hostname will also be used as the web address of your Pi on the network. Keep in mind that you’ll need to set up that host on your other devices in order to use it in place of the IP address.
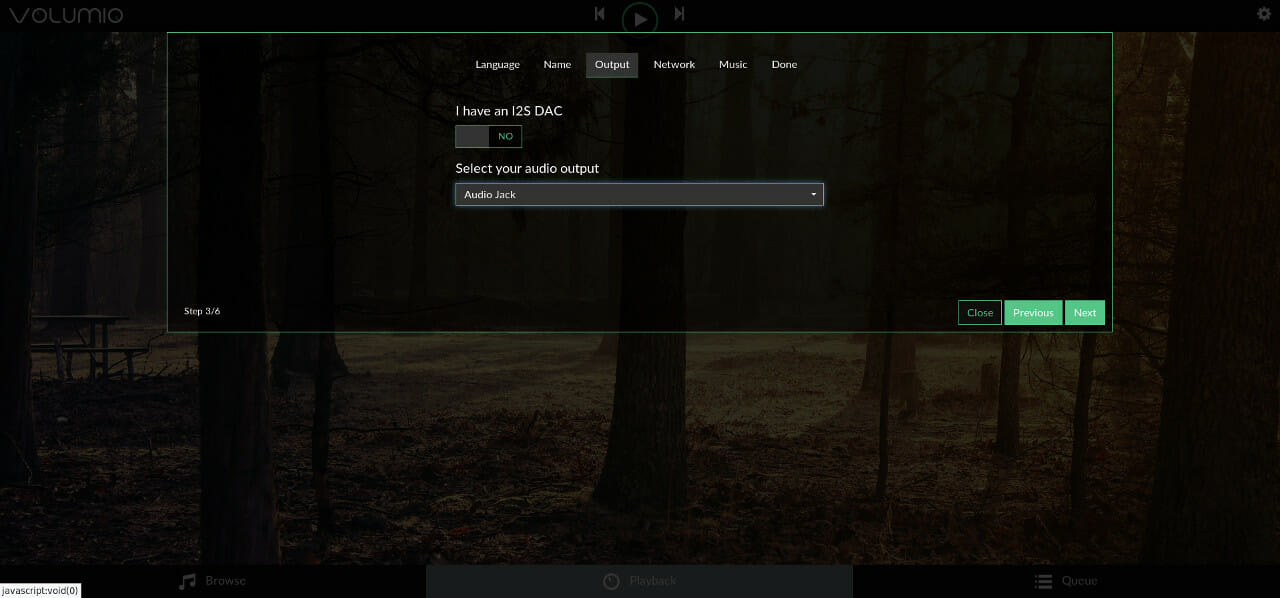
Following that, you’ll be asked to set up your default audio output. Here, Volumio asks you if you’re using a DAC. In either case, set the default output that you want to use. Don’t worry if you want to change this stuff later. You easily can.
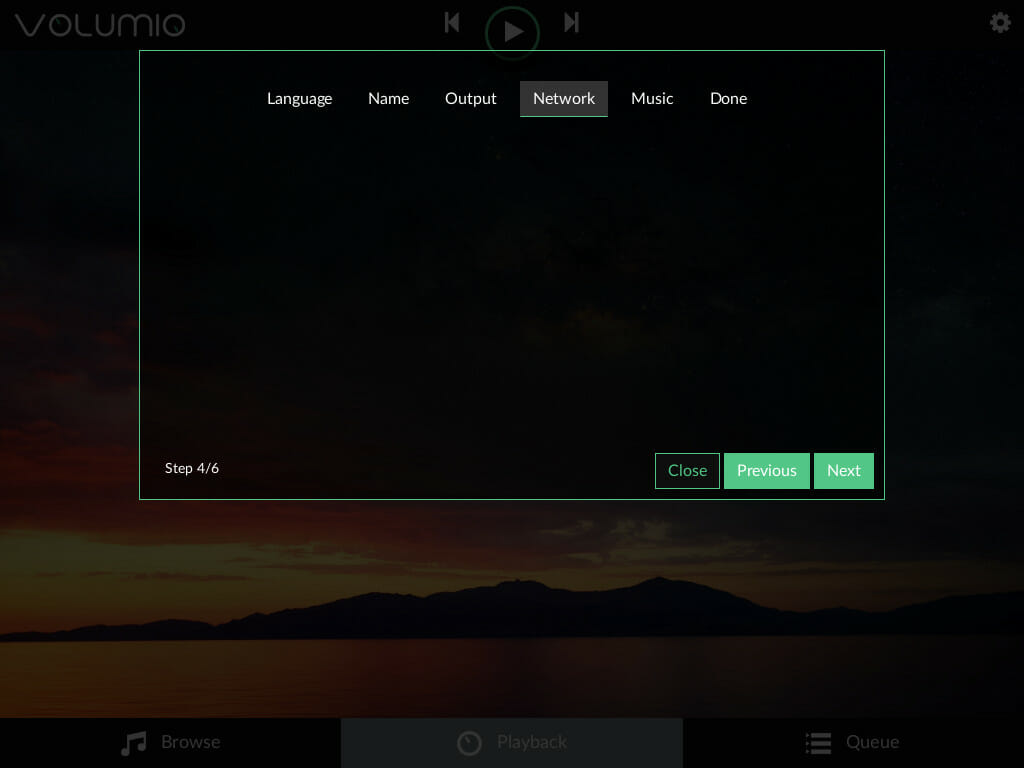
At this point, you can set your network up. If you’re on a Raspberry Pi 3, you should see an option to set up WiFi here. Connect to your WiFi network, and save everything. This way, you won’t need the wire again after this initial setup.
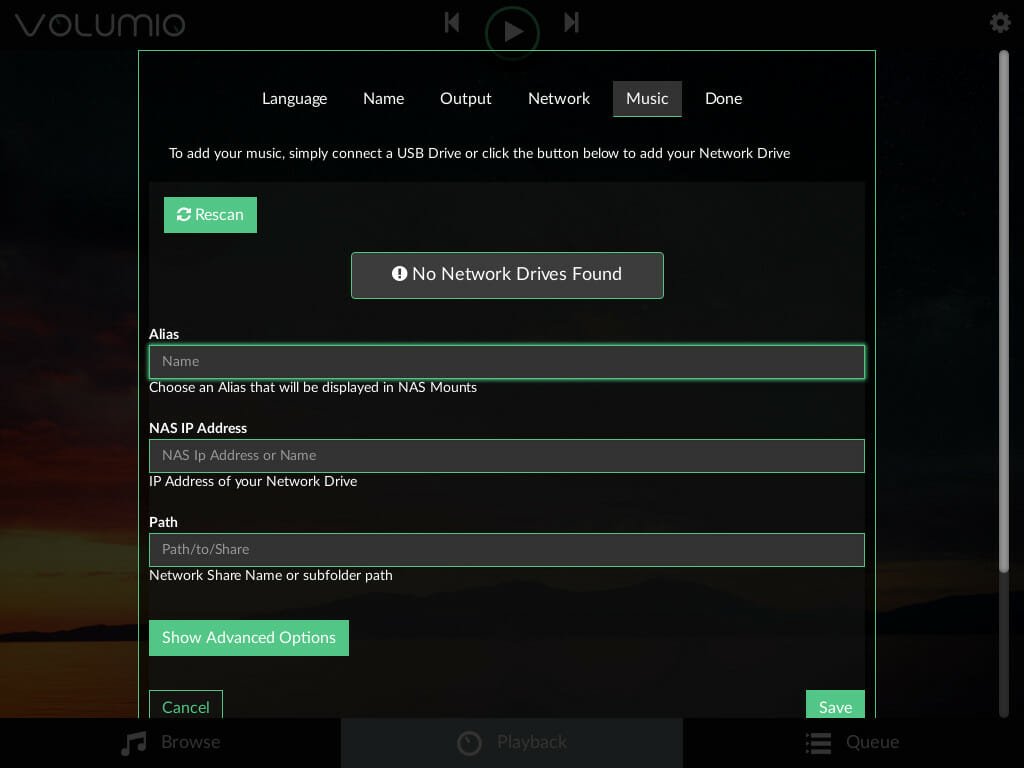
Volumio assumes that you’re going to be using either a networked drive or a USB device to store your music. If you’re using a NAS or another type of music share, enter the information for it here. You should click on the “Advanced Options” button because it lets you control which type of share you’re connecting to.
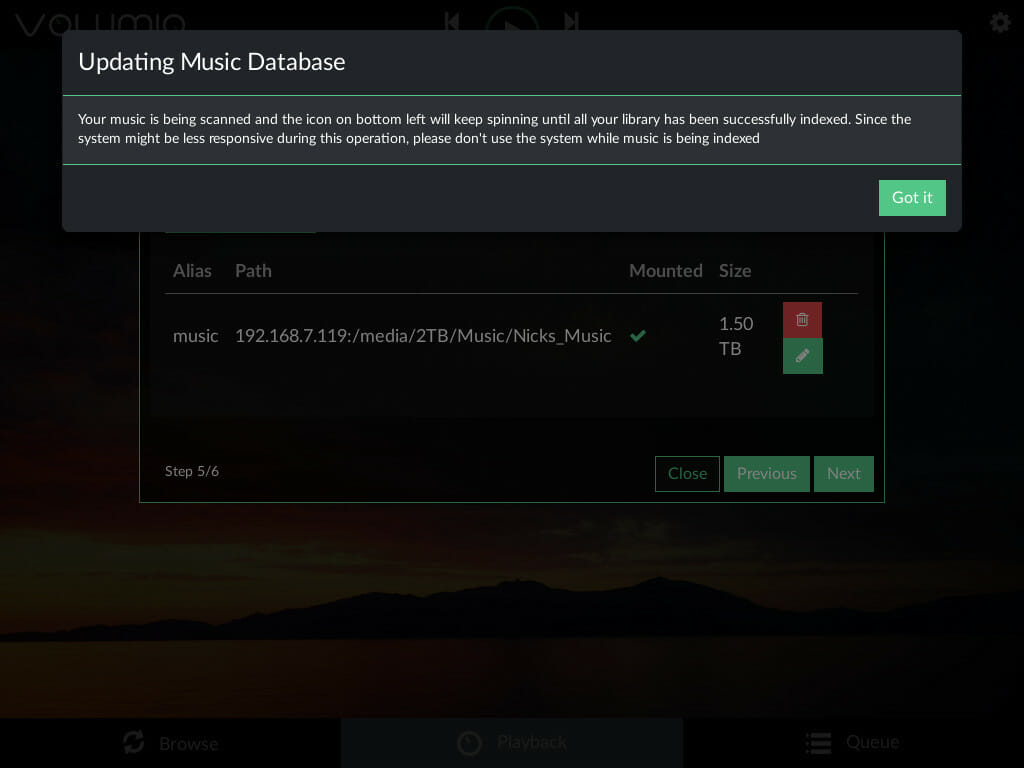
After you successfully connect to a music share, you should see a message stating that your database is being updated. You’ll also see your music share listed.
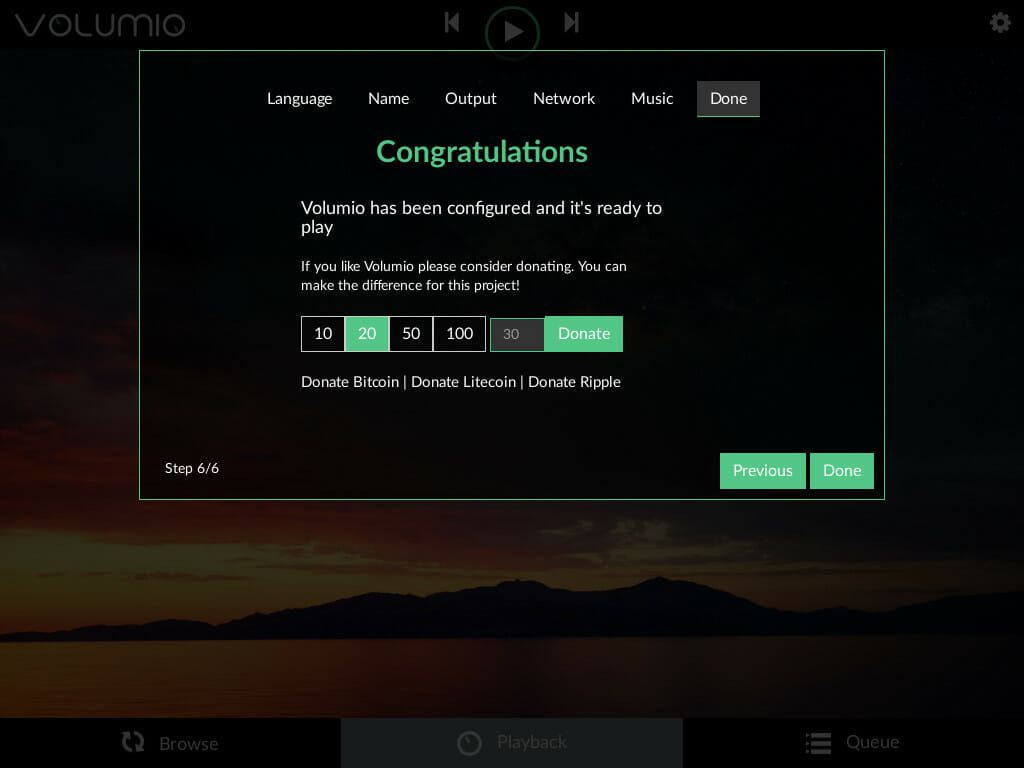
Finally, you’ll be shown a success message, and you can complete the setup.
Using Volumio
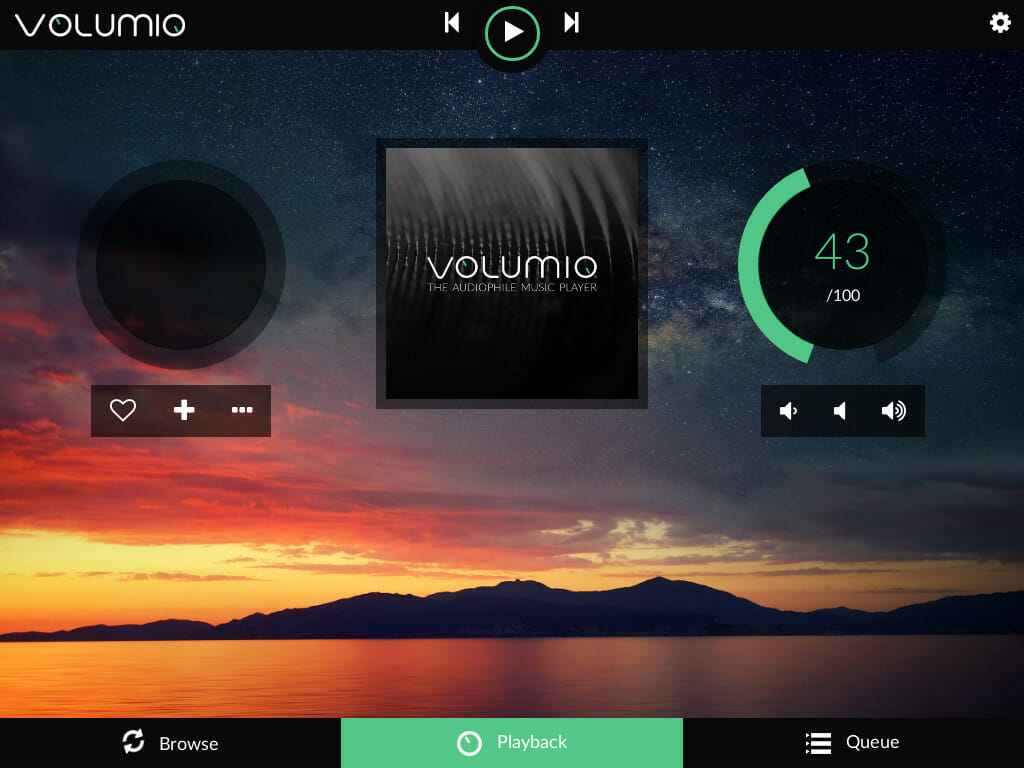
Volumio has three basic sections. The first one is what you’ll see immediately after the initial setup. That’s the playback screen. It shows you which song is currently playing, and it lets you adjust the volume.
To the left of the playback screen, you’ll see the button to browse for more music. Volumio focuses mostly on your own music library, but it also has capabilities for Internet radio. There are a wide range of sources for streaming content.
When you click on the different views for your music library, Volumio will provide a listing of your music accompanied by graphics. The artist layout displays pictures of your favorite bands, while the album view shows you the album art.
The button to the far right displays your queue. When you select a song to play, it’s added to your queue. You can save your queue at any time to turn it into a playlist. You can add songs to your queue without immediately playing them by clicking the three stacked dots to the right of the track listing.
Settings
You can access Volumio’s settings menu by clicking on the gear icon. Volumio allows you to reconfigure anything that you set up during the initial setup, and you can handle it all from the web interface.
Click through and take a look, but most of it is self-explanatory. The “System” tab is probably the most important. It allows you to update your Volumio install, and keep it from falling out-of-date.
The “Network” tab is also fairly important. There, you can connect to a new WiFi network, if needed. You can also modify your device’s network settings.
The “Playback” lets you change your audio output. If you modify your sound system, this is where to update Volumio.
You can also add new music sources. That’s what the “My Music” tab is for. You can manage your music sources there. It also gives you information about your music library.
Closing Thoughts
You can see that Volumio is an awesome option for managing and playing your music collection over your network. You don’t need to be tied to your computer or be hauling around a laptop to play your music. Volumio lets you take full advantage of whichever sound system you want conveniently over your network. With Volumio and your Raspberry Pi, any music player becomes a whole lot smarter.


One thought on “Turn Your Raspberry Pi Into The Ultimate Music Player With Volumio”
It’s a RPi 2 with a hifiberry DAC, the official 7 inch touchscreen, and volumio installed.
I use it to play hi res flac files off my home nfs media server.
It is great! Just what I needed.