How To Fix “the hosted network couldn’t be started” Error in Windows 10
The ability for a Windows computer to be a hotspot for other devices is a neat trick but one that can be troublesome to set up. While simple on the surface, it seems Windows is determined to make it as difficult as possible to get a hosted network up and running. One of the most common errors is the hosted network couldn’t be started error.
The full error syntax reads something like ‘The hosted network couldn’t be started. The group or resource is not in the correct state to perform the requested operation’. For once, the error actually tells us what is wrong, the network card is not set up to host the network you are trying to establish. That makes it easier to troubleshoot.
Assuming you have already rebooted your computer, router and have internet access, try the following.

Fix the hosted network couldn’t be started error in Windows 10
First let us check that your Wi-Fi card is capable of running a hosted network. Then we shall reset it to force a reload of its config.
- Open a command prompt as an administrator.
- Type ‘netsh wlan show drivers’. Look for ‘Hosted network supported: Yes’ in the list. If it says No, there is your problem. The hardware or driver doesn’t support hosted networks.
- Update your network driver to the latest version and run the command again. If it still says No, it could be a hardware limitation. If it now says Yes, try setting up the hosted network again.
If your hardware and driver are capable of running a hosted network, let us reset it and force a reload of its configuration.
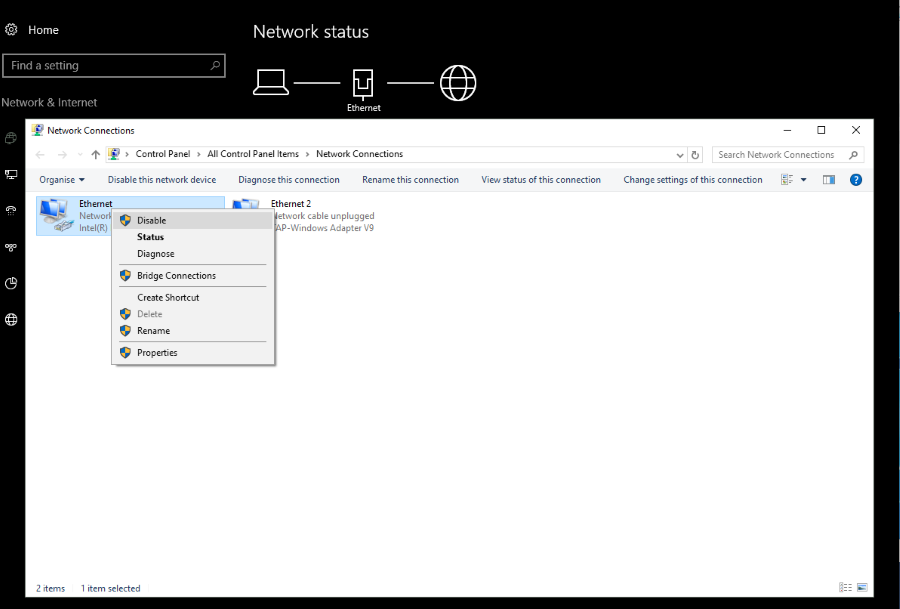
- Right click the Windows Start button and select Device Manager.
- Right click your wireless adapter and select Disable. Leave for a few seconds and then select Enable.
- Retest the hosted network.
In the majority of cases I have seen, this is enough to get your network up and running again. If not, try this:
- Right click the Windows Start button and select Device Manager.
- Right click your wireless adapter and select Properties.
- Click on the Advanced tab and select HT Mode in the Property list.
- Enable it from the options and click OK.
- Open a command prompt as an administrator.
- Type ‘netsh wlan show drivers’. As in the steps above, look for Hosted network supported: Yes. If it wasn’t supported before and your hardware is capable, it should now say yes.
- Retest the hosted network.
Finally, an odd setting within the power plan has been known to cause issues with shared networks.
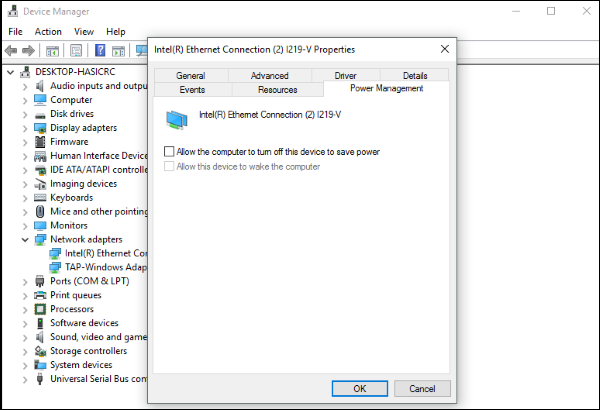
- Right click the Windows Start button and select Device Manager.
- Right click your wireless adapter and select Power Management.
- Ensure ‘Allow the computer to turn off this device to save power’ is unchecked. This is particularly important if you’re using a laptop or tablet but also works on desktops too.
- Retest the connection.
These steps ensure your hardware and drivers are in a position to host the network. As long as there is nothing wrong with core Windows files you should now be able to host it without any further issues.
Have any other ways to address the hosted network couldn’t be started error in Windows 10? Let us know below.