How to Fix Microsoft Office Error Code 4vt9f

In rare cases, Microsoft Office fails to update your account, resulting in “Office error code 4vt9f” or a similar error being shown when you try to launch any Office program. This is typically due to a desync between your PC and the server that checks the authentication (usernames and passwords) of accounts. Notably, the error is more likely to occur after an update or if you change your account credentials. There are a few ways to fix it.
Fix 1 – Fix Office Error Code 4vt9f by Clearing the Cache
Microsoft Office stores authentication codes in a cache (among other locations), and removing this cache might cause the underlying service to recheck it and fetch the correct data.
Step 1. Close all Office apps.
Step 2. Press “Win + R” to open the Run dialog. Paste in “%localappdata%\Microsoft\OneAuth\blobs”, then hit “Enter.”
Step 3. Select all files in the folder with “Ctrl + A” and delete them.
Step 4. Open the Run dialog again, then go to “%localappdata%\Microsoft\OneAuth\accounts” and delete all files there.
Step 5. Repeat with the location “%localappdata%\Microsoft\IdentityCache” as well.
Step 6. Reopen an Office program (like Word) and sign in with your Microsoft account when prompted.
Fix 2 – Disconnect Work or School Accounts
Work or school accounts might become invalid if you change schools or workplaces, so they might cause an error when Office tries to log you into them.
Step 1. Open Settings with “Win + I” and go to “Accounts.”
Step 2. Click “Access work or school” from the menu.
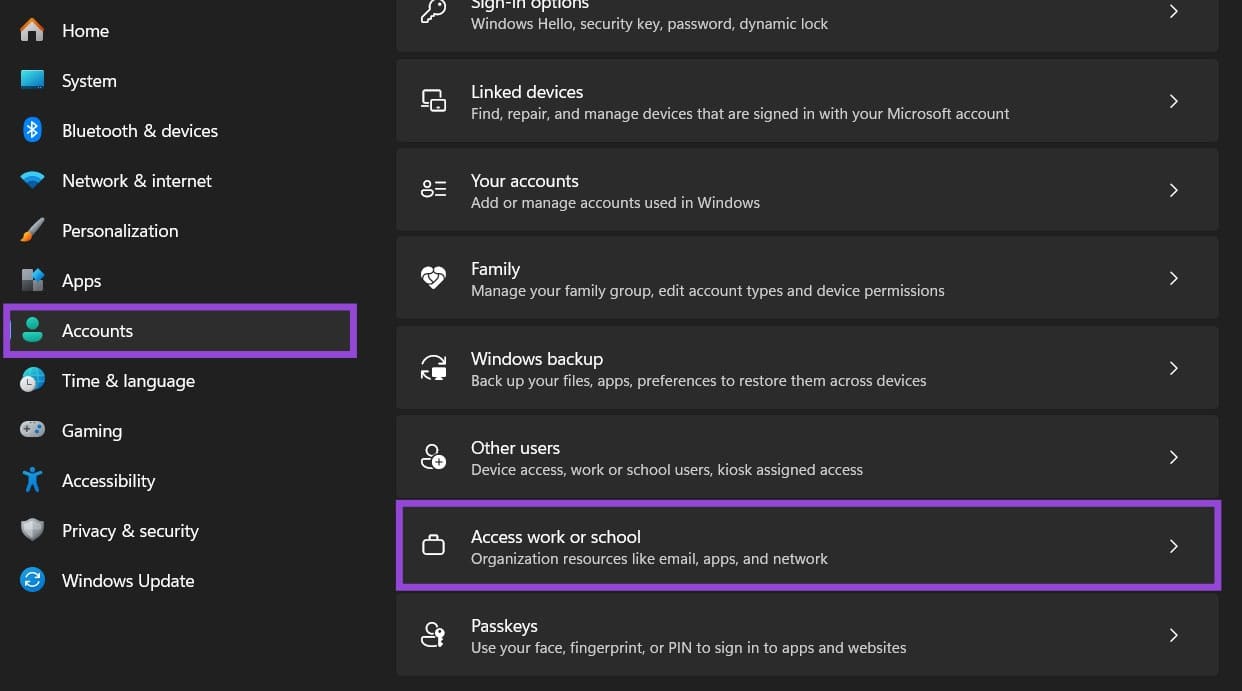
Step 3. If you see any accounts listed there, click on each one and select “Disconnect.” Remove all entries you find, even if they look correct.
Step 4. Restart your computer, then open an Office app and sign in when prompted.
Step 5. Go back to “Accounts” and add the accounts you’re actually using.
Fix 3 – Restart Windows Authenticator Services to Fix Office 365 Error 4vt9f
Office (and Office 365) uses a Windows service to check for updates and user accounts when needed. You can restart this service or force it to automatically start with Windows.
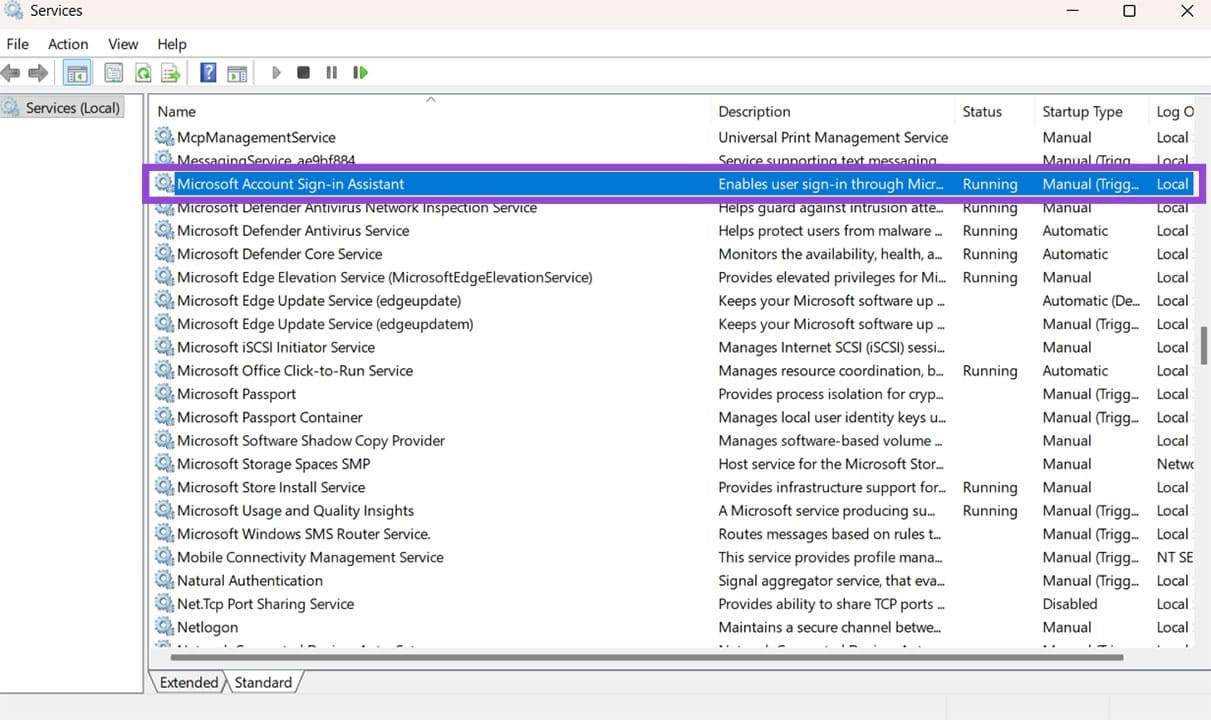
Step 1. Go to the Run dialog and enter “services.msc.”
Step 2. Scroll down and find “Microsoft Account Sign-in Assistant,” then double-click on it.
Step 3. Change the “Startup type” to “Automatic” and hit the “Start” button if you can, then press “Apply” and “OK.”
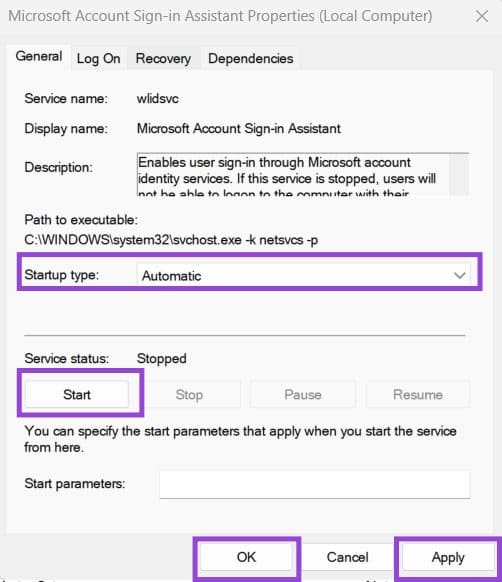
Step 4. Restart your PC.
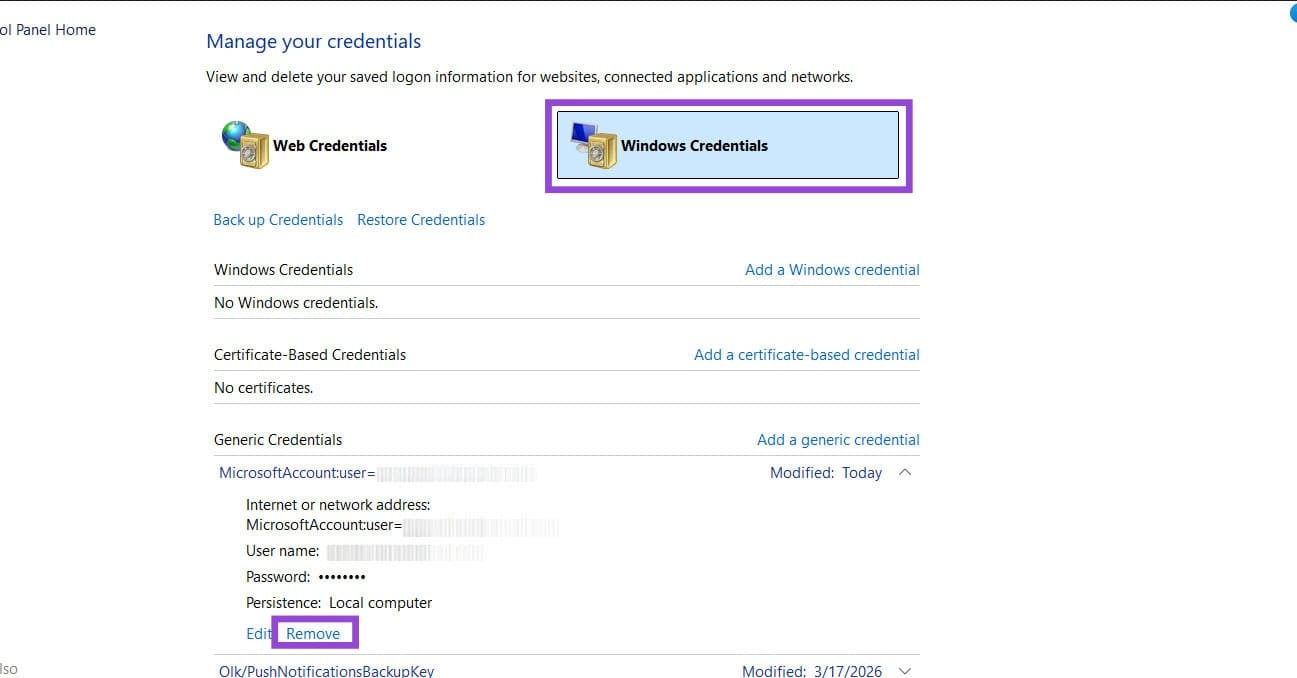
Step 5. Search for “Windows Credentials” and open the result (Manage Windows Credentials).
Step 6. Find an entry listed “MicrosoftAccount:user” followed by your email. Expand it, then click “Remove.”
Fix 4 – Run Office as Administrator
In rare cases, simply right-clicking on an Office app and selecting “Run as administrator” might solve some account issues, since administrative privileges allow the app to access restricted system files.
Fix 5 – Run Office Repair
If none of the above fixes resolve the error, the Office installation itself may have been corrupted and will need to be rechecked and validated.
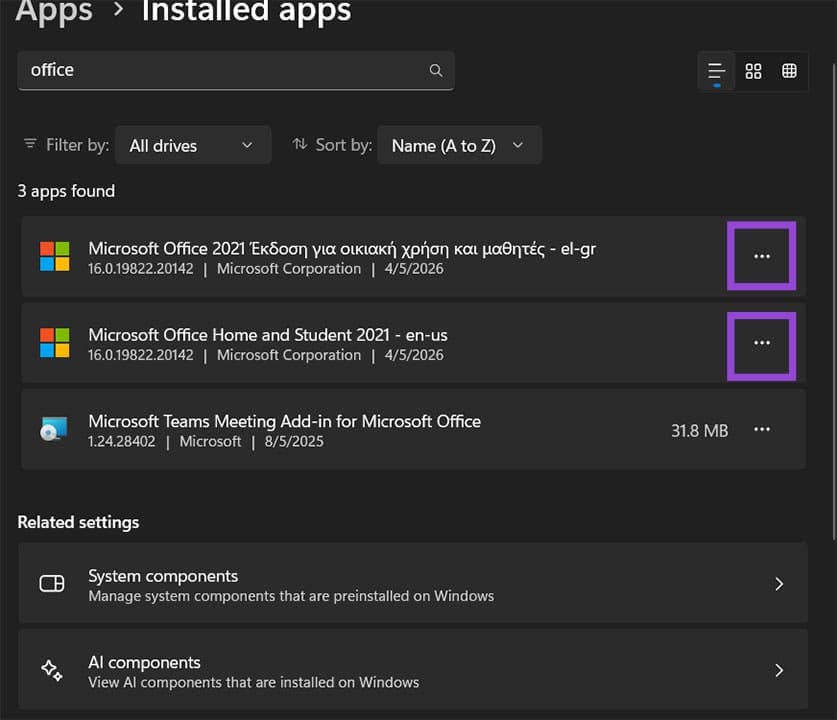
Step 1. Press “Win + I” to open Settings and go to “Apps,” then “Installed apps.”
Step 2. Find “Microsoft Office” or “Microsoft 365” in the list, click the three-dot icon for it, and select “Modify.” You’ll be prompted to accept the User Account Control.
Step 3. In the repair dialog, select “Quick Repair” first and let it run. This checks for and fixes common issues without needing an internet connection.
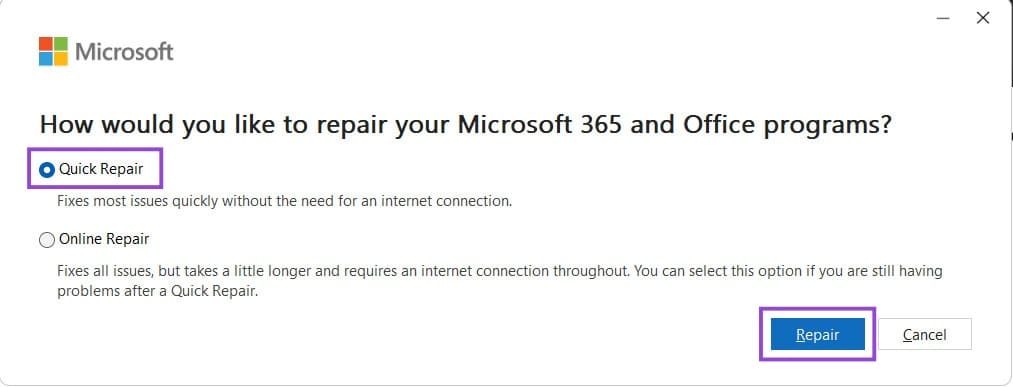
If this doesn’t work, repeat the process with “Online Repair.”