How To Fix ‘this device cannot start’ Errors in Windows 10
If you are coming up against ‘this device cannot start’ errors in Windows 10, you’re not alone. Of all of the various errors that users come up against, this is one of the most prevalent. It is also one of the most simple to address.
The full error syntax is ‘This device cannot start. Try upgrading the device drivers for this device. (Code 10)’. The error will also usually tell you exactly what device it cannot load. The error occurs when the device driver does not load properly or has become corrupted. It usually happens when Windows is trying to load a USB device driver.
Unusually, the error also tells you exactly what is wrong and how to address it. Anyone who has used Windows for any length of time will be quite surprised at that!
A device driver should have a list of reasons why it failed called the ‘FailReasonString’ value. It should then show the precise reason when something happens. If the ‘FailReasonString’ value is empty or incomplete, Windows will display the above as the default message.
While the syntax says ‘Try upgrading the device drivers’, it could also say reinstall the drivers as something has gone wrong.
Fix ‘this device cannot start’ errors
With any Windows error, there are a couple of things you can do to address it before getting into adding and removing device drivers.
Reboot your computer
The first troubleshooting step any Windows user should take is to perform a full reboot. Windows is not static and while the majority of files should not be overwritten, they sometimes are.
Occasionally, drivers or libraries that are loaded and held in memory can become corrupted. Rebooting your computer flushes these files and causes Windows to load fresh copies. This is why a reboot is often the only thing you need to do to get your computer working again.
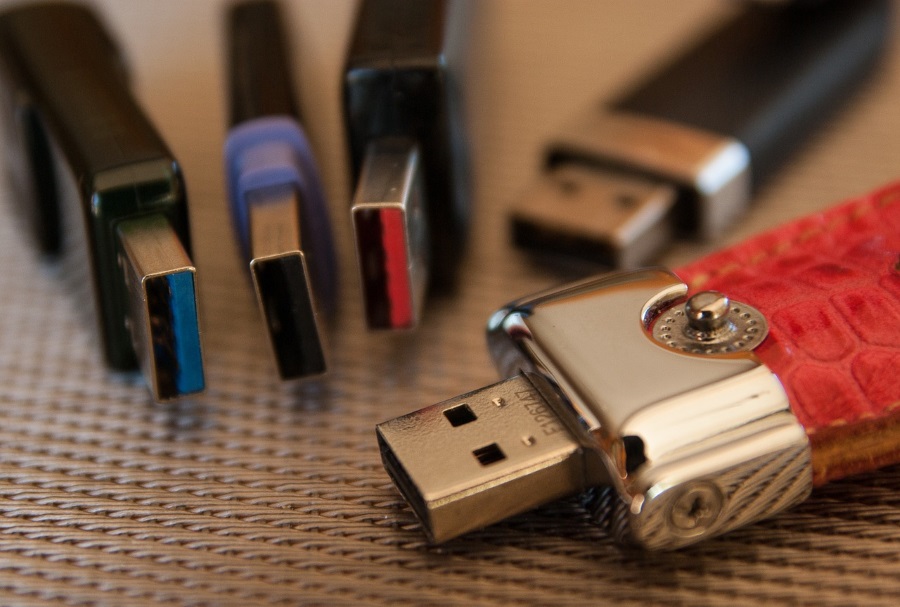
Change USB port
Another quick and dirty fix for ‘this device cannot start’ errors is to change the USB port. If you have rebooted and still see the error, you could change the USB port the peripheral is plugged into. This won’t always be effective but can sometimes get the device working as required.
Unplug the device that won’t load and connect it to a different USB port. Give Windows a few seconds to detect the new device, attempt to load the drivers and see how it goes. Sometimes it will work, sometimes it won’t.
Reload device drivers to fix ‘this device cannot start’ errors
The primary fix for ‘this device cannot start’ errors is to reload the driver. You can overlay a new driver version or reinstall the current version but it is much better to clean the old driver out first and reinstall it anew. It takes an extra minute but keeps your drivers tidy and avoids any conflict issues between driver versions.
- Download and install CCleaner onto your computer. This is optional but CCleaner has a useful registry cleaner that I find very effective at clearing out the trash.
- Open CCleaner and navigate to Tools and Uninstall.
- Select the driver you want to uninstall from the list and select Uninstall on the right.
- Select Registry from the left menu and then hit the Scan for Issues button at the bottom.
- Select Fix selected Issues once the scan is complete. Confirm and elect to save or not to save as you see fit.
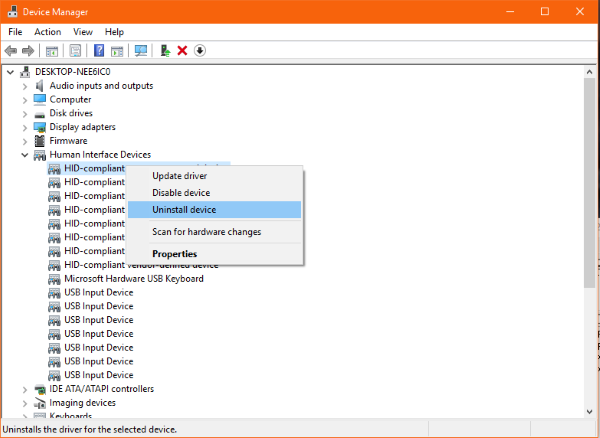
If you don’t see the driver in CCleaner, we need to go to Device Manager. It should appear in the Uninstall list but not a problem if it doesn’t. Try this instead.
- Type ‘dev’ in the Search Windows/Cortana box and select Device Manager.
- Select the device with the yellow triangle or manually select the device giving the error.
- Right click it and select Uninstall Device. Let Windows remove the device.
- Download a fresh version of the latest driver from the manufacturer’s website and install. You can also let Windows automatically detect and download a driver if you prefer.
- Open CCleaner and navigate to Registry.
- Select Scan for Issues button at the bottom.
- Select Fix selected Issues once the scan is complete. Confirm and elect to save or not to save as you see fit.
Depending on the device and/or driver, you may be asked to reboot the computer, you may not.
There are a couple of extra steps involved in removing the old driver but the long term results are much better. You remove any old files and stop Windows accidentally referring to old driver files. You also clear out old registry entries with CCleaner and ensure Windows is only loading the files and resources it needs.