Tips for Managing Your Downloads Folder
From images to documents to email attachments, downloading content is a part of life for most computer users. The only problem is that, after a while, your downloads folder can become overfull and start to use up a significant portion of your hard drive space.
Let’s take a look at the best ways to clean up downloads folders and keep your computer organized.
Stop Downloads Folder From Getting Too Big: Three Methods
Manually Delete Individual Files You Don’t Need
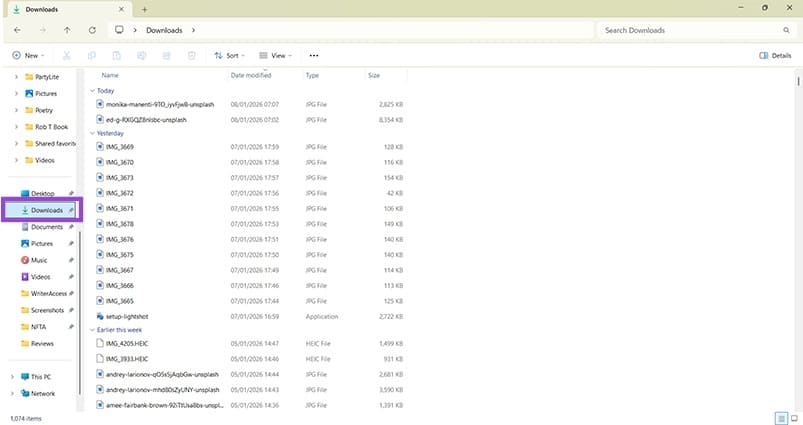
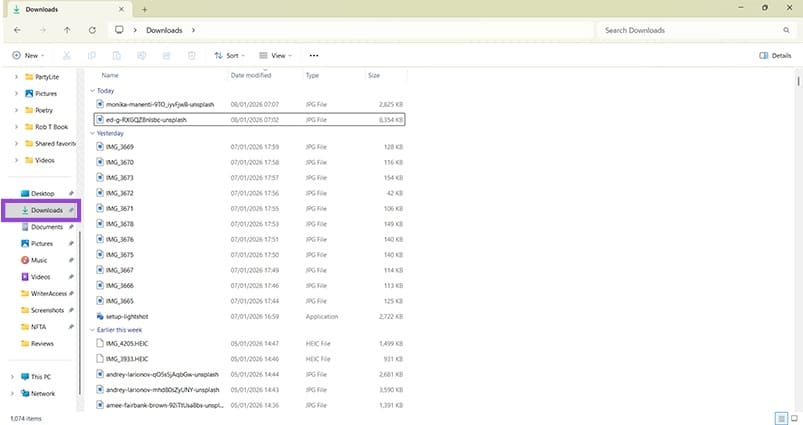
Step 1. Open your downloads folder using Windows Explorer. Note: If you’re a Mac user, you’ll open “Finder” which is the Apple equivalent of Windows Explorer.
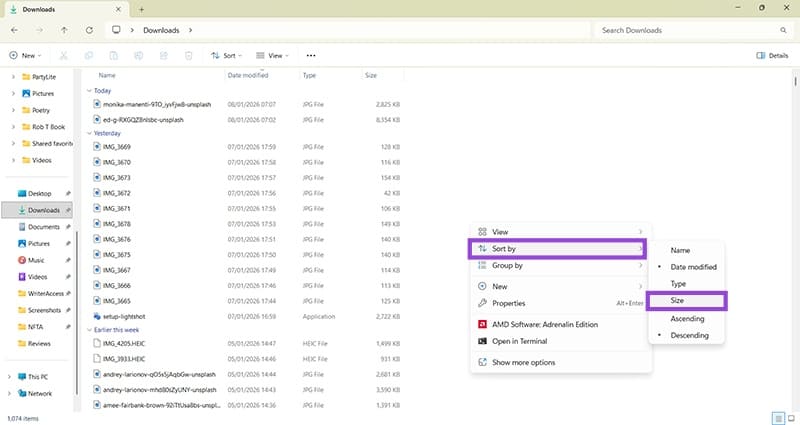
Step 2. Figure out which downloads are taking up the most space: Right-click in the blank space to the right of your downloads list, hover over “Sort by” and choose “Size.”
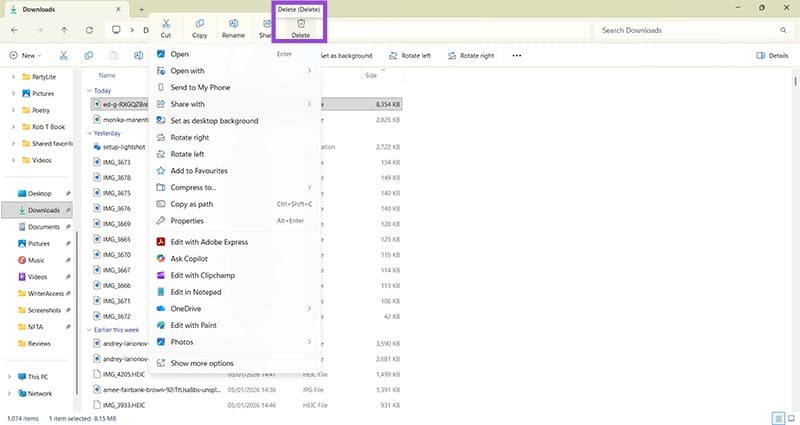
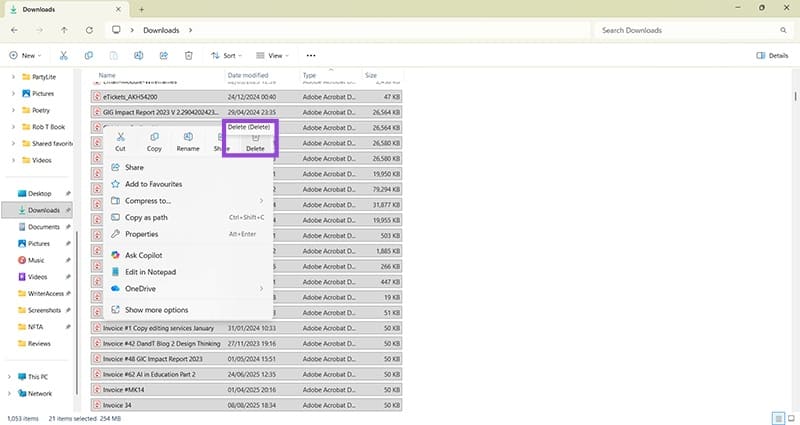
Step 3. You’ll now see the largest downloads at the top of the list, and can manually choose which to delete to free up some space. You can highlight any file and press the delete key, or right-click on a file name and choose the Delete option. It looks like a trash can.
Organize by Type
As well as organizing your folders by size, you can sort them by type. Doing this allows you to quickly select all of a certain type, for example, .exe files you no longer need, and delete them in bulk. This is one of the best ways to clean up downloads folders quickly.
Step 1. Open your downloads folder.
Step 2. Right-click anywhere in the blank space, just like in the previous instructions. This time, choose “Sort by” and then “Type.”
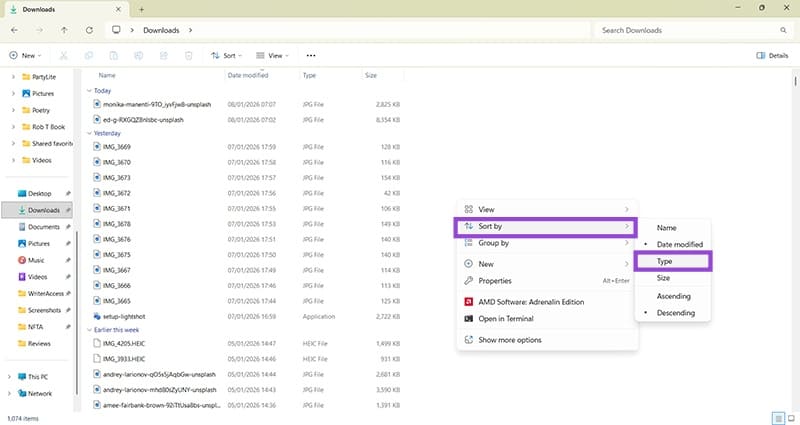
Step 3. You will now see all similar file types in groups. From here, you can click and drag your cursor to highlight an entire group, then press the delete button. Alternatively, highlight the files, right-click on them, and choose the delete option.
You can also create separate folders within your downloads area. Moving files into these separate folders helps keep the downloads folder organized and avoids digital clutter.
Use Storage Sense
If manual deletion sounds too tedious, set up the Windows Storage Sense option to clear your downloads automatically. MacOS Automation recently significantly expanded the Shortcuts app and Smart Folders to allow for automated “Move to Trash” rules that mimic Storage Sense.
Step 1. Open “Settings” and click on “System.” You can find “Settings” by using the search bar on Windows or pressing the Windows key and “I” simultaneously.

Step 2. Click on “Storage” and ensure that “Storage Sense” is switched on. If not, just click the toggle button once until it turns blue.
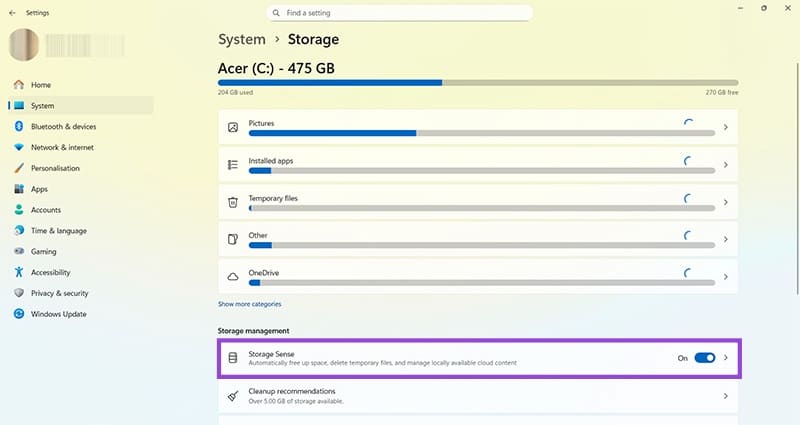
Step 3. Click the arrow next to the Storage Sense “On” button to access the service’s settings.
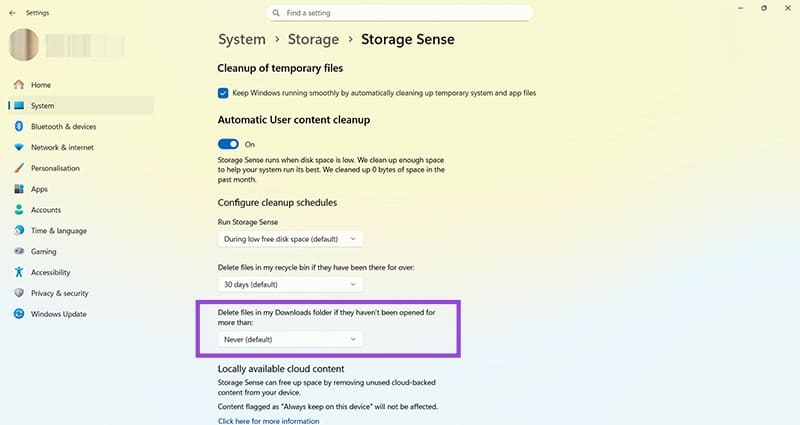
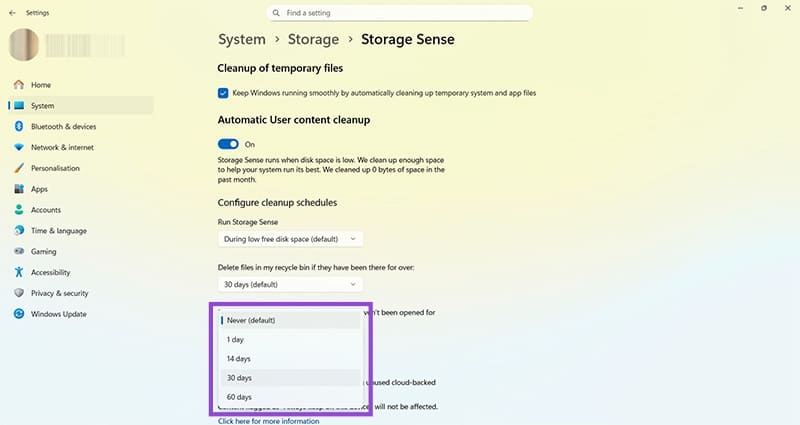
Step 4. Look for “Delete files in my Downloads folder if they haven’t been opened for more than:” and choose from 1, 14, 30, or 60 days. You can always revert this setting back to “Never” if needed.
Your computer will now automatically delete anything you haven’t used within your chosen time period, helping to stop downloads folder from getting too big.