


5 Steps To Troubleshoot Bad Computer Memory
Sit down, ladies and gents. Let me tell you a little story…
One day, you’re using your system, and you notice that things seem to be running a little more sluggish than you’re used to. After sitting in puzzlement for a few moments, you eventually work out that your physical memory usage is abnormally high, or at least much higher than it should be for what you’re using. Out of curiosity, you check your system information…only to find that you have about a quarter of the RAM installed that you should.
This happened to me. In my case, it was displaying 12 GB of RAM installed, and 4 GB available. Understandably, I was a touch bewildered. Thankfully, I’ve since fixed the issue. Here’s what you can do if you ever find yourself in my shoes.
Oh, and for the record, the OS I’m using is Windows 7 Enterprise.
Step One: Check Your OS
![]()
First things first, you’re going to want to double-check what OS you have installed. I’m assuming that most of you are here because you suddenly noticed your system slowing to a legendary degree, but it’s still worth noting that certain installations of Windows have limits on the amount of memory they’re capable of addressing. Check out this Microsoft help page to see if the issue might be OS-related. If it is, I’ve got bad news for you: The only way to really fix the problem is to upgrade.
Step Two: Check Your Software
Presumably, this is where most of you are going to start. It’s certainly where I began. See, I knew for a fact that my memory limitation wasn’t based on the version of Windows I was using. It was something else entirely, and it was just a matter of figuring out what.
Check and see whether or not your system configuration settings are borked. Go to the Start menu, and type msconfig into the Search bar. Run the program that pops up as an administrator, then go to the System Configuration Window. Make sure the Maximum Memory checkbox is unchecked, then click OK. Finally, restart.
If that didn’t work, move to step three.
Step Three: Fiddle With The BIOS
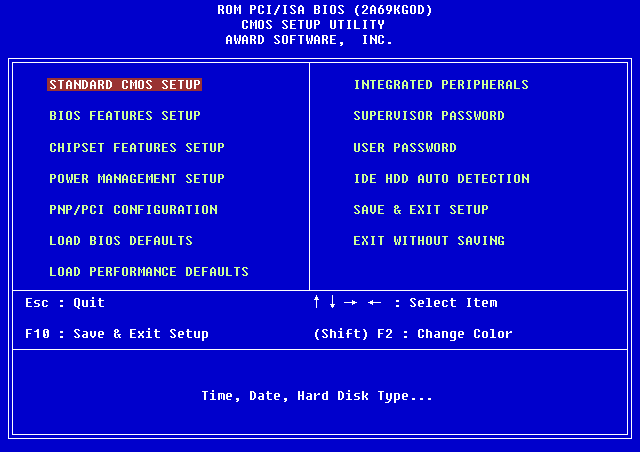
Note: don’t mess around in the BIOS if you’re not absolutely confident in what you’re doing. Setting up something wrong, and messing with voltage settings in particular can cause irreversible damage to your system.
That said, the first thing I’d do is check to see if there’s a BIOS update for your particular motherboard. If you want to know what you’re running without having to pop open your case, you can usually figure it out by accessing the System Information Utility (found under Accessories->System Tools). There, you should find displayed both the system model and system manufacturer, as well as your current BIOS version. From this point, it’s usually a simple matter of going to the manufacturer’s website and downloading an update. There’s a small chance this’ll fix the problem, but it’s by no means guaranteed.
If that doesn’t work, you’re going to want to boot up the BIOS and enable memory remapping. Unfortunately, I can’t really help you here. Every single motherboard is equipped with a slightly different BIOS, and as a result, what works for one likely won’t work for another. The best advice I can give you here is to look around online and see if there’s any documentation for your particular model floating around to help you along.
While you’re there, check the AGP Video Aperture size, as well. It’s a long shot, but changing that setting might free up some RAM.
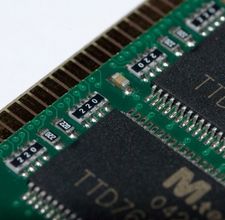
Step Four: Re-Seat

This is what ultimately solved my own problem. There’s a chance that your RAM is either damaged or improperly seated. Turn off and unplug your computer, ensuring that each and every component has stopped running before you do anything else. Make sure there’s no static electricity around you (a grounding bracelet is definitely your friend, in this case). Next, pop open your case, and remove the RAM. Memorize what order it’s installed in, as in most cases, this is extremely important; incorrectly re-installing your memory can lead to even more frustrating problems. Put each stick back in place, ensuring it’s properly plugged in before moving to the next one. You may hear a click as you press down; this is normal. Once that’s done, cross your fingers and re-start.
If the problem still doesn’t correct itself, the next step is to download and run Memtest86. You’re going to be testing to see if you have bad RAM. Pray that you don’t, because your next step won’t be an enjoyable one if you do.
Aside from inspecting them for physical damage (which isn’t always immediately evident), the only reliable way to do this is through trial-and-error. Remove all your sticks. Place a single stick back into its place, and start your system up. If it boots, the stick’s probably good. Rinse and repeat until you’ve tried every single piece of RAM. Note that your RAM slot/motherboard, too, could be the culprit. If the system won’t boot up with a particular piece of RAM, try inserting it into a different slot. Also note that some RAM sticks are installed in pairs, and might not work without their partner.
Step Five: Check The CPU
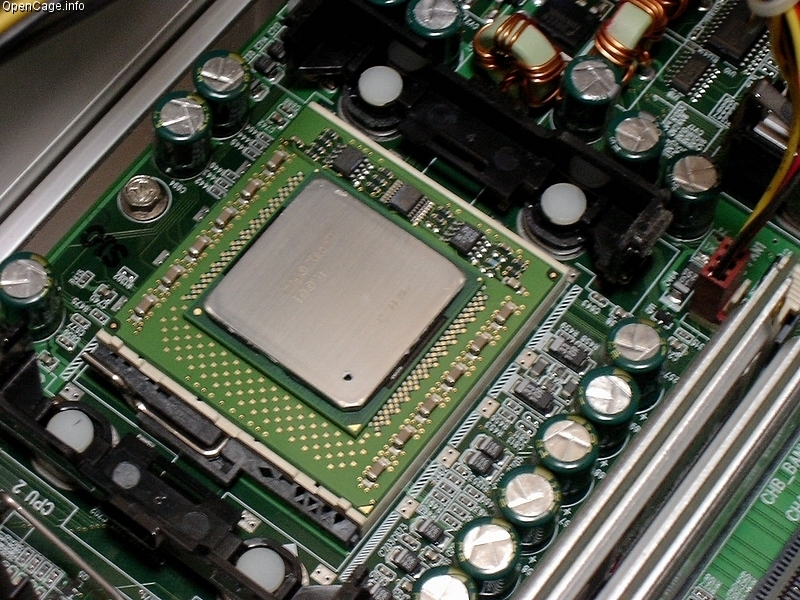
Last, but not least, after you’ve tried everything else, you’ll want to check your CPU. I left this one for last because, well…it’s going to be painful.
Believe it or not, there’s a chance (albeit a small one) that your RAM problems might not be related to your sticks, but to your processor. You’re going to have to re-seat your CPU. Make sure you’ve got some thermal paste ready, and when you do the re-seating, check the CPU for any bent or damaged pins. This guide will walk you through the basic process.


