


How to Take Windows 10 Screenshots with the Snipping Tool
There are several ways to take Windows 10 screenshots. Some, like the physical button combo for Windows tablets, are relatively new. Others, such as the famous Print Screen key, have been around for years. But many Windows users don’t know that the operating system includes a handy utility called the Snipping Tool, which allows for the creation and annotation of screenshots in a much more granular way. Here’s how it works.
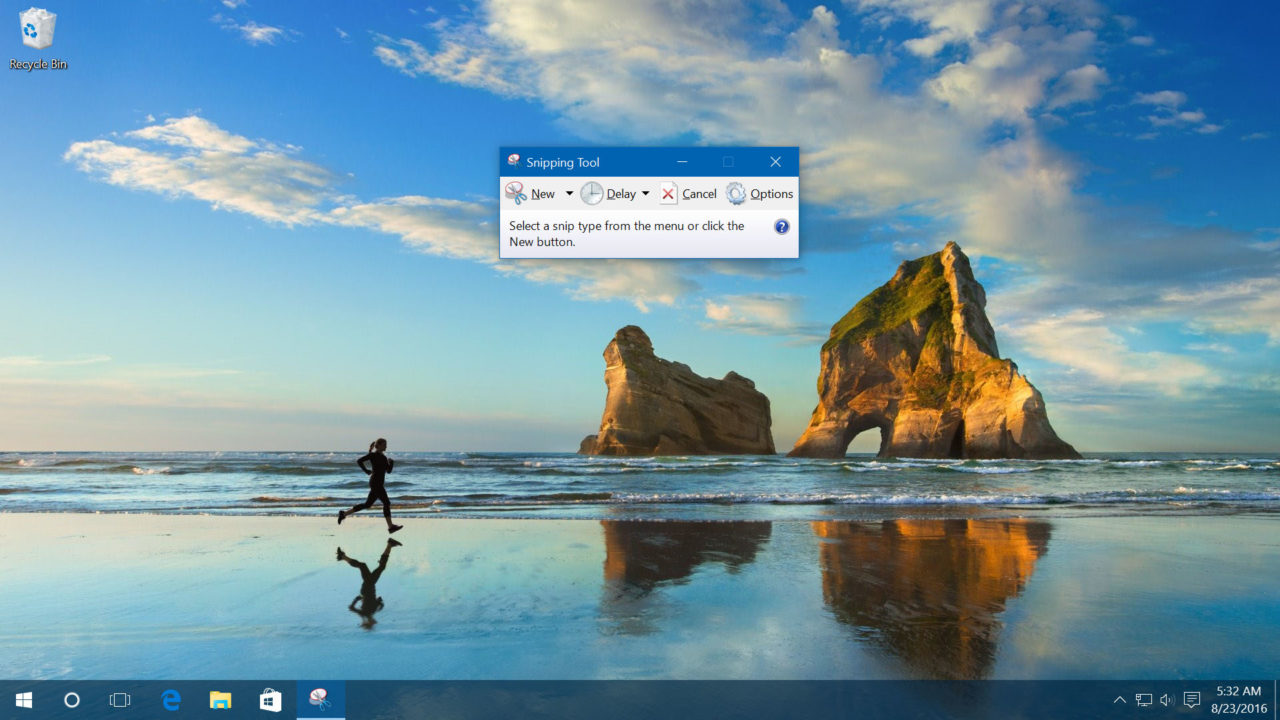
To launch the Snipping Tool in Windows 10, simply search for it via the Start Menu. The Snipping Tool is also available in earlier versions of Windows, and can be launched via Start Menu (Windows 7) or Start Screen (Windows 8) searches.

When launched, the Snipping Tool displays a small window with just four buttons. But don’t let its diminutive appearance fool you. There’s quite a bit of power hidden in those buttons.
To use the Snipping Tool, first decide exactly what you’d like to screenshot. Aforementioned methods for Windows 10 screenshots such as Print Screen only capture the entire screen. The Snipping Tool, on the other hand, lets you capture a specific window or a user-defined section of the screen as well.
As an example, let’s say that we want to capture a screenshot of the Windows 10 calculator app. We’ll first launch Calculator and resize or configure the app’s window as desired. Next, click the downward arrow next to New and select Window Snip.
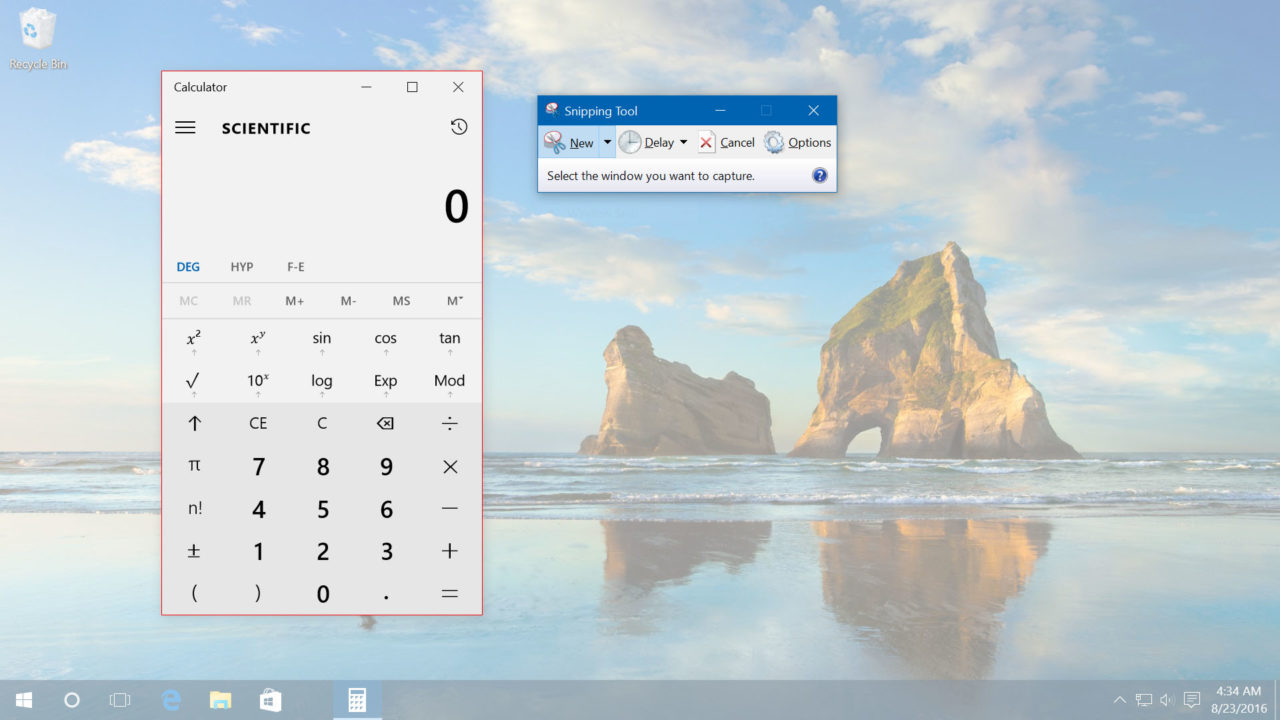
Hover the mouse cursor over the desired window. The screen will dim everything except for the application window underneath the mouse cursor, which will be outlined in red. When you’re ready, simply click once to grab a perfect screenshot of the chosen window. The resulting screenshot will appear inside the Snipping Tool window, beneath the buttons. If you need to capture more than just a window, you can select Free-Form or Rectangular Snip from the New Menu to capture a specific area of the screen, or Full-Screen Snip to grab the entire thing.
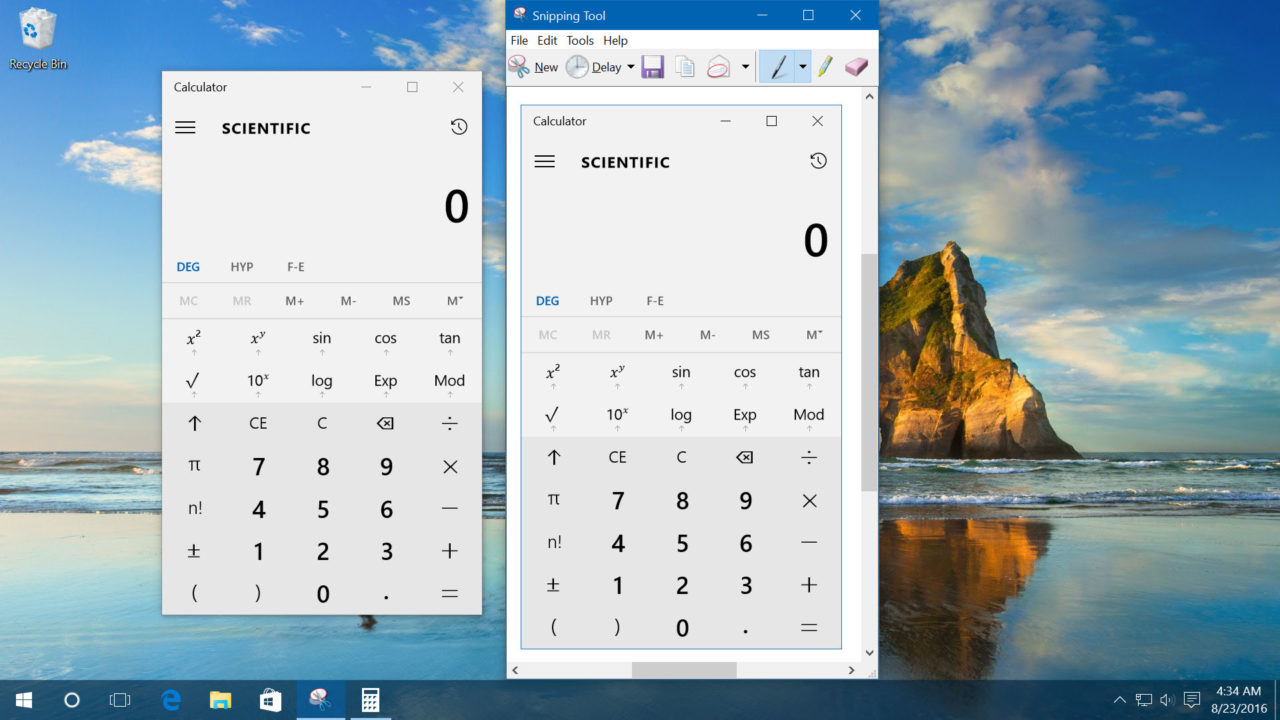
Once you have your screenshot captured, you can either save it to your PC as a GIF, JPEG, or PNG file (the floppy disk icon), copy the image to your clipboard (the two documents icon), or attach it to an email using your default mail application (the envelope and letter icon). Before taking any of these actions, however, you can also annotate the screenshot with a digital pen or highlighter by clicking on the corresponding icons. If you’re not happy with the screenshot and want to try again, just click New to discard your existing image and grab a new shot.
Capture the Perfect Moment
Sometimes you need to capture a screenshot of an app performing a certain action or responding to user input. In cases like these, you can use the Snipping Tool’s Delay feature to give yourself up to five seconds to prep the app or perform an action.

Just choose a delay time in seconds from the Delay drop-down menu and then choose one of the capture options under the New menu. The tool will silently count down the designated number of seconds and then freeze everything to take the type of screenshot you selected. There’s no audible or visible countdown during the delay, however, so you’ll need to act fast and keep count in your head.
Third Party Tools for Windows 10 Screenshots
The Snipping Tool certainly provides more flexibility than something like the Print Screen key, but third party screenshot utilities may be the answer if you need even more advanced capabilities. There are dozens of paid and free screenshot utilities on the market, but here are a few we’ve used and like:
WinSnap ($30): In addition to the standard screenshot options, WinSnap can capture multiple windows at once from different applications and includes more advanced editing tools, such as the ability to add drop shadows, reflections, and watermarks to captured images.
PicPick (Free): Offers an assortment of image editing tools to modify your screenshots, as well as some unique capture modes, such as capturing the entire output of a scrolling window.
Greenshot (Free): It includes all of the basic capture methods of the previous utilities, but Greenshot excels at sharing captured images, with built-in integration for most of the popular file sharing services and social networks.
As mentioned, there are many more tools of varying quality available, but those above are options with which we have personal experience. Most users will find the capabilities of the Snipping Tool to be more than adequate for their Windows 10 screenshot needs, but if you find yourself wanting more, the above utilities are a great place to start.


3 thoughts on “How to Take Windows 10 Screenshots with the Snipping Tool”
Step 2: configure hotkeys or use the defaults
Step 3: never use the snipping tool ever again until you don’t want babies anymore.