


How To Convert a Song into a Karaoke Track File
Want to convert a song into a karaoke track? Have some music you would like to sing to rather than listening to it? As usual, be careful when using commercial music to create a karaoke track. There are all sorts of licensing and copyright issues you may come across if you modify a copyrighted song. If you’re into karaoke, you can buy CDs, DVDs, or digital media that are made explicitly for karaoke fun. The vocals have been excluded, and subtitles have replaced lyrics so you can play them on any karaoke machine. Fortunately, you can also make your karaoke songs for free with nothing more than a couple of audio programs, a video program, and a little effort.
Before we “jump in” to the subject, you need to understand a few important “notes.”
- Removing vocals from a song is very challenging and requires patience, especially since all sounds get meshed together into one stereo track.
- Trial and error is a must. You won’t be able to make just a couple of changes and have a great-sounding song without vocals.
- For better quality, you’ll need a couple of music apps to craft your song.
- Paid karaoke conversion software is always better than free software, for the most part. You get more control and more features for better results.
- You will need various plugins, which may or may not be included in the software by default.
- Results and quality will be affected by each song’s compression levels and file extension.
- You will NEVER have a perfectly sounding song without lyrics. The best you’ll get with voice removal software or plugins is reduced vocal levels that are also drowned out (not completely) by other sounds.
- The results will never sound as clean and clear as the original song with the lyrics, but it can come close.
Online Vocal Remover Website
If you try all the below suggestions and find that they did not work for your particular songs, give PhonicMind a try. The online vocal remover uses artificial intelligence and does the job nicely! PhonicMind is NOT free, but it is not expensive either. They offer cheap packages for a specified number of songs. All you have to do is upload the track, and it does the rest. You get to preview every song before using your credits, and you can also mute and unmute the vocals, bass, drums, and other sounds during the preview. No, this is not a promotional ad. We just thought it was so great that we wanted to share it with you.
How Do You Completely Remove Vocals from a Song?
To get started, you need music apps that include options like vocal removal, low-pass filters, and high-pass filters. You cannot remove vocals entirely, but you can reduce them fairly well. Vocal removers try to eliminate the frequencies that produce the voice, but you end up with other frequency loss that makes the song low-end or garbled. Second, low-pass filters allow lower frequencies to pass while it blocks higher ones. High-pass filters let the higher frequencies pass through without lower ones.
Why do you need low-pass and high-pass filters? If you remember from above, your vocal remover takes away many other frequencies too. The low-pass and high-pass filters allow you to bring some of them back by mixing them all into one track.
You can also use an amplifying plugin (for low-pass and high-pass filtered tracks) to boost the lower and higher frequencies to drown out the vocals better and boost the bass and treble to improve the results. However, you won’t get all low and high frequencies unless you want the remnant vocals to boost with it.
Software for Removing Vocals
Audacity by The Audacity Team
Audacity is a free, open-source program with compatibility for almost all operating systems, from Windows and Mac to Linux and BSD. The program was developed with a focus on Linux, but it has evolved into offering compatibility with other operating systems. Audacity has been around for years. It’s a popular option for removing vocals for free and provides many music editing and creation tools. Both installation and source code files are available. You COULD just run “solo” with this program, but it may be easier to integrate another music app to eliminate those vocals better.
Eliminate Vocals Using Audacity for Karaoke
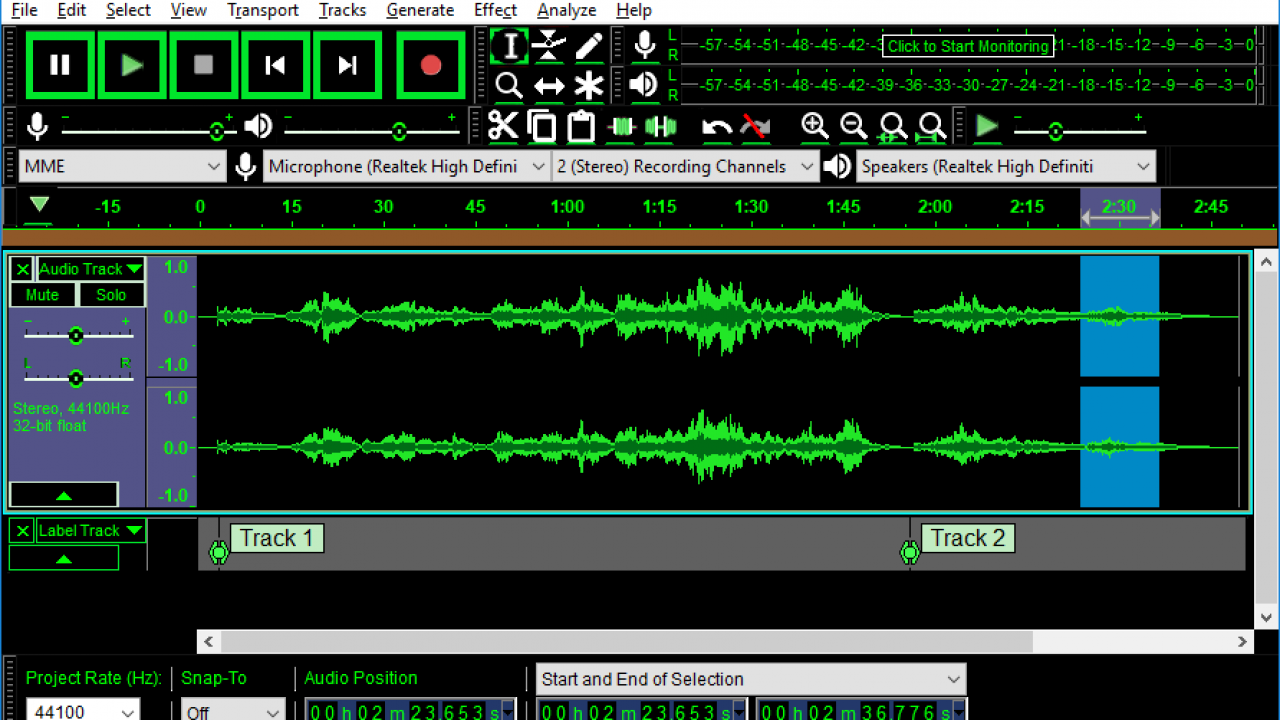
- Open Audacity, and you will be presented with the main screen.
- Select the song you want to convert and drag it into that screen or open it from the dropdown File menu.
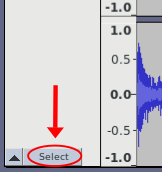
- Copy the track: Hit the Select box for the loaded track, click the Edit tab at the top, and then select Copy. You can also select the track and just press Ctrl-C in Windows.

- Click below the track in the blank area of Audacity and select Edit -> Paste from the tab menu to make a duplicate copy, or you can press Ctrl-V in Windows.
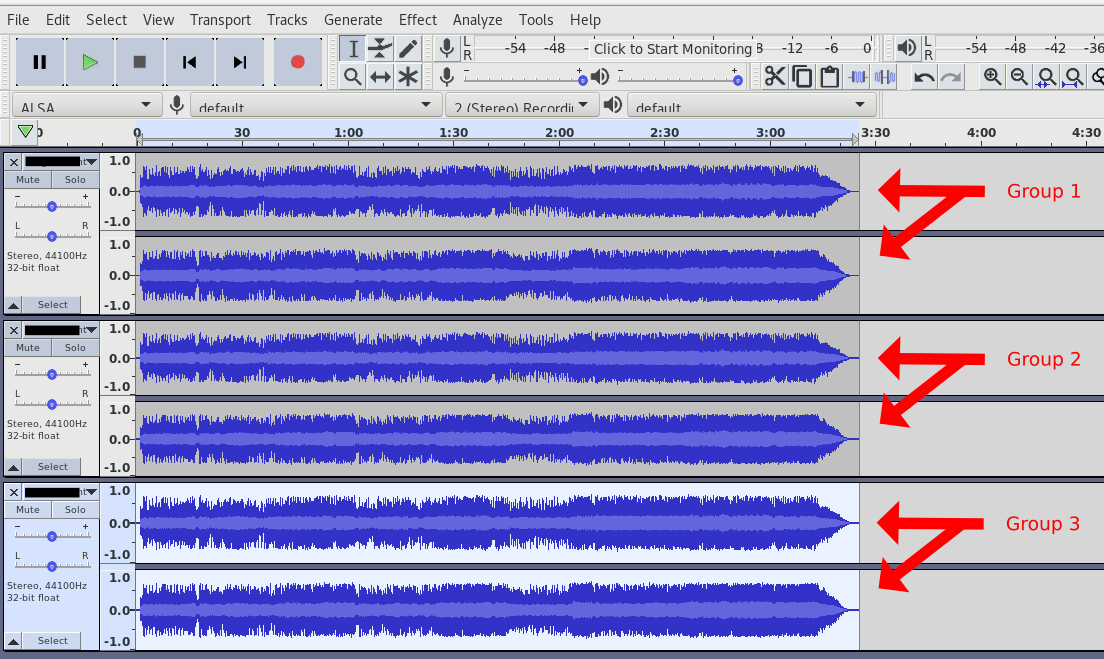
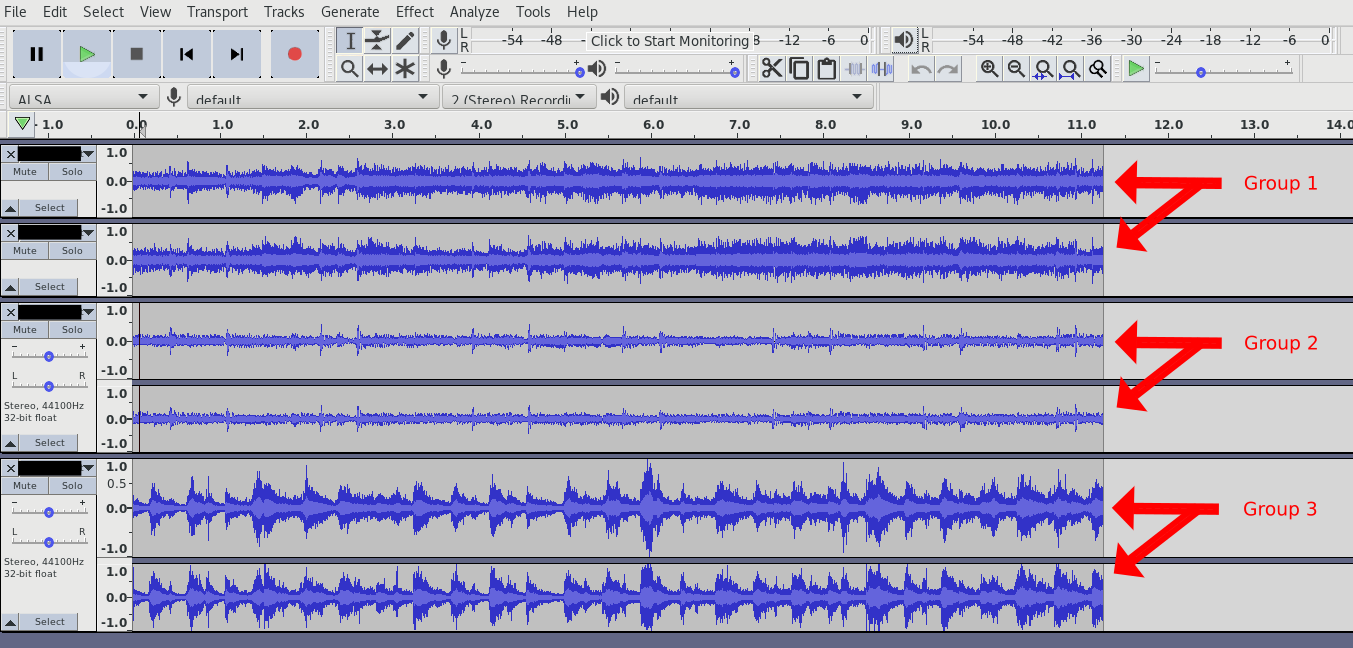
- Repeat steps 3-4 so that you have 3 tracks (Groups) in total.

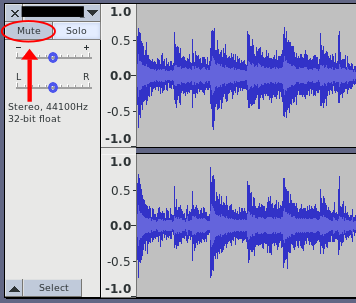
- On the bottom two tracks (Groups 2 and 3), click the Mute box so they won’t be heard when playing the split track in Group 1).

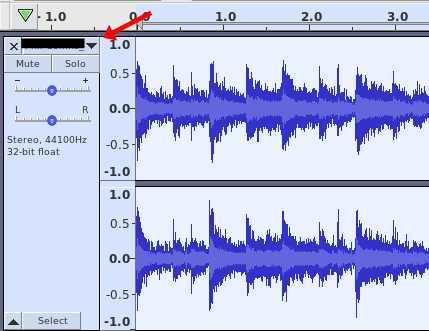
- On the first track (at the top), select the small black down arrow to the left of the waveform screen.

- Select Split Stereo to Mono. Monaural sound is required so that both tracks are identical for the inversion process (cancels out the vocals).
- Choose one of the split tracks by hitting the Select box. The other one should turn light gray, and the selected track will have a colored border. The waveform is the blue audio display in the center.
- Select Effect -> Invert from the top menu. The selected track will get inverted to drown out the vocals in both tracks of group 1.
The inversion process is usually where most web articles stop and say you’re done, but that leaves garbled results most of the time. If you hit the Play button with only “Group 1” tracks unmuted, you’ll hear how it sounds before you decide to continue the enhancement process. At this point, the second and third copied tracks (Group 2 and 3) become useful.
- Mute group 1 tracks (the two monaural tracks) and Group 3 tracks (last group).
- Select Group 2 using the Select box.
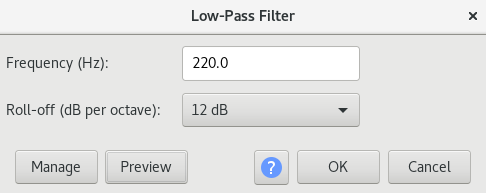
- Select Effect -> Low-Pass Filter from the top menu.

- Hit the Preview button to listen. You want the bass to sound immersive while the vocals are “buried,” or minimal at the least.
- Adjust the frequency level up or down to make adjustments until you hear good bass with less voice. You can also adjust the roll-off (dB per octave) to see if it helps.
- Once you like what you hear (low-end only), click the OK button to save it.
- Preview the results: Ensure that Group 3 is muted, and Groups 1-2 are unmuted. Press the Play icon to listen. You can compare results by muting and unmuting Group 2. You’ll see how Group 2 enhances the overall quality.
At this point, you may or may not be finished. Group 3 will only be used if the High-Pass Filter can make the song sound good with minimal voice output, which can be tricky.
- Ensure that Groups 1 and 2 are muted. You can also click Solo on Group 3 to do the same thing.
- Select Group 3.
- Unmute Group 3, if applicable.
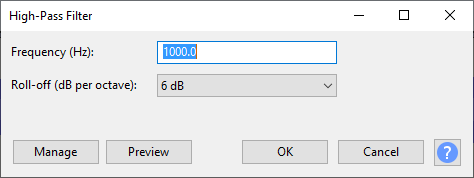
- Click Effect -> High-Pass Filter from the top menu.

- Adjust the frequency (Hz) level up or down to make changes until you hear good treble with less voice. The preview will probably be much quieter, which is adjustable in a future step. You can also raise or lower the roll-off (dB per octave) level to see if it improves the output. When you change the roll-off, you may need to readjust the frequency. So, be sure to remember your previous setting.
- Once you like what you hear (high-end only), click the OK button to save it.
- Preview the results: Ensure that Groups 1-2 are unmuted (Solo button on Group 3 can be used too to turn solo on/off) so that you can hear the full spectrum from all three groups. Press the Play icon to listen. You can compare results by muting and unmuting Group 3. You’ll see how Group 3 enhances the overall quality.
- If Group 3 (the high frequencies) are not helping much, try using the Amplify plugin to boost it, which we had to do. Ensure that Allow Clipping is checked, or you will not be able to preview the edit.
Now that you have a final mix with minimal vocals, you can save the MP3 as one track.
- Select File -> Export -> Export as MP3.
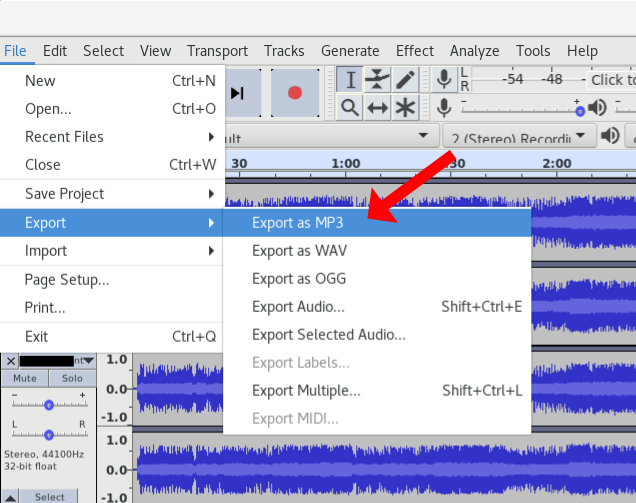
- Select File -> Export -> Export as MP3.
- Label your new karaoke file.
- Test it out on your favorite mp3 player.
Your Audacity track is now complete. Let’s move on to option #2.
WavePad by NCH software
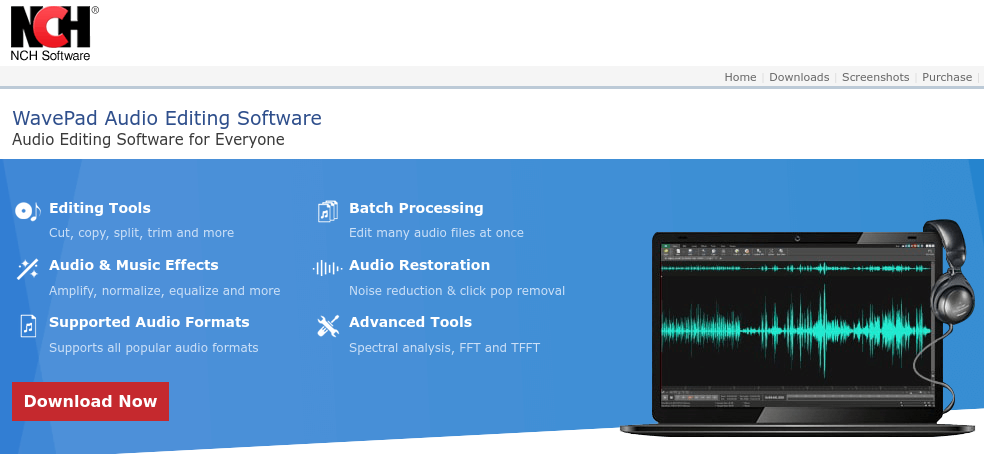
WavePad by NCH Software can be used as an alternative or in addition to Audacity. Scroll down the page to look for the free, home-use only download if you don’t want premium features. Compared to Audacity, it seemed like this program (free version) provided better results with vocal removal and was easier to perform. Your mileage may vary. WavePad is designed for Windows, but it can be installed in Linux through Wine or associated Wine programs. The application features all the plugins you need and is ready to go. It doesn’t have a built-in phase inverter like Audacity, but it uses a different technique to eliminate vocals from songs.
- Open your chosen mp3 file.
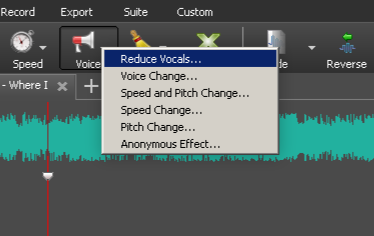
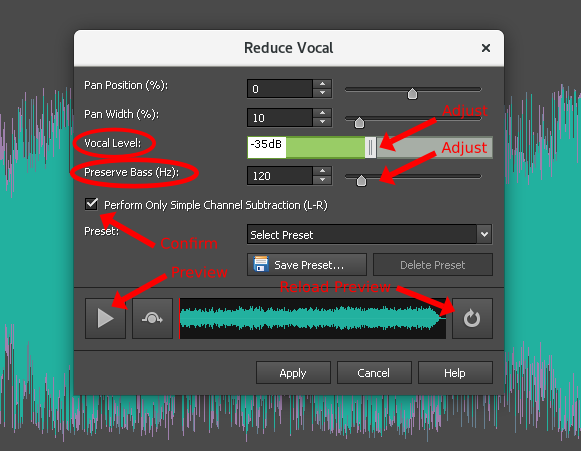
- In the featured buttons underneath the Menu Options, select Voice -> Reduce Vocals.

- Within the “Reduce Vocal” window, ensure that the box is checked next to “Perform Only Simple Channel Subtraction (L-R),” as shown below.
- Click the Play icon to hear a preview.
- Adjust “Vocal Level” and “Preserve Bass (Hz)” until you get a minimal voice level. You can continue to make changes, then click the Reload Preview button. You may have to hit the Stop icon first, which is also the Play icon.
- When you are satisfied with the results, select Apply.

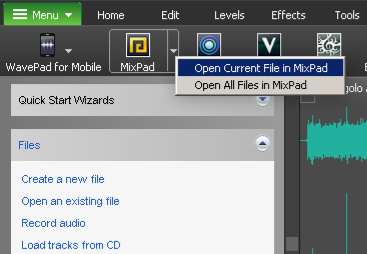
- In the featured buttons underneath the Menu Options, select MixPad -> Open Current File in MixPad.

- MixPad will open and place the newly edited track at the top.
- Return to WavePad and repeat the steps above to create a high-filtered track and low-filtered track using associated plugins. You’ll need to delete the first file or let the new file replace it. The app doesn’t like opening the same file in separate tabs. That’s also why you need MixPad to mesh all three tracks (voice reduced track, low-filtered track, and high-filtered track).
- Once you have all three tracks in MixPad, you can tweak them some more and even boost the sound level of the low-filtered and high-filtered tracks to drown the “almost voiceless” track further. It is a good idea to SAVE first before playing around.
Overall, Wavepad is another audio editor that is packed with many useful tools, just like Audacity. The GUI looks great, and functionality is good too. You can always create the vocal-reduction track in WavePad and let Audacity handle the other filtered tracks. You decide, and as previously mentioned at the beginning of this article, it takes patience, trial and error, and the acceptance that it won’t be perfect.
Wavosaur by The Wavosaur Team
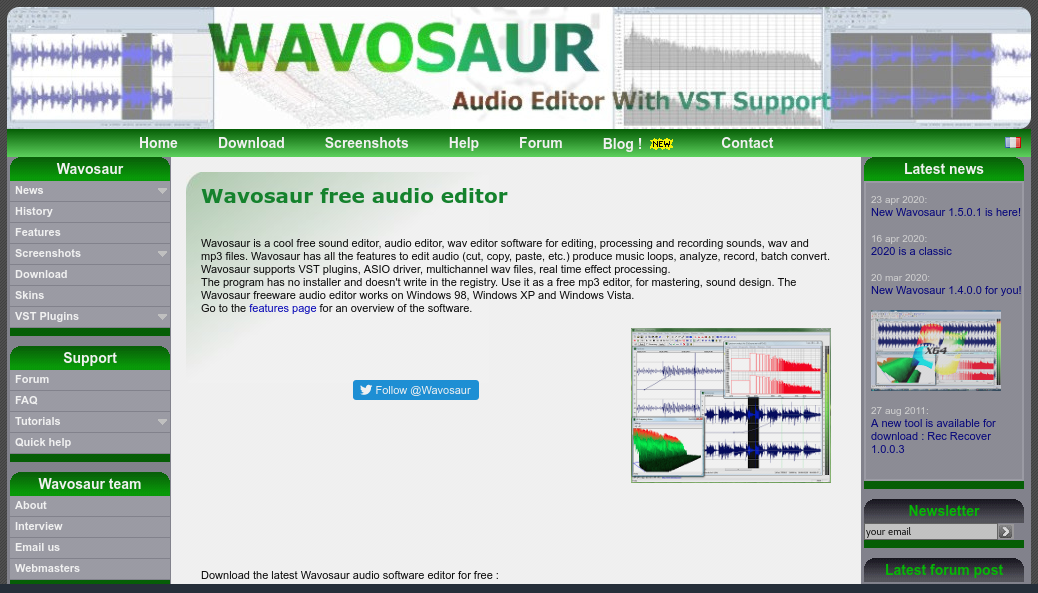
The last suggestion on this list of “vocal-removing” programs is Wavosaur, which offers simplistic, one-click vocal reduction, but it seemed like it didn’t hit the mark as well as Audacity or WavePad. You may want to try this first before “diving in” to the other options. The program may do the job, depending on the song you choose.
Adding Lyrics to Your Karaoke Track
Now that you have removed vocals from a song or even ten or fifty (LOL), you need lyrics to go with that “combo meal.” If you have iTunes or a similar premium audio app, you may have an option called MP3 tagging that will add the lyrics. Some mobile players also display lyrics. It’s not as common on computers. You can then transfer the file to any device for playback. Third-party players may require plugins to show the lyrics. You can find LRC (.lrc) lyrics online, as well as SRT (.srt) captions that some players will read. If you have a player that accepts LRC, LRC Generator is the easiest online, real-time LRC creator you can use. Megalobiz is a website that offers custom LRC creations and also provides premade LRC lyrics from other users.
If you want to use lyrics manually, you can navigate to MetroLyrics, AZLyrics, or any other lyrics website. Find your song and download the file for it. You can then print the lyrics or have them stationary on your screen. They won’t be synchronized, but they can be useful.
For using your songs on media players, you can create your own karaoke video using the voiceless tracks you created. In any video maker, add your audio track for sound. Next, you would export the project as an MP4 or other file format, depending on your video needs. Then, you would open the player and use a caption plugin to display the lyrics over the video. You may need to create an SRT file for the captions. VLC is one source that accepts caption plugins for video playback.
Lastly, you can just burn a CD-G disc (requires CD-G capable burner) that will display the lyrics and play the audio in a karaoke machine. Regular CD players can still play the audio on a CD-G disc too! With that cool feature in mind, enjoy “Road-Trip Karaoke” fun, but be sure to have earbuds and pain relievers on hand!


One thought on “How To Convert a Song into a Karaoke Track File”