How To Downgrade Windows 10
Not a fan of Windows 10? Recent updates giving you trouble? Prefer the look, feel and privacy of Windows 8? While there are over a billion Windows 10 users right now, not everyone is a fan. In fact, I have been asked a couple of times this year how to downgrade Windows 10. Here’s how.
I like Windows 10. It is fluid, stable and works well. But there are compromises, with privacy being first among them. While there are third party software tools that can tame the spying, it isn’t enough for everyone. Add to that incompatibilities and problems that can be introduced by a particular Windows update and you have a couple of very good reasons why you might want to downgrade Windows 10.
Downgrade Windows 10 to a previous version
I am an advocate of letting Windows update itself automatically, but as we have seen over the past year, that doesn’t always go too well. If you have just performed an update and it is causing problems, you can roll them back so you regain the stability you once had.
First you will need to boot into safe mode. This ensures the cleanest rollback without interfering with anything else.
- Click the Windows Start button.
- Hold Shift and select Restart.
- Allow your computer to reboot into safe mode.
It is always a good idea to boot into safe mode if you are making any significant system changes.
Then:
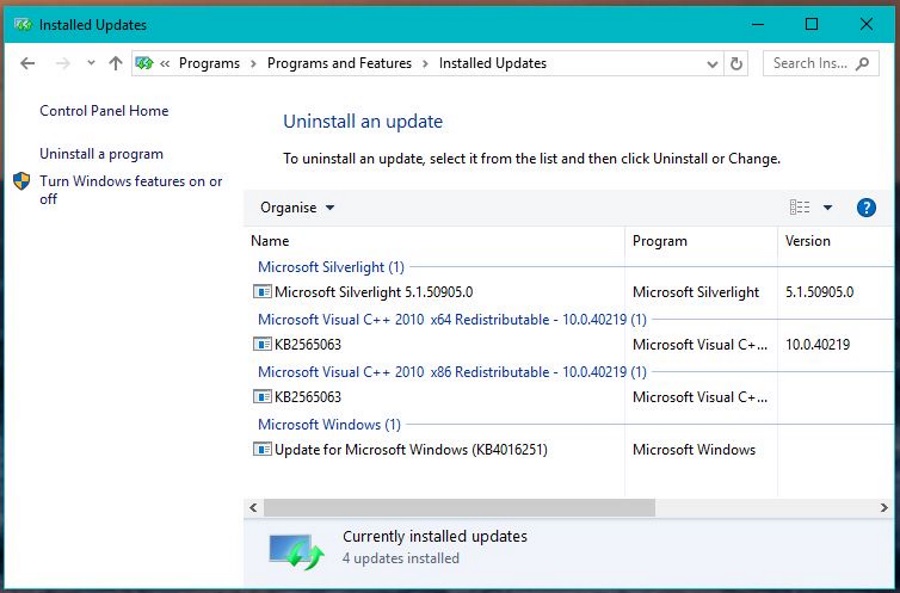
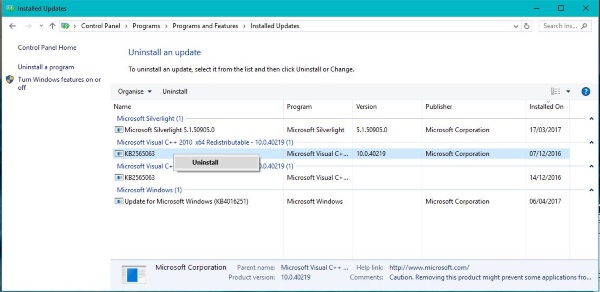
- Open Control Panel and select Uninstall a program.
- Select View installed updates on the left. This will show you all the recent Windows Updates that can be removed.
- Scroll to the Installed On section of the window and isolate the update that began causing issues.
- Highlight the update, right click and select Uninstall.
- Retest and repeat if necessary.
Ideally, you would uninstall a single update and retest your computer to see if the problem is still there. It takes time, but it is more effective than just uninstalling every update from a particular date.
If you uninstall one update and the problem persists, just repeat this task until your system is stable again. It helps to make a note of what update you remove, just write down the KB code (stands for Windows KnowledgeBase). Then, when you update Windows, deselect that update and install the others.
Downgrade Windows 10 to Windows 8
Windows 8 did have a lot of faults but it also didn’t play quite so fast and loose with your privacy. While the 30 day rollback period has long gone, you can still downgrade Windows 10 to Windows 8 if you have a legitimate installation disk.
The upside to this is that Windows 8 is still supported for now. The downside is that the process requires a full clean install so you will lose any data you don’t save from your computer. So let us first save everything so you don’t lose it.
- Back up everything from Documents, Pictures, Videos, Music and Downloads.
- Copy anything else installed or saved onto a different drive.
- Put your Windows 8 installation DVD into the optical drive of your computer. Use USB if you downloaded an ISO.
- Remove all peripherals except keyboard and mouse.
- Reboot your computer with the installation media inserted.
- Press a key when prompted to boot from that media.
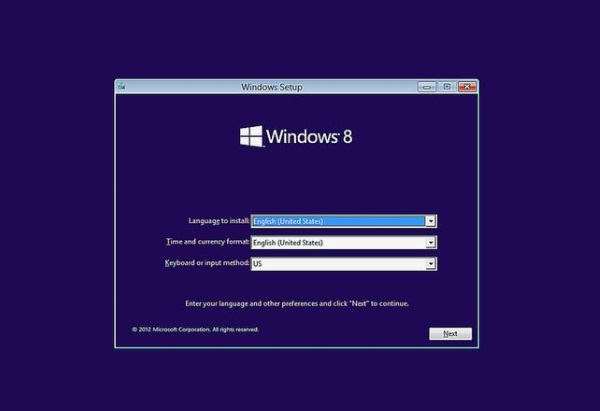
- Select language, time zone and keyboard language then hit Next.
- Select Install now.
- Enter your Windows 8 product key when prompted and hit Next.
- Select Custom Installation when prompted.
- Select the disk drive to install Windows 8 onto and select Next.
- Wait for the installation wizard to complete.
The installation process may take a while depending on how fast your computer is. The wizard guides you through the installation process and will reboot your computer a couple of times to install the processes necessary to move on to the next part. There is a lot of waiting around but Windows should tell you what’s going on throughout.
Once completed, you should be presented with the setup screen where you select colors, networks, express settings and other essential elements of the install. Then you will be asked to sign in with your Microsoft account. You can use it or set up a local account, it is entirely up to you.
Once SkyDrive has been set up, which is now OneDrive and Windows 8 finalizes settings, you should be presented with a fully working Windows 8 desktop. Don’t forget to install a software firewall, antivirus and malware scanner before you do anything else!