



Cannot Insert a Picture in Microsoft Office – 8 Solutions

Clicking Insert, choosing a picture, and having absolutely nothing happen is one of the more baffling Office problems, mostly because there’s no error message pointing you toward a cause. If you cannot insert a picture in Word document or another Office program, the exact symptom you’re seeing usually points to a specific fix.
Fix 1 – Enable Editing (Turn Off Protected View) if You Cannot Insert Picture in Word Document
Files downloaded from the internet or opened as email attachments open in Protected View by default, which blocks editing, including inserting images.
Step 1. Look for a yellow bar at the top of the document that reads “Protected View” with an “Enable Editing” button.
Step 2. Click “Enable Editing,” then try inserting the picture again.
Fix 2 – Check Your Privacy Settings
If you’re choosing the image, “This Device” works fine, but “Stock Images” or “Online Pictures” are grayed out or blocked, you’ll need to modify settings.
Step 1. Click “File” and go to “Options,” then select “Trust Center” and “Trust Center Settings.” Go to “Privacy Settings” (which might also be available in Options).
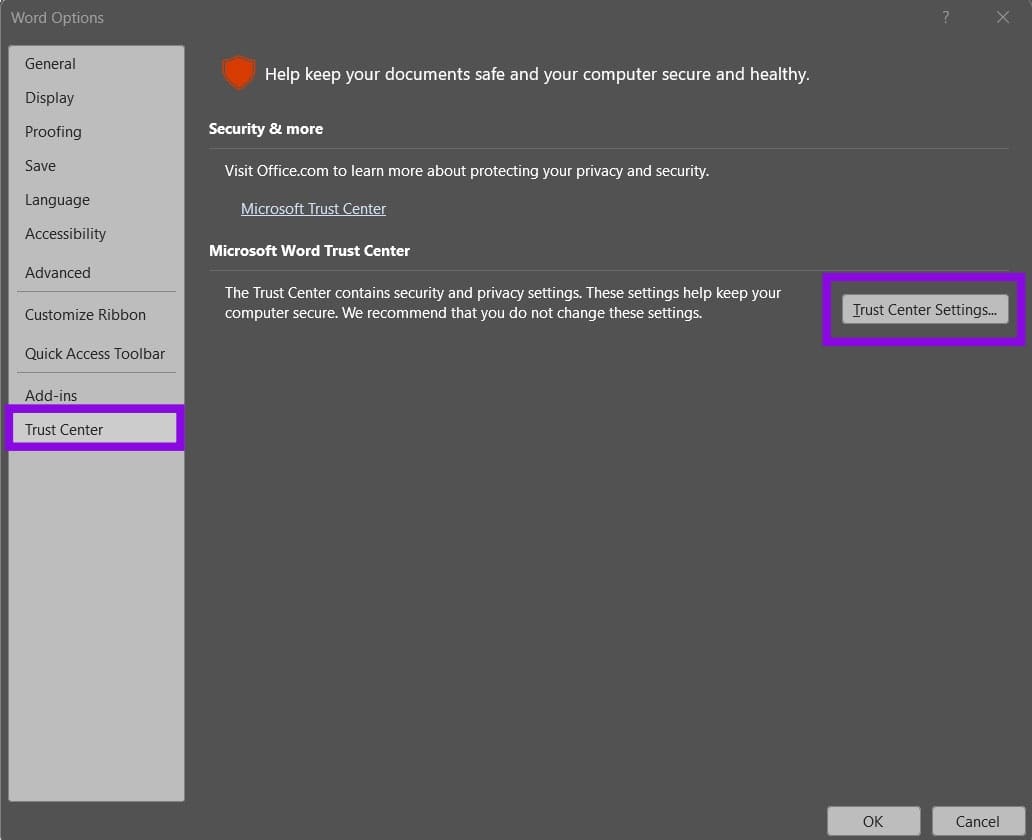
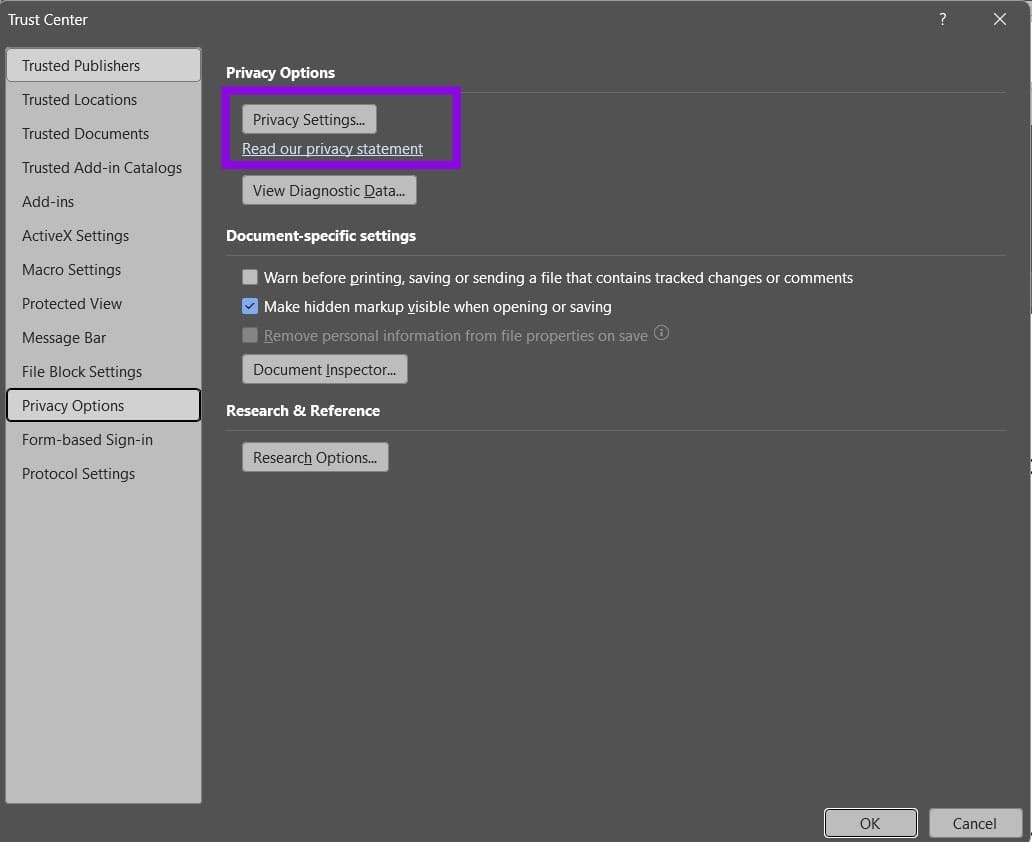
Step 2. Under “All connected experiences,” check “Turn on all connected experiences.”
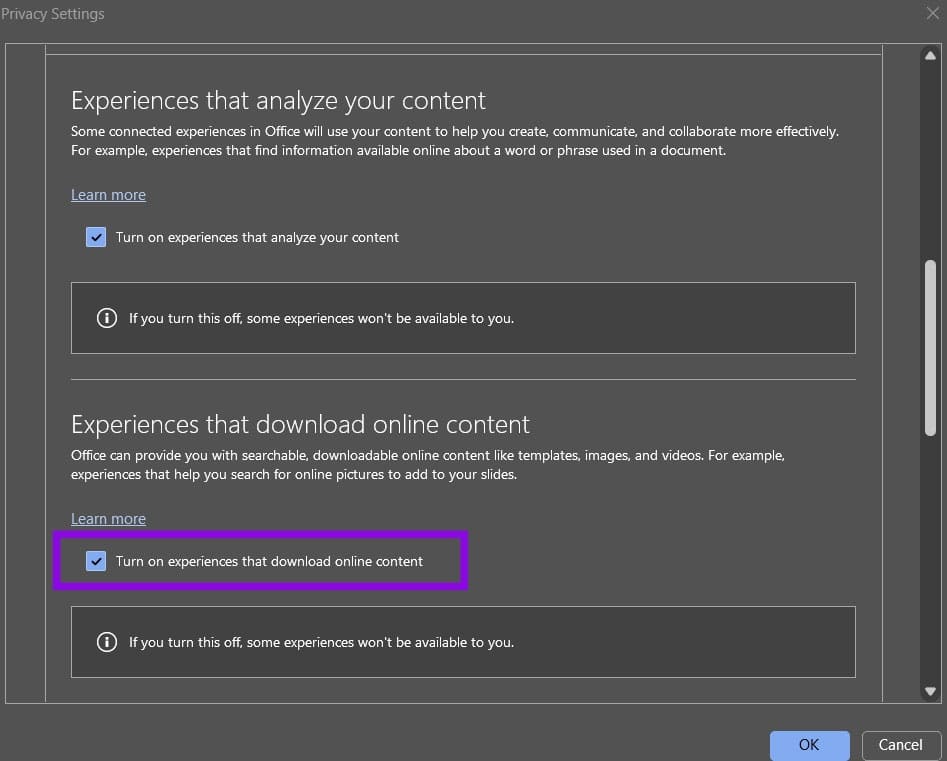
Step 3. Under “Experiences that download online content,” check “Turn on experiences that download online content.”
Step 4. Click “OK” to exit all dialog windows and restart Word.
Fix 3 – Insert From the Menu Instead of Pasting
If pasting a screenshot or copied image specifically doesn’t work, the clipboard might not be working.
Step 1. Save the image to a file first if you haven’t already, rather than relying on the clipboard.
Step 2. Go to “Insert,” then to “Pictures” and select “This Device,” then browse to the file directly.
Step 3. If you specifically need to paste, press “Win + V” to open Clipboard History, clear it, then copy the image again.
Fix 4 – Switch to Print Layout View
In Word specifically, “Draft” or “Outline view” might not display inserted images.
Step 1. Go to the “View” tab.
Step 2. Select “Print Layout.”
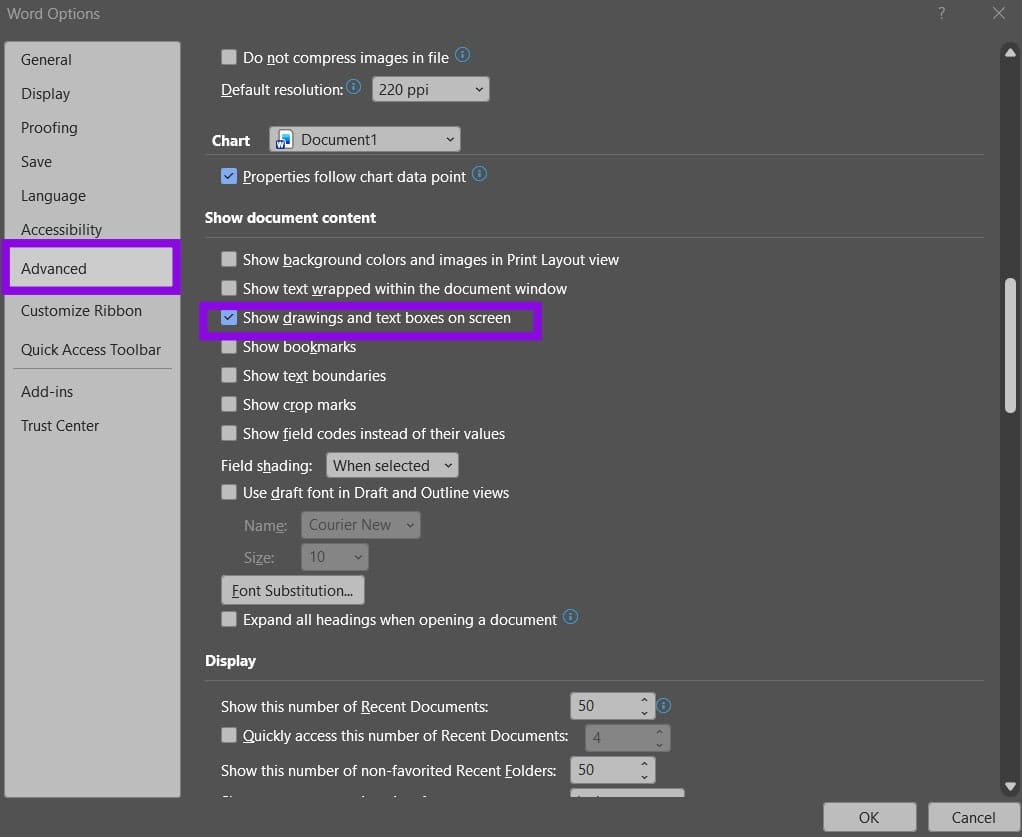
It’s also worth going to “Show document content” in Advanced Options and confirming “Show drawings and text boxes on screen” is checked.
Fix 5 – Convert an Older File or Image Format
If you’re working in an old document format, you might have issues trying to get some newer functions and files to work.
If the title bar shows “Compatibility Mode,” go to “File,” then to “Info,” and select “Convert” and choose a format.
For an unsupported image,stick to JPEG or PNG. For a WEBP or HEIC file, open it in Paint or Photos and save a copy as PNG or JPEG before inserting it.
Fix 6 – Disable Add-ins
Third-party add-ins can negatively affect the Pictures menu.
Step 1. Close the Office app, hold “Ctrl,” and reopen it. Click “Yes” when asked about Safe Mode.
Step 2. Try inserting a picture. If it works in Safe Mode, an add-in is the cause.
Step 3. Go to “File,” then to “Options” and “Add-ins,” then set the “Manage” dropdown to “COM Add-ins,” and click “Go.”
Step 4. Uncheck all add-ins, click “OK,” and restart the program. Re-enable add-ins one at a time to find the one causing the conflict.
Fix 7 – Restore the Default Template
A corrupted Normal.dotm template file could be causing you to get an error where you cannot insert image in Word document.
Step 1. Close Word completely.
Step 2. Press “Win + R,” paste in “%AppData%\Microsoft\Templates,” and hit “Enter.”
Step 3. Rename or delete Normal.dotm.
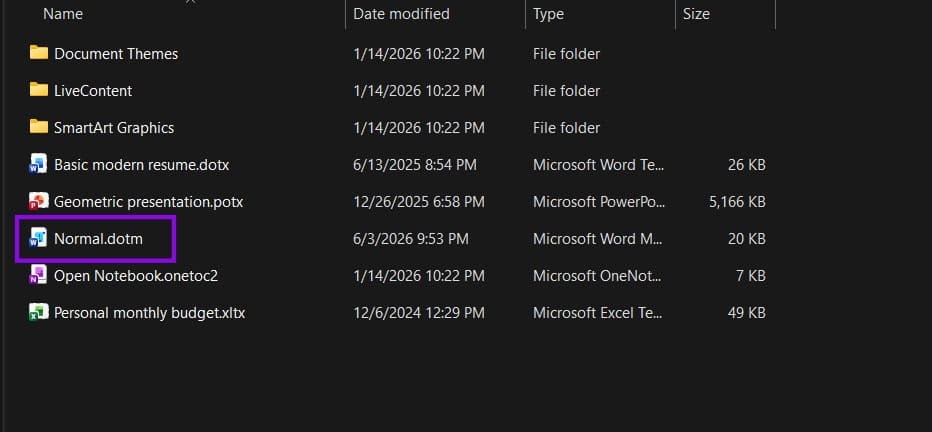
Step 4. Reopen Word. A fresh, default template file is created automatically, which should work.
Fix 8 – Update or Repair Office
If nothing above resolves it, the Office installation itself is the most likely remaining cause.
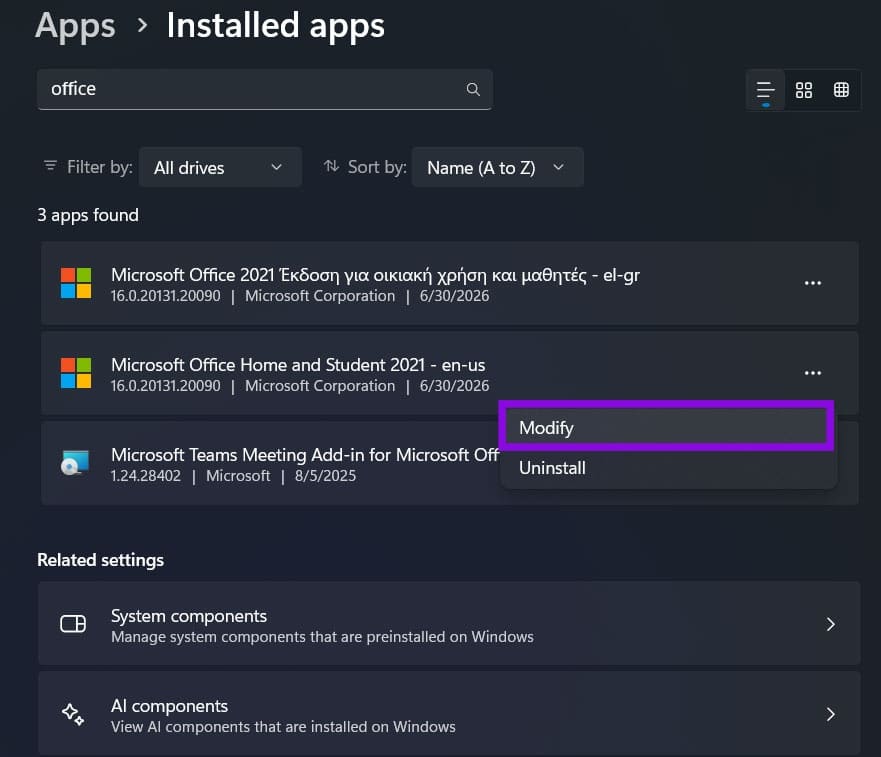
Step 1. Go to “Settings” and choose “Apps.”
Step 2. Go to “Installed apps.”
Step 3. Find Office on the list, click on the three-dots icon, and choose “Modify.” Use the “online repair” option first.
10 Settings That Will Boost Your Xbox Cloud Gaming
Read Next