How to Turn an Old Windows 10 Laptop Into a Chromebook
That old laptop you have stowed away might not be as good as it once was and may take longer to start than it takes you to make a cup of coffee, but that doesn’t mean it’s useless. Windows 10 is a demanding, resource-intensive operating system, but your old laptop can run like new with a lightweight operating system like ChromeOS Flex.
In this article, we’ll show you how to turn your Windows 10 laptop into a Chromebook.
Benefits of Chrome OS
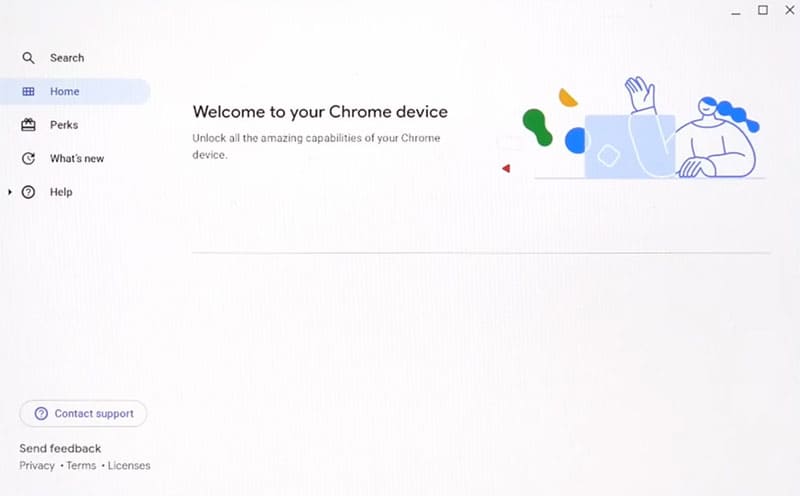
So, why ditch the Windows 10 operating system on your old laptop for a Chromebook OS? The biggest factor is speed. ChromeOS Flex is vastly simplified compared to its counterpart and requires less computing power, too, since it uses web-based apps. You still get the benefits of automatic updates and the Google ecosystem, but you’ll have your startup and operational speed boosted, a big problem with older machines with aging hardware.
How to Turn Your Old Laptop Into a Chromebook
To install ChromeOS Flex onto your old laptop, you’ll have to completely wipe it and start fresh. Before you do that, though, there are a few other requirements to check:
- Your laptop can’t be older than a 2010 model.
- Back up any data you don’t want to lose. Your device will be wiped.
- You’ll need an Intel or AMD x86-64-bit CPU.
- You’ll also need 16GB of internal storage and 4GB of RAM.
- You will need a USB drive to boot the OS from.
As you can see, these specs are comparatively low, and most computers built after 2010 will meet them. Now, let’s look at how to install it.
Make a Bootable USB
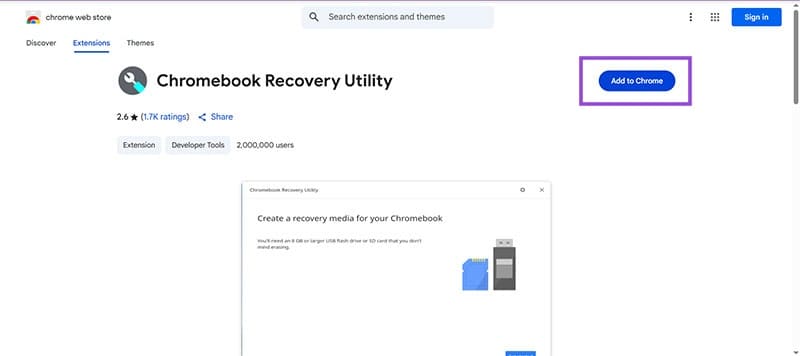
To load the ChromeOS Flex files onto your USB to create a bootable drive, you must first prepare the USB. You can do this via the extension Chromebook Recovery Utility. Here’s what to do:
Step 1. Head to the Chrome Web Store in Google Chrome and type “Recovery Utility.” Download the file.
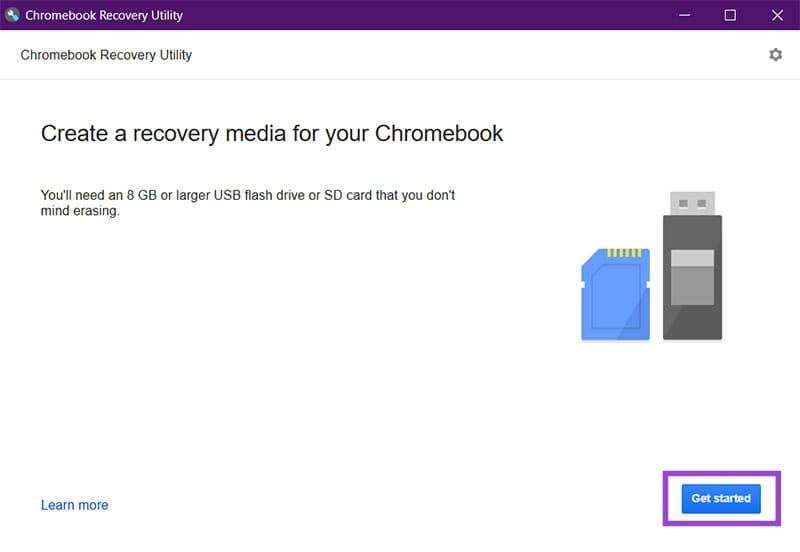
Step 2. Once the utility has been added, select it from the Extensions icon (puzzle piece). A new window will open.
Step 3. In the “Identify your Chromebook” section, ensure the model is “Google ChromeOS Flex.”
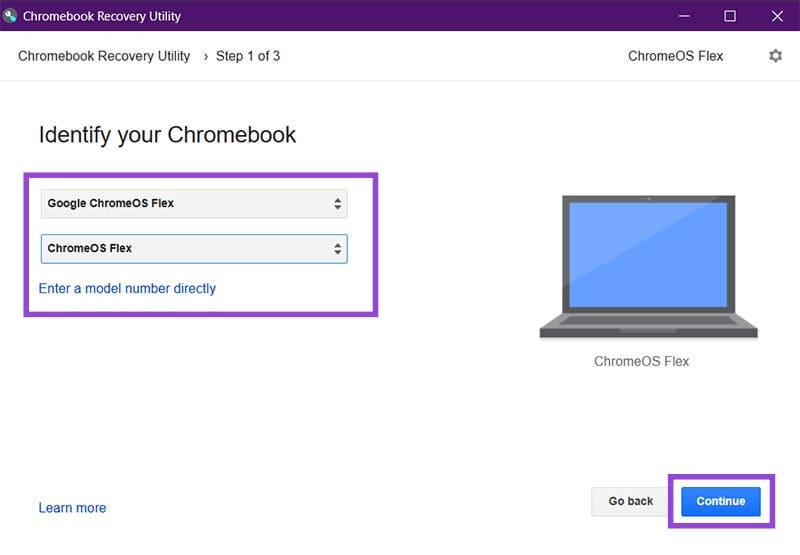
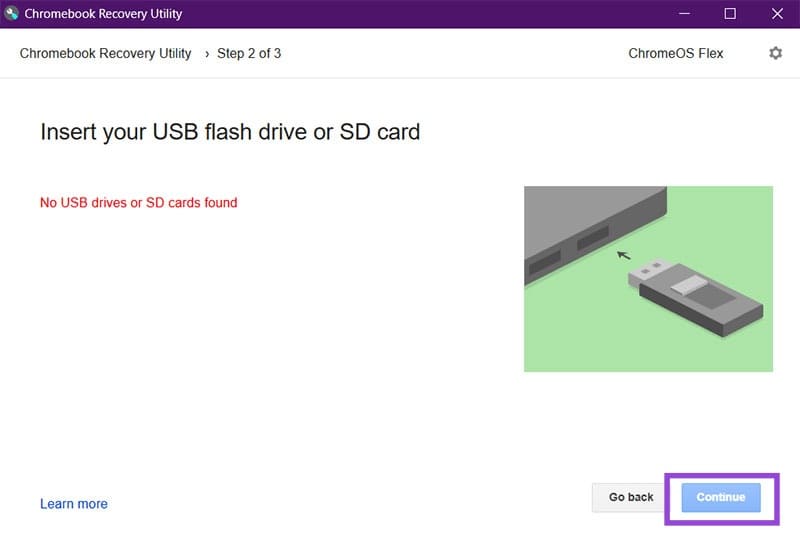
Step 4. Choose the USB or SD card you want to use and click “Continue.” Click “Create Now” on the next screen to start the process.
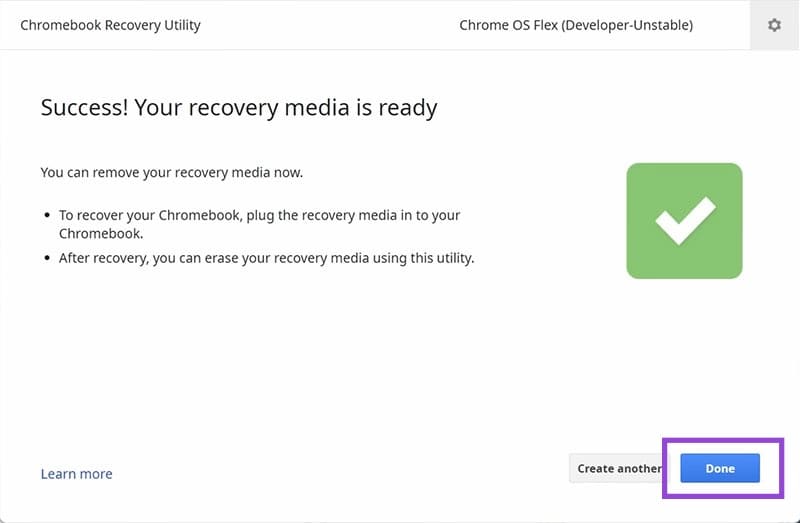
Step 5. Once the process is done, you’ll be greeted with a “Success” screen. You’re now ready to start installation.
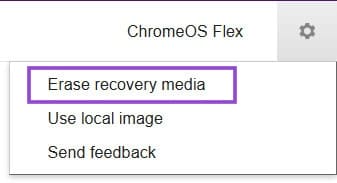
You can use the utility again to delete the installation info from the USB. Just click the Settings icon in the utility and select “Erase recovery media.”
Install From Boot
The “scary” part of the OS install actually isn’t scary at all. Once you’ve backed up all files and are ready to wipe your machine, it’s time to install ChromeOS Flex from your bootable drive. Here’s what to do:
Step 1. Restart your laptop and, on reboot, press the boot menu key. This varies between manufacturers, but is usually a Function key or the Delete key. The key required is typically shown on startup.
Step 2. In the UEFI menu, find the bootable drive with the OS information on and select it to boot from.
Step 3. The Chrome logo will pop up. You’ll then be greeted with a screen allowing you either to install ChromeOS Flex or to try it out first. Choose the latter if you’d like to see what Flex has to offer while keeping your hard drive files and Windows OS intact.
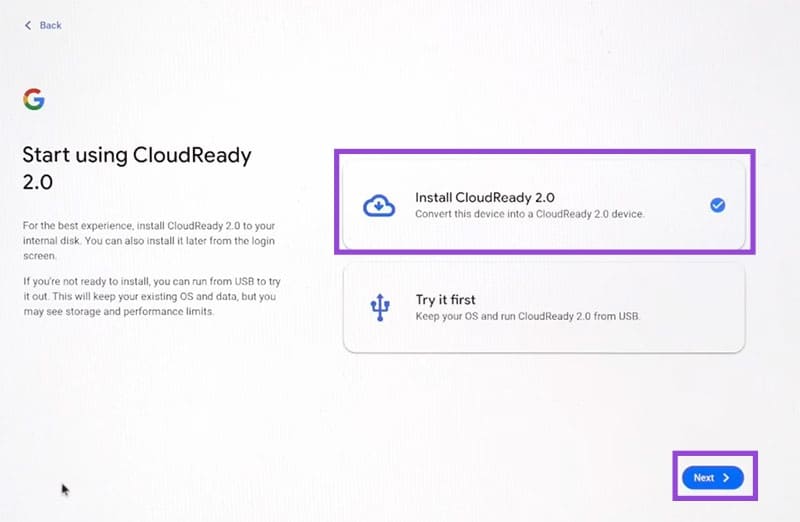
Step 4. Click “Install CloudReady 2.0” to begin full installation and click the “Next” button.
Step 5. Let the process run, and you’ll soon have a Chromebook OS instead of a PC.