


How to use a metered connection in Windows 10
It goes without saying, Windows 10 uses a lot of bandwidth. The operating system is untamed when it comes to eating up your download and upload speeds. Thankfully, there’s a way to fix this, or at least limit how much Windows 10 is taking up. By setting your connection up as a metered connection, you might begin to notice that you’re taking some of your speeds back.
We show you how and why you might want to use the metered connection settings below.
Why should I use a metered connection?
Like we said, Windows 10 uses a lot of bandwidth. And that’s largely because of the sheer amount of uploading and downloading it does in the background, and all automatically, too. There’s the automatic downloading of operating system updates, app updates and even live tile updates. You even have peer-to-peer uploading of Windows updates (sharing updates with PCs over the Internet), too.
By setting up your connection as metered, much of this comes to a halt, letting you save a good portion of your bandwidth for the work you’re doing on your PC. Of course, it’s worth noting that some stuff will automatically download even on a metered connection. For example, Microsoft made it known that Windows Update would still download critical security updates automatically over a metered connection; however, the company did promise not to abuse this. Critical security updates are, of course, critical and you’re putting yourself at risk by even forgetting to download them.
But, besides that, you can free up a lot of bandwidth by marking your connection as metered. In doing this, you’ll have to manually download updates for your system, apps and so on, but you do it on your time schedule instead of Windows 10’s. And, this way, you don’t have something always automatically happening in the background.
When is a good time to use the metered connection setting?
As a personal choice, I keep the metered connection setting on all the time. This is because I want greater control over updates and when they happen on my system. However, even if you don’t care about that, there’s still some other specific scenarios that you want to turn it on.
If you’re on a slower Internet connection (dial-up, satellite, some DSL packages, etc) and/or have a data cap, that’s a good time to mark your connection as metered. You already have a slow connection, and you don’t want Windows 10 making that even slower. And, if you have a data cap, you really don’t want your system using a good portion of that up.
If you’re connecting your Windows 10 laptop or computer by way of your a smartphone or dedicated mobile hotspot device, that’s another time to mark your connection as metered. A good portion of these devices have data caps and are slower connections, so you really don’t want Windows 10 eating through that. Even if you are on an unlimited plan with your smartphone’s carrier, many of those plans still put a cap on hotspot connections (usually around 10GB), so you’re still going to want to set your connection as metered here.
Setting up your Wi-Fi and Ethernet connection as metered
Setting up the metered connection over Wi-Fi is super easy. First, click on the Start menu and select the Settings gear icon. From there, head into Network & Internet and select the Wi-Fi tab in the left navigation pane.
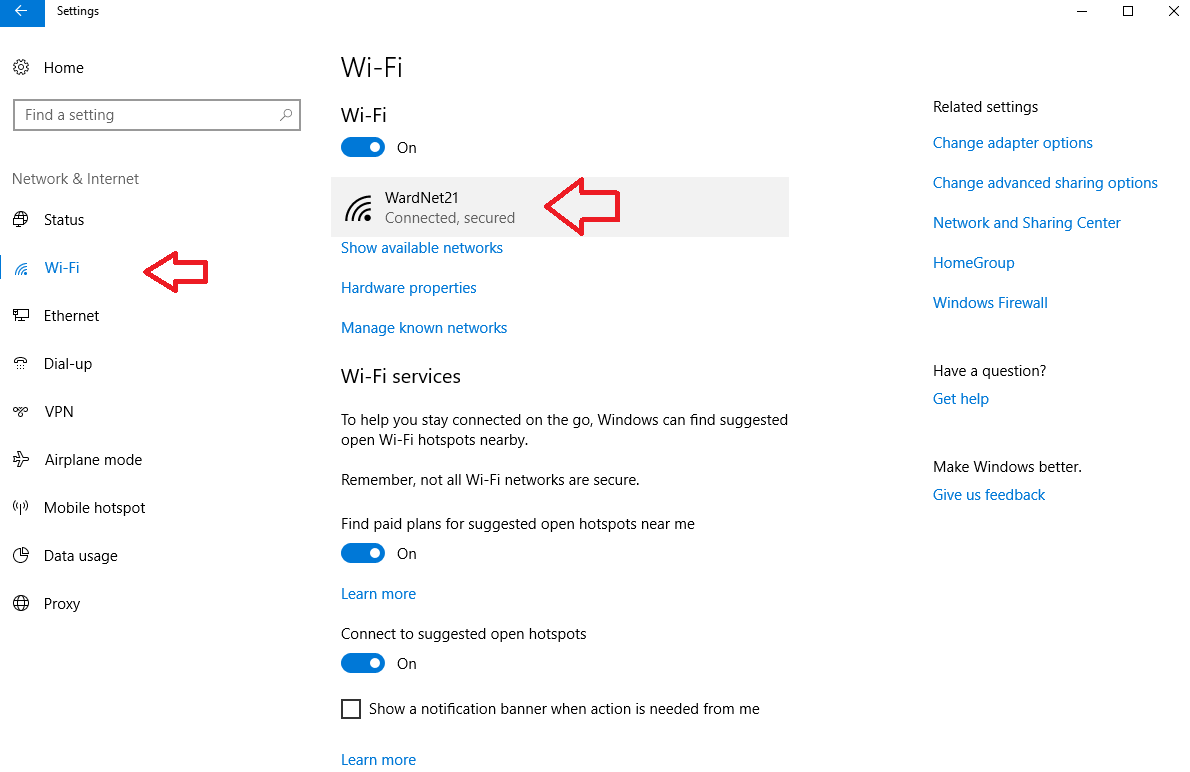
Click on the Wi-Fi network you’re connected to. This will open a page with information about your current Wi-Fi connect. This same page has the option to set your network as a metered connection. If it’s not already on, click on the slider to enable it.
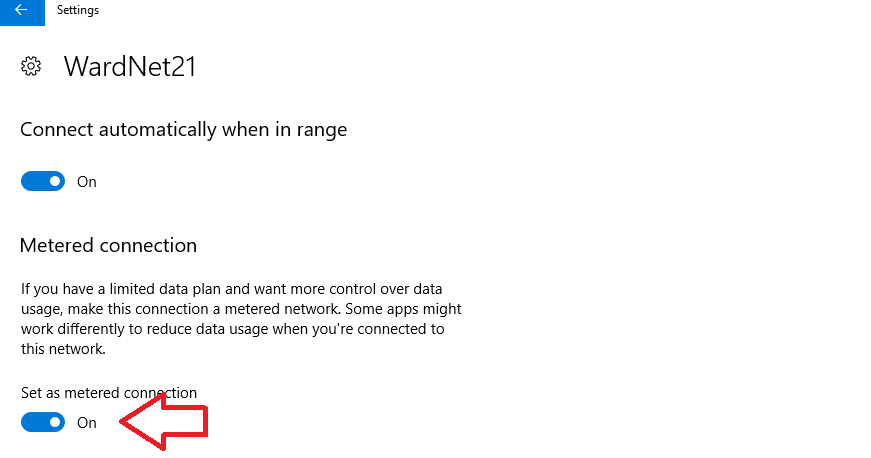
Keep in mind that you’ll need to do this for every new Wi-Fi network you connect to. Windows 10 will only remember it from network-to-network — it’s not a blank system wide option, unfortunately.
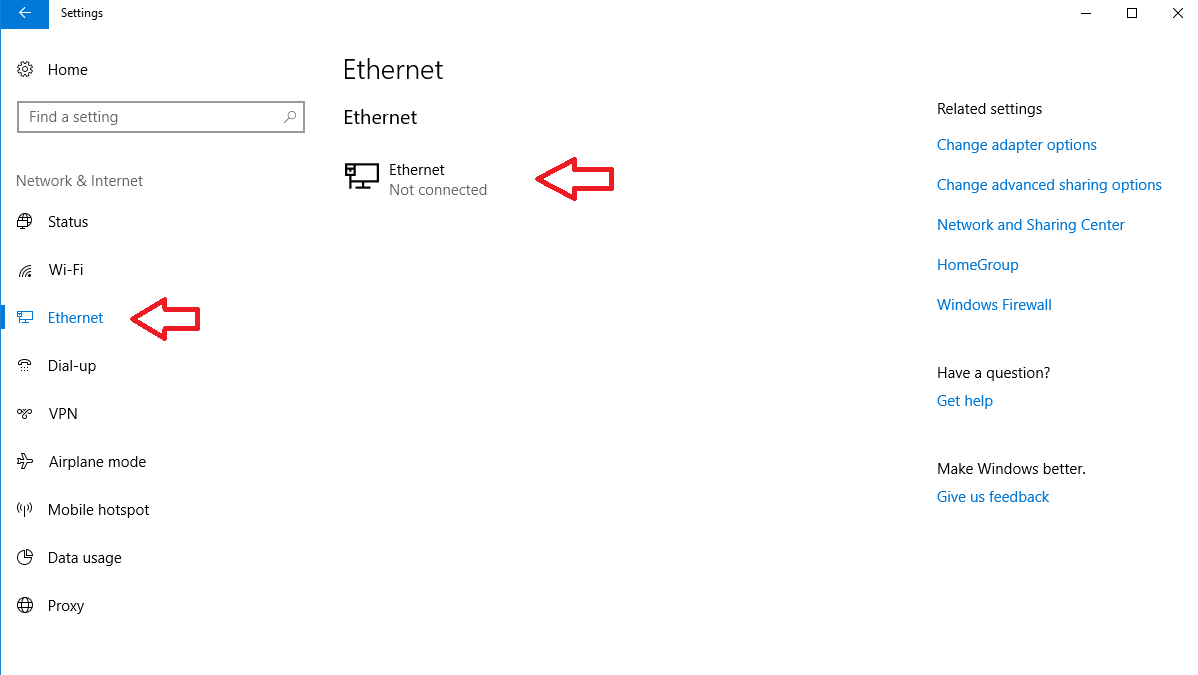
Activating it for Ethernet is the same principle. Instead of selecting the Wi-Fi tab in the navigation pane, you’ll want to select Ethernet. Click on the Ethernet connection, and then it’ll take you to the information page about said Ethernet connection.
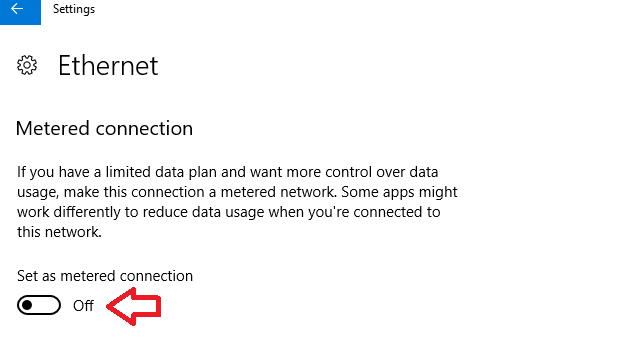
Here, you can also switch on the metered connection. And again, you do that by simply clicking on the slider to enable it.
It’s the same principle as Wi-Fi — this only affects this specific Ethernet connection. If you connect to another one, you’ll need to follow the process again to enable it.
Keep in mind that, if you don’t see the option to meter your Ethernet connection, that’s probably because you don’t have the Creators Update yet. It’s something that Microsoft just brought in with the Creators Update, so you’ll need to download that before being able to meter your Ethernet connection.
Closing
Really, even if you have a fast Internet connection, setting it as metered is a great way to better control when updates happen, whether that be system updates or app updates. By following the above steps, you’ll be able to stop Windows 10 from doing much of its automatic downloading and uploading, freeing up the bandwidth for yourself.


