


How To Record Bad Debt in QuickBooks Online

When you invoice a client but they decline to pay for whatever reason, you find yourself dealing with bad debt. As any small business owner knows, unless they write off this bad debt, it will be shown on their accounts receivable and net profit, which means that they will also be taxed for it.
QuickBooks Online is a popular accounting service that allows you to easily record and write off bad debt. That way, you won’t have to worry about overpaying come taxation time. In this article, you will learn exactly how to do it.
Stage 1: Identifying Bad Debt
Before you start, you need to check your account for any outstanding bad debt.
Here’s how to do it:
- Log in to your QuickBooks account and choose Reports from the menu on the left.
- Start typing the words “Accounts Receivable” into the search bar.
- From the list of results, choose Accounts Receivable Ageing Detail.
This is a report that contains all your outstanding accounts receivable. If your clients have declined to pay any of those, they are considered bad debt and need to be written off accordingly.
Stage 2: Separating Bad Debt
Now that you have identified bad debt, you need to create a separate account for it.
Do the following:
- Click on the Gear icon in the top-right corner of the screen.
- Click on Chart of Accounts, which is located under Your Company.
- Click on the green button labeled New in the upper-right.

This will open the Account setup page. There you should do the following:
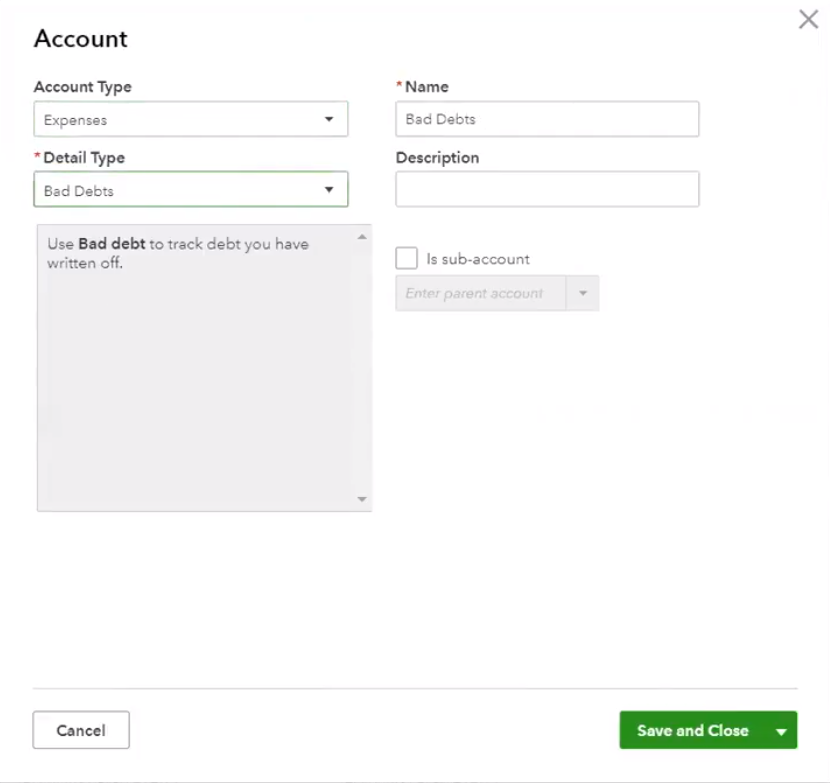
- Under Account Type, select Expenses.
- Under Detail Type, select Bad Debts.
- Type “Bad Debts” into the Name
- Add a description (optional).
- Click on Save and Close.
Stage 3: Specifying the Details of Bad Debt
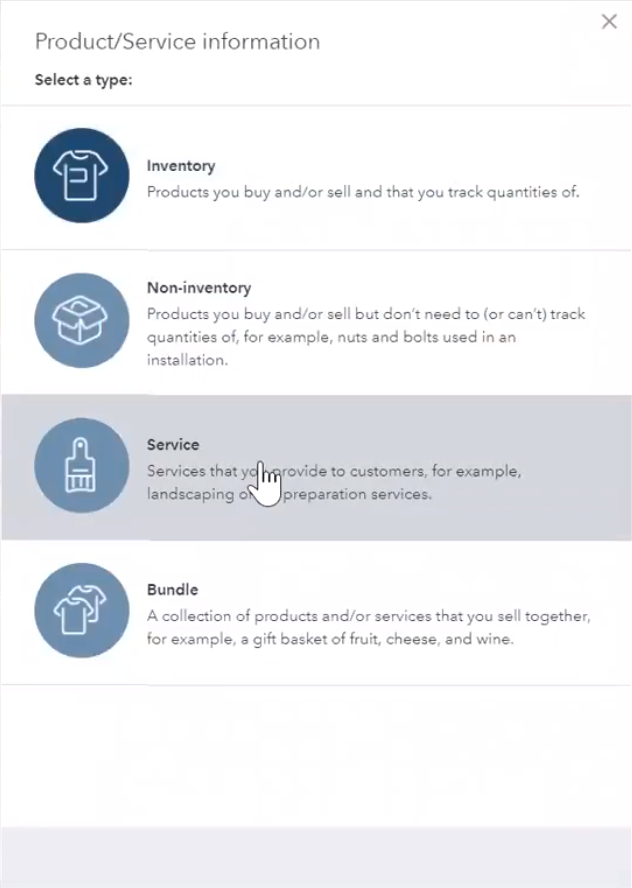
The next step is to specify the details of bad debt by setting up a product or service item for it.
Once again, you need to click on the Gear icon, only this time you will select Products and Services in the Lists section. As in Stage 2, you now need to click on the green button labeled New.
From there, do the following:
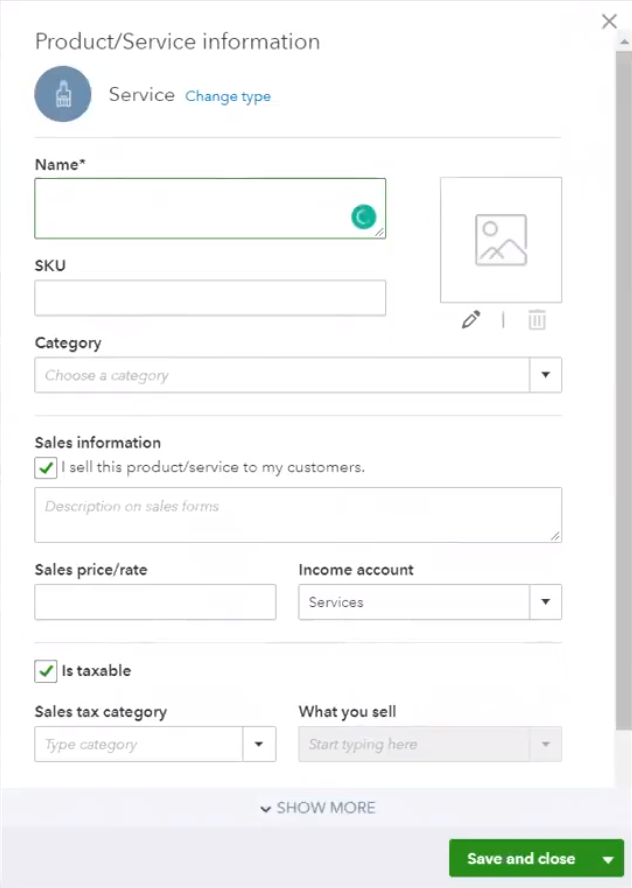
- Select Services in the Product/Service Information

- Type “Bad Debts” into the Name
- In the lower-right section of the window, you’ll see the Income Account Change the value from Services (which is selected by default) to the Bad Debts account you created in Stage 2.
- Uncheck the box next to “Is Taxable”.
- Click on Save and Close.
Stage 4: Setting Up a Credit Note
With the item created, now it’s time to create a corresponding credit note.
You can start by clicking on the “+” icon and selecting Credit Note from the Customers section.
After that, do the following:
- Under Customer, choose the name of the customer responsible for the bad debt.
- Under Product/Service, select the Bad Debts item you created in Stage 3.
- Enter the exact amount of the unpaid invoice.
- Type “Bad Debt” into the Memo
- As always, click on Save and Close.
Stage 5: Applying the Credit Note
The credit note should be automatically applied if you’ve enabled this option.
If not, you can do so by going to the Account and Settings menu.
From there, follow these steps:
- Click on Advanced.
- Under Automation, click on the pencil icon.
- Find the option “Automatically Apply Credits” and check the box next to it.
- Click on Save.
- Click on Done to confirm.
Stage 6: Finalizing the Report
With the credit notes automatically applied to bad debts, you now only have to run a report that contains the details of these debts. To do this, you essentially have to go back to Stage 1 and once again go to your Chart of Accounts.
This time, you will see Bad Debts as one of the options in the expense account section. Simply open the dropdown menu in the Action column, select Run Report, and you’ll have a report that contains all the relevant information about your uncollectible receivables.
Writing Off Bad Debt
While this process may seem very complex, it is pretty straightforward. If you follow the instructions laid out in this article, you should have no problem recording and writing off bad debt in QuickBooks Online.
Keep in mind that these steps are for the online version only. If you use desktop software, some of the steps may vary, but the process itself shouldn’t be that much different. If you get stuck and need help, you can always contact the QuickBooks support from their website.


