


How to Use Split Screen with Excel

Excel is the perfect software for handling massive amounts of data. Sometimes, you will have to crunch through thousands of tables with countless categories and dizzying amounts of data. Things can get even more complicated when you have to compare elements in multiple sheets, which is where the split-screen feature jumps in.
It makes it possible to keep track of multiple files on the same screen, helping you get more work done faster. The feature is easy to set up, and once you figure it out, you will get a huge efficiency boost.
Setting Things up
There are two ways you can use the split-screen feature in Excel. The first one will allow you to see multiple areas of the same file, while the other one will enable you to see different files on your screen at the same time. You can also choose if you want to split the screen horizontally, vertically, or both. Here is what you have to do:
- Open Excel and click on the “View” tab.
- Select the “Split” icon and divide the screen to split it into four different panes.

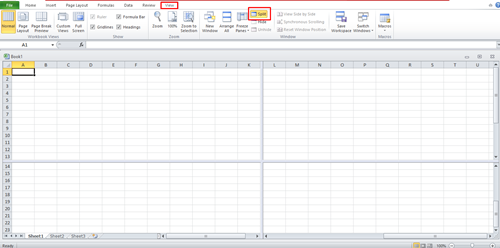
The feature includes both vertical and horizontal splitting, and each pane will show you the same worksheet. That makes it easier to monitor and compare different parts of the sheet at the same time.
You can move each bar horizontally and vertically until you find the parts you need. You can also reposition each pane by clicking and dragging it to a different position. However, having four separate panes can sometimes be a little confusing. However, you can reduce the number of panes to two.
Splitting the Screen into Two Panes
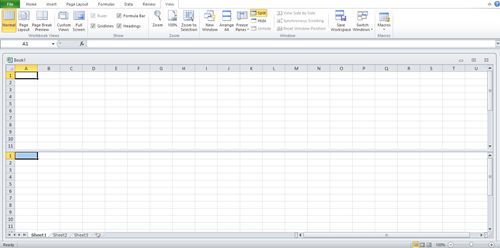
If you need only two panes, you can choose between vertical and horizontal split. Let’s say that you need only two horizontal panes. After splitting the screen into four panes, click on the vertical dividing line and drag all the way to the right. It will then disappear, and you will only have the horizontal split. The method works 2013, 2016, and 2019 versions of the software. If you are using Excel 2010, the setup is a little different.
Splitting the Screen into Two in Excel 2010
Excel 2010 doesn’t have a split-screen feature. It uses the split box instead. It can split the screen only vertically, which is what most people are looking for. Unlike the newer versions, Excel 2010 doesn’t have the split option under the “View” tab, but it’s still easy to set up. Here is what you have to do:
- Place the pointer just above the vertical scroll bar. The pointer will then change into a black arrow with two points.
- Hold down the left mouse button, and you will see a dark line appear above the first row in the file.
- Drag the pointer up or down, and the line will follow.
- Place the line where you want to split the screen and release the mouse button.
- When you split the screen, Excel will copy all of the data into the newly formed pane.
- You can repeat the same process for horizontal splitting, and you can reposition the split at any given time.
The steps above don’t work only for single Excel files. You can use the split-screen feature to open two or more sheets in parallel.
Opening Multiple Workbooks
You can also open multiple workbooks in the same excel file. That allows you to quickly refer to other files without having to switch tabs all the time. Here is what you have to do:
- Open all Excel files you want to use.
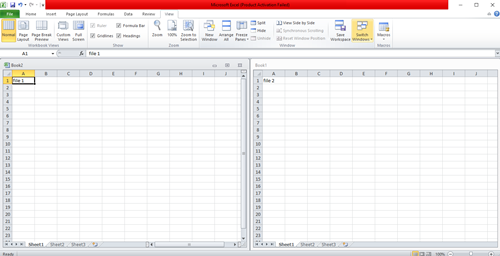
- Under the “View” tab, click on the “Arrange” option.

- Select the type of split you want. You will get to choose between tiled, horizontal, vertical, and cascade.
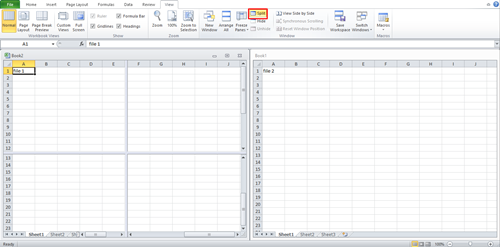
- Each of the files will be displayed in a separate Excel screen within the original file.
- You can then even split those screens separately to access multiple areas of each file. You can split every separate window however you want it. You can also remove splits by dragging the line away from the file.

Removing Split Screens
When you’re done, you can remove the split-screen feature by clicking on the “Split” box in the “View” tab. Everything will return to normal, and all changes will be saved automatically.
Excel in Excel
Tricks like the split-screen feature will make your life much easier when working with large Excel workbooks. Excel has many options and shortcuts and mastering them will give you more control and improve your efficiency.
Why do you use the split-screen feature in Excel? Did it help you finish your work faster? Tell us how you use it in the comments section below.


One thought on “How to Use Split Screen with Excel”