




What to Do if CHKDSK Stays Stuck in Stage 4 (Windows 11)?

CHKDSK is a vital way of troubleshooting many hard drive-related problems on your PC. So, what happens when the fix needs a fix? If you have a problem with CHKDSK stuck at Stage 4 (Windows 11), we’ve got some troubleshooting tips to help you determine whether it’s actually stuck and, if necessary, get things moving again.
What Causes This Error?
To those who’ve finally reached Stage 4, CHKDSK stuck can feel like a frustrating fumble just before the finish line. Often, though, it isn’t actually stuck, just moving very slowly, or failing to update the percentage counter.
Stage 4 has to do primarily with sector verification on your drive. A bigger disk, or a slower one, can greatly impact performance time at this stage.
CHKDSK Has Been Stuck at Stage 4 (Windows 11) – Fixes to Try
Now you know why, you’re better equipped to handle the how-to. We’ve got some troubleshooters below to help:
Hit Enter
Perhaps the quickest fix we can offer is just to hit the “Enter” key if things look stuck. Why? In some cases, the CHKDSK window may appear unresponsive even though the process is still running. If the percentage changes after pressing “Enter,” that suggests the process was still active.
Wait Things Out
If you know you have a slower or larger hard drive, it’s important to let the process run. Disk checking, especially the verification stage, can be a slow and arduous process. And we’re not just talking half an hour here, but potentially overnight.
If Stage 4 still hasn’t progressed after six to eight hours, it’s time to try something else.
Check the Process in Task Manager
A stuck process won’t use nearly as many resources as one running. If you suspect CHKDSK is frozen, a quick peek at Task Manager (if you aren’t in Recovery Mode) will let you know. Here’s what to do:
Step 1. Open “Task Manager” by hitting (Ctrl + Shift + Esc).
Step 2. Click the “Performance” tab in the sidebar.
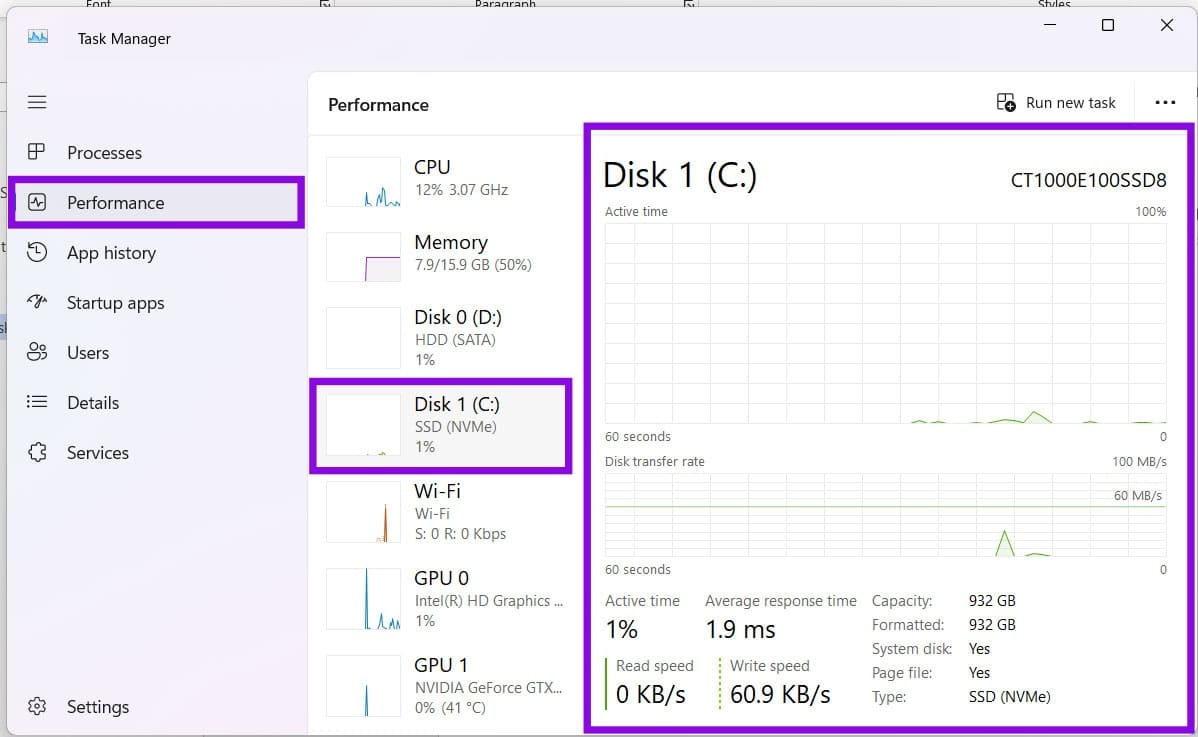
Step 3. Click the disk that’s being checked and let Task Manager monitor it for a minute or so.
Step 4. If active time is above 0% and as high as 100%, then you know the process is running. A steady active time on the graph is also a clear indicator.
Do a Less Thorough Scan
Checking your disk for every bad sector and attempting recovery will take forever in some cases. If you’ve, knowingly or unknowingly, been using the command “chkdsk /r” then you’ve been doing just that. The /r option can also take longer on SSDs, although its purpose is different from simply scanning the file system for logical errors.
For an NTFS volume, you can instead use chkdsk C: /scan for an online scan. If you need to repair errors, use the appropriate repair option, such as /f, when the volume can be locked.
Optimize Your Drive
During Stage 4, CHKDSK verifies clusters in use and checks for bad sectors when the /r option is being used. You can make the process’s job faster and easier by forcing the drive to optimize. Here’s how:
Step 1. Open the Run dialog (Win + R) and type “powershell” before hitting (Ctrl + Shift + Enter) to run as Admin.
Step 2. In PowerShell, type the following command: “Optimize-Volume -DriveLetter C -ReTrim -Verbose” and hit “Enter.”
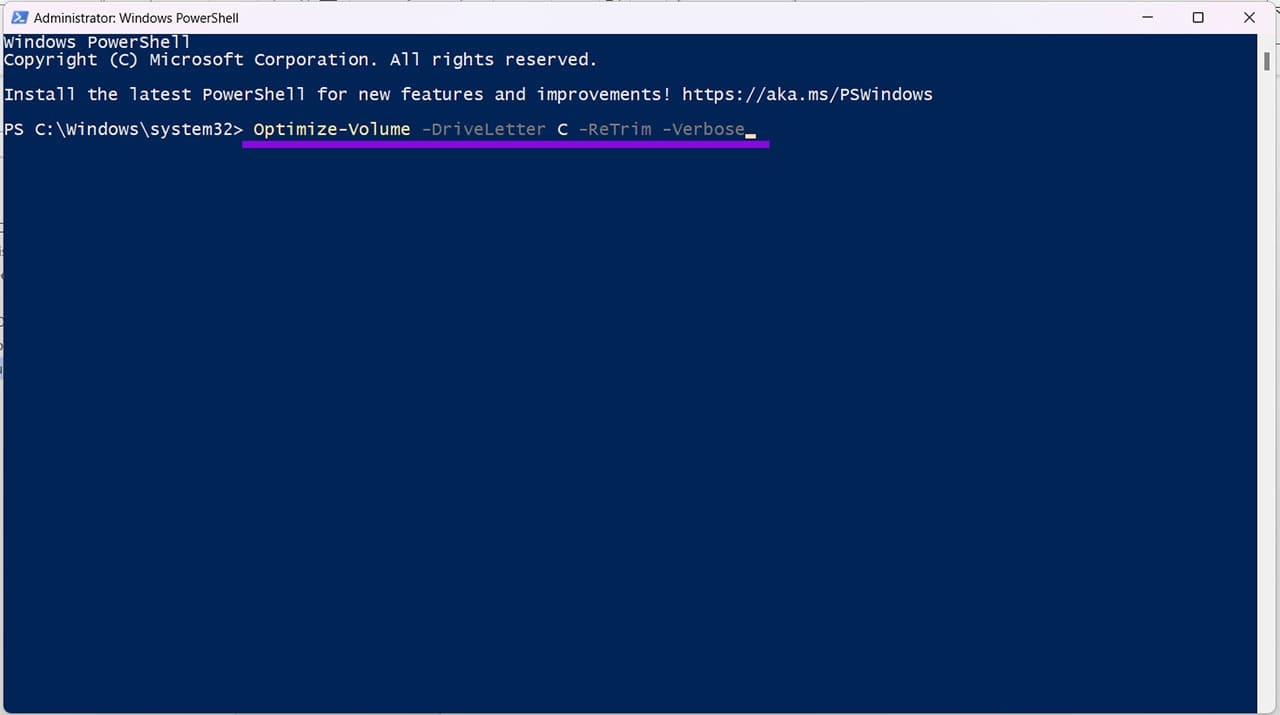
Step 3. Let this process run, and afterwards run the CHKDSK process once again.