How To Whiten Teeth in Paint.net
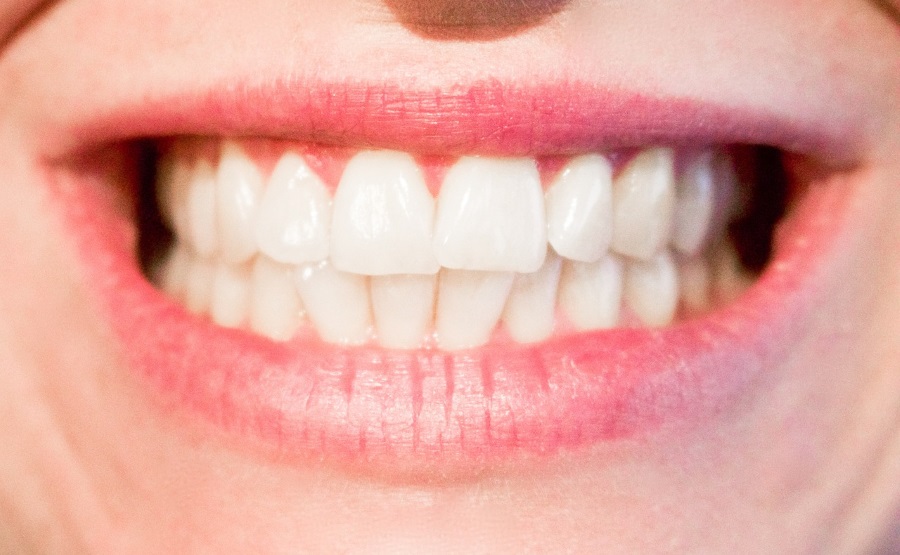
If you’re taking selfies or portrait shots to use in public, you want to look your best. If your teeth didn’t come out as well as they should there is no need to hit the drawing board afresh, we can whiten them and make them look much better. The awesome free image editing tool Paint.net is our weapon of choice in this tutorial. Here’s how to whiten teeth in Paint.net.
Not everyone has that dazzling Hollywood smile. We seem obsessed with white teeth and seem to find teeth that aren’t as white as our own to be distracting. Some teeth don’t photograph well either, coming out yellow, dark or a mixture of the two. Something to do with light reflection apparently. That’s where this technique comes in useful. We can quickly whiten teeth in Paint.net without ruining the rest of the image.
Touching up images is nothing new and something magazines do every single day. The trick is to enhance a picture so it looks better without making it look too unrealistic or over the top. Nobody minds a little artistic license to make something look better as long as the truth is still being (mostly) told.

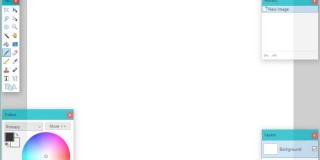
Paint.net
If you haven’t used it already, Paint.net is an awesome free image editing tool for Windows. It has been around for years and is my go-to program for this kind of thing. It isn’t as powerful as Photoshop but isn’t as expensive either!
It is light weight, has some neat features and can do most things credibly well. Only graphic designers or professional photographers would need more I think.
Whiten teeth in paint.net
So how do we whiten the teeth without ruining the rest of the image? Download and install Paint.net if you don’t have it already before we move on.
- Open Paint.net and open the image containing the teeth you want to whiten.
- Select Save As and save the image as a copy of the original. That way, if anything goes wrong, the original is still untouched.
- Select Layers and Duplicate Layer. This will create another copy of the image on top of the original.
- Select that layer and Select Layer Properties from the Layer menu. Set it to around 120.
- Select the paintbrush tool to around 5 width and pure white color.
- Zoom in so the teeth take up most of the screen and trace around the inside of each tooth with the white brush. Don’t go right up to the edges, leave those as they are. Teeth are not naturally white, neither does that white go right to the edge. We shall address the disparity in a minute.
- Fill in each tooth with the white brush. Use small strokes and let go each time to make undoing easier. Take your time and don’t worry if you miss bits. Once the image is finished they will look like light reflection anyway.
- Once done, select View and Actual Size to see the fruits of your labor.
- Touch up any teeth that aren’t as good as you would like and check again.
- Rinse and repeat until the teeth look fairly realistic.
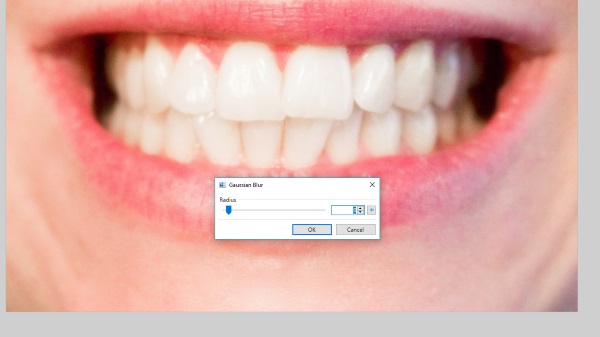
The coloring part of the process is done but you’ll notice that there is a stark line between the natural color of the teeth and the white you added. We remove that with a little blur.
- Select Effects and Blurs, Gaussian Blur and carefully add blur until the edge of the teeth you whitened blend into the rest of the image.
- Select Layer and Layer Properties and change the blending mode to Overlay. Reduce opacity if necessary to make it look more natural.
- Tweak these two settings until you get a good balance between the clarity of the image and the blending of your coloring.
The process takes a while to perfect as it’s all too easy to add too much white, run over the teeth, add too much blur or slip over the gum. In the example, I whitened one of the teeth on the left as it looked darker than the others. The end result is subtle but to my eyes at least, it looks much better after being touched up.
There is a technique where you use the lasso tool to outline the teeth and apply the same effects. I can never get the lasso tight enough to the teeth to make it work. You could always try it though as you might have more luck.
That’s all there is to whitening teeth in Paint.net. Now your online profile pictures can look better than ever!