


Installed Desktop Themes Aren’t Appearing or Syncing With the Microsoft Store Library
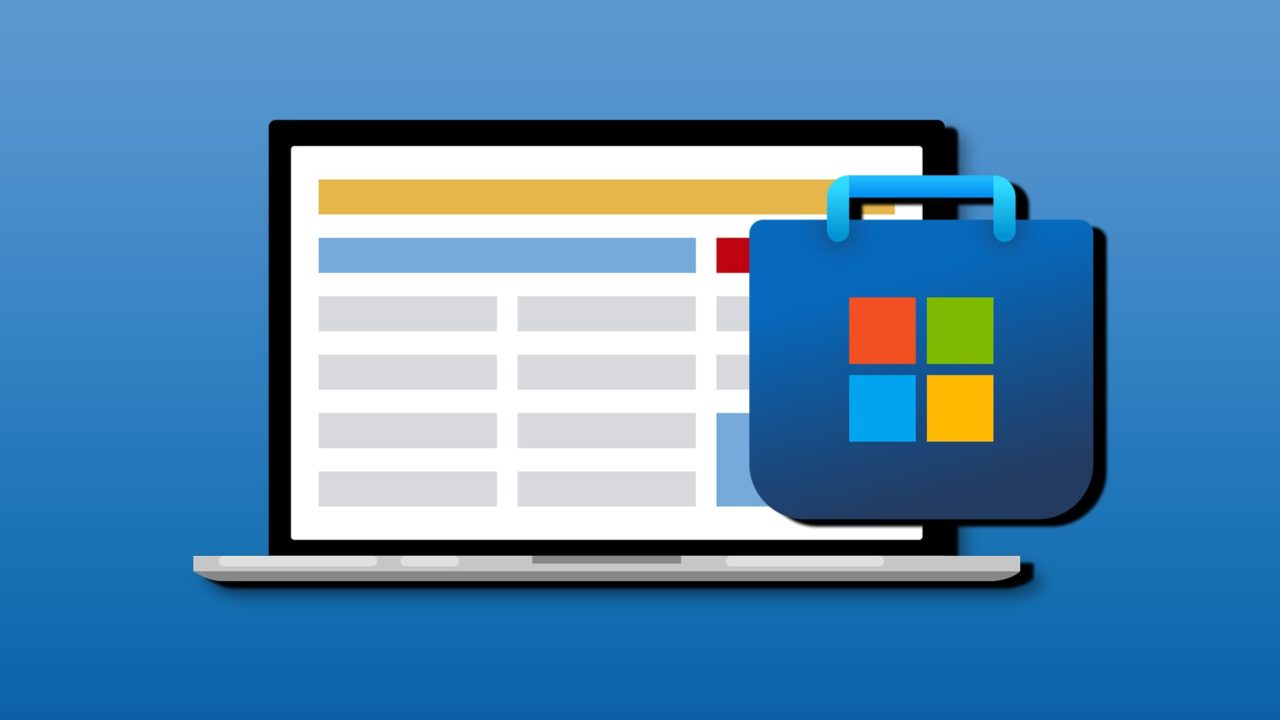
Personalization is what makes the PC, well, personal. What makes themes in Windows 11 great is that you can sync them across devices for a unified experience, very handy if you’re going for a certain feel. If, however, you suddenly find that installed desktop themes aren’t appearing or syncing with the Microsoft Store library, then you’re no doubt looking for answers and fixes. This article aims to do both.
What to Do if Installed Desktop Themes Aren’t Appearing or Syncing With the Microsoft Store Library
If you’re suddenly suffering from syncing problems for your themes, then we’ve got a few troubleshooters below to help you out:
Test With Another Theme
To ensure that your theme is really not syncing, it’s a good idea first to change things up and see if the new theme reflects. Here’s what you need to do:
Step 1. Open “Settings” (Win + I) and click “Personalization” in the sidebar.
Step 2. Under “Current Theme,” choose any theme to test the sync.
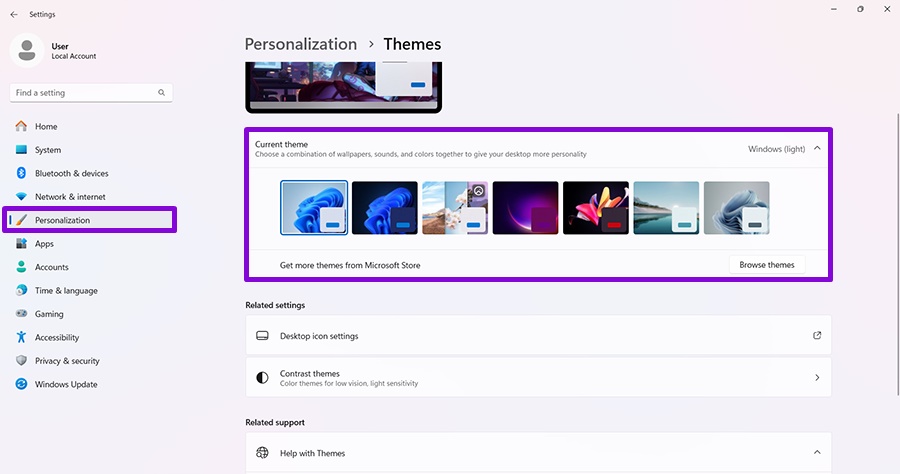
Step 3. Restart your machine and other synced devices and see if the change reflects.
Verify Your Account
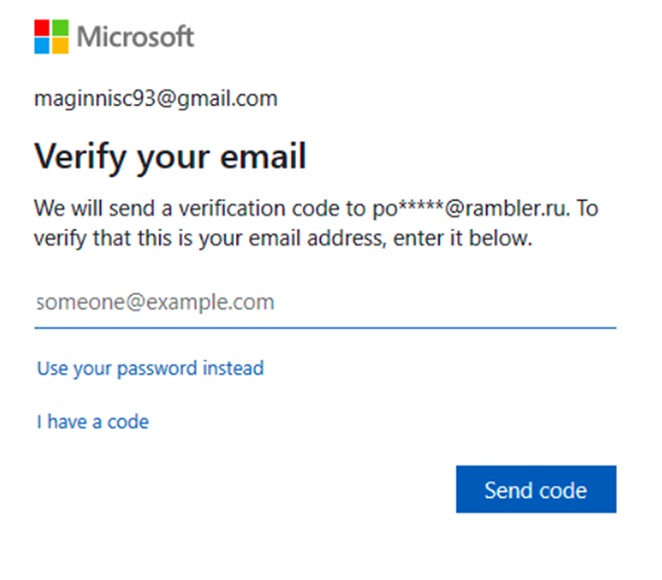
The key to any form of cross-device synchronization is a shared account. Verify that you’re signed in with the same Microsoft account on each device. If Windows asks you to verify your identity, complete the verification process before testing synchronization again. To do so, you’ll need a working email address you have access to that a verification email with a code can be sent to. Enter the code to complete the process.
Check That Sync Settings Are Enabled
You should also ensure that your settings for each device with the theme are allowing syncing. To do this, you need to confirm via Settings. It goes without saying that you’ll also need to be signed into the same user account on these devices. Here’s what to do:
Step 1. Open “Settings” (Win + I) and click “Accounts” in the sidebar.
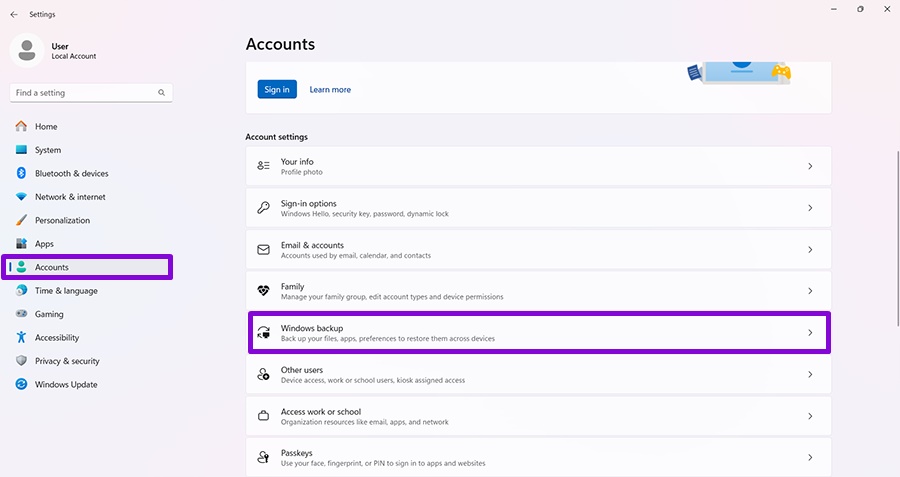
Step 2. Click “Windows backup” in the main window.
Step 3. Click “Remember my preferences” to expand the subsection and ensure that all options below are ticked and that the whole section is toggled to “On.” If things are greyed out, you are not signed in.
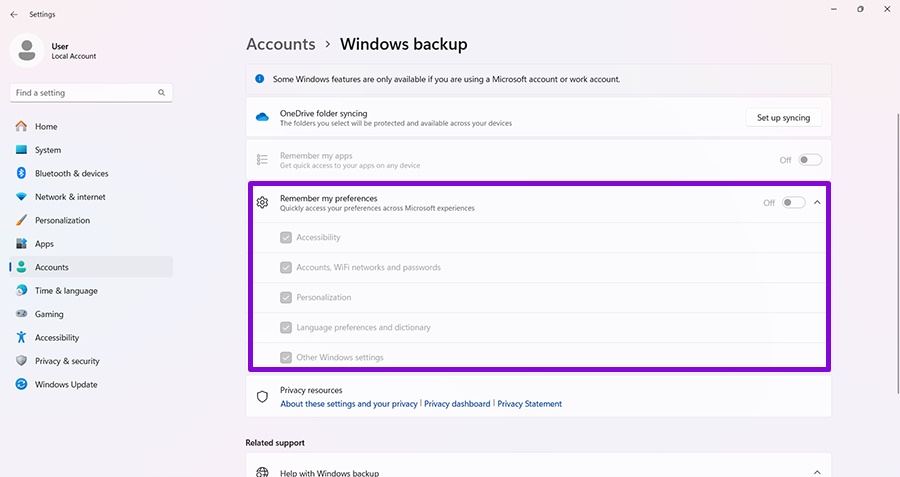
Step 4. Restart your machine and see if this resolves the problem.
If the above doesn’t solve the issue, then you can always try disabling and re-enabling sync. Simply head straight back to the menu and toggle “Remember My Preferences” to “Off,” restart, and turn it back to “On” again.
Enable via the Registry
You can also force sync through the Registry, though you should be careful not to change anything you don’t understand in this critical directory:
Step 1. Open the “Run Dialog” (Win + R) and type “regedit” before hitting (Ctrl + Shift + Enter) to run as Admin.
Step 2. In the Registry, input the following address in the Address Bar: “Computer\HKEY_LOCAL_MACHINE\SOFTWARE\Microsoft\Windows\CurrentVersion\Policies\System”
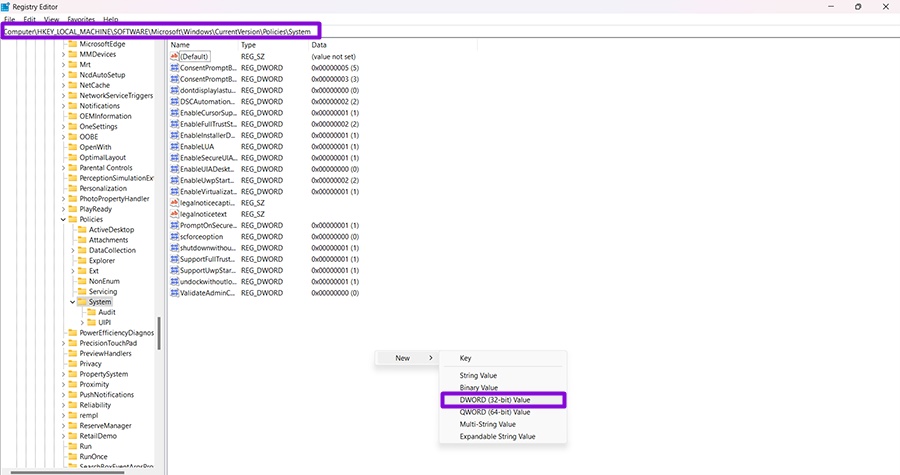
Step 3. Right-click the main window and select “DWord (32-bit) Value” from the context menu under “New.”
Step 4. Name the value “NoConnectedUser”
Step 5. Double-click the value and set the value to “0.”
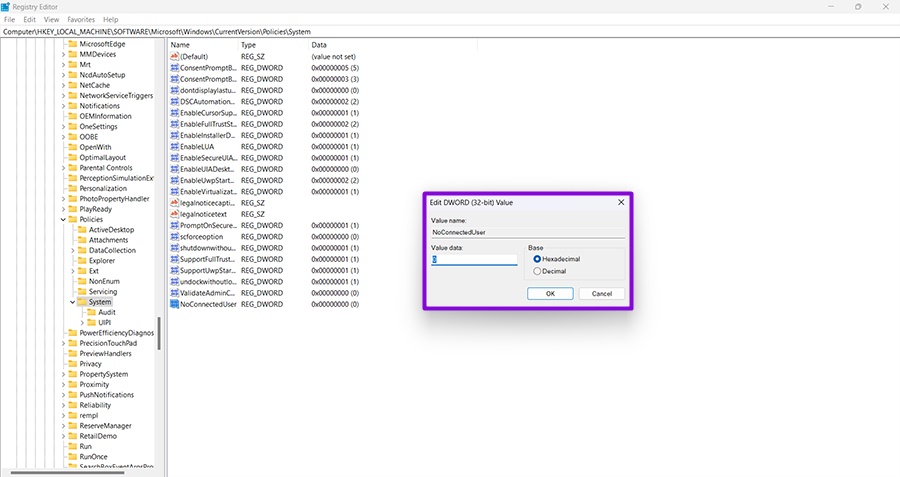
Step 6. Hit “OK” to finalize and see if this solves the issue after a restart.
What to Do if Windows 11 Won’t Detect a Third Monitor
Read Next