Windows 11 Installed Automatically Without Your Consent? What to Do Next

Microsoft hasn’t been subtle about pushing Windows 11 on users. Windows 10 has reached the end of its support, and though many have signed up for the ESU or keep using the operating system, some have reported that Microsoft updates their machine without their knowledge or consent. We’ll be looking at your options if Windows 11 installed without asking.
Windows 11 Installed Without Asking
Multiple users have reported that Windows 10 has suddenly been upgraded to Windows 11 without their knowledge or consent. This has been reported to occur when updates have been disabled or permission has been denied.
In some cases, users have accidentally accepted the upgrade somewhere (it being offered as an optional update in Settings, for example) without fully knowing what they’ve done. Whatever the case, let’s look at the next steps.
Roll Back ASAP
When Windows 10 updates to Windows 11, Microsoft gives the user 10 days to change their mind and roll back the upgrade. If Windows 11 automatically installed on your machine recently, you can take advantage of this. Here’s how:
Step 1. Open Settings (Win + I) and choose “System” in the sidebar.
Step 2. Navigate down to “Recovery” and click it.
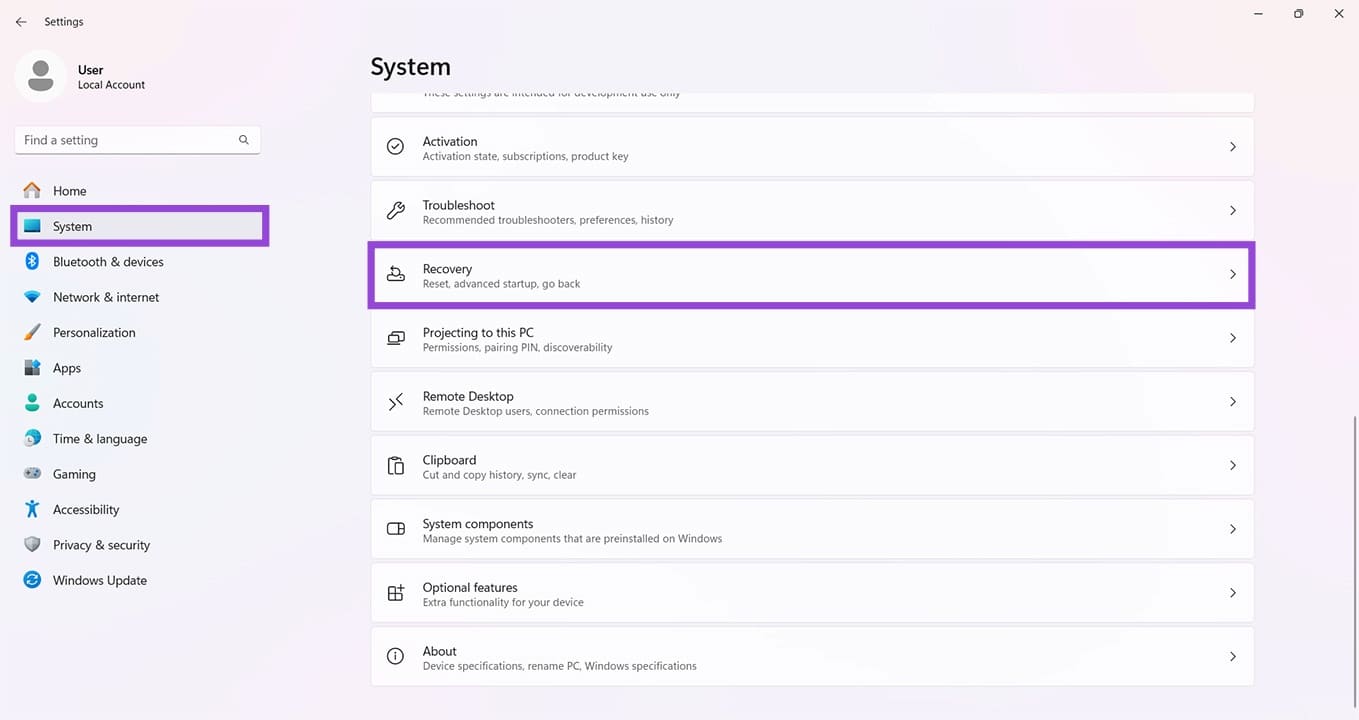
Step 3. If it’s possible for you to roll back the update, a “Previous version of Windows” option will be visible. Click the “Go back” button next to it to start the process.
Reinstall Windows 10
If you’ve passed the 10-day rollback period, then unfortunately, there’s no way to revert back, as your old OS files have been deleted. The only solution, if you want to return to Windows 10, is to reinstall it from scratch.
Before you do so, back up all important files and system settings, as everything will be wiped upon reinstallation. You’ll also need your license key. When you’re done, follow these steps:
Step 1. You’ll need to create a bootable USB drive that’s properly formatted (NTFS is good) and empty. Open Disk Management, right-click your drive and select “Format.”

Step 2. Ensure that “File System” is set to “NTFS” and press “OK.”
Step 3. From there, download the Windows 10 image file from Microsoft and copy the ISO to your USB.
Step 4. Restart your machine. Press the BIOS key (depends on your PC) to enter the BIOS.
Step 5. Every manufacturer’s BIOS is different. Once inside, look for the “Boot” option under Settings and select it.
Step 6. Look for the “Boot Override” and select your USB from the list of alternatives. Save your changes and exit.
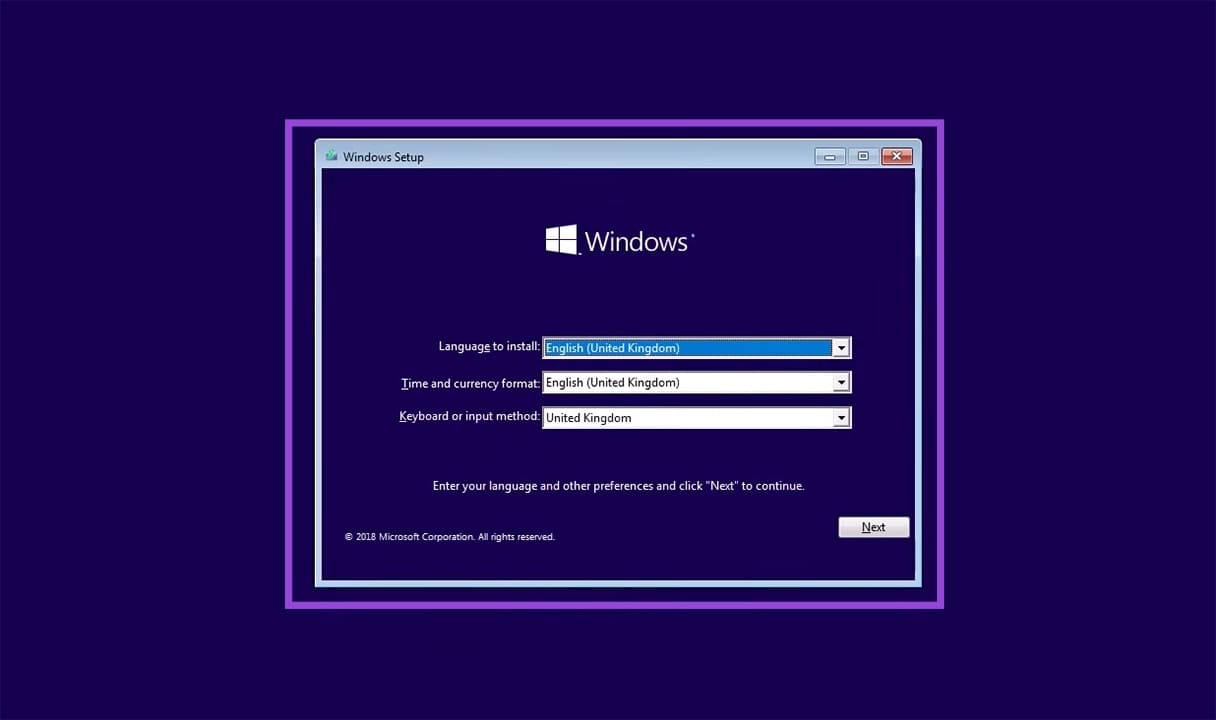
Step 7. You’ll be taken to a new page where you can choose your language and region preferences.
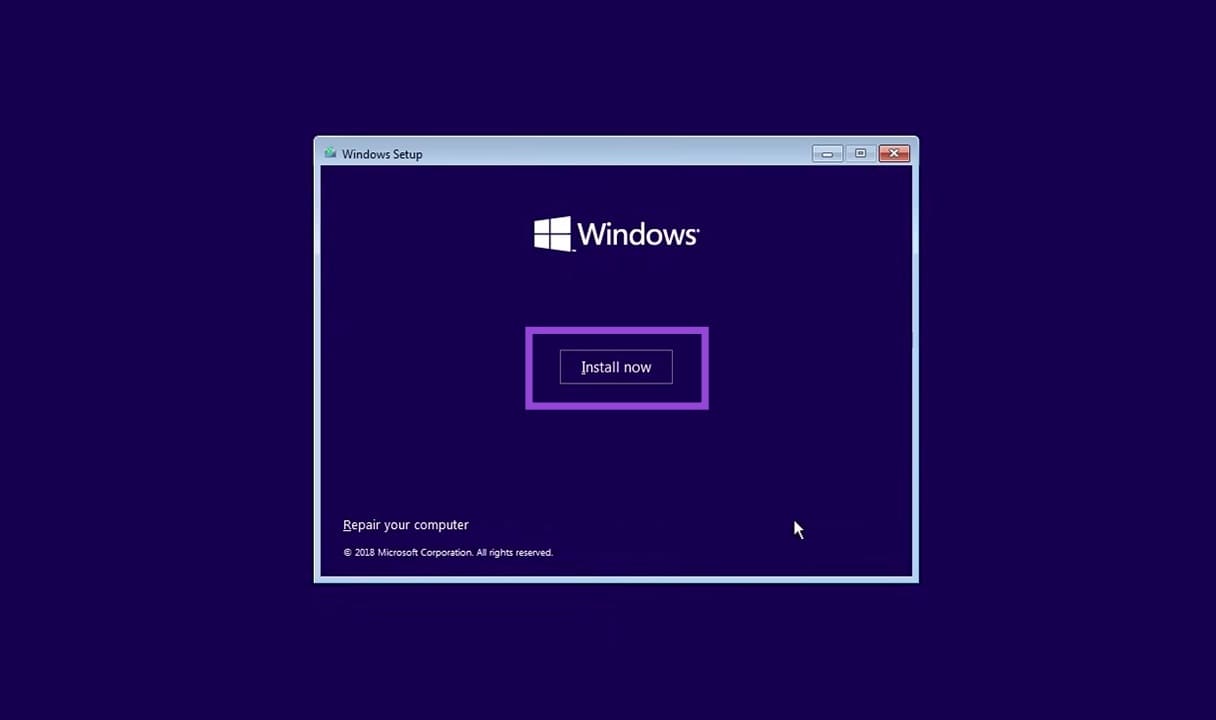
Step 8. Click “Install Now” and enter your Windows license key. You can also activate Windows later once the OS has been installed.
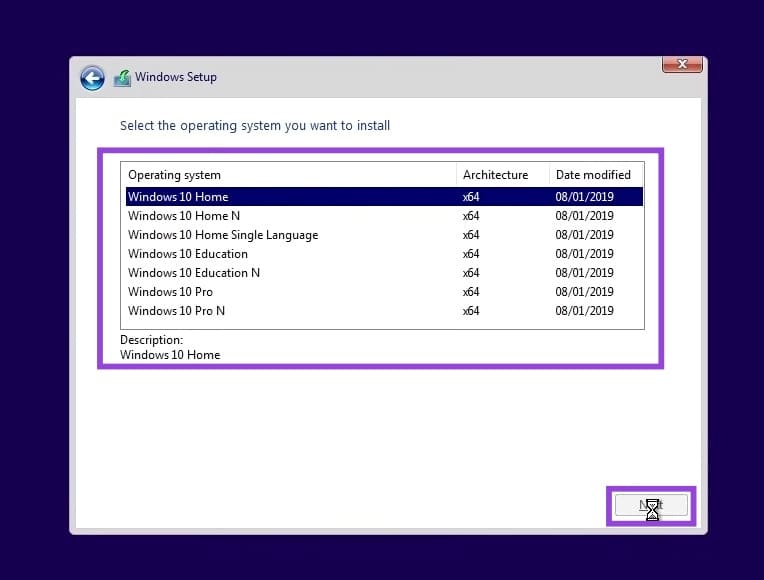
Step 9. Choose the version of Windows that you want to install (that aligns with your old version of Windows 10) and click “Next.”
Step 10. Accept the License Agreement and follow the other steps. Windows will begin to install.