


How To Adjust Brightness in VLC and Other Video Effects
I have waxed lyrical about the awesomeness of VLC before so I won’t bore you all over again here. If you’re not using it already, you really should be. As a media player, it is unrivaled in terms of power, features and usability. Only seriously advanced movie producers would need more than VLC to deliver a solid experience. Aside from tweaking audio, you can also adjust brightness in VLC.
This tutorial will cover adjusting video properties within the program and a few other tricks you might not know.
How to adjust brightness in VLC
If you’re making your own movies, adjust brightness to compensate for poor light or levels during recording is a good way to go. It can elevate a scene or make details clearer in low light. It can also calm down too much light and bring scenes down to a normal level.
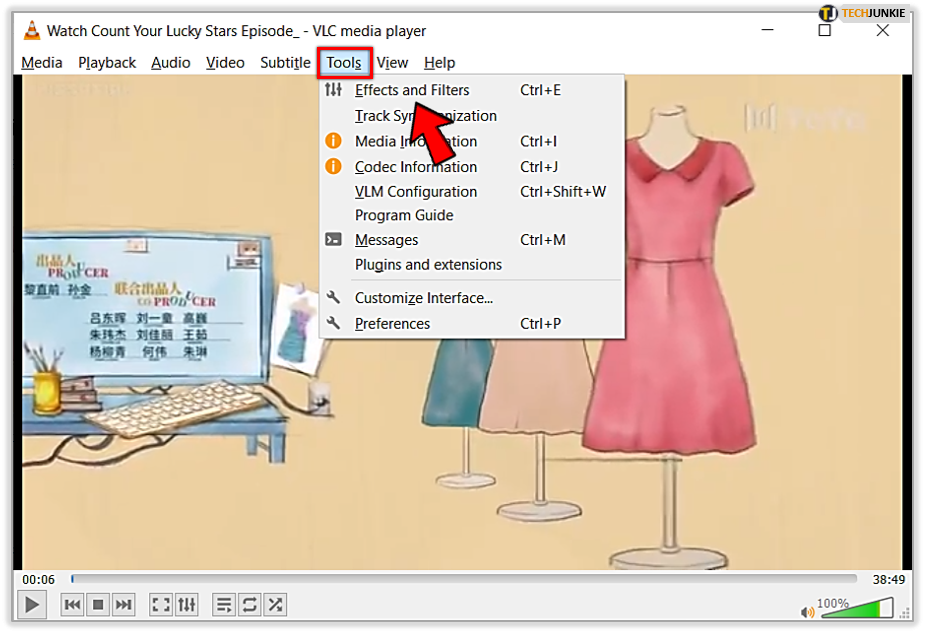
- Open VLC with the video you want to adjust.

- Select Tools and Effects and Filters.

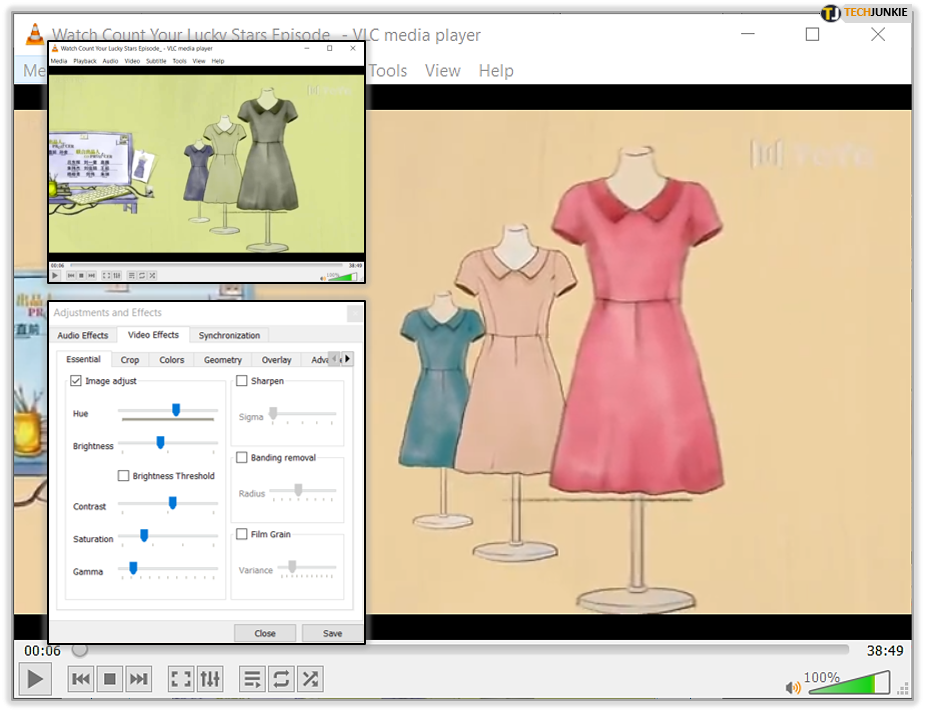
- Select the Video Effects tab and enable Image adjust.

- Select the Brightness slider and move it up or down as required.

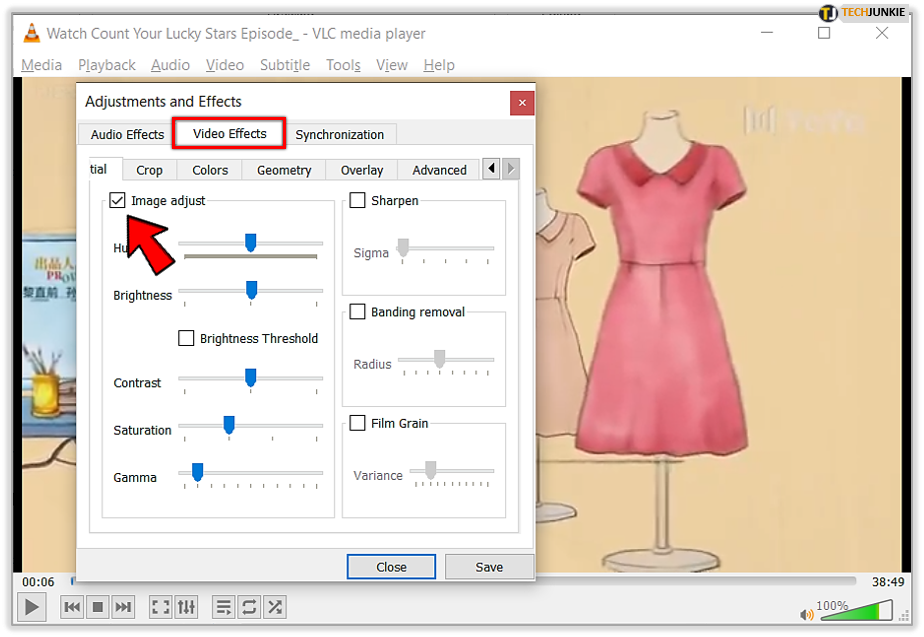
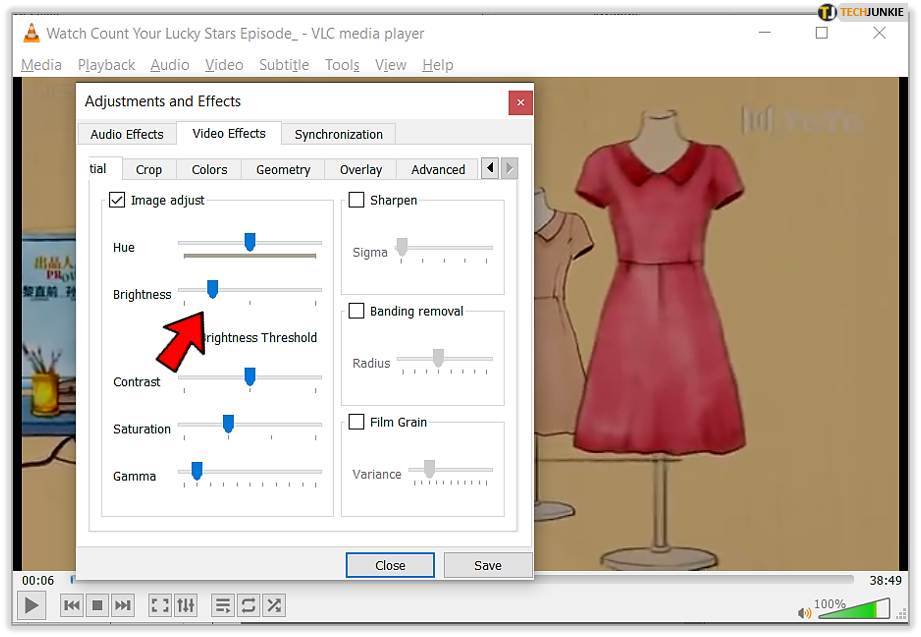
When using the slider, the screen will react accordingly. Slide right to make the scene brighter and left to make it darker. You can also play with the Contrast and Saturation should the Brightness throw the levels out.
The Video Effects feature within VLC is pretty powerful. Aside from adjusting brightness, it can do all sorts of neat things. Let’s take a look at each option.
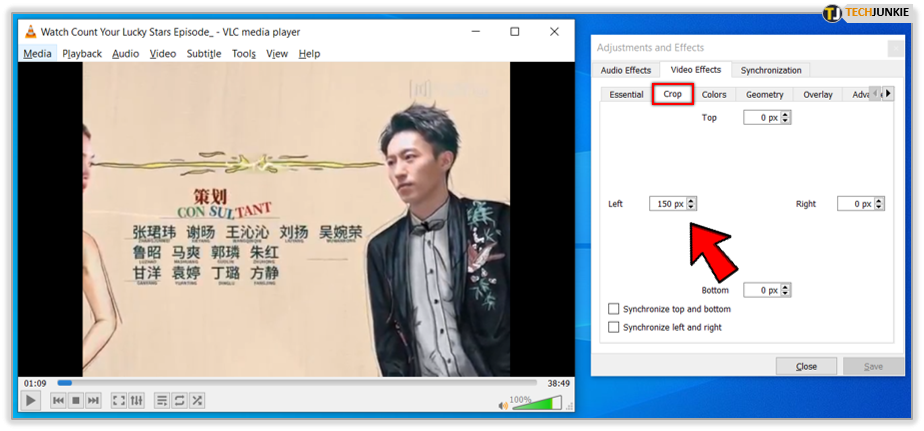
Crop in VLC
Select the Crop tab after adjusting the brightness in VLC and you will see a selection of four boxes at the main compass points. Add a value in one of them and VLC will automatically crop the video in using that value. It’s a great little tool for removing unwanted elements from a video. Once you have a value you like on one side, select the Synchronize top and bottom or left and right to reflect it on the opposite plane.
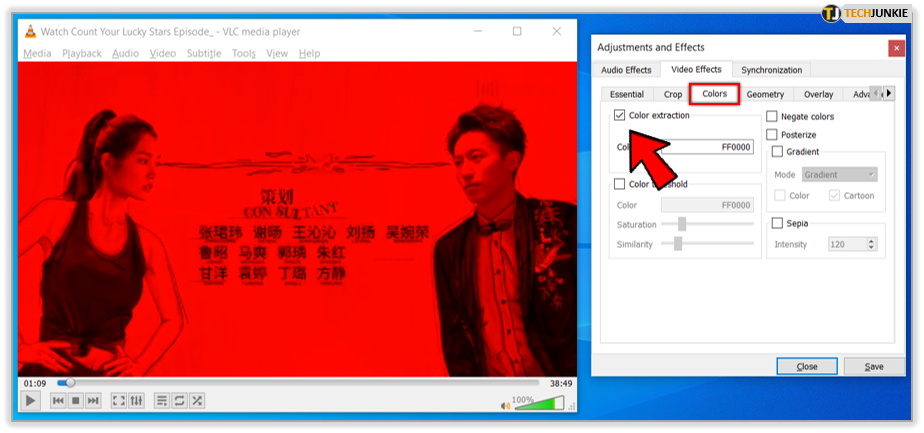
Colors in VLC
The colors tab in VLC is equally useful. It allows you to add effects and extra colors from the video. Select Color extraction and then a color to turn the video into shades of that color. Use Color threshold to play with color levels while changing saturation and similarity. Select Negate colors to turn the video into a negative, Posterize to do exactly that and Gradient to illicit a look similar to a watercolor. Sepia does exactly what you think it does.
Geometry in VLC
Geometry in VLC is to do with shapes and perspective. Enable Interactive Zoom to bring a single part of a scene to the fore. Enable Rotate to rotate the entire scene to any of 360 degrees. Wall creates a wall of video in rows and columns while the Puzzle game splits the scene into jigsaw pieces and muddles them up. You use a mouse to put the scene back together again.

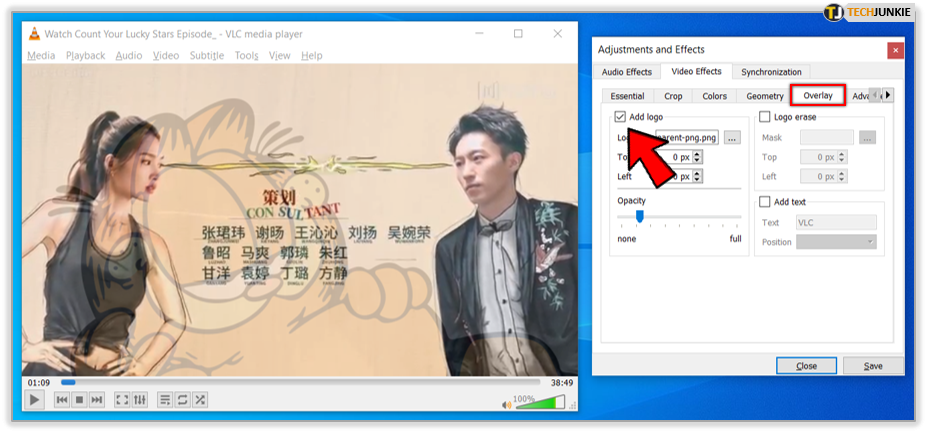
Overlay in VLC
Overlay is pretty descriptive really. You can add text overlays or a logo to videos for branding. You can select size, position and transparency from here as well as mask it for specific scenes. There is also the option to add your own text should you need to as well and then place it in various positons on the screen.
AtmoLight in VLC
AtmoLight is a software controller for the old Philips AmbiLights. It isn’t really used any more but the interface is still present. If you don’t have an AmbiLight connected to VLC, these controls will do nothing. Other lighting systems do or did work with this effect but I don’t have any so cannot comment on them.
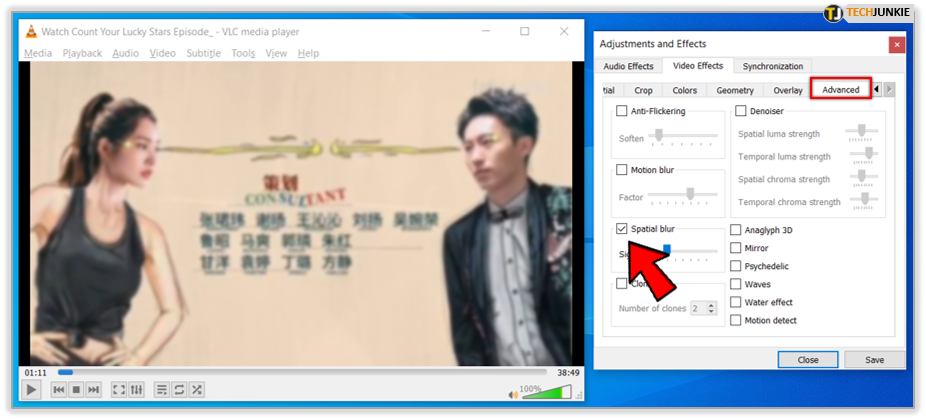
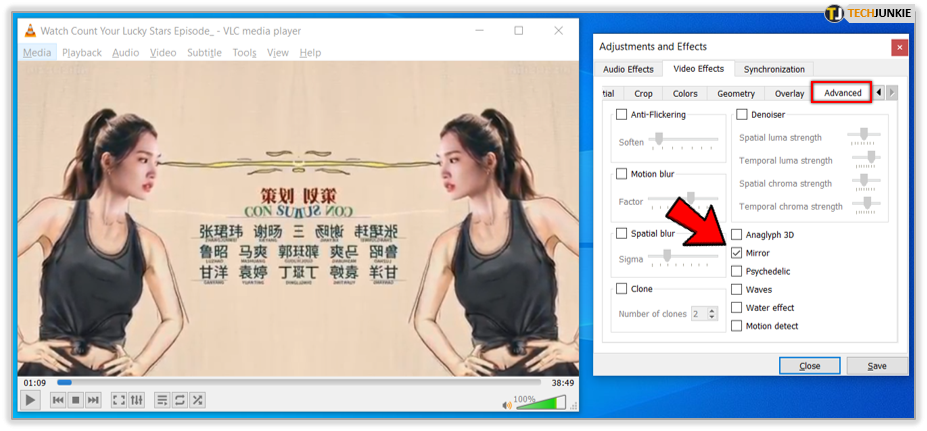
Advanced video effects in VLC
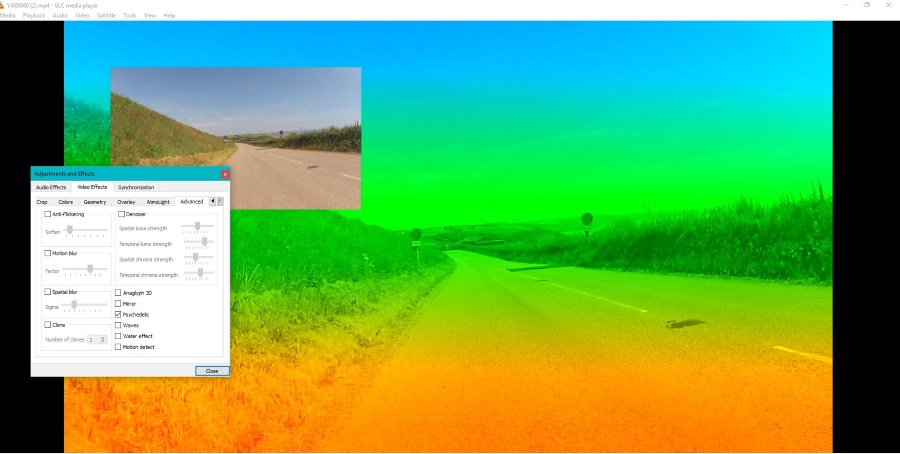
The final tab in Video Effects is Advanced. Here you can tweak video playback to add some cool effects. Anti-flickering is good for lower frequency or shaky video to smooth out playback. Motion blur adds or removes the same for action shots. Spatial blur adds blurring across the scene while Clone makes multiple copies of the scene in their own window. Dionizer is for reducing noise within a scene but I cannot seem to get it working in my version.
The real fun comes in the form of Anaglyph 3D, Mirror, Psychedelic, Waves, Water effect and Motion detect. These all add effects to the video that go from the extreme to the quite gentle. Effects are applied to still and moving scenes and some, like Psychedelic make your eyes hurt while Wave is a nice gentle effect.
Video effects in VLC are a powerful but underused aspect of the player. They are quick to get to grips with and can make or break a video. Do you use them?


3 thoughts on “How To Adjust Brightness in VLC and Other Video Effects”
Maybe my vlc version is the problem. Am using vlc latest version. Thank you.