


How to Change Skin Color in PicsArt

As different beauty standards apply for people worldwide, apps that allow you to change your skin color are currently in high demand. That’s why it doesn’t come as a surprise that one of the most popular options on the PicsArt app is a Beautify Tool. With it, you can change your skin tone and effectively remove any imperfections you have on your face.
In case you were wondering how to use PicsArt to edit your photos or change your skin color, we’ll have laid out the complete process to tell you more about this powerful editing tool.
How to Change Skin Color with the Beautify Tool?
Changing a skin tone is very simple in PicsArt, and we’ll guide you through it step by step:
- Open the PicsArt app and open an image that you want to edit.
- Open the “Beautify tool” and then find the “Skin tone” option.
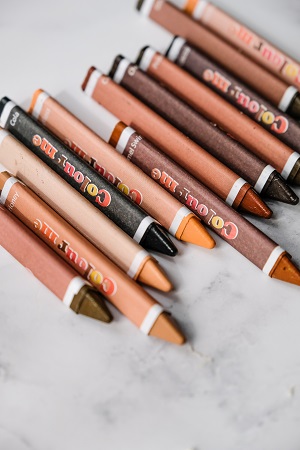
- Once you click on the “Skin tone” option, you’ll see a tone pallet where you can choose from light or dark skin tones.
- Decide which skin tone you prefer and tap on it.
- You’ll also have additional options for your brush like, “Size,” “Opacity,” and “Hardness.” “Size” adjusts the size of your brush, “Opacity” adjusts the transparency of the brush, and “Hardness” changes the softness of the brush.
- Finally, when you’re done with adjustments, you can apply them or delete them with an eraser tool.
- On the top right corner, you’ll see a checkmark, tap it when you’re all done. This way, you’ll save your new edited image to your gallery.
How to Edit Photos Fast on PicsArt?
Filters are one of the best ways to edit the whole photo in an instant. When filters appeared on Instagram and Snapchat, they soon became a part of every photo editing app on the market. PicsArt has a rich library of filters that can help you uniquely edit your photos.
Instagram-Friendly Filters
If you’re used to using well-known filters like Clarendon, Valencia, or Lo-Fi, you’ll enjoy going through PicsArt’s list of powerful filters that outperform any filter you’ve used so far. With categories like FX, Artistic, Trendy and Grainy, Magic, and Pop Art, you’ll have a wide range of solutions to make photos look great on all your social media accounts. Here’s how you can use these filters:
- Open the PicsArt app and tap the “+” sign on the bottom of your screen.
- Upload the image you want to edit.
- Tap “Effects” to open an impressive collection of filters.
- Select one of the filters and apply them to your photo.
Layering Filters
Has it ever happened that you have all your photos ready, but then you can’t decide which filter to use? All of them seem so simple, and your photos suddenly look so blunt? If you’ve ever been in this situation, PicsArt’s layer feature is just the thing for you. Layering filters will give you a chance to combine some of your favorite filter features, layering them until you get a fabulous effect for your future posts.
Making Your PicsArt Presets
Presets are a must-have item for anyone with a social media profile. Once you’ve mastered the photo editing process, having a theme will set you apart from others.

To create a custom preset with PicsArt, you’ll need to go through your usual editing steps. Once you’re finished with adding filters, changing colors, you need to turn on “PicsArt Replay” before you save the photo. Consequently, your saved edits will enable the “Replay” option to repeat the process on any other image.
Every time you use the “Replay” option, and you want to add some last-minute changes, you can do it while the preset is on. Each step is customizable to make the editing experience as easy and creative as possible.
Also, you will have a library of your saved Replays and presets to use whenever you need them in future. Make a preset for every account, topic, or theme to align the whole profile with the same aesthetic.
Face Swapping on PicsArt
If you tried to change your skin tone, add filters, or add some presets, and you still don’t like your photo – face swap might do the trick. Swapping your face with Elsa from Frozen or one of the Greek goddesses might help you get what you’re looking for. Furthermore, with PicsArt, you can make unique face swaps, if you’re interested, here’s how:
- Open the PicsArt app and click “+” to import the background image.
- Click on “Add photo” to upload a picture of you or a model you want to use for a swap.
- Fit the mast to the background image and make it look as realistic as possible.
- Click on the “FX” option to add a filter so that the mask matches the background image’s tone.
- Use the “Adjust” option to edit the photo’s saturation or tone.
- Use the “Eraser” option to smooth the edges so that the mask blends in.
Keep on Editing
PicsArt is a prominent all-in-one photo editor and one of the largest editing platforms with more than 150 million active members. With its numerous editing features and tools, PicsArt will help you add a unique spark to your profile.
Now that you know how to edit your skin color or use multiple filters for editing, it’s time to start using them. Instead of looking at other influencers’ posts, try to rearrange your images with presets and make new ones. In the end, you might be pleasantly surprised by the outcome.
How are you at editing your photos? Do you have preferred filters, or do you edit your photos manually?
Let us know in the comments section below!


One thought on “How to Change Skin Color in PicsArt”