How to Customize the Mouse in Windows 10

The mouse is still essential to Windows even in these days of touchpads and touchscreens. There are plenty of ways you can customize the mouse both with Windows 10 settings and extra third-party software. This is how you can configure the cursor, cursor speed, mouse buttons and wheel.
Customizing the Mouse with Windows 10 Settings
Windows 10 has a variety of mouse options. Click the Cortana button on taskbar, enter ‘mouse’ in its search box and then select Mouse & touchpad settings. That opens the window directly below from which you can reconfigure the primary mouse button and adjust scrolling settings.

However, the options there are somewhat limited. You can select more by clicking Additional mouse options to open the window directly below. That window’s tabs include most of the mouse settings in Windows 10.

Firstly, customize the cursor by clicking the Pointers tab. There you can select a variety of alternative cursor schemes by clicking the Scheme drop-down menu. A preview of the selected cursor scheme is below the Scheme drop-down menu.
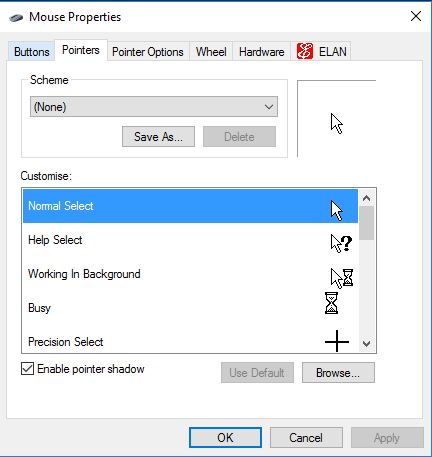
You can further customize the cursors by selecting them in the Customize box and clicking Browse. Then you can choose more cursors from the folder. Alternatively, you can add entirely new cursor sets to Windows from the Open Cursor Library site. Click a cursor set on that page and press the Download button to save it to a folder.
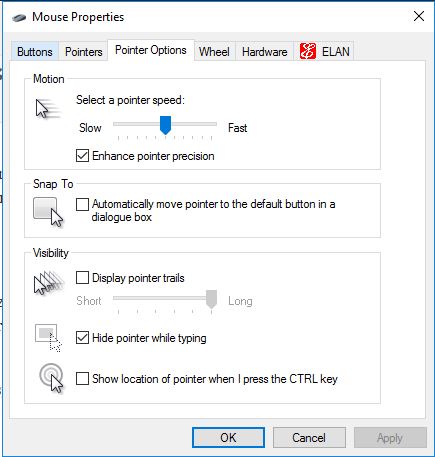
To configure the cursor speed, click the Pointer Options tab as below. That includes a Motion bar that you can now drag. Drag the bar slider further right to increase the cursor speed.
The Buttons tab also includes a handy ClickLock option. To drag windows, you would usually hold the left mouse button down. However, ClickLock enables you to drag windows without holding the left mouse button. Select the Turn on ClickLock option and press Apply to enable it.


Now click the top of the Mouse Properties window for a few secs. Then you should be able to drag that window, and others, without holding the button. Furthermore, you can also select text on website pages much the same without holding button.
Customizing the Mouse Buttons with X-Mouse Button Control
X-Mouse Button Control is a great third-party software package to customize the mouse with. With that you can reconfigure the mouse buttons. Open the software’s website and click Latest version to save the X-Mouse setup wizard and add the program to Windows 10. Then double-click the X-Mouse Button Control system tray icon to open the window below.
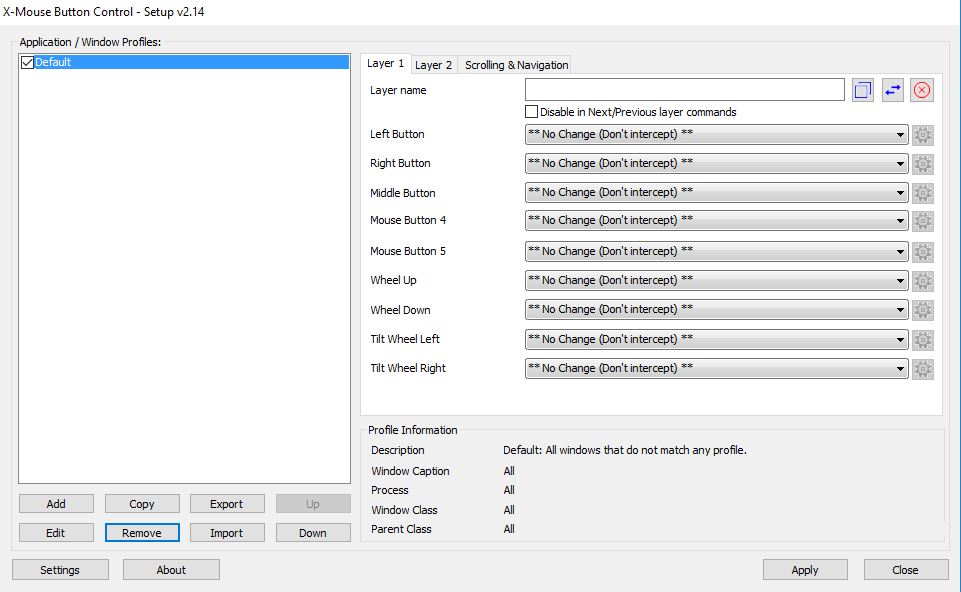
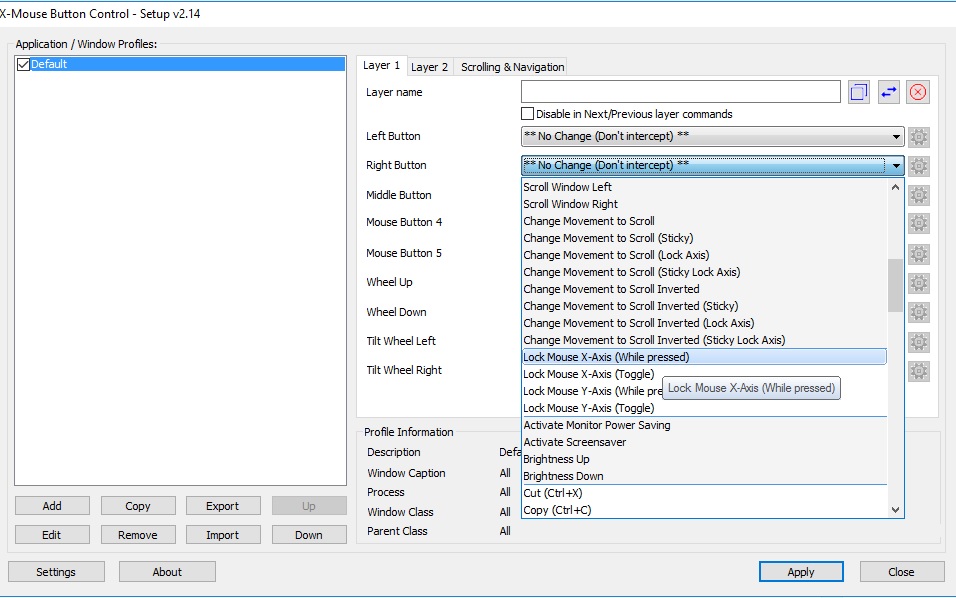
Click the Right Click No Change (Don’t intercept) drop-down menu to select alternative mouse actions for that button. For example, you could select Alt + Tab from that menu to open the Alt + Tab switcher by pressing the right mouse button. Press the Apply button to save the selected settings.
Don’t reconfigure the primary left mouse button. If you were to reconfigure that button to something else, you then won’t be able to effectively use the X-Mouse Button software and have to re-install it to restore the default settings. That’s what I did when I configured the left button to open Alt + Tab switcher.
You can also assign multiple actions to a mouse button with the X-Mouse layers. Click the Layer 1 and 2 tabs and select a new action for the same button in both tabs. Then click Apply, and right-click the X-Mouse system tray icon. You can switch between the layers by selecting Layers on the context menu.
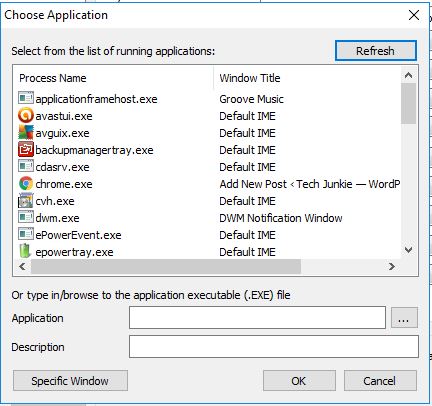
To customize mouse buttons for a more specific software package, open the program and press Add on the X-Mouse Button Control window. That opens the window below that includes a list of running applications. Select the program from the running applications list and click OK. Select the program’s check box on the left of the X-Mouse Button Control window, configure the mouse buttons for it and press Apply. Then the customized mouse buttons will only work for the selected software.
X-Mouse Button Control also has a Scrolling & Navigation tab. Click that to open some further scroll settings as below. There you can further configure the mouse scroll. For example, if you select Invert mouse wheel scrolling the scroll bar slider moves down when you roll the wheel up.
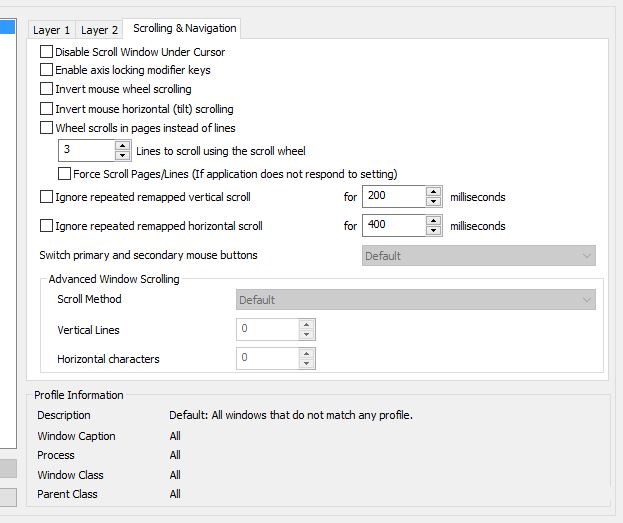
Press the Settings button to open further mouse options. The General tab has some extra customization settings. That includes an Activate window when scrolling check box. If selected, that option enables you to automatically switch windows by scrolling their bars with wheel.
So there are plenty of ways you can customize the mouse with Windows 10 options and X-Mouse Control. Furthermore, you can also assign macros to mouse buttons with ClickyMouse. Open this Tech Junkie page for more details about that software package.