How to Delete a Virtual Machine in VMware

VMware is a virtualization software where you can create virtual machines to test different programs and apps, upgrades, and many other things.
You can use one virtual machine for multiple testings, but you can also create new environments every time you have a new feature to test. When you no longer need a virtual machine, you can delete it.
Read this article to find out how you can delete a virtual machine in VMware.
Are You Sure You Want to Delete This?
In VMware, you can either completely delete a VM from the disk or remove it from favorites. First, we will cover the ways to delete it, and then we’ll show you how to remove it from the favorites. Finally, we’ll show you how to kick a VM from a team.

1. Deleting a VM (for Workstation 7.x and Above)
If you wish to delete a virtual machine from your computer completely, you can follow these steps:
- Select the desired virtual machine’s name.
- Go to the Workstation menu bar.
- Find Manage in and select it.
- Choose Delete from disk.
- Click on Yes to confirm.
- Empty the Recycle Bin.
The last step is optional, but you should do it if you want to get more space in the Workstation.
2. Deleting a VM (for Workstation Player 12.x)
Things work a bit differently for the Workstation Player 12.0 and above.
- Right-click on the name of the VM you want to delete.
- Choose Delete from disk.
- Select Yes to confirm.
- Empty the Recycle Bin to free up space.
The virtual machine is now completely removed from your computer. You can’t access the data that you once stored on it. That’s why it’s good to back it up before deleting the VM. Deletion is an irreversible action in VMware.
3. Removing from Favorites
If you merely want to remove your virtual machine from favorites, do the following:
- Launch the Workstation on your computer.
- Go to View and then Favorites.
- If you don’t want the virtual machine that’s currently running to be among your favorites anymore, click on File.
- Now choose Remove from favorites.
Your VM will no longer be in your Favorites, but it will still exist on your hard disk.
How to Delete a Virtual Machine from a Team
Virtual machines can also work together. If you’re using the Workstation 5.0, you have access to Virtual Machine Teams. This feature allows you to connect multiple virtual machines and have them work together on one computer.
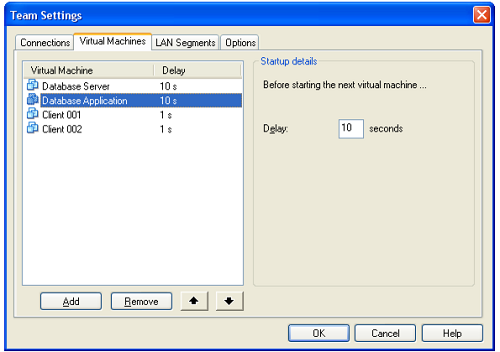
If you want to remove a virtual machine from such a team, do the following:
- Open the Workstation and click on a team. You can find your teams in Favorites, or by looking at the console tab or summary.
- Click on the team name, and then select Remove from the menu.
- Now choose the virtual machine name.
Note that this disconnects virtual network adapters connected to LAN segments because they’ve been removed along with the virtual machine.
You have successfully removed the desired machine from the team. Now it can keep working independently. You can also add it to Favorites again since it was automatically deleted from that list when added to the team.
Create, Delete, Repeat
It’s easier to delete a virtual machine than to create one. When you’re done using a specific virtual environment, VMware lets you remove it in a couple of easy steps and move on to the next task.
But be careful. Once you delete a virtual machine, there’s no going back. You can’t restore it, and all the data is lost. The smartest thing to do is to create backups if you think you might need some or all data from the said V in the future.
How often do you delete virtual machines from your computer? Have you ever deleted one by mistake? Let us know in the comments section below.