


How to Securely Erase External Drives with Disk Utility on the Mac

When you delete a file on your Mac’s drive, it’s gone, right? Well, when you delete a file on your Mac and then empty the Trash, then it’s gone, right? Not exactly.
Let’s talk about how deleting files works and why you’ll want to Securely Erase your external hard drives before sharing them with others or tossing them out.
What Happens When You Delete a File
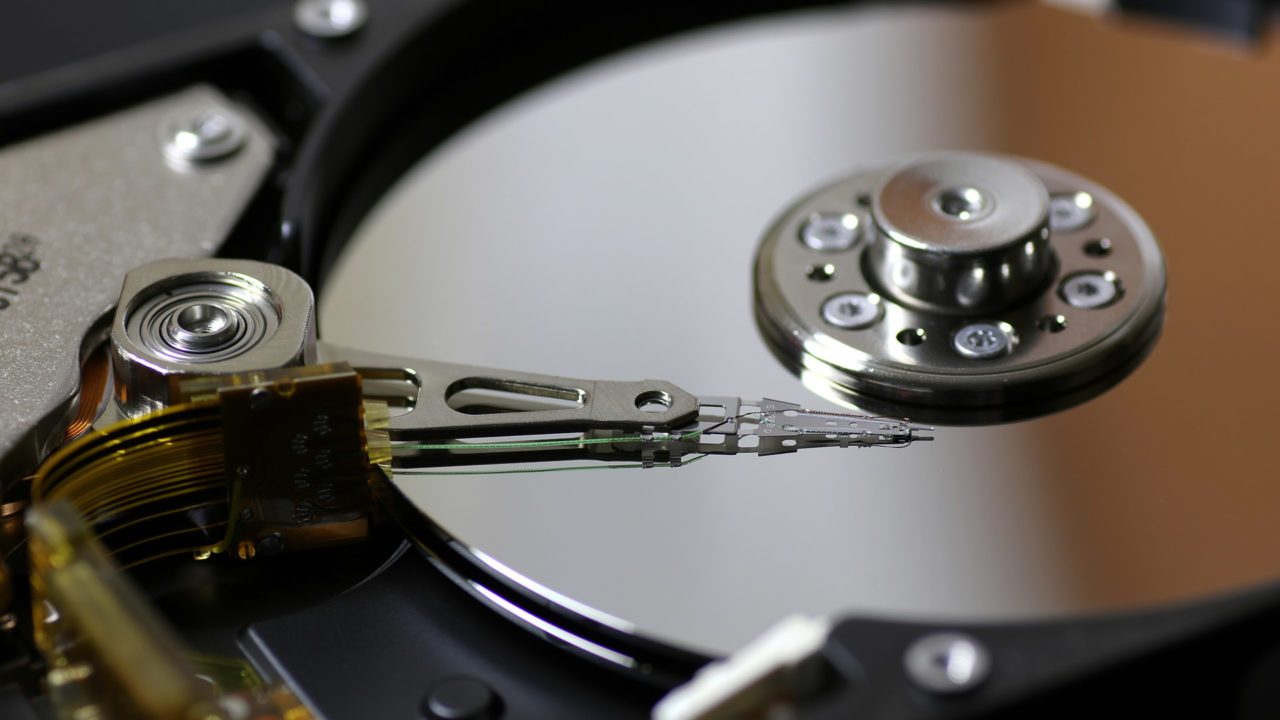
In general, when it comes to traditional mechanical hard drives at least, deleting a file and even emptying your Trash simply removes the file from view. You won’t see it anymore in Finder and your Mac will report the space the file used as available. But the bits of data that comprise the file aren’t actually gone, and will remain on your drive until the space they occupy is needed for new data.
Adobe Stock
Here’s a good analogy: think of your Mac’s hard drive as a book with a table of contents or index. The index tells you (the computer) exactly which page to turn to when you need a specific piece of information, but the information itself exist only on that page. When you delete a file, including when you Empty the Trash, your Mac essentially erases the file’s entry in the index, but doesn’t go and erase the page in the book on which the information was stored. It simply says “hey, this page is no longer needed, so go ahead and write new information on it when necessary.”
Therefore, if you delete a bunch a files and then load your Mac up with new data, there’s a good chance that your new data will need the space occupied by your deleted file and then overwrite it. Unless that happens, however, those bits of data from the original file will still be on your hard drive, and may be accessible via special data recovery applications or, in more serious cases, physical analysis of the drive’s internal platters themselves. This means that files you thought were gone may still be lurking on your hard drive, including tax and financial records, confidential businesses or medical information, and even things like private photographs.
Securely Erasing Your Drives
A way to protect yourself from having this sensitive information exposed is to use a feature called “Secure Erase.” Normally, when you use Disk Utility to erase a drive, it essentially wipes out the drive’s “table of contents” from our example earlier. But if you use the Secure Erase feature, it will actually go through the drive sector-by-sector and write data to every part. This overwrites the entire drive and makes data recovery efforts much more difficult.
There are different levels of Secure Erase that increase the number of passes Disk Utility will make when writing new data to the drive. For most users a single pass each of 1’s and 0’s will be enough, but if your drive contains data from certain industries such as health or government, you’ll want to use the more robust levels which write up to seven passes over every sector of the drive.
Securely erasing a drive takes a lot more time than a standard erase procedure, of course, and may take more than a day if you’re dealing with a huge multi-terabyte hard drive and a seven-pass erase setting. But if the data is sensitive enough, then trust me, it’s worth the wait to ensure that it will be unrecoverable.
How to Securely Erase External Drives
Our instructions here (and the title of this tip) focus on external drives. This is because most Macs ship with solid state drives these days (yeah, those entry-level iMacs and Mac minis with HDDs are kind of a rip-off) and there’s no need to securely erase SSDs because they store data differently from hard drives. In fact, recent versions of Disk Utility in macOS won’t even let you initiate a secure erase of an SSD, and if you somehow manage to do it anyway, all you’ll be doing is severely damaging the longterm health and performance of your drive.
That said, if you have an external drive that you use for data storage or backup, and one that is far more likely to still be a mechanical hard disk drive, you can and should securely erase it before giving it away or throwing it out.
To do so, plug the external drive into your Mac and connect it to power if necessary. Once it powers up and mounts in Finder, launch Disk Utility (found in the Applications > Utilities folder). In Disk Utility, you should see a list of both your internal and external disks in the sidebar on the left.
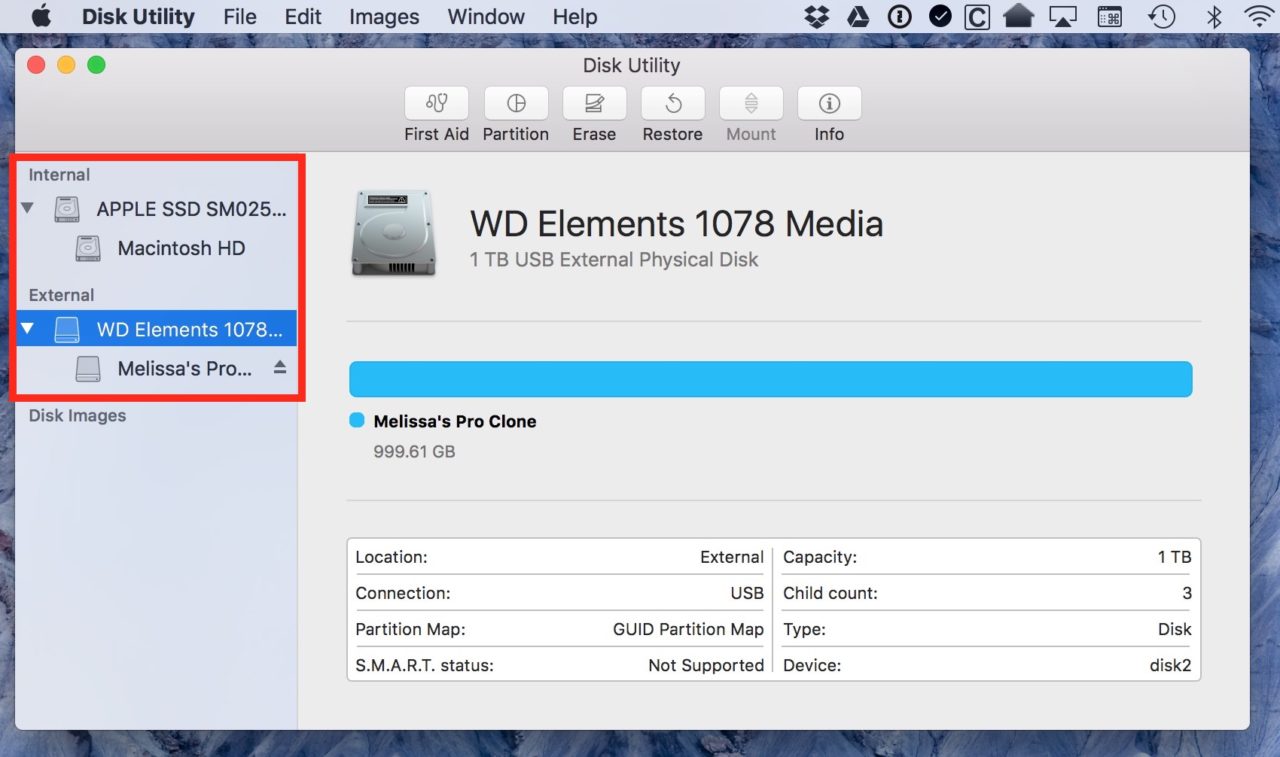
Click on the drive you’d like to erase (not any of its indented partitions) and then click the Erase button in the toolbar.
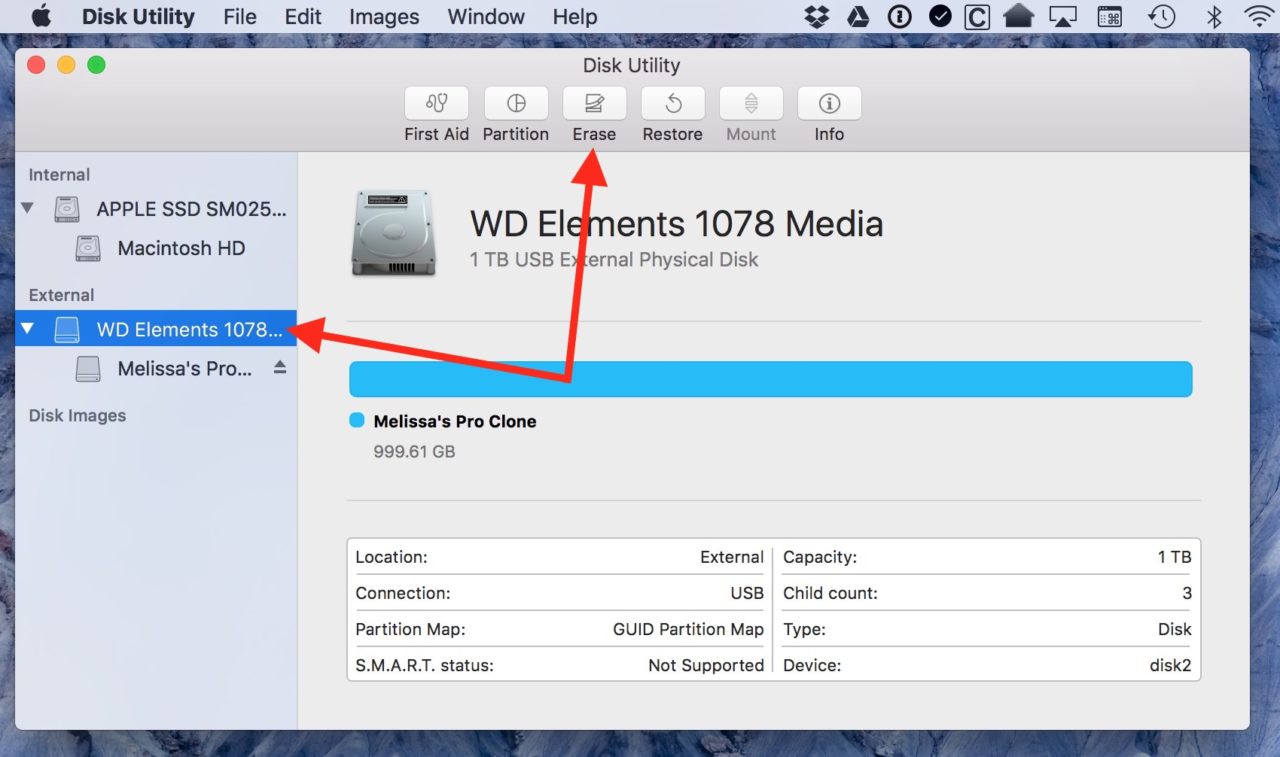
And, uh…in case it needs to be said, be doubly super über sure that you’ve picked the right drive. Because you ain’t getting its stuff back after you do this, so be careful.
Anyway, when you click “Erase,” you’ll get some choices for your drive’s new format, partition scheme, and so on. Unless you’re planning to use the drive for something very specific, what I’ve chosen below will be how you want to roll. Once those options are set, click on the Security Options button at the bottom left. If you don’t see the Security Options button, make sure (1) that you’ve selected the drive itself from the sidebar on the left (and not any of its partitions), and (2) that you’re not working with an SSD or RAID array of any kind.
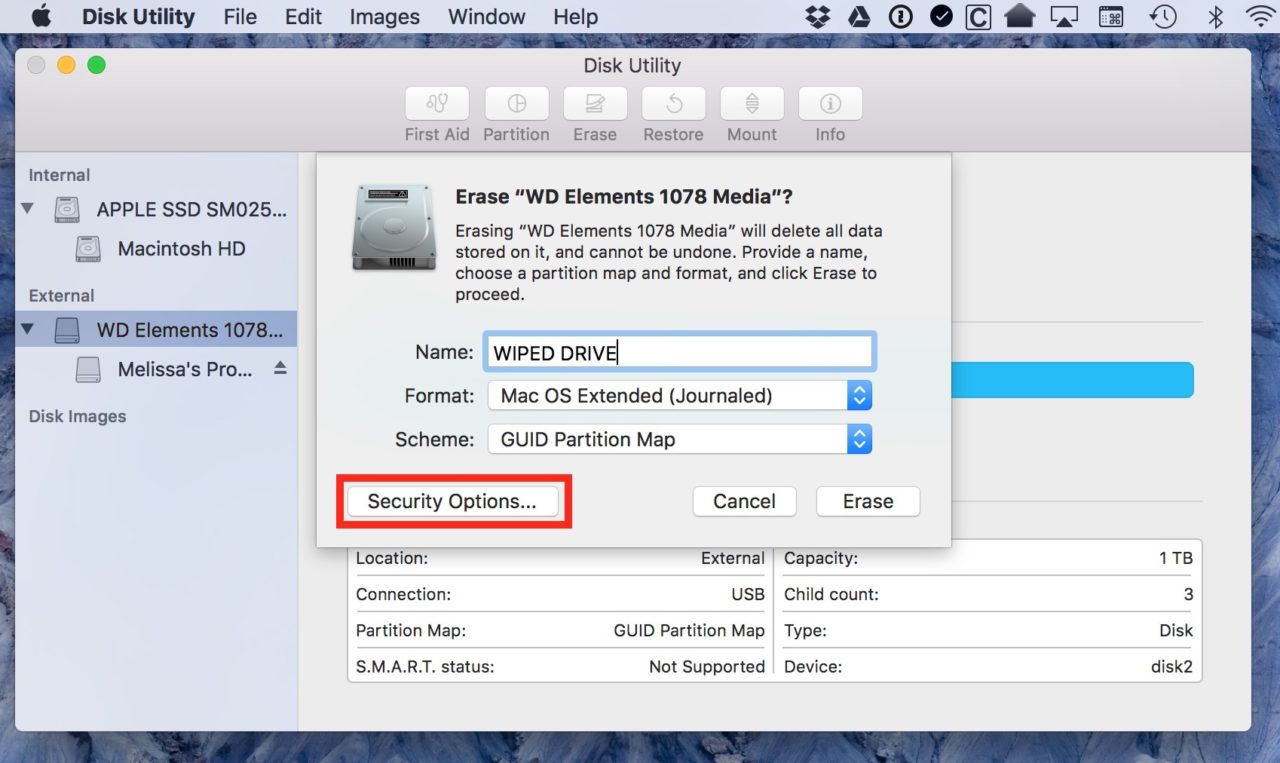
Under “Security Options” is a slider for overwriting the drive securely. “Fastest” writes a single pass of zeros over the entire disk and while it is indeed the fastest method as its name implies, it’s not very secure and the data may still be easily recoverable by someone who knows what they’re doing. For most users, moving the slider one tick to the right, which represents a two-pass cycle, is the best balance of speed and security. As mentioned earlier, if your drive contains data from certain sensitive industries, check with you IT department for the minimum level you’ll need to use to remain compliant with data protection policies.
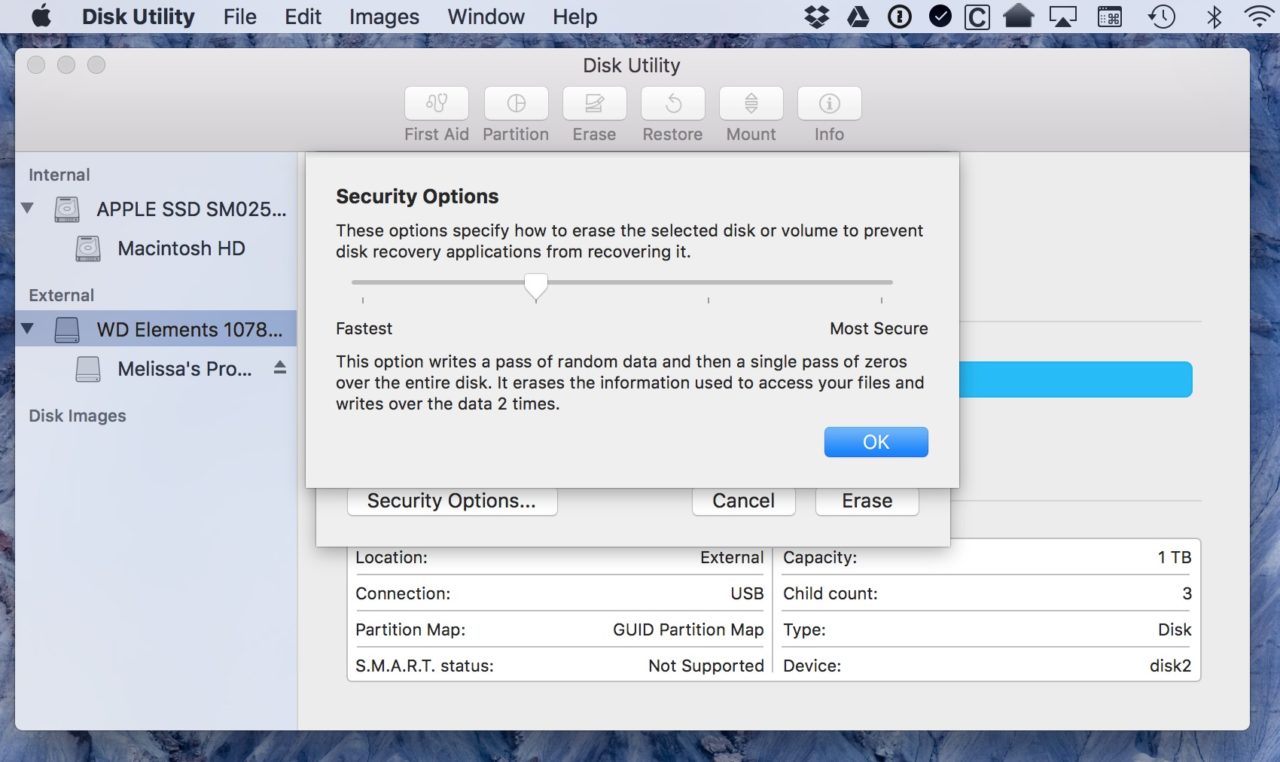
No matter which option you’re comfortable with, though, be prepared to wait a while. Once you select “OK” and then “Erase” on the previous drop-down, a progress bar will appear that’ll take between a few hours and until the heat death of the universe to complete, depending on how many passes you chose and how much storage your drive has.
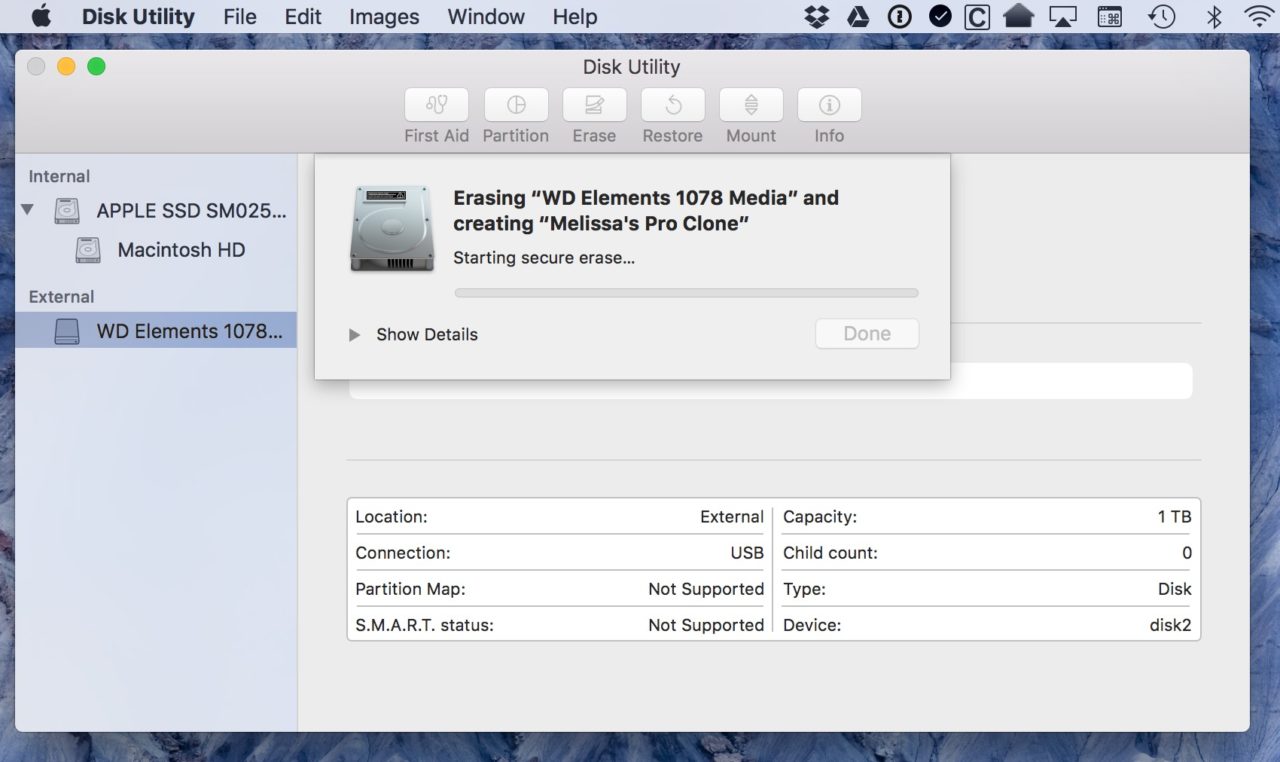
All right, I’m exaggerating a bit. That seven-pass erase will only take half of the time until the heat death of the universe.
Once the process is complete, you can do whatever you like with the disk. Give it to a friend! Recycle it! Wear it around your neck like a trophy! Because no one’s gonna be getting your data off of it afterward. One more note, though: If you can’t securely erase your drive—say, the disk is failing so badly that Disk Utility won’t even mount it—the best thing to do is to physically destroy it before you get rid of it. Drill some holes through it, for example. Then you can rest easy at night knowing you didn’t just toss out a disk containing a complete copy of your financial info. Yuck!


