


How to Send an E-mail With a Previous Date
Nowadays, emails are essential for communicating. It’s among the best ways to exchange important documents and notes with your friends, family, and colleagues at work. If you frequently send emails for work, you may schedule a few to streamline your workflow.
However, what if you forgot to send an important email before the deadline? Wondering if there’s a way to send an email with a previous date? There are a few ways to backdate an email, including changing the date and time on your computer, using Inspect Element, or creating an SMTP server.
In this post, we’ll discuss a few ways that you can use to send an email with a previous date.
1. Change the Date & Time on Your Computer
One basic way to send an email with a previous date is to change your PC’s clock to the time you are trying to simulate before sending the email. Some older email clients like Outlook Express will accept this date and send it to the email server with the local date and time.
Here’s the procedure:
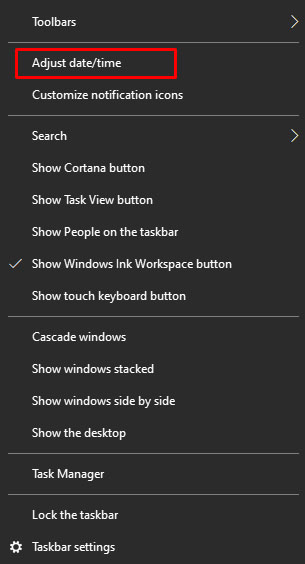
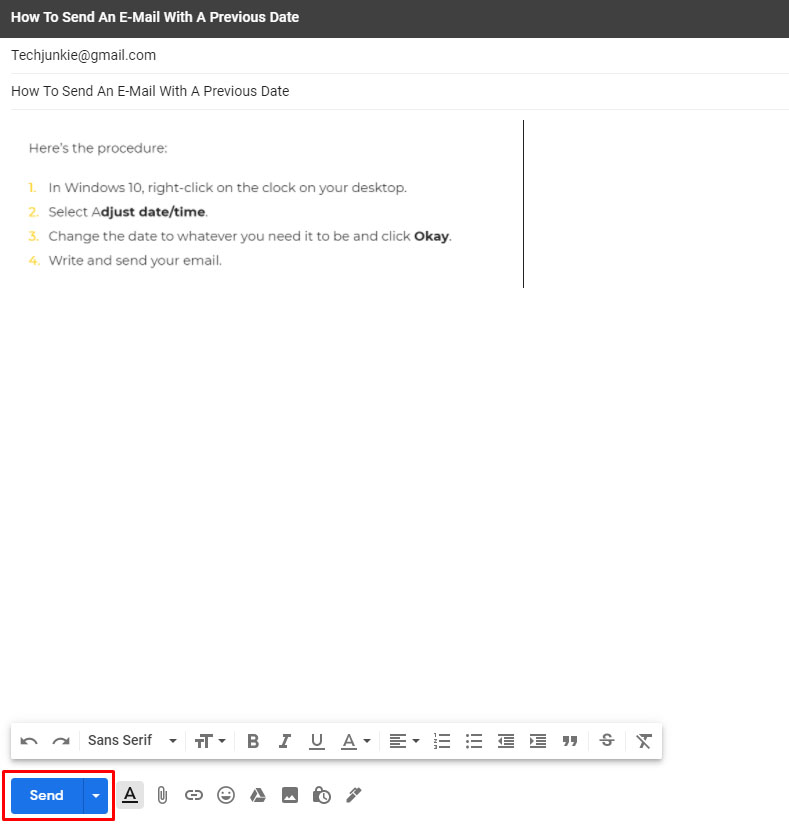
- On a Windows computer, right-click on the clock on your desktop.
- Select Adjust date/time.

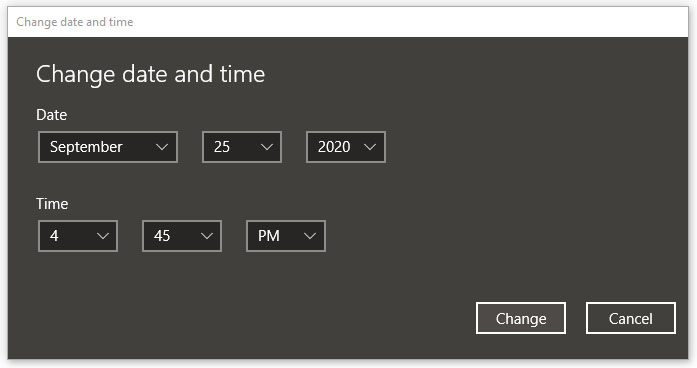
- Change the date to whatever you need it to be and click Okay.

- Write and send your encrypted email.

You can try the above trick on Mac with one of the many mail clients available for macOS.
Why This Method May Not Work
While this method may work, the email metadata will still contain the correct date. As such, this method may fail for several reasons:
- Depending on your email setup, your email provider may also overwrite the time and date.
- Subsequent relay servers (the computers that send your email toward its destination) will ignore the timestamp from the computer and use the server time anyway.
- The metadata from your email server will show when it received your email, not when you wrote and sent it.
- The receiving email server will still stamp the correct receipt time before it heads to the recipient.

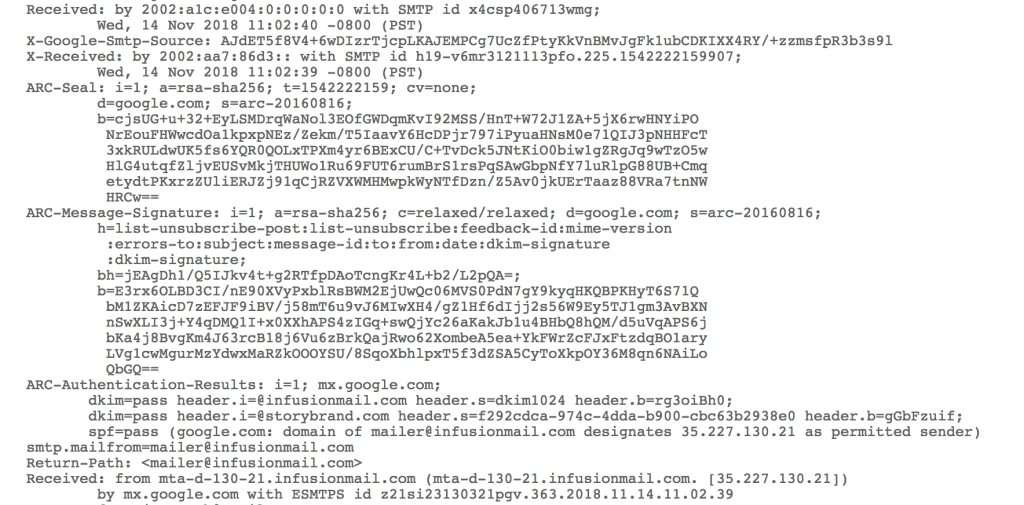
For example, in the image of an email’s metadata above, the real-time and date are included four separate times:
- Delivery date: Thu, 08 Sep 2016 17:31:45 +0100.
- Received: from mail by mail147.extendcp.com with spam virus-scanned (Exim 4.80.1) for EMAIL ADDRESS; Thu, 08 Sep 2016 17:31:45 +0100.
- Server (version=TLS1_0, cipher=TLS_ECDHE_RSA_WITH_AES_256_CBC_SHA_P384) id 15.1.609.9; Thu, 8 Sep 2016 16:31:40 +0000.
- Received: from DB5PR03MB1415.eurprd03.prod.outlook.com 15.01.0587.013; Thu, 8 Sep 2016 16:31:40 +0000.
To view metadata for any email in Gmail, click the three dots in the top right corner of the email. Then, click Show original. As you can see from the screenshot below, the metadata will display the correct date and time for each stop the email makes on its way to the recipient.
Interested in how all this stuff works under the hood? Check out our tutorial on how TCP/IP works.
2. Creating an SMTP server
So, the email server will put the correct date and time stamp on your email, but what if you can set up and control your own email server?
Email works using the Simple Mail Transfer Protocol (SMTP) and SMTP servers, which are not incredibly difficult to set up or use.
If you have an earlier version of Windows, particularly a server OS such as Windows Server 2000, you may already have an SMTP server on your PC. All you have to do is turn it on and configure it to send your emails.
However, Windows 10 no longer includes an SMTP server. Fortunately, there are a lot of free SMTP server programs out there that you can download for free. This is rather a lot of trouble to go through to get an email date to look different, but if it’s really necessary, this may be the only way.
Note that you must own a domain to use this procedure!
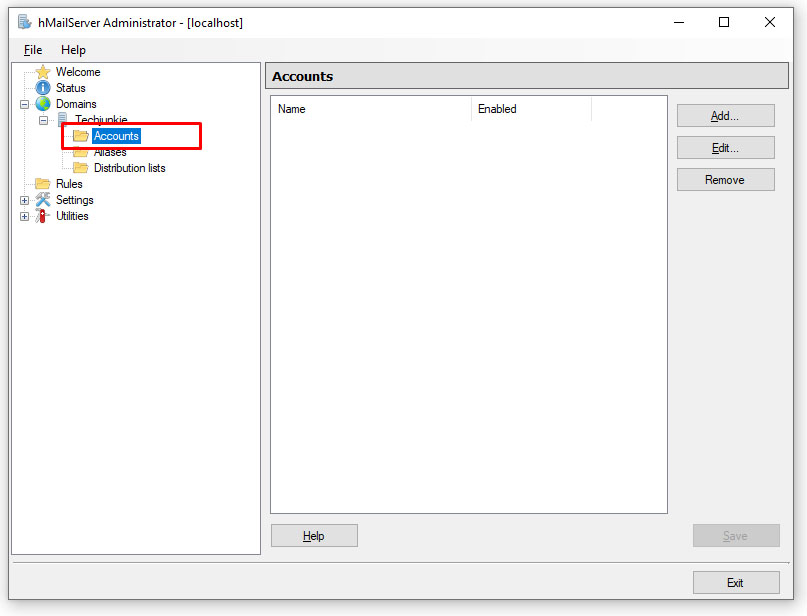
3. Using hMailServer
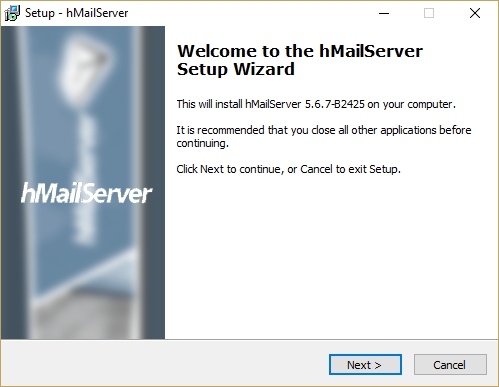
hMailServer is one of the most popular free email servers. Here’s a quick rundown on how to install and configure it.
- Get the latest version of hMailServer and download it.

- Run the installer. You can accept the default values.

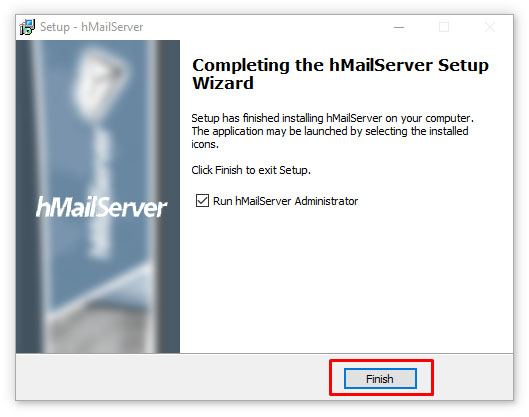
- Be sure to note your administrator password, as you will need this later.
- Click Finish to complete the installation.

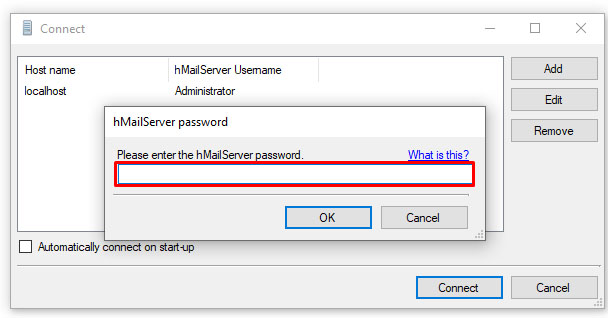
- In the hMailServer interface, click the localhost, click Connect, and enter the password.

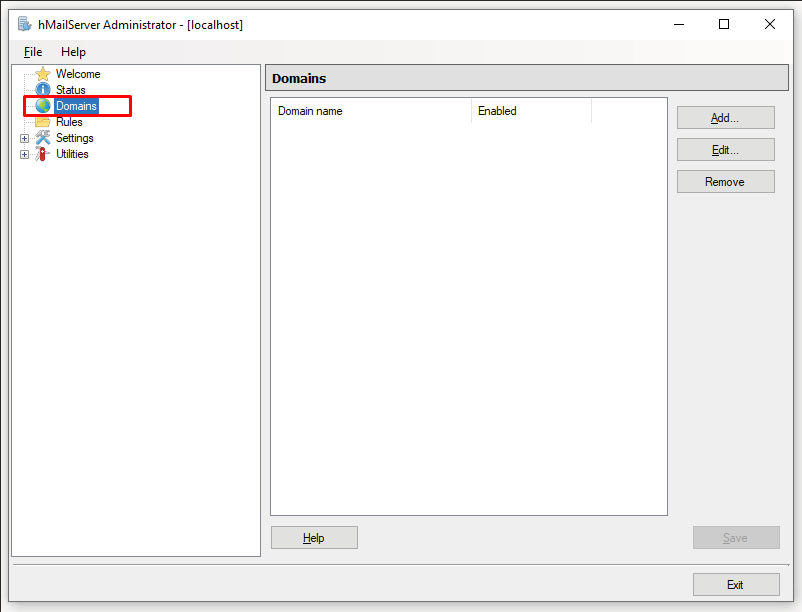
- Click the Domains tab.

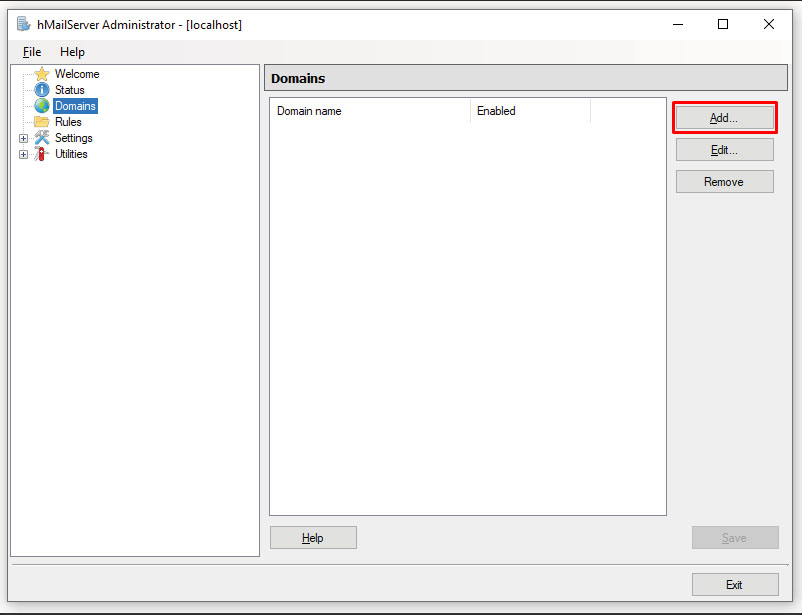
- Select Add Domain.

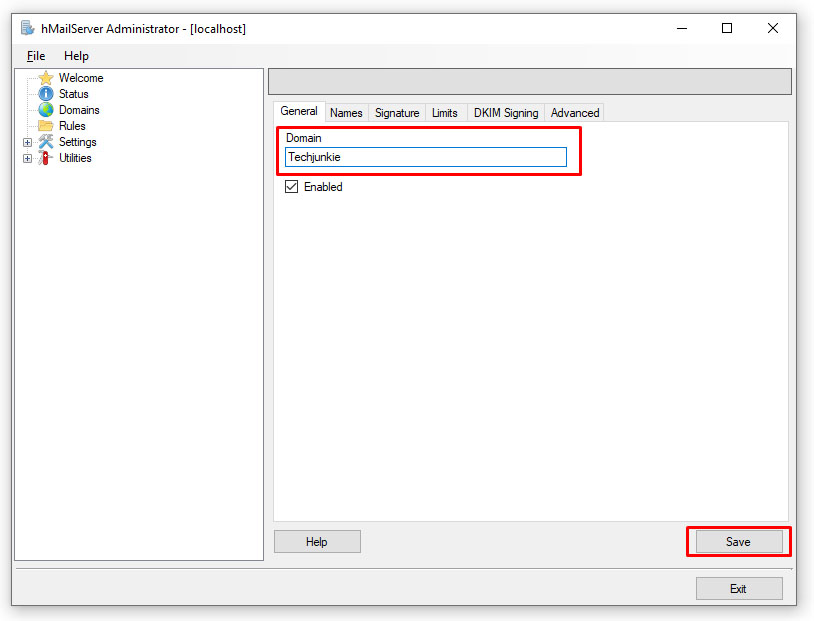
- Enter your domain name and click Save.

- Click the domain name in the domain list on the left-hand side of the interface, and then click the Accounts subfolder.

- Select Add and enter the account information for the email account you are going to create on your domain.


To set up the actual mail transfers, you must get information from the ISP with whom you’ve registered the domain.
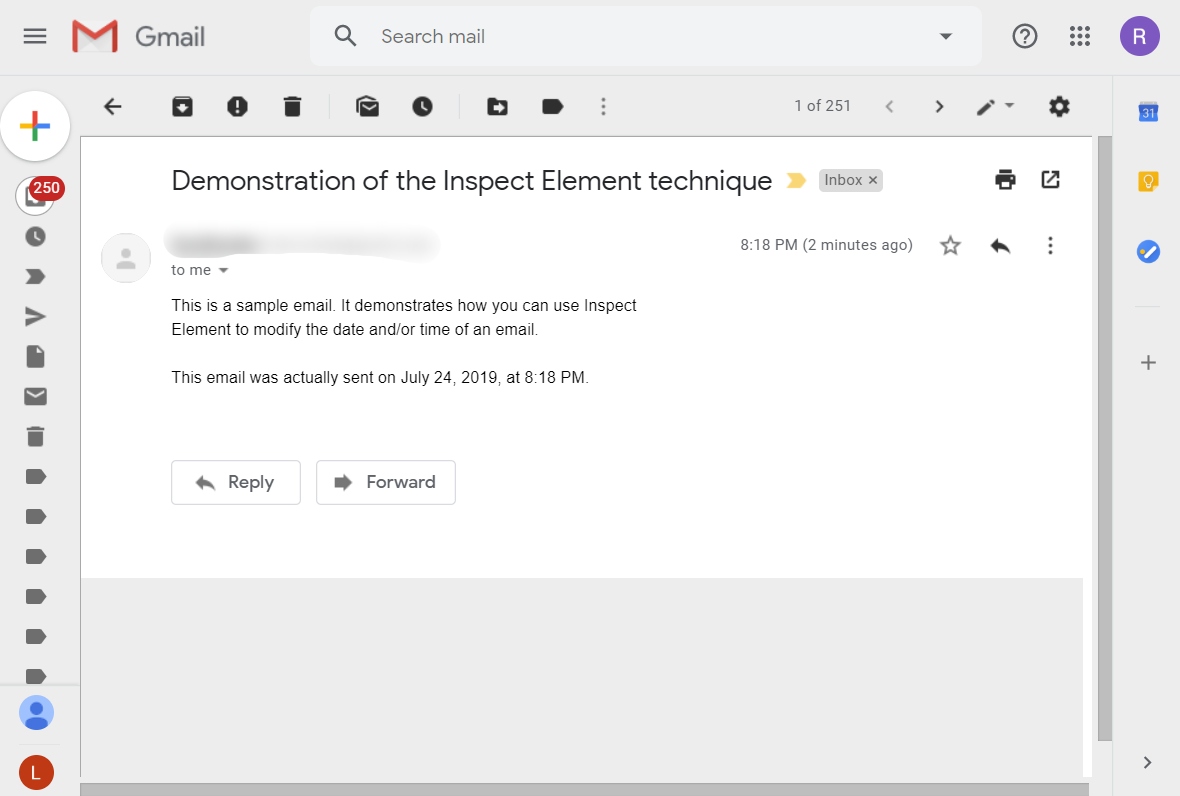
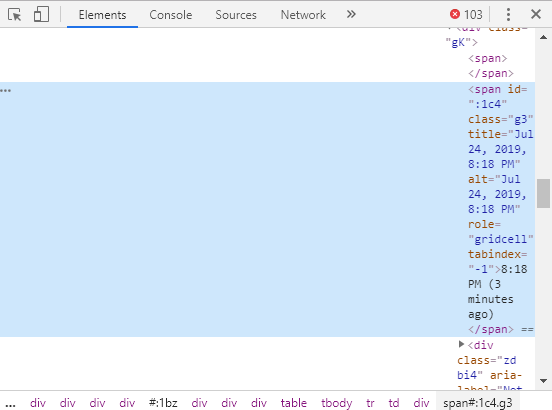
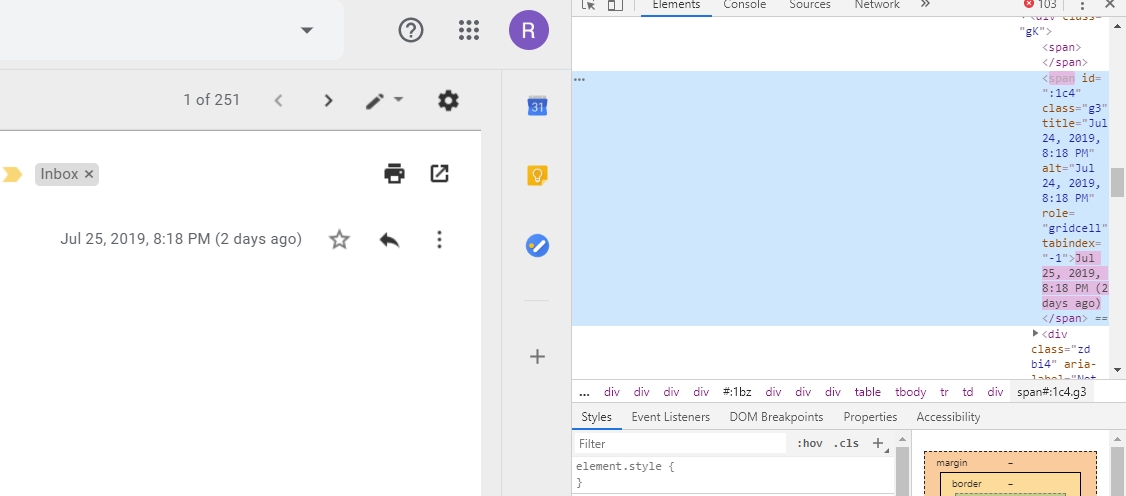
4. Using Inspect Element to Modify Webmail
If you are using Gmail or another webmail client, use Google Chrome’s Inspect Element feature to temporarily modify the HTML code that displays an email on the screen, then take a screenshot of the displayed email to prove that the email has a particular date on it.
Remember that this is essentially forgery, so be aware of your legal liability when engaging in this behavior.
- Open the email you want to modify in your Gmail account.

- Right-click on the displayed date and select Inspect from the context menu.

- Double-click on the time text under the grid cell in the Element Inspector and change the text to the date and time you want the email to display. The text in the email itself changes when you hit Return in the Inspector.

- Quickly take a screenshot. The element will only display for a few seconds before Chrome changes it back to what the source HTML tells it is the true text.
- Trim your screenshot just to show the email with the modified date.
It won’t fool the FBI, but it might be good enough for your professor.
Final Thoughts
If you need to backdate an email for any reason, these are a few tricks you can try. However, while it may fool individuals who don’t bother doing any digging, remember that these methods are far from foolproof and likely won’t work against more tech-savvy people.
Any other tips or methods for sending backdated emails? Share them in the comments below!
If you found this post helpful, consider checking out our guide about how to forward email to your phone as a text message next.
FAQs
A. While there isn’t a way to send a backdated email that’s guaranteed to work, there are a few methods you can try to do it:
1. Change the date and time on your computer.
2. Create an SMPT (Simple Mail Transfer Protocol) server.
3. Edit elements of the mail using the inspect feature.
A. Unfortunately, you can not send an email with a previous date. You can try the methods mentioned in this post, but they are far from foolproof. While it may fool individuals who don’t bother digging, they likely won’t work against more tech-savvy people.


2 thoughts on “How to Send an E-mail With a Previous Date”