How To Turn on Extensions in Incognito Mode on your Chromebook
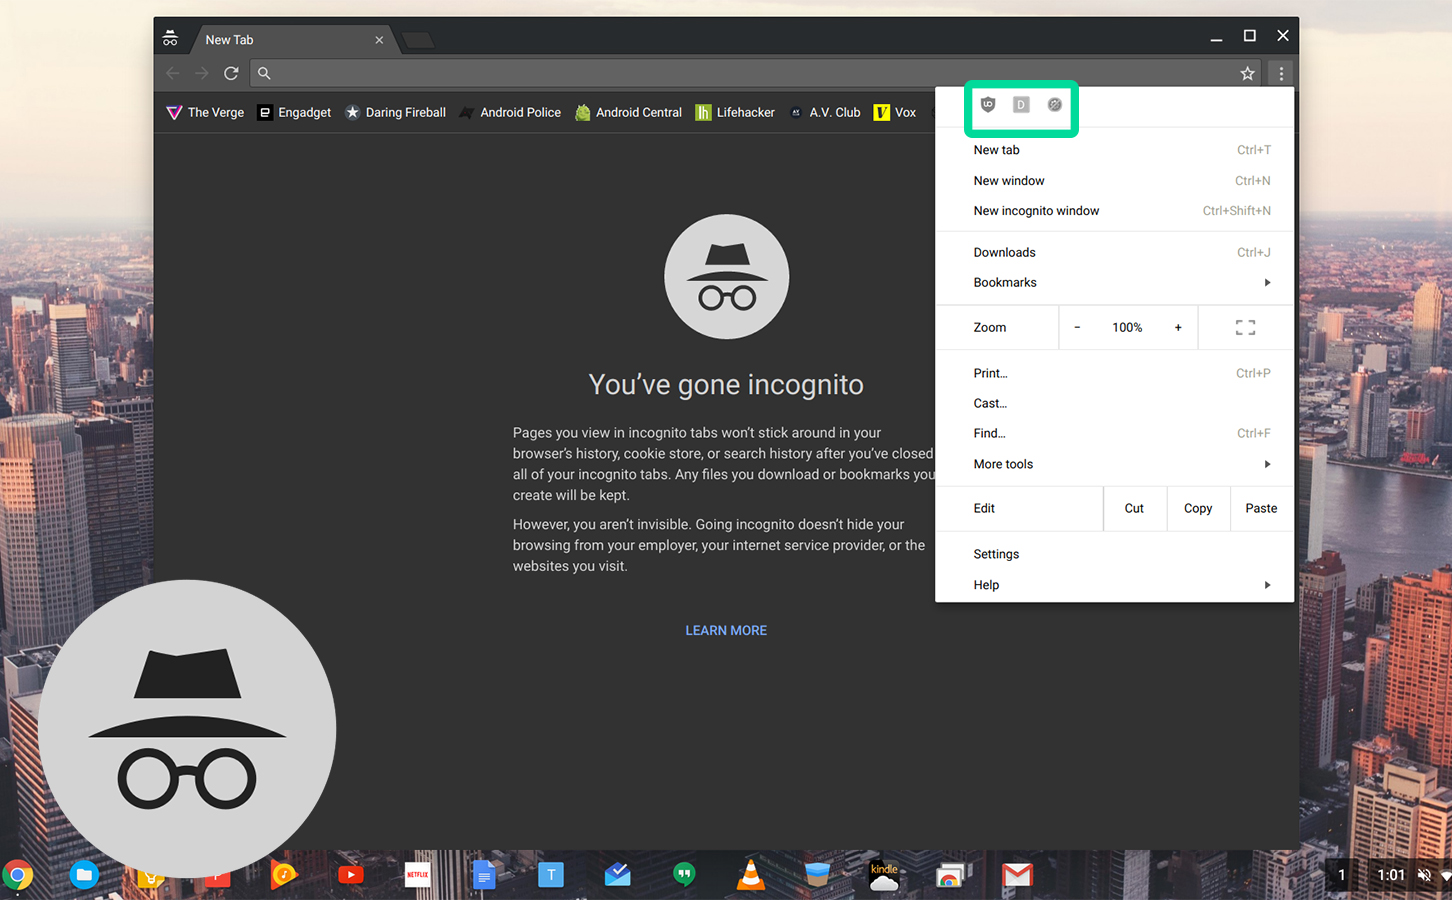
Though browsing in Incognito mode won’t stop your internet provider from seeing the activity you do online, it’s still generally a good idea for protecting your information locally. If addition to hiding your browsing information from family or friends you might use the same computer, it also prevents your information being saved into forms. This can make it really useful for viewing bank information or other sensitive accounts. It also cleans up your search results, giving you unbiased information that isn’t influenced by previous inquiries. Even more, it can be really useful for checking a secondary or tertiary email account without logging out of your main account. So, there are plenty of reasons to use Incognito mode, in addition to the stereotypical uses of which you’re probably already thinking.
One major consideration for Incognito mode: by default, your extensions don’t carry over to Incognito mode. Because some extensions have permissions that allow them to “see” the websites you’re viewing (like ad blockers or deal savers), extensions are disabled so as to help keep your browsing data as private as possible. The problem with this: plenty of people rely on extensions to perform their typical browsing tasks, like using LastPass or OnePass to log into sites with long, complex passwords. For those people, extensions are practically a requirement for browsing. If you still want to use Incognito mode for your browsing, but you need to enable some extensions to make your browsing a bit easier, we can help. Enabling extensions to run in your Chromebook’s Incognito mode is quick and easy, and will save you a ton of time and frustration in the future.
Open Chrome’s settings
Begin in a typical Chrome window. You can use an Incognito window if you already have it open, but it is just going to redirect you back to a standard Chrome window outside of Incognito mode, because you can’t view your extensions in Incognito mode.
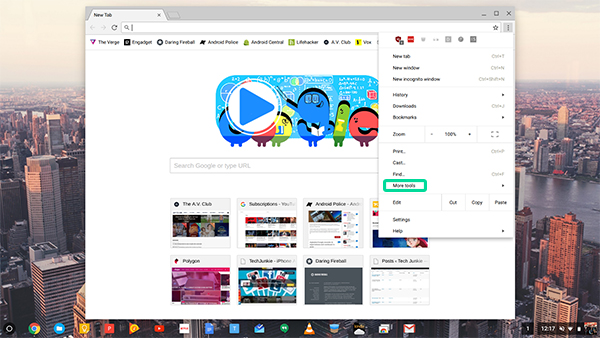
Click the menu button in the top-right of the browser; it’s three dots vertically-aligned. Move your mouse down to “More Tools,” which will extend a second menu with several options. Click “Extensions.”
Enabling Extensions
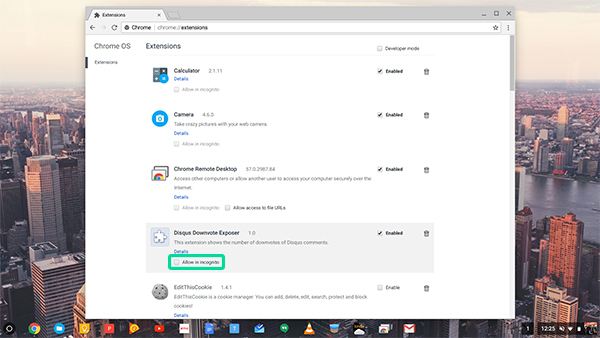
This will bring you to a menu with every extension you have installed in Chrome. If you’re like me, you have a ton of extensions running, everything from standard Google applications like Hangouts and Docs to LastPass for my passwords to extensions that stop autoplay from working in YouTube (a lifesaver on multiple occasions). There isn’t one catch-all switch for enabling extensions to work in Incognito mode. Instead, because Google understands that some extensions have permissions that may be seen as “dangerous” to Incognito users, you have to enable each extension independently of each other. Do consider each extension before you enable its support in Incognito mode. Once you’ve decided which extensions to use (or, if you’ve still decided to select all), it’s as easy as checking a box on each extension.
You’ll notice that each extension has a few options. On the right of the panel, you’ll see a checkbox that either says “Enabled” or “Disabled,” depending on whether or not you’re using the extension at the time. This controls whether the extension is used in proper Chrome, but not whether the extension opens in Incognito mode. Instead, under each extension, you’ll find the information and description for each extension, followed by an option to “Allow in Incognito.” Checking this box will enable the extension in Incognito windows, along with Google’s warning on the subject: “Google Chrome cannot prevent extensions from recording your browsing history. To disable this extension in Incognito mode, unselect this option.”

Remember that each extension has to be enabled independently of each other, so it’s a good idea to enable only the applications you need to work efficiently in Google’s private mode. Also note that, for ChromeOS users, some extensions will be grayed out, unable to be run in Incognito mode. These are typically system apps, like your laptop’s camera, and won’t allow the option.
View Extension Permissions
It’s also a good idea to check the permissions of each application you’re using before you allow access in Incognito mode, just to make sure you aren’t allowing a dangerous extension access to your most private browsing sessions. Luckily, this is just as easy as enabling the extensions in Incognito mode on Chrome.
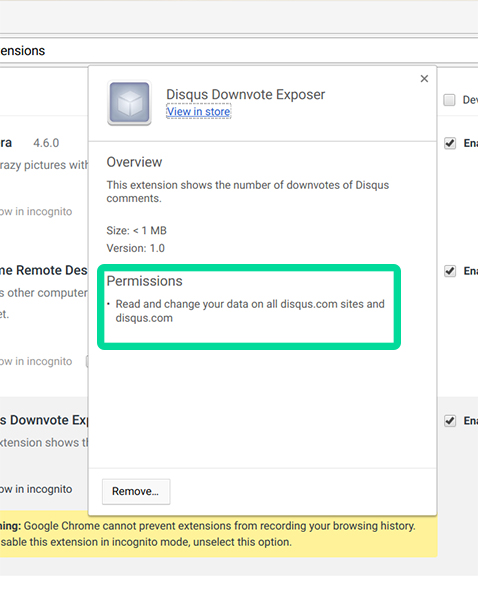
Under the description for each extension installed in Chrome, you’ll see a link that reads “Details.” Clicking it will open a window with some specific information on your selected extension, including an overview of the app, the size and version number, and finally, the permissions each extension needs access to. These are typically written in fairly-plain English; for example, looking at “Disqus Downvote Exposer” in my instance of Chrome, I’m giving permission to the extension to read and change my data on any site that uses Disqus’ commenting system. From there, I can make my own decision on whether or not to enable the extension in an Incognito window. Some extensions require far-reaching permissions; ad-blockers, for example, require the ability to read and change data on every website you visit. It’s here where you have to weigh the pros and cons of sacrificing some privacy in order to change the way Chrome works. Some readers may not care at all about privacy concerns, while others may choose to leave some extensions disabled in Incognito mode to avoid giving over sensitive data.
Disable Extensions
If you decide to disable an extensions previously enabled in Incognito mode, it’s just as easy as turning on the extension to begin with. Open the Chrome menu again, and browse back to the Extensions menu under “More Tools.” From the extensions menu, just uncheck the box that you previously enabled your selected extensions in Incognito, and they’ll disappear from your private browsing. This is a great idea if you need an extension once, but don’t want it to run every time you open a new instance of Incognito browsing.
***
The simplicity and user-friendliness of Chrome makes it really easy to enable and disable functions as you need them, and to check the permissions of each extension on a basic level. This makes turning on and off extensions quick enough to improve your private browsing as you need it. Just remember to pay attention to the permissions you’ve allowed each extension, and you’ll make your browsing experience that much better.