


What to Do When Voice Isolation Won’t Work in Voice Access
Voice Access has the incredibly useful feature Voice Isolation that helps to remove any background noise and let you be heard more clearly. However, there can be times when this feature in Windows 11 doesn’t work, and that’s where this article is here to help.
So, join us as we explore what to do when Voice Isolation won’t work in Voice Access.
What Causes Voice Isolation Problems?
There are a few reasons the Voice Isolation feature won’t work in Voice Access. These include:
- Voice Access is using a different microphone from the one you used during Voice Isolation setup.
- You didn’t complete calibration and setup properly. This includes the initial voice calibration.
- Microphone access is disabled for Windows or for desktop apps.
- There’s interference from a third-party app, overlay, or driver.
- You have an out-of-date Windows version (below KB5101684).
Voice Isolation Won’t Work in Voice Access – Fixes to Try
Seeing as there are a few potential causes of the Voice Access error, we have as many fixes to help. Let’s get started:
Update Windows
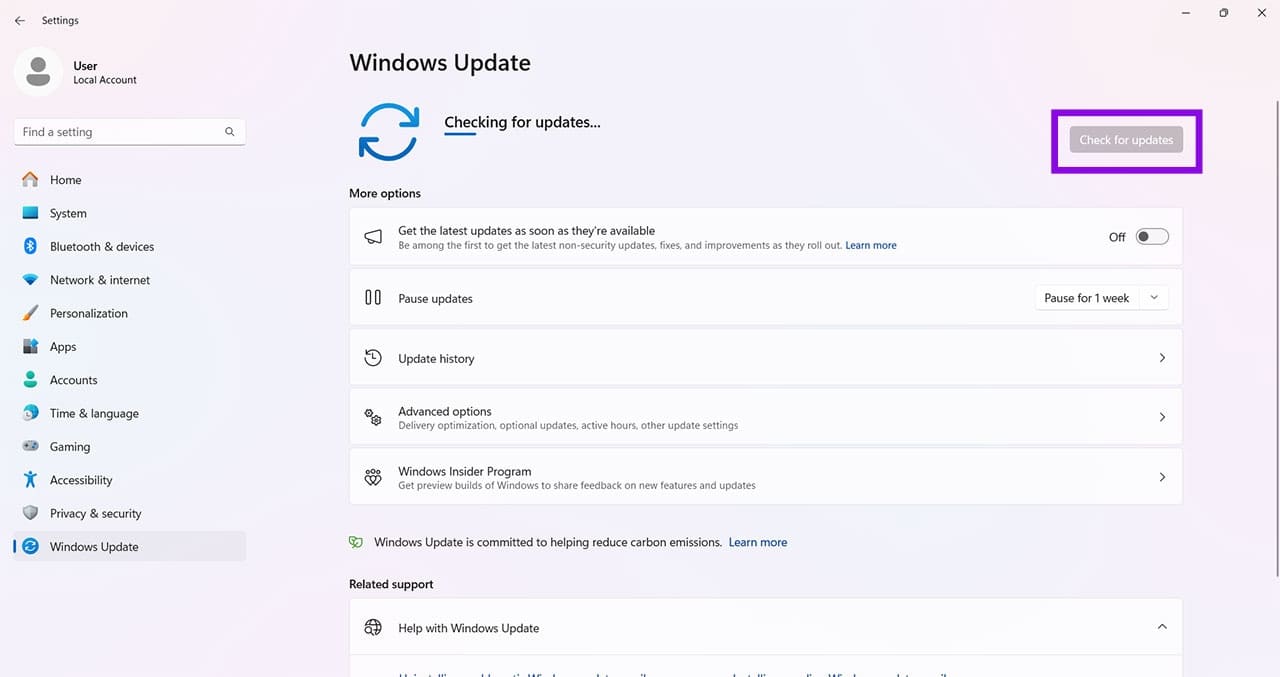
Let’s start simple. Seeing as Voice Isolation depends primarily on the version of Windows you have, if you’re below KB5101684, it’s time to update your OS. You can do this via Settings (Win + I), under “Windows Update.” Click “Check for updates” and install anything new.
Check Your Mic Permissions
If Windows has denied Voice Access mic permissions, then you’ll have a hard time being heard, never mind reducing background noise. Here’s how to check:
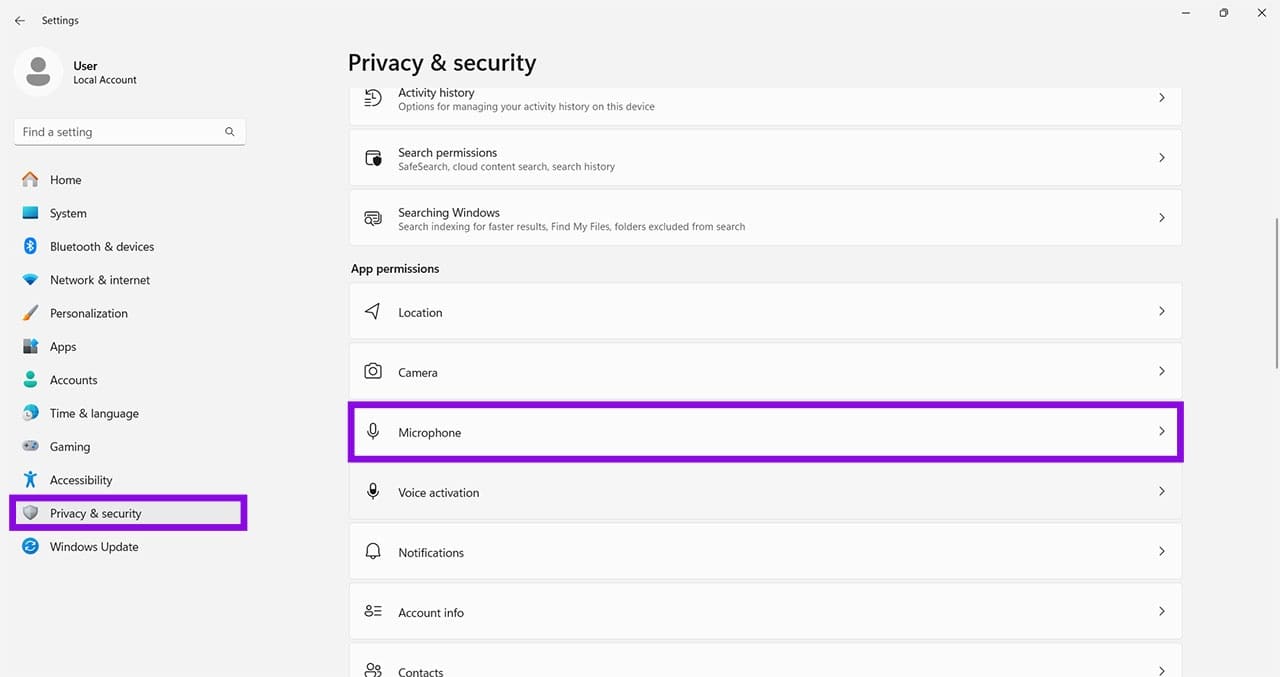
Step 1. Open “Settings” (Win + I) and click “Privacy & security” in the sidebar.
Step 2. Under “App permissions,” click “Microphone.”
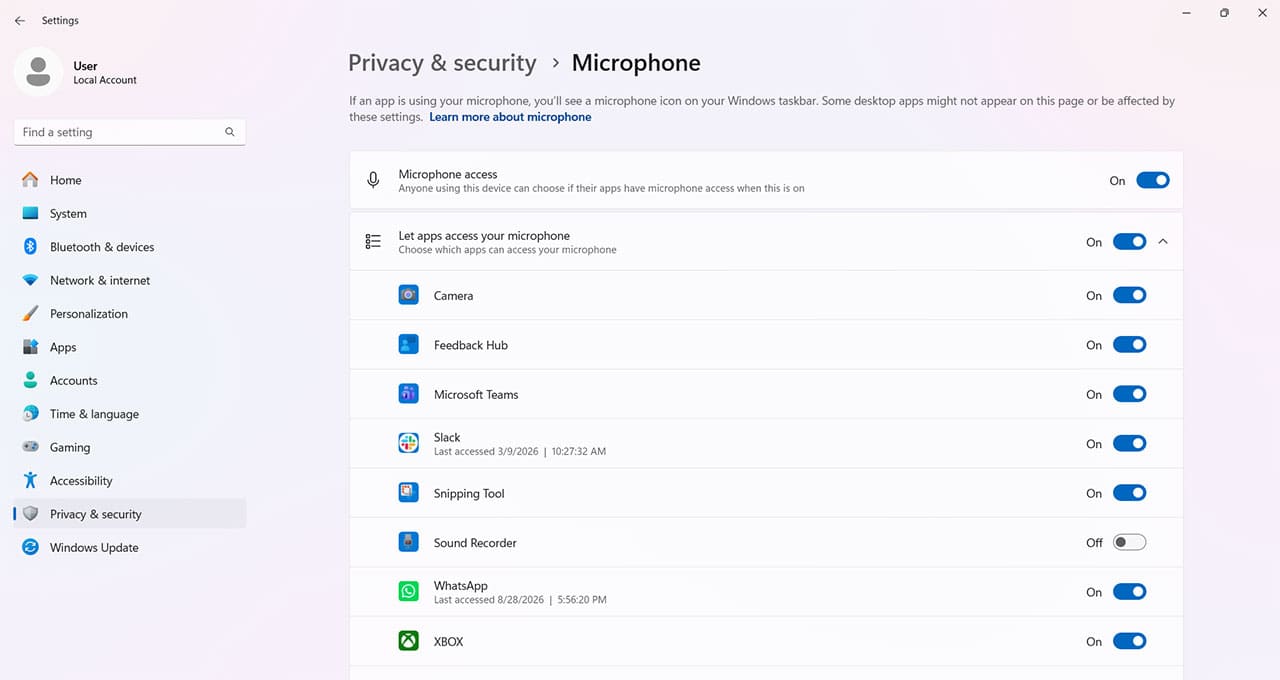
Step 3. Make sure Microphone access and Let apps access your microphone are turned on. Then make sure “Let desktop apps access your microphone” is also turned on.
Check for the Right Mic
It could also be that Voice Access is using a different microphone; one did not calibrate for Voice Isolation. Here’s how to check:
Step 1. Open “Voice Access” and click the “Settings” icon on the bar.
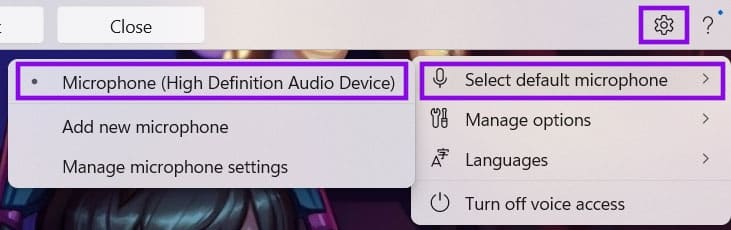
Step 2. Click “Select default microphone” and choose what you normally use.
Reinstall the Speech Language Component
Voice Access downloads the speech model needed for its language during setup. Voice Isolation has an additional one-time voice-model download and voice-recording step. If this component becomes corrupted or damaged, Voice Isolation might not work. A fresh reinstall can help here:
Step 1. Open “Settings” (Win + I) and click on “Time & language” in the sidebar.
Step 2. Choose “Language & region.”
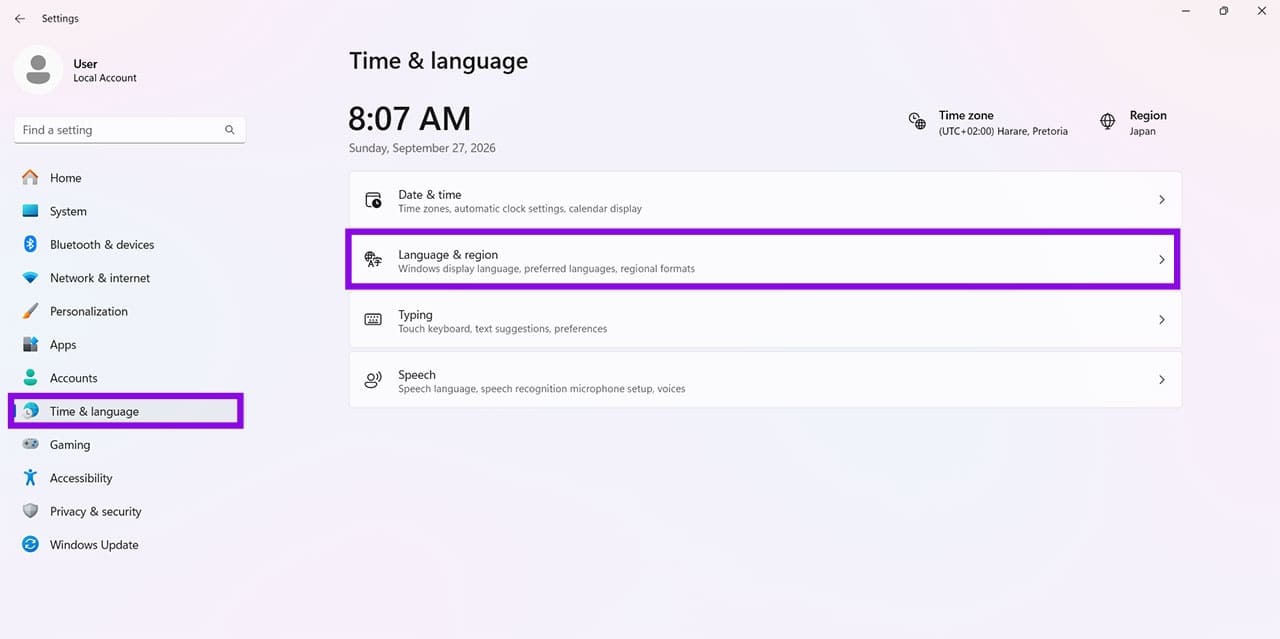
Step 3. Choose the language that you use Voice Access in and click the “More” button (three dots) next to it.
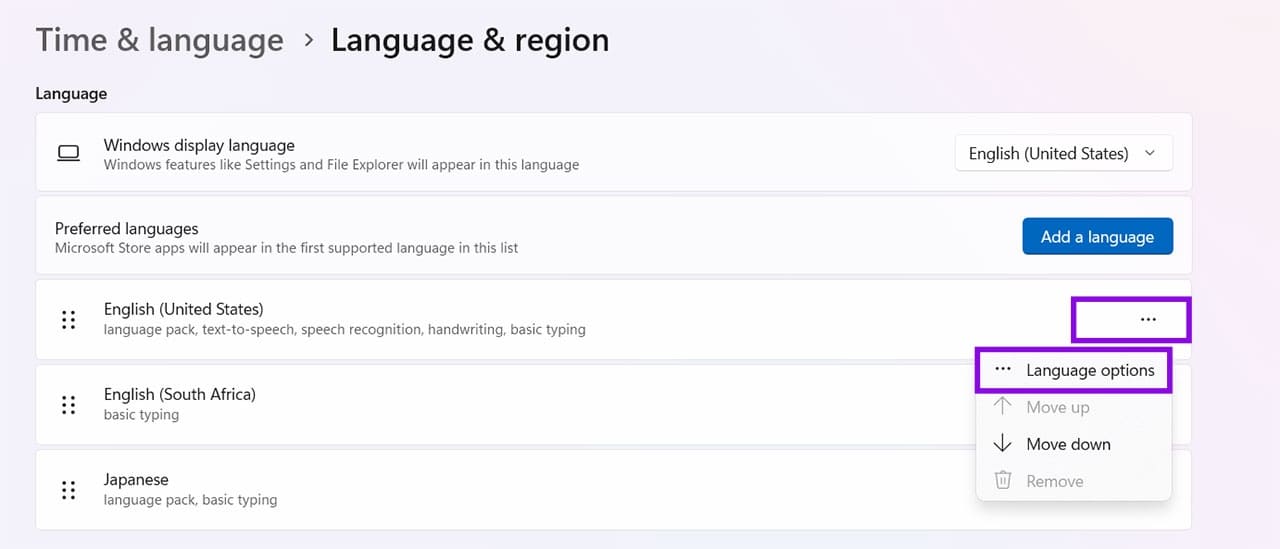
Step 4. Choose “Language options.”
Step 5. Check that both “Basic speech recognition” and “Enhanced speech recognition” are registered as “Installed.”
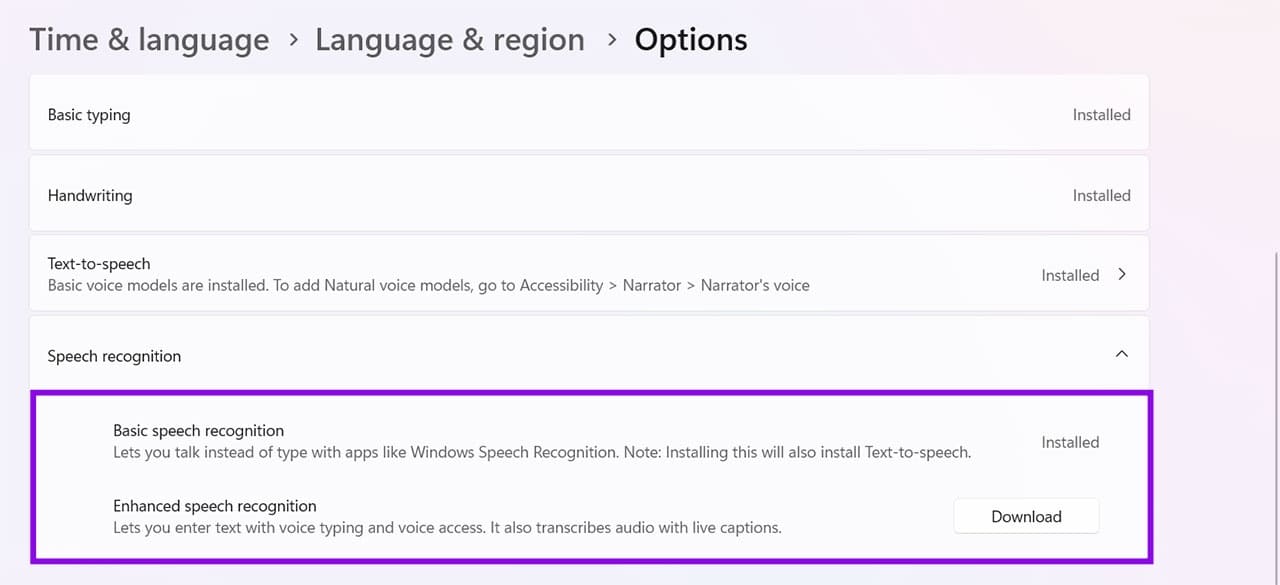
Step 6. If they are, click the “Installed” button for Enhanced Speech Recognition to download and reinstall again.
Restart Voice Access
If the Voice Access process is running into trouble, you can try restarting the process, as it may be affecting Voice Isolation:
Step 1. Close “Voice Access” and launch it again from “Windows Search” or “Settings.”
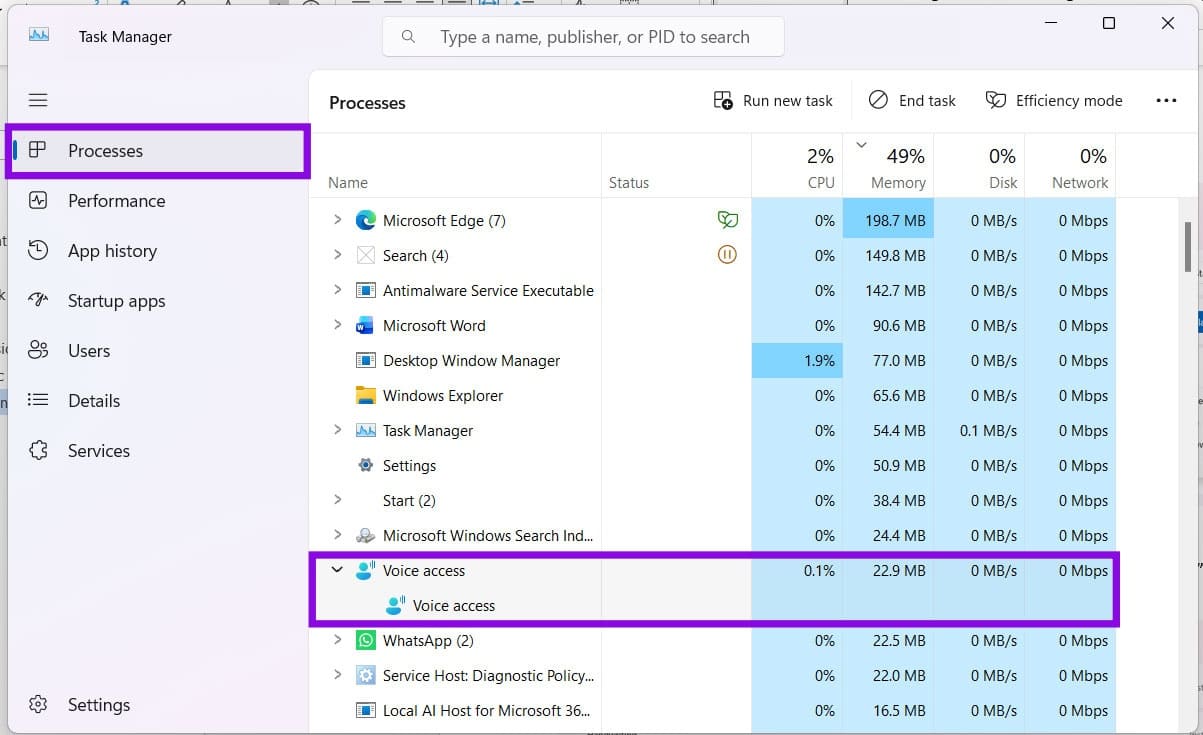
Step 2. Once done, relaunch the “Voice Access” bar via the “Start” or “Search” menu.
Step 3. Open the “Voice Access” settings menu, select “Improve speech recognition,” and confirm that Voice Isolation is available and selected.
Cloud Storage Comparison: What You Actually Get for Free vs. Paid
Read Next