How to Hide Guides in Photoshop

Photoshop is the industry leader in the graphics editing field and has introduced many features now considered essential. One of them is the use of rulers and guides in raster graphics editing. They’re very useful for adjusting and aligning elements but they can also make it hard to manage objects freely.
If you’re working on a very sensitive area of an image or an image that doesn’t need symmetry or alignment, they can get in the way. Fortunately, getting rid of them is easy and you will learn how to do it in this article.
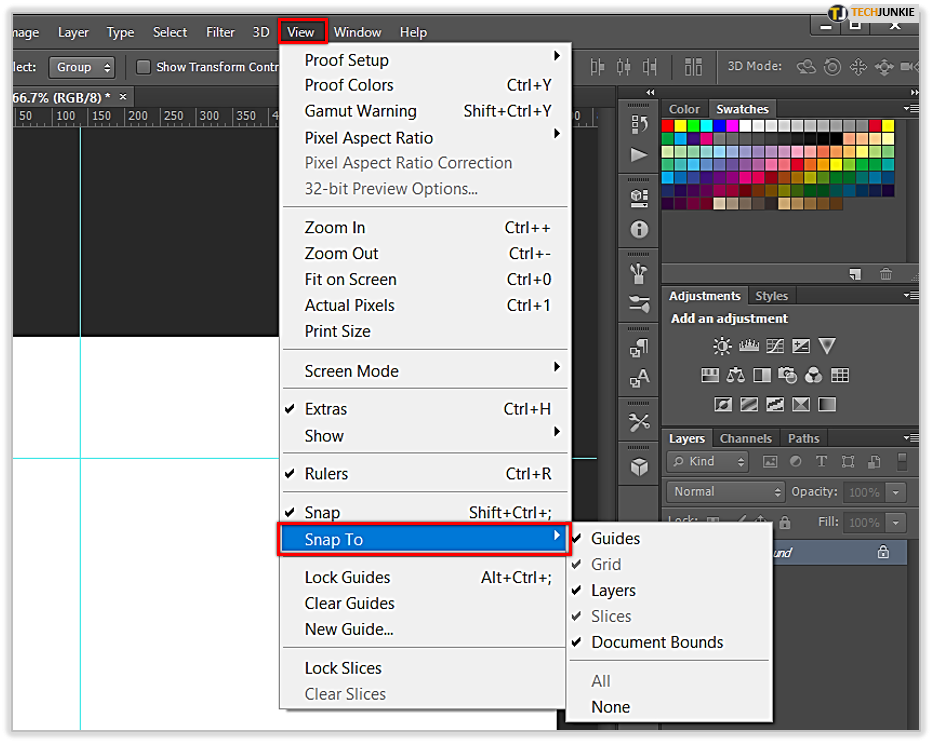
Turning Snap To on or off
The most common problem people have with guides in PS is the Snap To function. When moving elements around with this option on, Photoshop looks for relevant guides and auto-aligns those elements with the guide. Luckily, this problem is easy to fix.
Access the View menu in PS and look for the “Snap To” submenu. There you can select what the elements will snap to when you move them. If you select “None” you’ve effectively turned it off. You can also click on the “Snap” function in the View menu — the checkmark will let you know whether it’s on or off — or use the keyboard shortcut Shift + Ctrl + ; to quickly toggle it on or off.
Alternatively, you can just hide the guides without removing them, or remove them altogether.
Hiding and Clearing the Guides
If you want to keep your guides but don’t want to see them on the canvas, there are several options. The most straightforward way to do this is through the View menu.
Access the View menu and hover the mouse over the “Show” submenu to reveal it. In the Show menu, you should click on “Guides” to toggle them on or off. Keep in mind that the guides will still be present and active, but you won’t be able to see them. Or, use the keyboard shortcut Ctrl (Command on Mac) + ; to toggle them on or off.
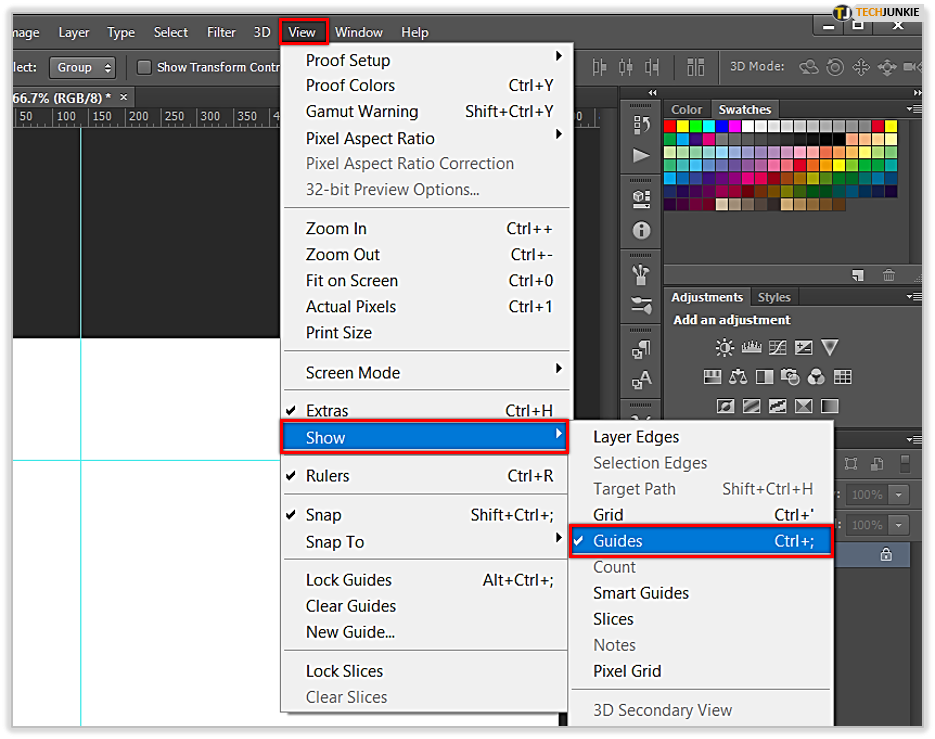
You can also turn “Smart Guides” on or off in the same submenu. Smart guides are contingent guides that only activate when you manipulate elements and objects. They help with symmetry and alignment even if no regular Guides are present. They will also snap to other elements and guides unless the Snap To function is off.
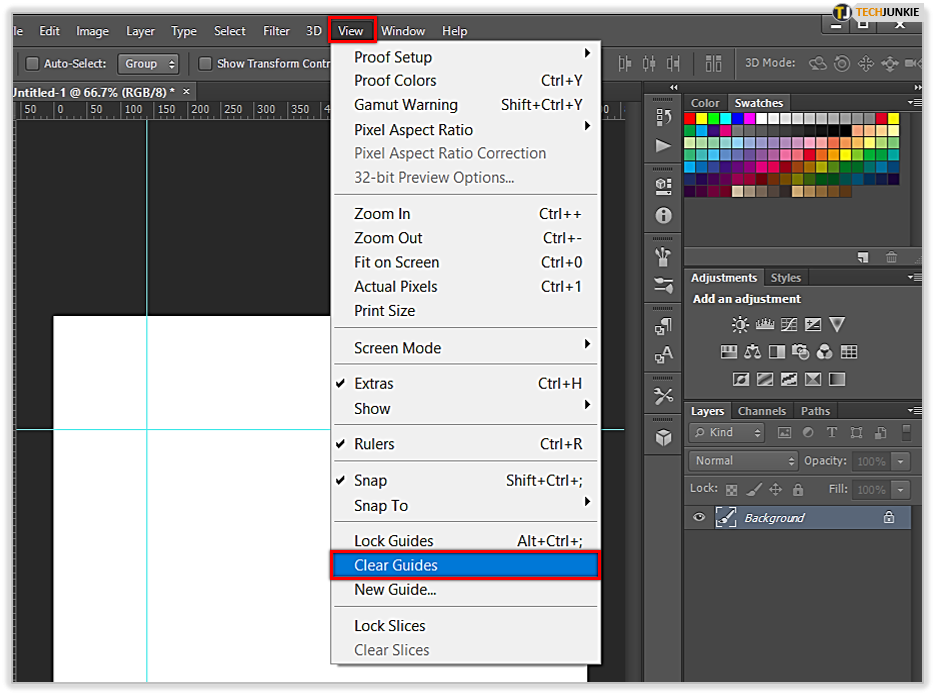
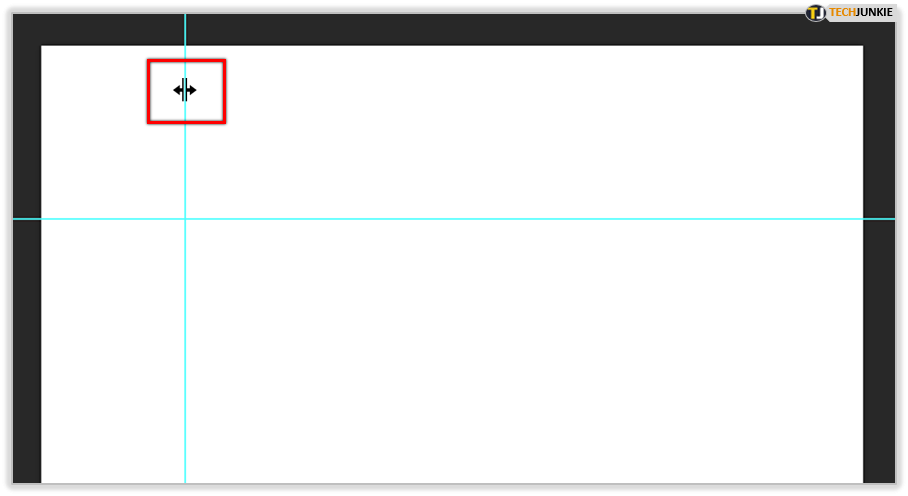
If you want to remove guides altogether rather than hide them. Select “Clear Guides” from the View menu. This will delete all the guides you’ve created for the image. Alternatively, select the “Move” tool and hover with your mouse over any of the guides. When your cursor shows a split line pointer, click and drag the guide off the canvas to delete it. Note that this only works if “Lock Guides” is unchecked (Alt + Ctrl + ;).
Some Tips for Working with Guides
If you learn how to use Guides to your advantage, it will make a big difference in your designs. When the elements in a composition aren’t perfectly aligned, it’s usually obvious. Guides can help you avoid that.
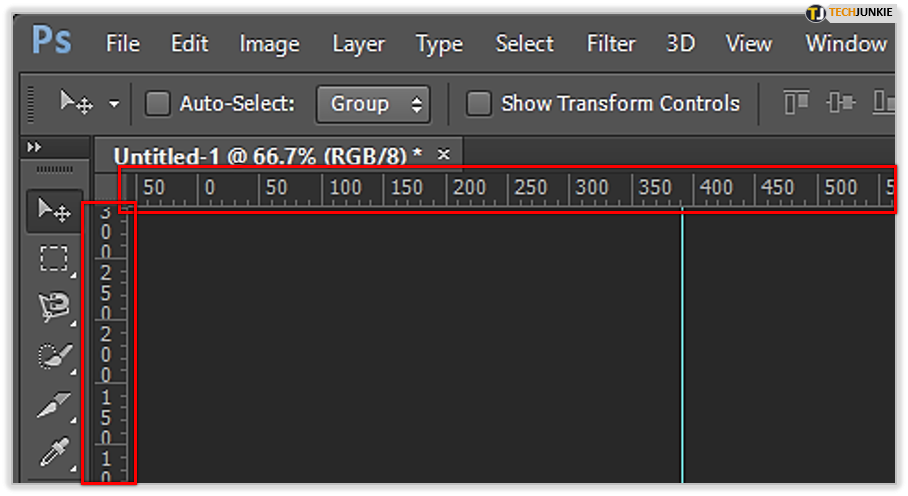
For starters, get used to the rulers. Rulers can be toggled on or off in PS with Ctrl/Command + R. They’re essential in getting you to think in terms of proportional distances. With rulers up, you can hold down the Shift key while dragging a guide to make it snap to the units on the ruler.
You can also create guides very quickly by clicking and dragging from either the horizontal or vertical ruler. This is also a way to quickly check alignment. Click and drag a guide to where you need it, and drag it back off-canvas to delete it.
If there are a large number of elements and objects to work with, try using a “Grid.” Grids essentially act as multi-guide overlays on your image. You can toggle them on or off with Ctrl/Command + ‘ or through the Show submenu. You can change their spacing and appearance by double-clicking on either of the rulers and selecting “Guides, Grids, and Slices” from the menu that appears.
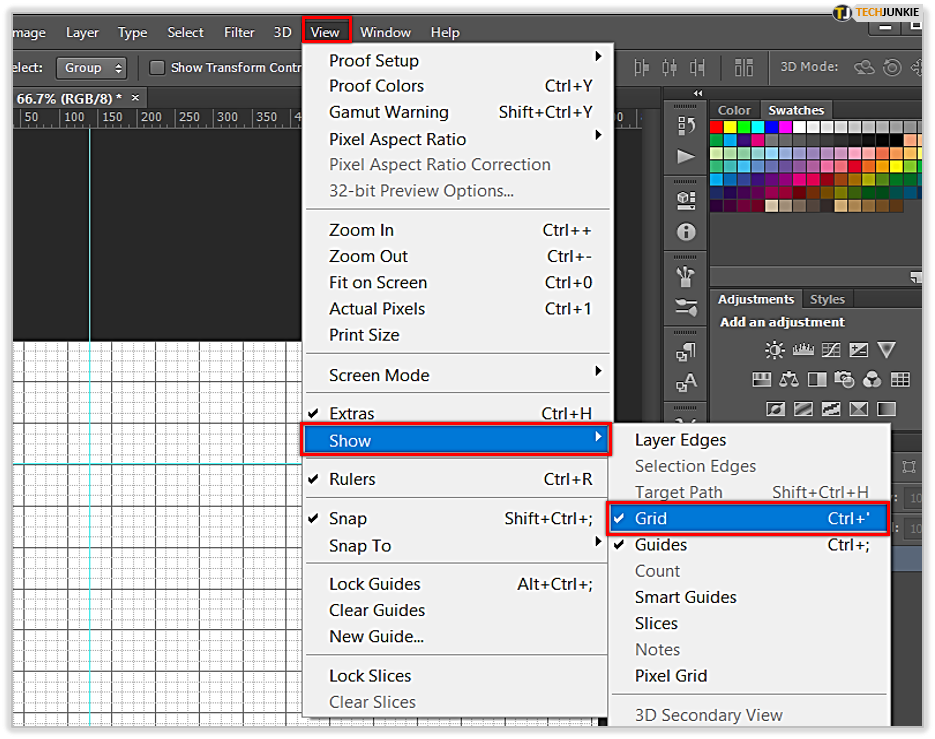
Finally, Guides are — along with Grids, Layer Edges, and many others — part of a category called “Extras” in Photoshop. To hide all the Extras you can use the keyboard shortcut Ctrl/Command + H. This is remarkably useful and time-saving if you learn to use it effectively. You can also go into the “Show Extras Options” submenu – located in the Show menu – to pick and choose which features you want to see.
A Guide on Guides
This is how you can hide or remove guides form your canvas. If you just want to hide them temporarily, use the shortcut Ctrl/Command + ; and they’ll be hidden. Use Ctrl/Command + H to hide them along with any other visible extras.
On the other hand, if you want to delete a guide the easiest way is to drag it off-canvas. To delete all guides, select the Clear Guides option from the View menu. Guides are an invaluable feature and you should get used to them if you’re serious about graphic design.
Have you come up with any clever uses for guides? Other than guides, what other ways are there to keep everything symmetrical and aligned in a composition? Let us know in the comments below.