How to Add Images to InDesign
InDesign is a widely-used tool for creating everything from books to flyers. The kind of images and pictures the app supports enhance the reader’s experience, evoke emotion, and add visual interest.
You might be an InDesign user who’s never worked with pictures in their print design. If you want to create genuinely compelling print products, you need to get on board with adding images. Here’s how to do it.
Adding Images in InDesign
It all starts with opening the actual document. Whatever you’re working on that requires you to add an image, open the file as you would normally. Do this by starting the InDesign app. Then, go to the File tab in the upper taskbar and select Open from the drop-down menu. Alternatively, if you’re starting from scratch or want to try adding images in this app, click File, then select New, followed by Document to open a brand-new document.
Now, it’s time to add your desired photo or image. Go to the File drop-down menu again. Only this time, select Place. A popup window will appear, prompting you to find the location of your image/photo file. Find it and then double-click the file.
The image should appear in your document. Now, you can manipulate the image to make it fit your print product.
Adjusting the Image in Your Document
Now that you’ve added the image to your print product, chances are that you’re going to want to fine-tune its size and location. Of course, this is very much possible in InDesign. What’s more, you’ll find the whole process very familiar.
To get started, left-click the image. You’ll see a square appear around it. This square will have handles (displayed as small squares) around the frame. Navigate to one of these handles with your mouse pointer and left-click and hold them. Now, move your mouse cursor and notice how the size and dimensions of the image change.
Chances are, however, that you want the image resized proportionally. In other words, you want to make it bigger or smaller, without changing its shape. To adjust the image size proportionally, hold the Control (Command on Mac) and Shift keys while dragging the mouse cursor to adjust the image size. This will ensure that the image doesn’t change in terms of shape.
You may also want to crop out a part of the image. To do so, click to drag one of the handles and hold the Control key on your keyboard. Everything is pretty intuitive here and you’ll get how it works the moment you start dragging the handles.
You can also use InDesign’s control panel to enter the exact values regarding the picture’s width and height. This is done as you would normally do it in any Adobe image editing product.
Fit the Content to a Frame
Given the fact that you’re working in InDesign, you’re probably dealing with textual content and adding images to create some flavor to make your print documents more compelling. Therefore, you’ll often need the textual content to fit the actual picture in a nice, convenient way. This is actually exactly what InDesign does very well.
It’s best done by adjusting the actual frame of the picture first. This will give you a better oversight of how the image will fit the rest of the print product. Then, you have two options. You can either fit the content to the frame or fit the frame to the content.
The former means that the image size will be adjusted in order to match the frame dimensions. Fitting the frame to the content means that the frame will be adjusted so that it fits the full image. This option is mostly used when you’ve made changes to the size of the frame, potentially cropping the image content while you were at it.
The Fit Frame to Content option will swiftly and easily bring back your original image settings. You can also do this by selecting the image and double-clicking any corner handle.
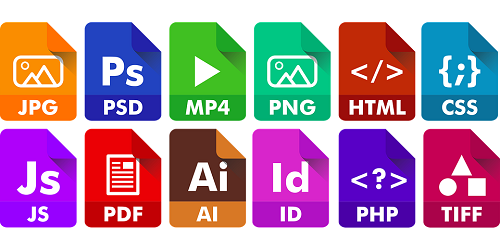
Image Formats That Work with InDesign
As you’d expect, and like the vast majority of Adobe products, InDesign is very image-friendly. It supports a wide variety of formats. These include JPEG, EPS, PNG, PDF, PICT, TIFF, and PSD. Working the formats is going to be easy for you if you have some experience with Photoshop.
Although it’s one of the most common image formats, JPEG is something that you should always look to avoid. This is because it allows low-resolution settings, which can completely ruin your entire print document. So, if you absolutely have to use the JPEG format, at least make sure that the selected image has a resolution of at least 300 PPI (pixels per inch). Oh, and ensure that the select saved color mode for it is CMYK.
You should never extend the size of your images past its 100% size. If you do, the results will be pixelated and your print document ruined. That is, of course, unless the pixilation is somehow the desired effect you wish to achieve.
All in all, try avoiding JPEG altogether. Instead, stick to formats such as TIFF and EPS, seeing as how they’re intended for print document.
PSD Image Files
You may want to import a PSD file. This is entirely understandable, as it’s the default Photoshop file extension. This is great for print documents with transparent or partially transparent elements. But the coolest thing about working with PSD files inside InDesign is being able to turn the layers on and off, right there, in InDesign.
That said, don’t be surprised if loading a PSD file into InDesign or the exporting process takes a long time to finish. PSD files are quite hefty.
Images and InDesign
Although it’s print document-dedicated software, InDesign works brilliantly with images of various shapes, sizes, and formats. You’ll quickly learn how to work the dimensions and sizes. Keep the supported formats in mind and don’t go overboard with some of them either.
Have you ever worked with images in InDesign? Did this article help you find your way around the app? Let us know in the comments section below and feel free to ask any additional questions.