


How to Erase an iPhone, iPad, or iPod touch Before Sale or Trade
Your iDevice likely contains a terrifying amount of your personal data: phone numbers, text messages, pictures, and, depending on what types of apps you use, perhaps even social security numbers and bank account information. Getting a new iPhone, iPad, or iPod touch can be an exciting event, but you’ll want to make sure that you properly erase your existing iDevice before getting rid of it to protect this valuable information.
There are two methods of erasing an iDevice: restoring it via iTunes and resetting it via the device’s settings.
Restoring an iPhone, iPad, or iPod touch via iTunes


First, connect your iDevice to your PC or Mac using a 30-pin or Lightning cable and launch iTunes.
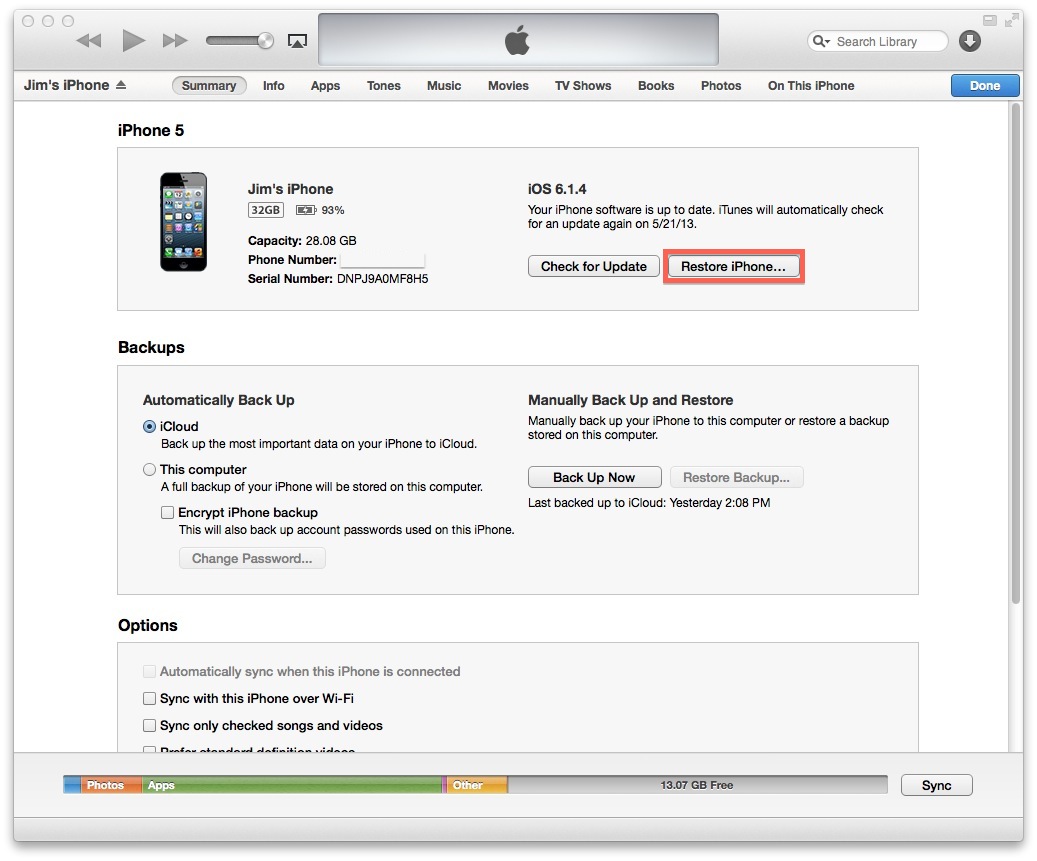
If using iTunes 10 (or iTunes 11 with a visible sidebar), find your device in the source list on left of the window. In iTunes 11’s default view, you’ll see your device listed in the source bar on the top right of the window. In either case, click on your device to open its configuration page.
Here, you’ll find information about your iDevice, including iOS version, capacity, battery charge, serial number, and, if applicable, associated phone number. To erase your iDevice and restore it with the most recent firmware, press the “Restore iPhone” button. Note that this will completely erase all data, apps, and settings on the device, so make sure you’ve backed up any data you want to keep before proceeding with this step.
Once you’ve confirmed your choice to restore the device, wait while iTunes downloads the latest firmware from Apple. Depending on the speed of your Internet connection, this could take several minutes. Once the download is complete, the restore process will begin automatically. Leave the phone connected to the computer while the restore takes place, which will involve an automatic reboot or two.
Once complete, iTunes will report that a new device has been found and ask you if you’d like to configure it. At this point, disconnect the iDevice from the computer; it has now been wiped and reset to factory conditions. You can now sell, give, or trade the device away for another user to set up.
Resetting from the Device Itself
The steps outlined above for restoring an iDevice require an available computer with iTunes. If you don’t have access to a computer, you can also reset and erase the device using the Reset feature in Settings.
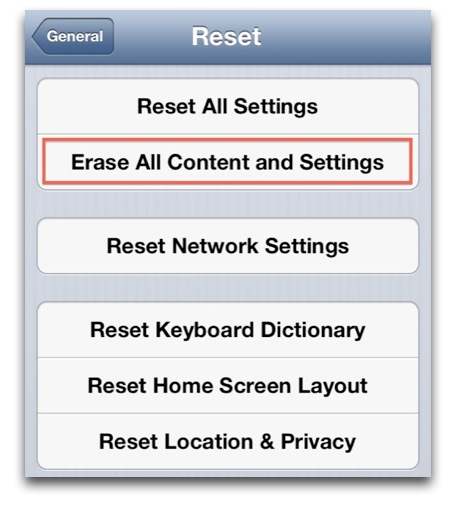
First, just as above, make sure that you’ve backed up any data you want to keep. Once you’re ready to erase the device, head to Settings > General > Reset. Here, press “Erase All Content and Settings.”
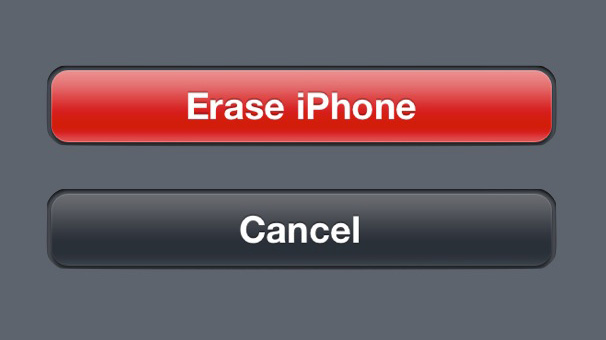
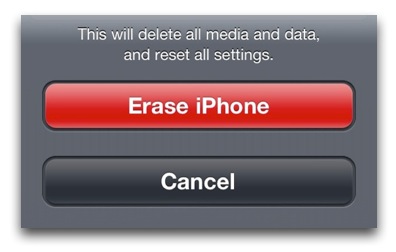
You’ll receive a warning that proceeding with the reset will erase all data on the device. Press “Erase” to confirm you decision. Note that users with passcode locks on their iDevices will also have to enter the passcode to initiate a reset.
After you’ve confirmed the reset, the device will process for a moment and then reboot. Once rebooted, you’ll recognize the familiar iOS setup screen. All of your data and settings will be gone and the device will appear as it did when new, requiring first-time setup. Don’t enter any information at this point; simply pack the phone up and it will be ready for sale or trade.
While this method is quick and easy, it does not give you the benefit of updating the phone to the most recent version of iOS. For most users, selling a phone with the latest firmware is a good idea. For some users who like to jailbreak their iDevices, however, upgrading should be avoided at all costs, as new iOS versions break jailbreak compatibility. Therefore, if you know that the person you’ll be selling your iDevice to is interested in jailbreaking, make sure to use this second method of erasing your data, so that you don’t inadvertently install a newer version of iOS that may make jailbreaking impossible.
By taking the time to properly erase your iDevice before giving it away, you not only protect your crucial personal information, you also make the experience better for the next owner, who will get to set the device up with their own preferences from scratch just as if it were new.


2 thoughts on “How to Erase an iPhone, iPad, or iPod touch Before Sale or Trade”
from three other vendors, and company offers free shipping kit. I highly
recommend it, you can check it out at http://www.spruceit.net/tradein or http://www.facebook.com/spruceit