


How to Lock Notes in the iOS Notes App
A new feature in iOS 9.3 is the ability to lock individual notes in the Notes app, providing an additional and separate layer of protection for a user’s sensitive data. Here’s how it works.
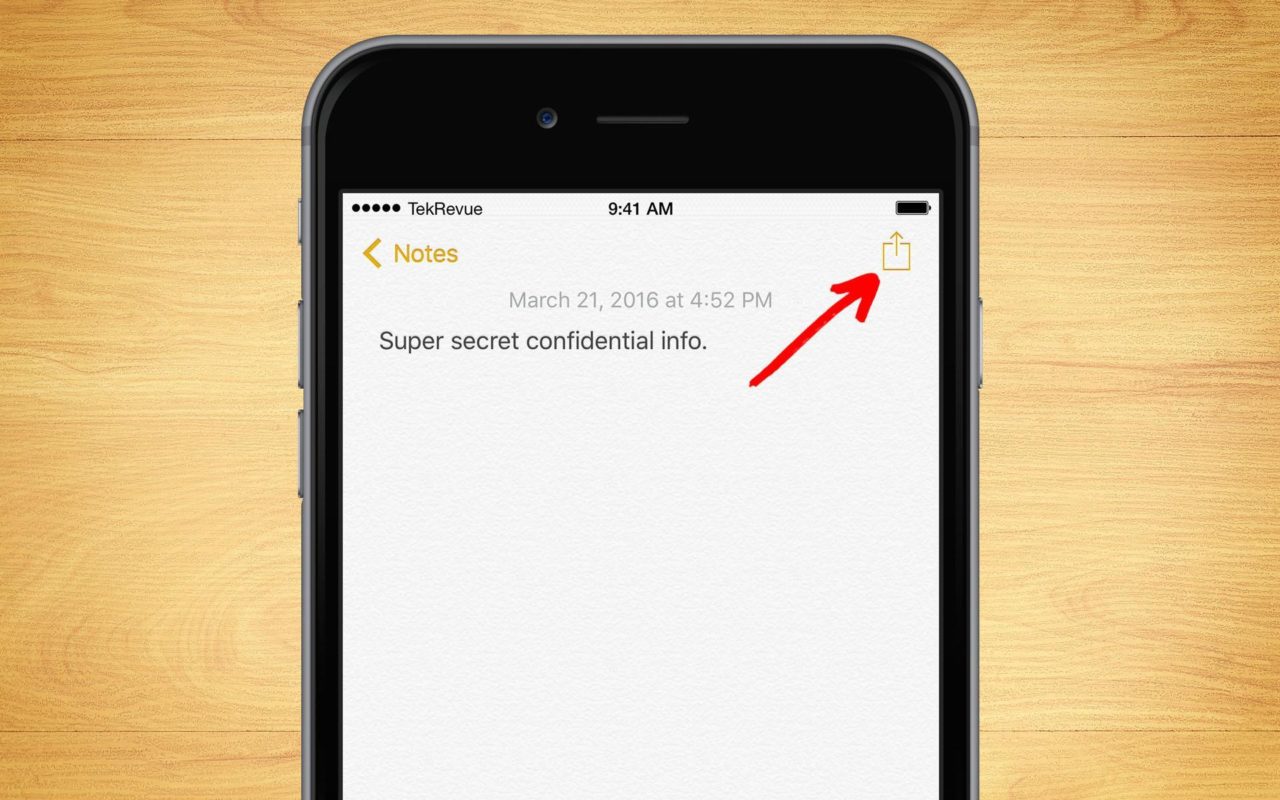
First, as noted above, locked notes are a new feature in iOS 9.3, released Monday, March 21, 2016, so make sure you’re iPhone or iPad is running at least this version of Apple’s mobile operating system. Once you’re updated, launch the built-in Notes app and select an existing note (or create a new note if necessary).
With the note open, tap the share sheet icon (the box with the upward-facing arrow) in the top-right corner of the screen.
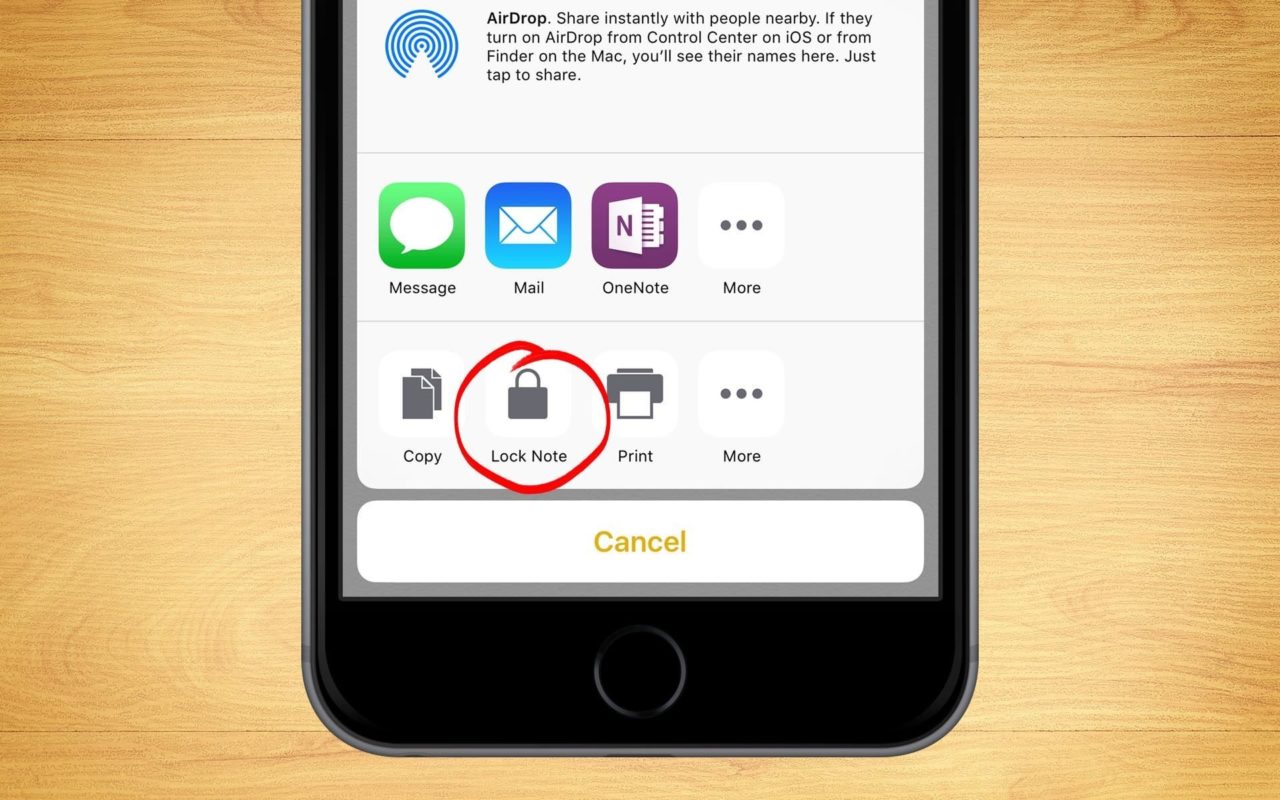
Your share sheet menu will differ from our screenshots based on the specific apps installed on your device and the way that you’ve configured it, but find the new option labeled Lock Note.
The very first time you attempt to lock a note, you’ll see a screen like the the one below which asks you to set a password for all of your locked notes and decide if you’d like to allow access to these locked notes via Touch ID. Create and verify your password, set a password hint if desired, and then enable or disable Touch ID access.
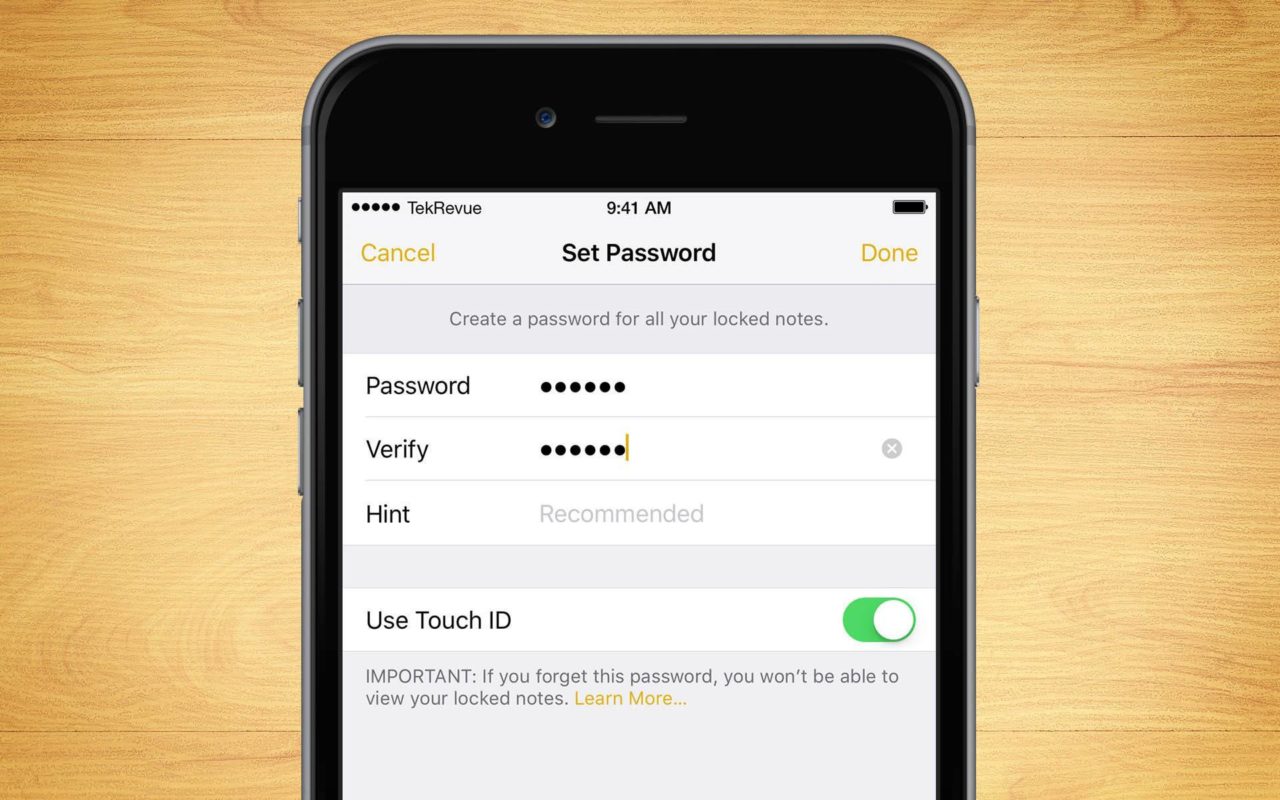
Note that the password you choose for your notes does not need to be the same as your iOS or Apple ID password, and in fact should be different from your other passwords for the best security. Similarly, those seeking the highest level of security may wish to consider disabling Touch ID access.
Tap Done once you’ve created your Notes password and enabled or disabled Touch ID access. You’ll be returned to your previous note and you’ll now notice a lock icon at the top of the note, just to the left of the share sheet icon. As you are already securely accessing this note, the lock icon will display in the “unlocked” position, and you can tap it to lock the note.
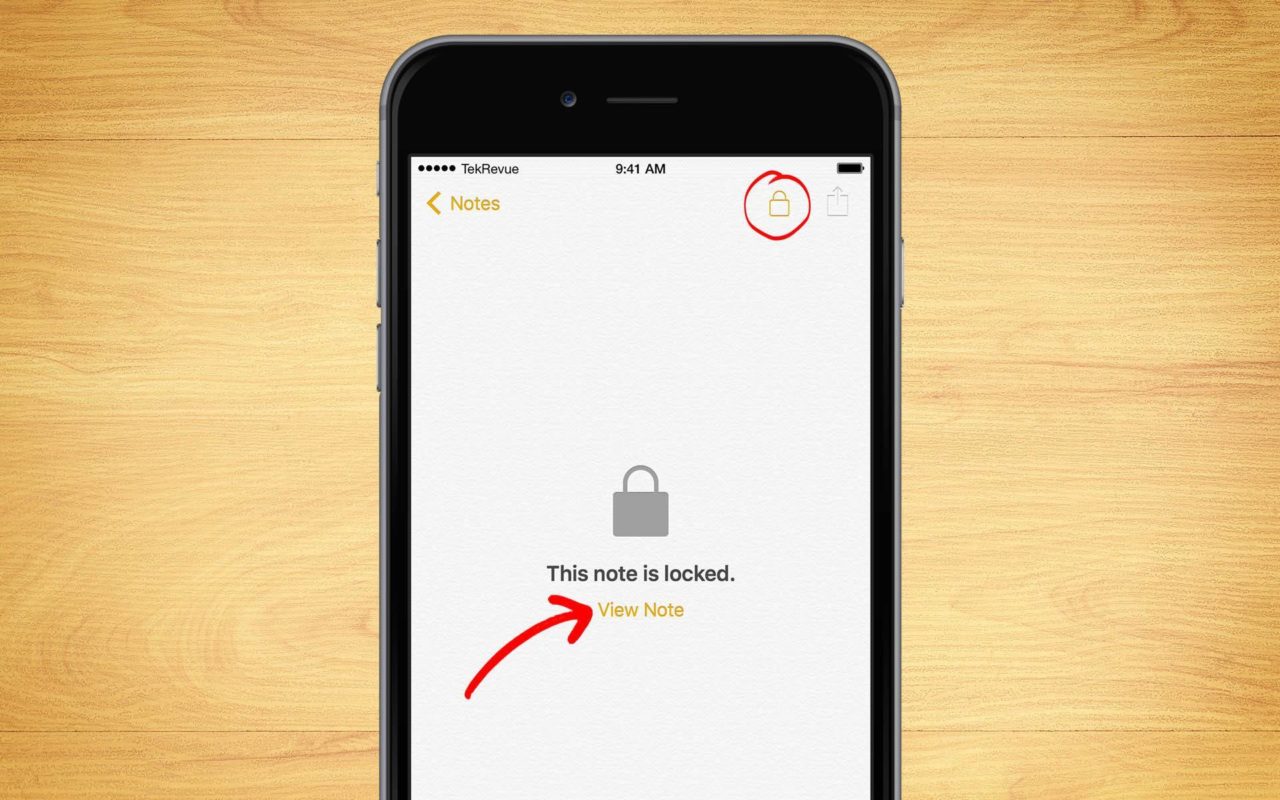
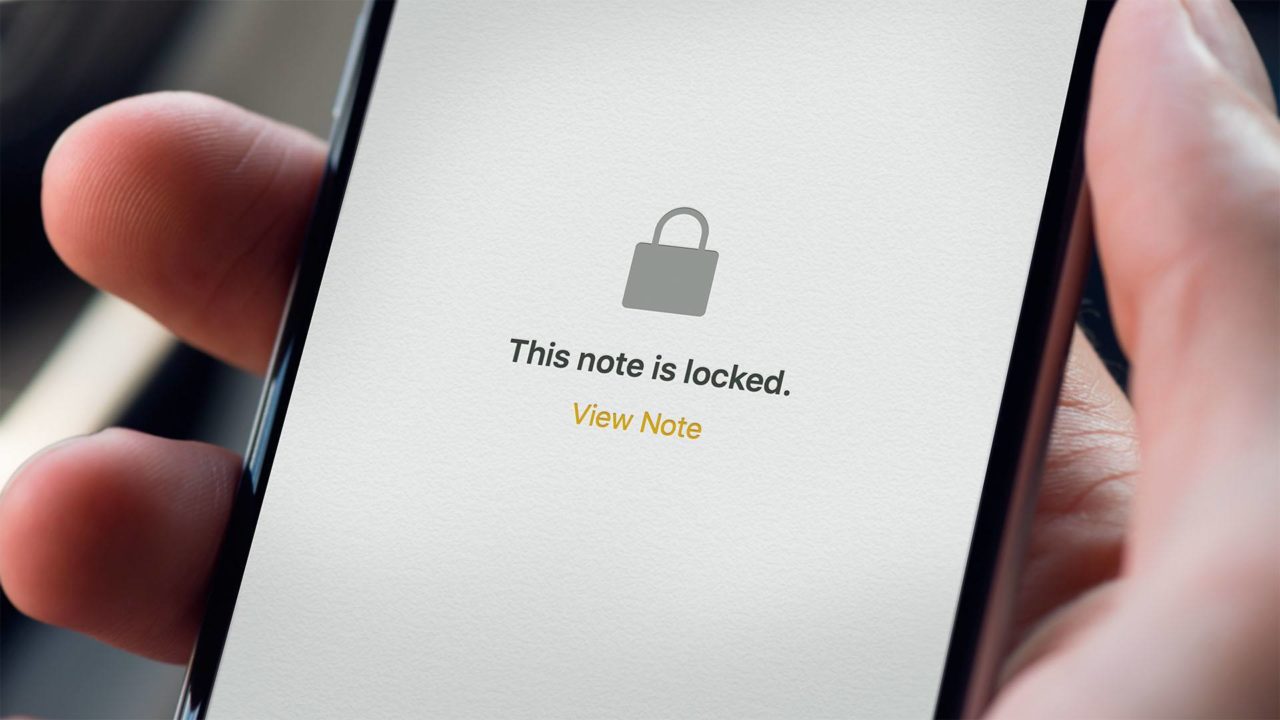
Once you’ve locked your note, you’ll need to enter your Notes password (or use Touch ID if enabled) to open it again. A note’s locked status will sync to your other devices, as long as they’re running iOS 9.3 or higher, as well as to your Mac as long as it is running OS X El Capitan 10.11.4 or higher.
After creating a password and locking your first note, you can lock additional existing or future notes by simply repeating the steps above to access the Lock Note function in the share sheet menu. This time, however, you’ll just receive a pop-up box asking you for your Notes password or Touch ID (again, if enabled) to lock the note. Enter the password you set up previously (or tap your finger to the Touch ID sensor) and the note will be locked.
The ability to lock individual notes in the Notes app with a password that is different from your standard iOS or Apple ID password is a great new security feature, but as you can probably tell from the description of the feature above, the one drawback is that all notes must share the same password. If you ever want to change this password, or enable or disable Touch ID access, head to Settings > Notes > Password.
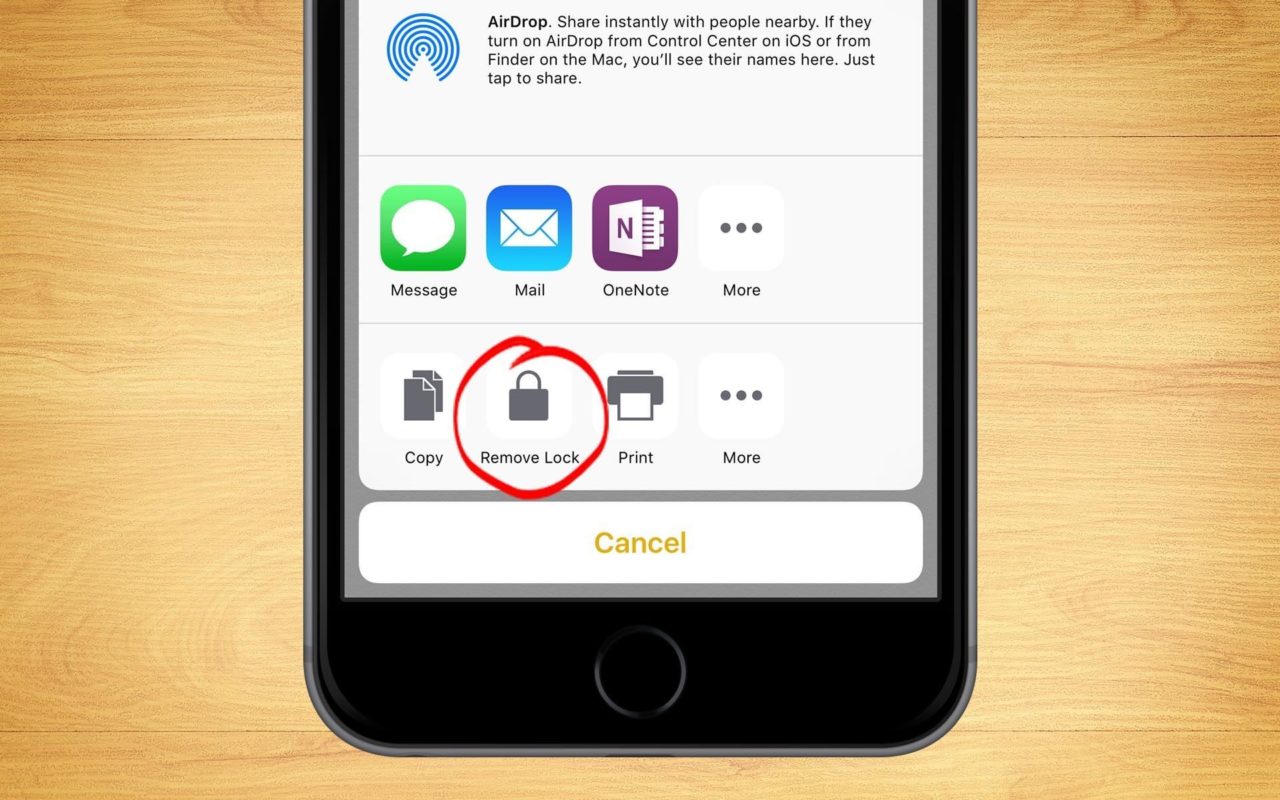
Finally, you can also remove a note’s lock via a similar process. To remove the lock from a note in the Notes app, first unlock and open the note. Then, head back to the share sheet menu you used to add the lock initially. This time, however, you’ll see an option labeled Remove Lock. Tap it and the lock will be removed, reverting the note and its contents to a standard, unlocked note.


3 thoughts on “How to Lock Notes in the iOS Notes App”