How To Print Screen on Mac
Windows users are a little spoiled having a PrtScrn button on their keyboards. We don’t have any such thing on Apple keyboards. What we do have is a series of shortcut keys and third-party tools that makes taking screenshots simple. If you want to know how to take a screenshot or print screen on Mac, you’re in the right place!
While we don’t have a specific key on our keyboard, we have many more options than Windows users. Several more in fact. I shall outline each of them here.
Mac users can capture the entire screen, a selection, a window, menu, use a timer and a few other tricks.
Take a screenshot or print screen on Mac
Most print screen options are accessible through shortcut keys. If you need a little more from your screenshots, search TechJunkie for ‘The best snipping tools for Mac’. The tools I mention in there offer a lot of utility in taking and editing screenshots. Otherwise, here are the shortcut keys you need to take a screenshot or print screen on Mac.
Screenshot the entire screen
To capture the entire screen on your Mac, you just need to press Command + Shift 3. The image will be saved as a .png file on your desktop. You can then open it in your graphics editor and do what you need to do.
Screenshot a portion of your screen
When creating screenshots for tutorials or blogs, it is often more useful to capture just a relevant part of the screen. This focuses the attention to the aspect you are describing and cuts out anything that detracts from the point you’re trying to make.
To take a screenshot of a selection:
- Press Command + Shift 4. This will change the cursor to a crosshair.
- Move the crosshair to the start of where you want to capture.
- Hold down the mouse button or trackpad and drag to encapsulate the entire area.
- Release the mouse button to trackpad to make the capture.
The image will be saved as a .png file on your desktop and you can do with it what you will.
Screenshot a dialog window on Mac
Often it is useful to just capture an active window or dialog within OS X to make a point. You can use the above method to drag and select an area of the screen that includes the window but there is also a command that captures just the window.
- Select Command + Shift 4 and hit Space. The cursor should change to a camera.
- Move the camera over the window you want to capture.
- Click the mouse button or tap the trackpad to make the capture.
The image will be saved as a .png file on your desktop the same as the other methods here.
Screenshot a menu on Mac
Getting a good screenshot of a menu is an essential part of creating tutorials as it accurately describes what you are asking the reader to do. I use this method all the time.
- Click the menu you want to capture.
- Select Command + Shift 4 and the cursor changes to a crosshair.
- Drag to include the menu and a little window context.
- Release the mouse button or trackpad.
You can also use the window capture method above and set the camera icon over the menu. The downside of that method is that it doesn’t capture the menu title which can be key in setting the context of the image.
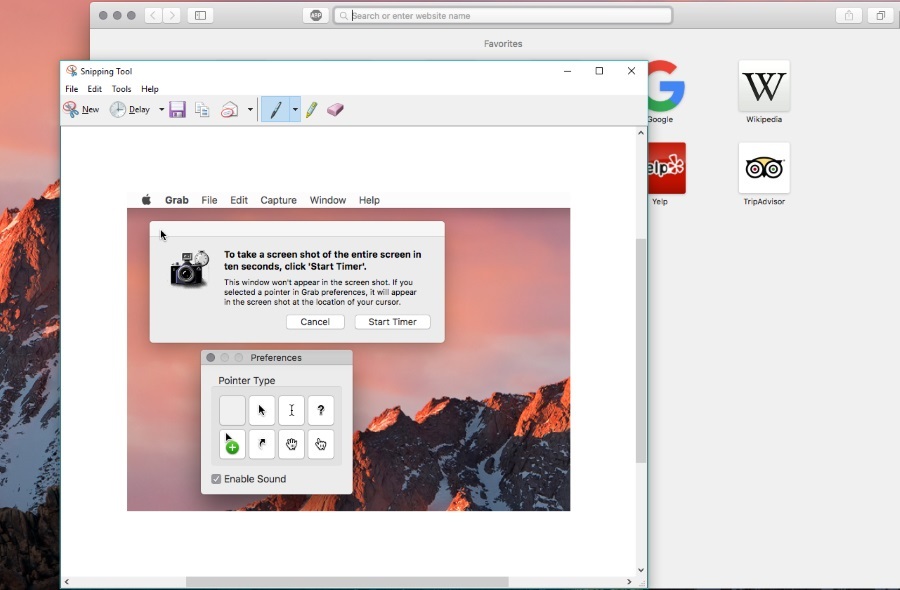
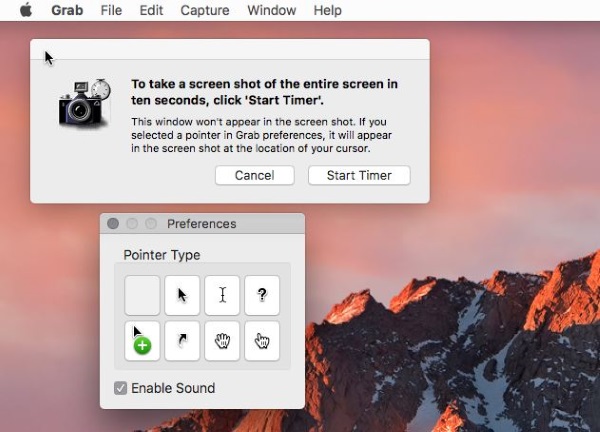
Take a screenshot using a timer
For more involved screenshots, sometimes you need to perform an action to describe what you want. That’s where the timer comes in. For this we need Grab, a built-in utility that takes screenshots. It’s a very useful tool that can do a lot more than use a timer.
- Open Utilities, Applications and Grab.
- Select Capture in the top menu and Timed Screen.
- Select Start Timer and set up the screen to be captured. The default is 10 seconds.
The screenshot will then be saved as a .png file as usual.
If your screenshot comes out blank
If you find your screenshot appears blank and not what you are expecting, you’re not alone. I have experienced this on a few occasions and I couldn’t work it out for the longest time. Apparently, some Mac apps don’t allow screenshots to be taken of them. Strange but true. I don’t have a definitive list but if you do see a blank image instead of what you were expecting, this could be why.
Other than that, the methods here will enable you to take a screenshot or print screen on Mac in almost any situation.